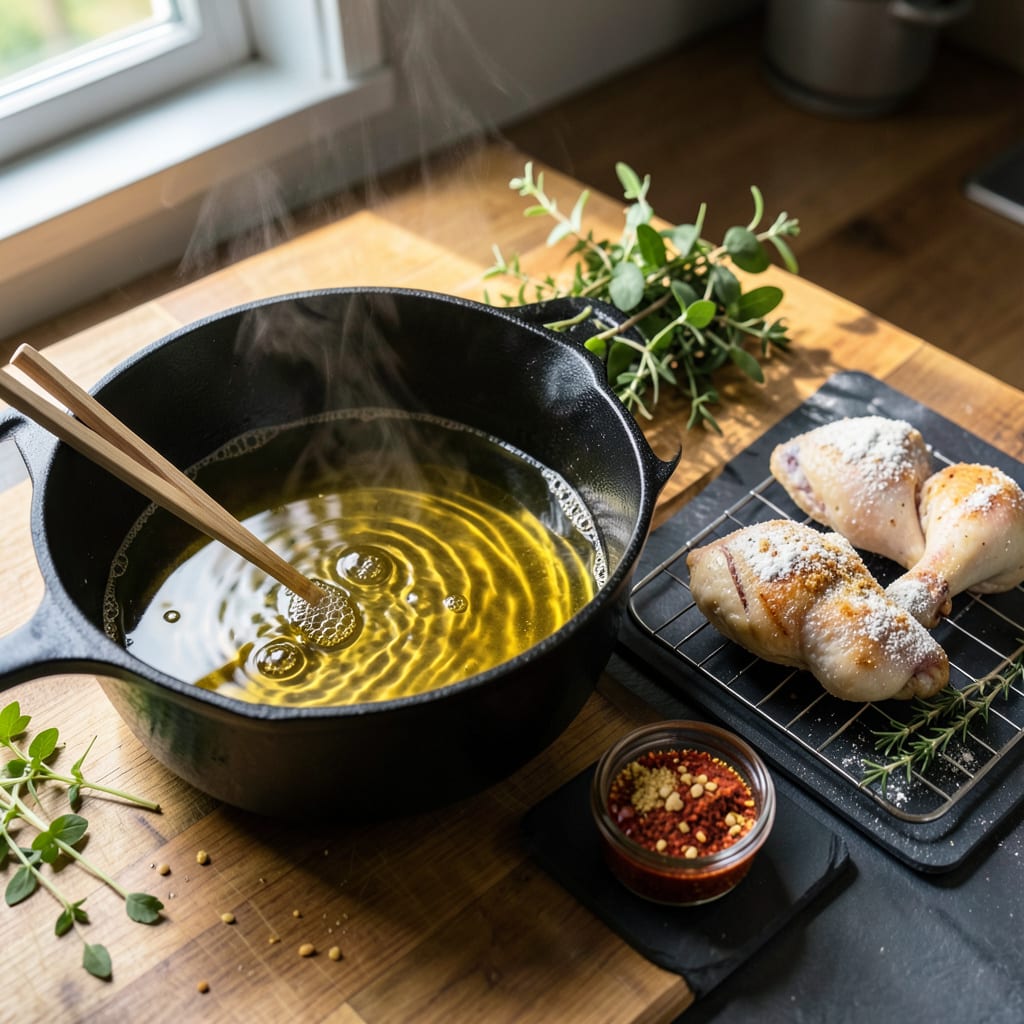
Nothing ruins fried chicken faster than oil that isn’t ready—too cold and you get greasy, soggy crust; too hot and you’re left with burnt outside, raw inside. I’ve burned through more batches than I care to admit before mastering this simple test that takes all the guesswork out of frying. The difference between perfect golden crust and disappointing results comes down to just a few seconds of proper oil prep.
Here’s the thing—you don’t need fancy equipment to get this right. A wooden spoon, a few drops of water, or even just watching for the right visual cues can tell you exactly when your oil is at that sweet spot. I learned this the hard way after ruining what should’ve been crispy, juicy chicken by jumping the gun on oil that looked ready but wasn’t. That shimmering surface can be deceiving if you don’t know what to look for.
The ideal window for frying chicken is between 350°F and 375°F—hot enough to create that signature crunch without burning before the meat cooks through. At this temperature, bubbles form immediately around test food, the oil shimmers like liquid gold, and that first piece of chicken hits with a satisfying sizzle that tells you you’ve nailed it. No thermometer? No problem. I’ll show you the foolproof tricks that work every time.
Once you’ve got the oil perfect, you’re minutes away from the crispiest, juiciest fried chicken you’ve ever made at home. But first, let’s make sure your oil is actually ready—because that’s what separates good fried chicken from the kind people remember. Stick with me, and I’ll walk you through exactly how to test it without any fancy tools.
📚 In This Guide
- What You’ll Need
- Instructions
- Tips and Common Mistakes
What Youll Need
- ● Cooking oil: 2–4 cups of high-smoke-point oil (peanut, canola, or vegetable oil work best). Pro tip: Avoid olive oil—it burns easily! 🌡️
- ● Deep fryer or heavy pot: A 5–6 quart pot (or deep fryer) with high sides to prevent splatter. Stainless steel or cast iron is ideal.
- ● Candy/deep-fry thermometer: A clip-on thermometer (0–400°F range) for precise temp checks. No guesswork! ✨
- ● Tongs or slotted spoon: Heat-resistant, long-handled tools to safely flip and remove chicken.
- ● Paper towels: A stack for draining excess oil post-fry. Extra crispy = extra happy! 😋
- ○ Wire rack (optional): Elevates chicken to keep it crispy while draining. A baking sheet works too!
- ● Kitchen timer: For tracking fry time (3–5 minutes per side, usually). ⏰
- ● Fire extinguisher (safety must!):strong> Keep a Class B extinguisher nearby—just in case. Safety first! 🔥
- ● Chicken pieces: Patted completely dry (wet = oil splatter!). Bone-in or boneless, your choice!
Instructions for Testing Oil Temperature for Frying Chicken
Here’s the foolproof method I use every time to get perfectly crispy, golden-brown fried chicken.
Choose the Right Oil and Equipment
Start by selecting an oil with a high smoke point—vegetable, peanut, or canola oil work best for frying chicken. I recommend using a heavy-bottomed pot or Dutch oven, which distributes heat evenly and prevents hot spots that can burn your chicken.
Fill your pot with enough oil to fully submerge your chicken pieces—typically about 1½ to 2 inches deep. Avoid overfilling, as the oil will bubble up when you add the chicken. Place it on a sturdy burner where it won’t get jostled during cooking.
Heat the Oil Gradually to the Right Temperature
Turn the heat to medium-high and let the oil warm up slowly. I’ve found that rushing this step leads to uneven heating and potential hot spots. You want the temperature to rise steadily, not spike too quickly.
While the oil heats, prepare your chicken by dredging it in flour or batter. This gives the oil time to reach the ideal frying temperature. Never leave heating oil unattended—it can overheat quickly and become dangerous.
Test the Oil Without a Thermometer (Visual Cues)
Here’s my favorite foolproof test: dip the handle of a wooden spoon into the oil. If you see steady bubbles forming around the wood, the oil is ready. No bubbles means it’s not hot enough; furious bubbling means it’s too hot.
Another reliable method is to drop in a small cube of bread. If it turns golden brown in about 30 seconds, your oil is at the perfect temperature. If it browns too quickly or not at all, adjust your heat accordingly.
Maintain Consistent Temperature While Frying
When you add chicken to the oil, the temperature will drop—this is normal. I recommend frying in small batches to prevent the oil temperature from plummeting. The ideal frying temperature for chicken is between 350°F and 375°F.
Watch for visual cues as you cook: the oil should bubble steadily around the chicken, and the crust should turn deep golden brown within 8-12 minutes depending on piece size. If the bubbling stops, your oil isn’t hot enough; if it’s smoking, it’s too hot.
Monitor and Adjust as Needed
Between batches, give the oil 2-3 minutes to recover its temperature. I use this time to drain the cooked chicken on a wire rack (never paper towels—they make the crust soggy). If you notice the oil darkening or developing an off smell, it’s time to replace it.
Remember that oil temperature affects both texture and cooking time. Too cool, and your chicken will be greasy; too hot, and it’ll burn before cooking through. With practice, you’ll develop an instinct for when the oil is just right—listen to the sizzle, watch the bubbles, and trust your senses.
Tips and Common Mistakes
Mastering oil temperature is the secret to perfect fried chicken—here’s what I’ve learned from years of frying.
Heat Control: When testing with the wooden spoon method in Step 3, look for bubbles that form consistently around the handle—not just a few sporadic ones. The bubbles should be about the size of champagne bubbles, not large and aggressive. This indicates your oil is in that sweet spot between 350°F and 375°F, where chicken cooks through without absorbing excess oil.
Batch Strategy: In Step 4, the 8-12 minute cooking window is crucial, but don’t overcrowd your pot. I fry no more than 3-4 pieces at once in a standard Dutch oven to maintain that steady bubble action. Overcrowding drops the temperature too much, leading to greasy results. Between batches, those 2-3 minutes of recovery time are non-negotiable—use a timer to stay consistent.
Visual Doneness Cues: The “deep golden brown” mentioned in Step 4 should resemble the color of a well-toasted marshmallow—not pale like butter, not dark like coffee. If you’re unsure, pull a test piece at 8 minutes and cut into it. The juices should run clear, and the meat near the bone should be opaque, not translucent. Remember, carryover cooking continues for a minute or two after removal.
Oil Maintenance: After multiple batches, you’ll notice the oil darkens slightly—that’s normal. But if it develops a burnt smell or starts smoking at your normal medium-high setting, it’s time to replace it. I strain and reuse oil once if it’s still clear and odor-free, but never more than that. The flavor degrades with each use, and you’ll taste the difference in your chicken.
Pro Tips for Know When Oil Is Ready To Fry Chicken
- Mastering oil temperature is the secret to perfect fried chicken—here’s what I’ve learned from years of frying.
- Heat Control: When testing with the wooden spoon method in Step 3, look for bubbles that form consistently around the…
- Batch Strategy: In Step 4, the 8-12 minute cooking window is crucial, but don’t overcrowd your pot. I fry no more tha…
Frequently Asked Questions
How long does it take for oil to heat up for frying chicken?
Typically, oil takes 5–10 minutes to reach the ideal frying temp (350–375°F) on medium-high heat. Use a thermometer for accuracy—never guess! A heavy pot or Dutch oven retains heat better, speeding up the process. Patience pays off for crispy, juicy chicken!
Can I fry chicken without a thermometer? What’s the trick?
Yes! Try the wooden spoon test: Dip a wooden spoon into the oil—if bubbles form vigorously around it, the oil is ready (~350°F). Or toss in a small piece of bread; it should sizzle and brown in 30–60 seconds.
What happens if the oil isn’t hot enough before frying?
Too-cool oil = soggy, greasy chicken. The coating absorbs oil instead of sealing, leaving your chicken limp and heavy. Always preheat to 350°F+ for that golden, crispy crust. If unsure, wait another minute and retest!
Is it safe to reuse oil after frying chicken?
Yes, but strain and store it properly! Cool the oil, filter out debris, and keep it in a sealed container (up to 3–4 uses). Discard if it smells rancid or smokes excessively. Pro tip: Reusing oil too many times lowers its smoke point.
What’s the best oil for frying chicken, and does it affect heating time?
High-smoke-point oils like peanut, canola, or vegetable oil (375–450°F) work best. They heat evenly and hold temps longer. Avoid olive oil—it burns easily. Heating time varies slightly, but most oils reach temp in 8–12 minutes on medium-high.
Now you’ve got the secret to perfectly crispy fried chicken every time—no guesswork, no soggy disappointments! 🎯 Remember: 350–375°F is the golden range, and simple tricks like the wooden spoon test or flour sizzle make it foolproof. Whether you’re a first-timer or a fried chicken pro, nailing the oil temp is your ticket to juicy, crunchy success.
Ready to put it into action? Grab your thermometer (or a trusty spoon!), heat that oil, and get frying—your taste buds will thank you! 🍗 For extra confidence, bookmark this guide or try a small test batch first. Happy frying!

Trained in classic French technique but raised on slow-cooked ribs and spicy rubs, she blends culinary skill with smoke and soul.
- Recipe for Boneless Pork Chops in Cast Iron Skillet: Sear and Baste to Juicy Perfection - October 3, 2026
- Recipe for Boneless Cross Rib Roast: Slow-Roasted Beef with Herb Crust - October 3, 2026
- Hamburgers in Sauce Recipe Crock Pot: Slow-Cooked Savory Delight - October 3, 2026