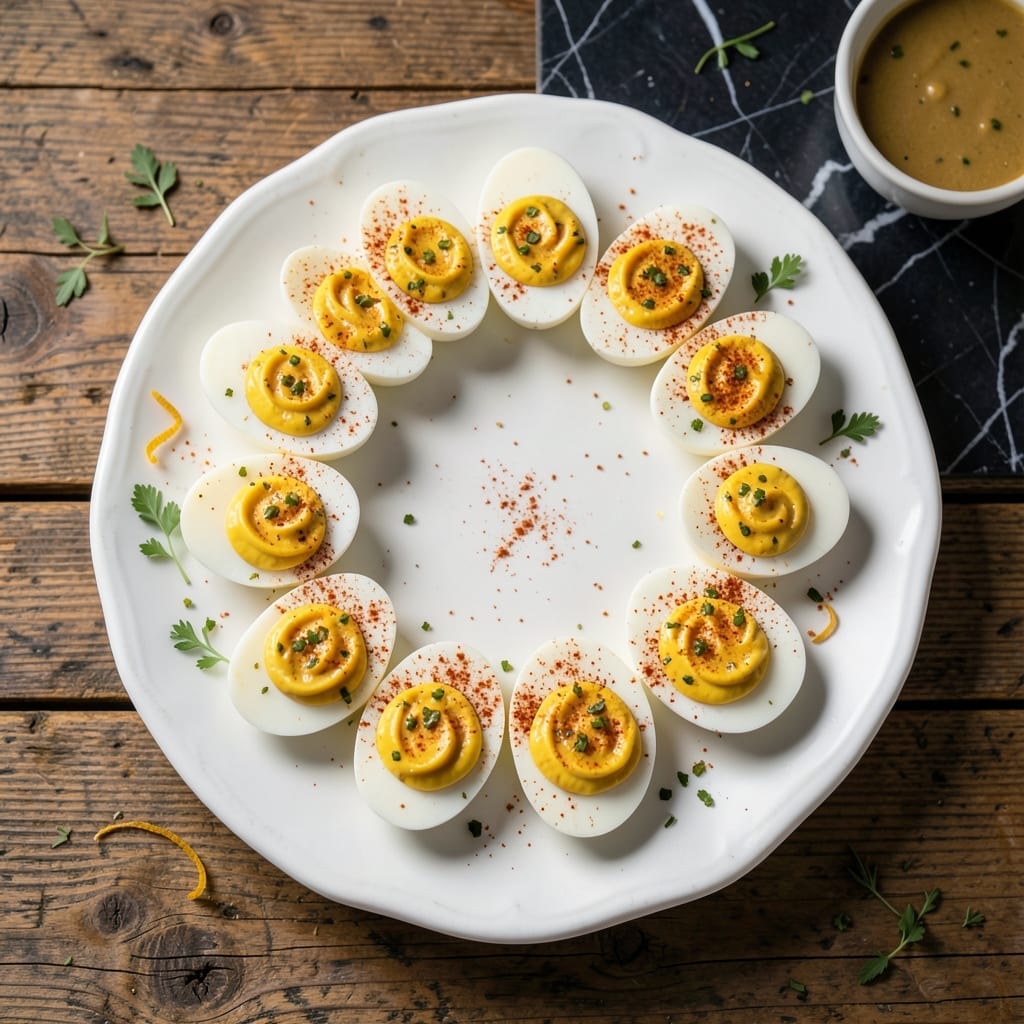
There’s something timeless about deviled eggs, and this version with Miracle Whip delivers a creamy, tangy filling that’s impossible to resist.
Hard-boiled eggs get a smooth, zesty upgrade with just a few simple ingredients, creating a dish that’s perfect for gatherings or a quick snack.
Ingredients for Recipe for Deviled Eggs with Miracle Whip
A few simple ingredients transform hard-boiled eggs into this creamy, tangy classic for a crowd.
| Ingredient | Amount | Notes |
|---|---|---|
| Large Eggs 🥚 | 12 whole | Hard-boiled and peeled |
| Miracle Whip 🥫 | ¾ cup | Original or light variety |
| Yellow Mustard 🟡 | 2 tbsp | Or Dijon for sharper taste |
| White Vinegar 🍶 | 1 tbsp | Or apple cider vinegar |
| Sweet Pickle Relish 🥒 | 2 tbsp | Drained well |
| Granulated Sugar 🍚 | ½ tsp | Balances tanginess |
| Salt 🧂 | ½ tsp | Adjust to taste |
| Black Pepper 🌶️ | ¼ tsp | Freshly ground preferred |
| Paprika 🌶️ | 1 tsp | For garnish, sweet or smoked |
| Fresh Chives 🌿 | 1 tbsp | Finely chopped, for garnish |
[recipe_ingredient_scaler]
The eggs are everything here. Use large, fresh eggs (older ones peel easier but look less vibrant). Most grocery stores carry Miracle Whip near the mayonnaise—original has the best tang, but light works if you prefer. For the mustard, Yellow ballpark style is classic, though Dijon adds a nice sharpness. The vinegar brightens everything up—white is traditional, but apple cider vinegar adds depth.
No Miracle Whip? Mayonnaise plus a splash of vinegar gets close (use 3/4 cup mayo + 1 tbsp vinegar). Skip the relish? Finely diced dill pickles or cornichons work. Want more zip? Add a pinch of cayenne. The sugar is optional but helps balance the tang—honey or maple syrup work too. Fresh dill can replace chives if that’s what you’ve got growing.
Filled eggs keep 2-3 days in the fridge—store them uncovered so the filling doesn’t get soggy. Best served within 24 hours for peak texture. Garnish right before serving so the paprika stays vibrant. Doubling the recipe? Use 18 eggs and scale everything up proportionally.
Why You’ll Love This Recipe
- No-Fuss Mixing: I just hard-boil the eggs, then stir together Miracle Whip, mustard, vinegar, and relish—no fancy steps.
- Tangy Creamy Bite: The Miracle Whip gives that smooth richness, while the vinegar and mustard add just the right zing.
- Party-Ready in Minutes: I bring these to potlucks and they’re always the first to disappear.
- Budget Stretch: A dozen eggs and a few pantry staples make a crowd-pleasing dish for pennies.
Step-by-Step Instructions for Deviled Eggs With Miracle Whip
This professional method ensures the creamiest filling with perfectly balanced tang and zip.
Step 1: Halve and Prepare the Hard-Boiled Eggs
Slice the 12 whole Large Eggs in half lengthwise using a sharp knife. I find that wiping the blade between cuts ensures clean, professional edges. Carefully remove the yolks and place them in a mixing bowl, reserving the whites on a serving platter.
Arrange the egg white halves with the cut side up, ready to receive the filling. This preparation step is crucial for achieving that classic deviled egg presentation we all expect.
Step 2: Create the Creamy Filling Base
Mash the yolks with a fork until they form fine crumbs. Add the 0.75 cup Miracle Whip, 2 tbsp Yellow Mustard, 1 tbsp White Vinegar, 2 tbsp Sweet Pickle Relish, 0.5 tsp Granulated Sugar, 0.5 tsp Salt, and 0.25 tsp Black Pepper. The acidity from the vinegar and mustard will create that signature tang.
Mix thoroughly until completely smooth and creamy. I prefer to use a rubber spatula to ensure I scrape every bit of the rich yolk mixture from the bowl. The texture should be velvety with no graininess—this is the hallmark of a professional deviled egg filling.
Step 3: Fill and Garnish with Precision
Transfer the yolk mixture to a piping bag fitted with a star tip, or use a zip-top bag with a corner snipped off. Pipe the filling into each egg white half, creating a neat, slightly mounded center. This technique gives that bakery-style presentation.
Garnish each egg with a light dusting of 1 tsp Paprika and a sprinkle of 1 tbsp Fresh Chives. The paprika adds a subtle smokiness and beautiful color contrast, while the chives provide a fresh, oniony brightness that complements the creamy filling perfectly.
Step 4: Chill and Serve at Optimal Temperature
Arrange the filled eggs on the serving platter and refrigerate for at least 30 minutes before serving. This chilling time allows the flavors to meld together beautifully and firms up the filling for cleaner serving.
Serve the deviled eggs chilled but not ice-cold. The ideal serving temperature is about 45°F, which allows the full range of flavors to be appreciated. The creamy texture will be at its peak, and the tangy zip will be perfectly balanced.
Pro Tips For Making Recipe For Deviled Eggs With Miracle Whip
- Age Your Eggs: Use eggs that are 7-10 days old—they peel cleaner than fresh ones. I learned this the hard way after ruining a batch with half the whites stuck to the shells.
- Shock in Ice Water: Plunge boiled eggs into ice water immediately for 10 minutes. This stops the cooking and makes peeling easier, especially with older eggs.
- Drain the Relish: Pat the sweet pickle relish dry with a paper towel before mixing. Sounds weird, but it keeps the filling from getting watery and sliding off the whites.
- Chill Before Filling: Refrigerate the egg halves for 15 minutes before piping the Miracle Whip mixture. It helps the filling hold its shape instead of melting into the whites.
Serving Suggestions for Leftovers
Platter Presentation
Serve these on a white platter for maximum visual impact—the egg whites pop against a clean background. I arrange them in a circular pattern with the points facing outward for a classic look. 💛
Garnish Elevation
For special occasions, add a small chive sprig on top of each egg instead of sprinkling. The vertical element creates height and sophistication. A light dusting of smoked paprika adds depth to the color palette.
Temperature Timing
Remove from the fridge 10-15 minutes before serving to take the chill off. This brings out the full creamy texture of the filling. I set a timer to avoid forgetting them on the counter.
Pairing Partners
These pair wonderfully with crisp cornichons and buttery crackers. The acidity of the pickles complements the tangy filling beautifully. For drinks, I love a dry Riesling or crisp pilsner.
Buffet Setup
For parties, use a tiered serving stand to display them at different heights. Place a small bowl of extra paprika nearby so guests can add more if desired. This also prevents double-dipping concerns.
Portable Options
For picnics, nestle them in a deviled egg carrier or line a container with parchment paper. They travel well for 2 hours with ice packs. Avoid direct sunlight to prevent the filling from separating.
Nutrition Facts
Frequently Asked Questions
Can I make these ahead of time?
Yes! Prepare the filling and fill the whites up to 1 day ahead. Store uncovered in the fridge to prevent soggy filling. Garnish just before serving for the freshest look.
Why use Miracle Whip instead of mayo?
Miracle Whip adds a sweeter, tangier flavor that balances the yolks perfectly. Its lighter texture also makes the filling fluffier compared to regular mayonnaise.
How do I prevent the filling from tearing the whites?
Pipe gently and avoid overfilling. Chill filled eggs for 30 minutes to firm up the filling before moving them. This keeps them intact.
Can I use a different type of mustard?
Dijon adds sharpness, while honey mustard brings sweetness. Adjust to taste—just keep the total mustard at 2 tablespoons for balance.

Trained in classic French technique but raised on slow-cooked ribs and spicy rubs, she blends culinary skill with smoke and soul.
- Recipe for Boneless Pork Chops in Cast Iron Skillet: Sear and Baste to Juicy Perfection - October 3, 2026
- Recipe for Boneless Cross Rib Roast: Slow-Roasted Beef with Herb Crust - October 3, 2026
- Hamburgers in Sauce Recipe Crock Pot: Slow-Cooked Savory Delight - October 3, 2026