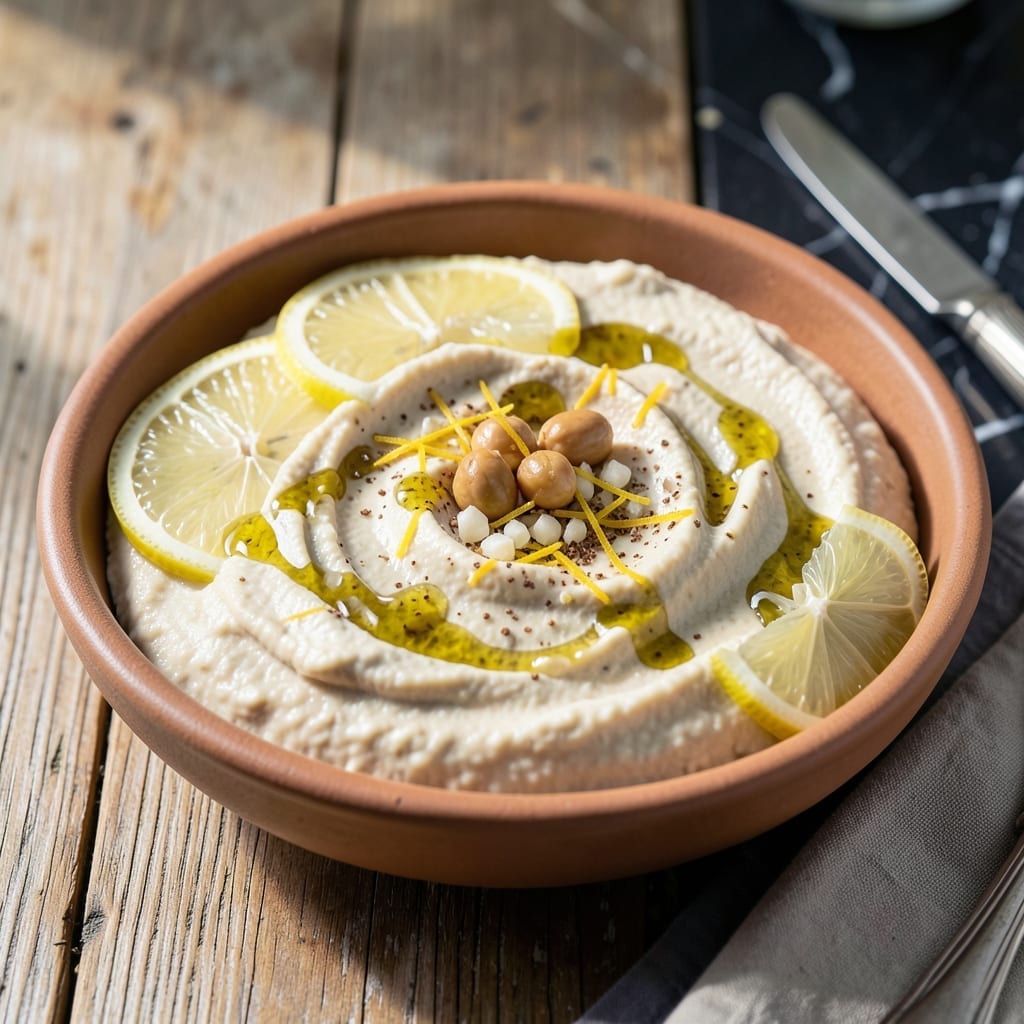
This tahini-free hummus delivers creamy texture through a simple blend of chickpeas, lemon, and olive oil. I developed this version to prove you don’t need tahini for authentic flavor.
What makes it work is using reserved chickpea liquid and lemon zest to achieve that signature smoothness. Perfect for dips or sandwich spreads.
Ingredients for Recipe for Homemade Hummus Without Tahini
Nine simple ingredients transform into creamy, dreamy hummus without a drop of tahini.
| Ingredient | Amount | Notes |
|---|---|---|
| Canned Chickpeas 🥫 | 2 cans | 15 oz each, drained, liquid reserved |
| Lemon Juice 🍋 | ¼ cup | Freshly squeezed preferred |
| Lemon Zest 🍋 | 1 tbsp | From 1-2 lemons, finely grated |
| Extra-Virgin Olive Oil 🫒 | ¼ cup | Plus extra for drizzling |
| Garlic Cloves 🧄 | 2 cloves | Peeled and minced |
| Ground Cumin 🌿 | 1 tsp | Toasted for enhanced aroma |
| Sea Salt 🧂 | ¾ tsp | Adjust to taste preference |
| Smoked Paprika 🌶️ | ½ tsp | Optional for depth of flavor |
| Ice Cubes ❄️ | 3 pieces | For ultra-smooth texture |
[recipe_ingredient_scaler]
The chickpeas are everything here. Goya or Eden Organic have the creamiest texture straight from the can—avoid brands with added salt if possible. Drain but save that liquid (aquafaba), it’s your secret to silkiness. I always grab mine from Whole Foods or Trader Joe’s for consistent quality. Fresh lemons make a difference too—look for ones that feel heavy for their size (more juice inside).
No fresh lemons? Bottled lemon juice at half the amount works in a pinch, but zest is non-negotiable for that bright pop. Swap cumin for coriander if you prefer a citrusy note. The olive oil can be any good extra-virgin—California Olive Ranch is my go-to. For extra creaminess, add a spoon of reserved chickpea liquid while blending (don’t overdo it, or it’ll get thin).
Keeps in the fridge for up to 1 week in an airtight container. The flavors deepen after a day, so make it ahead if you can. Freeze portions for up to 3 months—just leave room for expansion. A drizzle of olive oil on top before storing prevents that grayish film.
Why You’ll Love This Recipe
- No Fuss Blending: I just dump canned chickpeas, garlic, lemon juice, and olive oil in the food processor—no tahini hunting required.
- Zesty Punch: The lemon zest and fresh juice give it this bright, tangy kick that makes store-bought taste flat.
- Meal Prep Hero: I make a big batch on Sunday for lunches, snacks, and even a quick dinner spread. (Yes, even on a Tuesday night)
- Budget Friendly: A can of chickpeas and pantry staples? That’s a creamy, dreamy dip for pennies per serving.
Step-by-Step Instructions for Homemade Chickpea Spread
This method guarantees ultra-smooth, creamy results with minimal effort and maximum flavor.
Step 1: Prepare and Drain the Chickpeas
Open the 2 cans Canned Chickpeas and drain them, but don’t discard the liquid. I reserve about ¼ cup of the chickpea liquid (aquafaba) for adjusting the consistency later. Rinse the chickpeas under cold water to remove any excess starch, which can make your spread bitter.
This step ensures a clean, neutral base for the other flavors to shine. I always give them a quick shake in the colander to remove any lingering water—excess moisture will thin out your spread too much.
Step 2: Blend the Base Ingredients
In a food processor, combine the drained chickpeas, 0.25 cup Lemon Juice, 1 tbsp Lemon Zest, 2 cloves Garlic Cloves, 1 tsp Ground Cumin, and 0.75 tsp Sea Salt. Pulse for 30 seconds until the mixture is coarsely chopped.
At this stage, it’ll look chunky and dry, but don’t worry—that’s normal. Stop and scrape down the sides of the bowl with a spatula to ensure everything gets evenly incorporated. The garlic and cumin will start to release their aromas, filling your kitchen with a warm, inviting scent.
Step 3: Emulsify with Olive Oil and Ice
With the food processor running, slowly drizzle in the 0.25 cup Extra-Virgin Olive Oil through the feed tube. This gradual addition is key—it allows the oil to emulsify properly, creating that signature creamy texture. Add the 3 pieces Ice Cubes one at a time as you blend.
The ice cubes are my secret for an ultra-smooth finish. They help break down the chickpeas further while keeping the mixture cool, which prevents the oil from separating. Blend for another 2-3 minutes until the mixture is completely smooth and fluffy, stopping to scrape the bowl as needed.
Step 4: Adjust Consistency and Season
Check the texture of your spread. If it’s too thick, add some of the reserved chickpea liquid 1 tablespoon at a time and blend until it reaches your desired consistency. I like mine thick but still spreadable. Taste and adjust the seasoning if needed—the 0.5 tsp Smoked Paprika is optional, but I love the subtle smokiness it adds.
Transfer the spread to a serving bowl and use the back of a spoon to create swirls on the surface. Drizzle with a little extra Extra-Virgin Olive Oil and sprinkle with a pinch of smoked paprika for a beautiful presentation. Serve immediately or refrigerate for later.
Pro Tips For Making Recipe For Homemade Hummus Without Tahini
- Drain and Rinse Well: I learned this the hard way—always rinse canned chickpeas thoroughly to remove the starchy liquid, or your hummus will taste metallic and thin.
- Warm the Chickpeas: Microwave the drained chickpeas for 30-45 seconds before blending; it makes them softer and helps create a creamier texture without tahini.
- Balance the Garlic: Raw garlic can overpower, so start with 1 clove, blend, and taste before adding more—after ruining a batch with too much, I now measure carefully.
- Stream the Oil: Pour the olive oil in slowly while blending rather than dumping it all at once; this emulsifies the mixture better and gives it that smooth, fluffy consistency.
Health Benefits of These Flavors
Plant-Based Protein
This spread packs a serious protein punch with chickpeas as the star. A ½ cup serving delivers about 7 grams of plant-based protein, making it an excellent option for vegans and vegetarians. I often pair it with whole-grain pita for a complete protein source. 💪
Fiber-Rich Goodness
Chickpeas are loaded with dietary fiber—about 6 grams per ½ cup serving. This supports healthy digestion and helps you feel full longer. The combination of fiber and protein makes this spread a satisfying snack that keeps energy levels steady throughout the day.
Healthy Fats
The extra-virgin olive oil in this recipe provides heart-healthy monounsaturated fats, which are known to support cardiovascular health. These fats also help your body absorb the fat-soluble vitamins in chickpeas, like vitamin E and K.
Vitamin and Mineral Boost
Chickpeas are rich in essential nutrients like iron, magnesium, and folate. The lemon juice adds a dose of vitamin C, which enhances iron absorption. This makes the spread not just tasty but nutritionally balanced too.
Low Glycemic Index
Unlike many processed dips, this creation has a low glycemic index thanks to its fiber and protein content. This means it won’t spike your blood sugar, making it a smart choice for anyone managing diabetes or watching their carbohydrate intake.
Allergen-Friendly
By omitting tahini, this version is naturally free from sesame, a common allergen. It’s also dairy-free, gluten-free, and nut-free, making it suitable for most dietary restrictions. I always feel good serving it to guests with allergies.
Nutrition Facts
Frequently Asked Questions
What can I use instead of tahini?
Extra-virgin olive oil and reserved chickpea liquid create the creamy texture. You can also add 1-2 tablespoons of Greek yogurt for extra richness if you’re not keeping it vegan.
Why does my hummus taste bitter?
This usually happens when using chickpea skins or stale spices. Always use fresh lemon juice and rinse canned chickpeas thoroughly to remove excess starch.
How do I make it smoother?
Blend for at least 2-3 minutes and add ice cubes while processing. The ice helps break down the chickpeas completely.
How long does it last in the fridge?
Store in an airtight container and it will keep for up to 1 week. The flavors actually improve after 24 hours.

Trained in classic French technique but raised on slow-cooked ribs and spicy rubs, she blends culinary skill with smoke and soul.
- Recipe for Boneless Pork Chops in Cast Iron Skillet: Sear and Baste to Juicy Perfection - October 3, 2026
- Recipe for Boneless Cross Rib Roast: Slow-Roasted Beef with Herb Crust - October 3, 2026
- Hamburgers in Sauce Recipe Crock Pot: Slow-Cooked Savory Delight - October 3, 2026