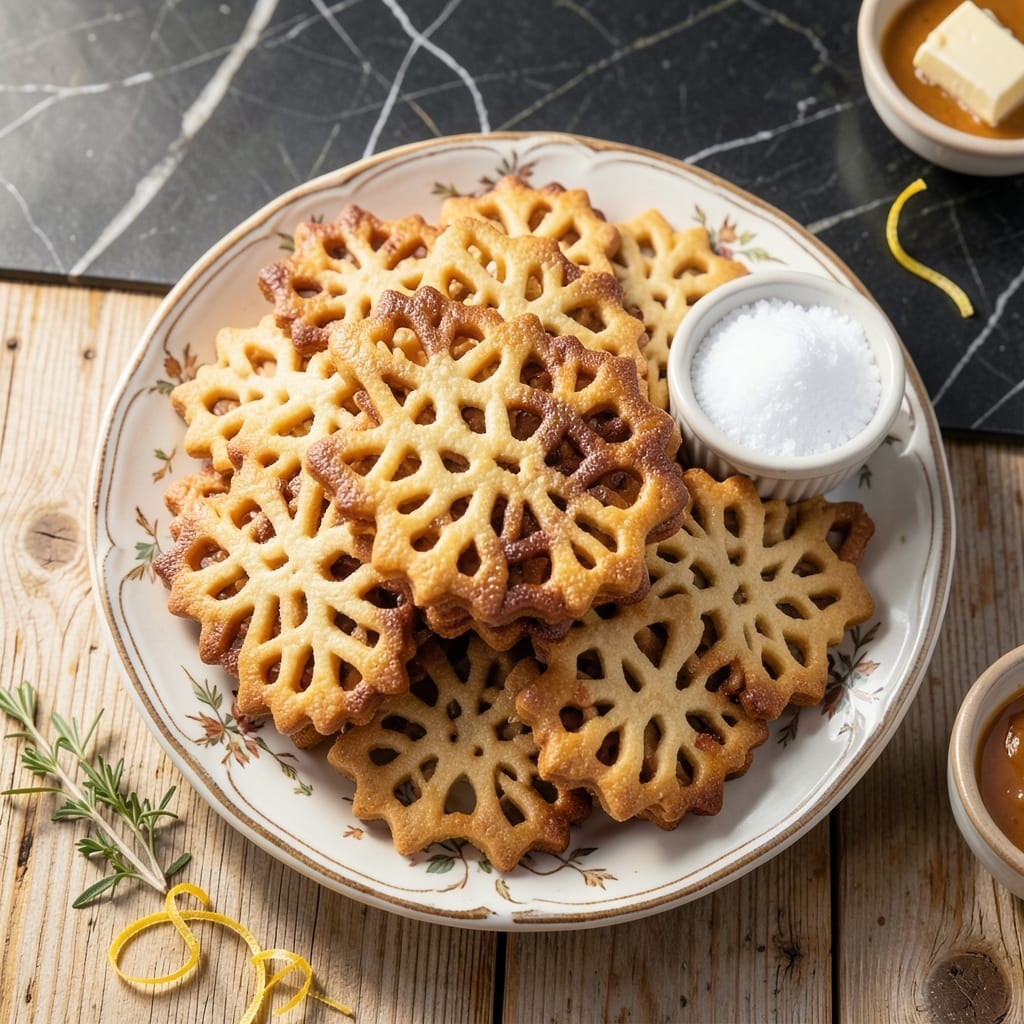
There’s a special art to making traditional pizzelles that transforms simple batter into delicate, lace-like cookies.
This recipe honors the authentic Italian method, using a hot wafer iron to create those signature golden-brown patterns. The secret lies in the perfect balance of eggs, sugar, and anise for that classic flavor.
Ingredients for Recipe for Pizzelles Italian Cookies
Traditional Italian wafer cookies require just a handful of quality ingredients for authentic flavor.
| Ingredient | Amount | Notes |
|---|---|---|
| All-Purpose Flour 🌾 | 2 cups | Sifted for light texture |
| Granulated Sugar 🍚 | ¾ cup | Fine grain for smooth batter |
| Large Eggs 🥚 | 3 whole | Room temperature for best volume |
| Unsalted Butter 🧈 | ½ cup | Melted and cooled slightly |
| Anise Extract 🌿 | 1 tsp | Pure extract for authentic flavor |
| Vanilla Extract 🌿 | 1 tsp | Pure extract recommended |
| Baking Powder 🧂 | 1 tsp | Fresh for optimal rise |
| Salt 🧂 | ¼ tsp | Fine table salt preferred |
| Anise Seeds 🌿 | 1 tsp | Lightly crushed for texture |
| Powdered Sugar 🍚 | ¼ cup | For dusting finished cookies |
| Vegetable Oil 🫒 | 1 tbsp | For greasing iron as needed |
[recipe_ingredient_scaler]
The anise is non-negotiable for authenticity. Penzeys carries excellent pure anise extract, or find it in the baking aisle of Whole Foods. The flour should be all-purpose—King Arthur is the gold standard for consistent results. Butter quality matters here; Plugrá or Kerrygold give superior flavor. Always use room temperature eggs—they emulsify better into the batter.
No anise extract? One tablespoon crushed anise seeds steeped in warm milk can substitute (though flavor won’t be as concentrated). Vanilla can be swapped for almond extract for a different but still traditional profile. The powdered sugar dusting is optional but recommended—Domino or C&H brands dissolve beautifully. For a citrus note, add half a teaspoon of lemon zest to brighten the batter.
Batter keeps in the fridge for 24 hours if you want to prep ahead. Finished pizzelles stay crisp in an airtight container for 2 weeks at room temperature. Freeze for up to 3 months if making in bulk—just revive in a warm oven to restore crispness.
Why You’ll Love This Recipe
- One Bowl Wonder: I mix everything in a single bowl—flour, sugar, eggs, butter, and that anise extract—and the dough comes together in minutes.
- That Anise Magic: The anise extract gives these cookies a warm, aromatic sweetness that’s uniquely Italian. Honestly, it’s the flavor I crave every holiday season.
- Holiday Starter: They’re my go-to for cookie swaps, gift tins, or just a cozy night in with tea.
- Budget Bakery: Five simple pantry staples and I get dozens of elegant, crisp cookies. Between us, they cost pennies per batch.
Step-by-Step Instructions for Pizzelles Italian Cookies
Achieve authentic texture and flavor by following this tested traditional method precisely.
Step 1: Prepare the Batter
In a large mixing bowl, whisk together the 2 cups all-purpose flour, 0.75 cup granulated sugar, 1 tsp baking powder, and 0.25 tsp salt until fully combined. Sifted flour ensures a light, airy batter without lumps.
Create a well in the center and add the 3 whole large eggs, 0.5 cup unsalted butter (melted and cooled), 1 tsp anise extract, 1 tsp vanilla extract, and 1 tsp anise seeds. Whisk vigorously until the batter becomes smooth and slightly elastic—this should take about 2-3 minutes of steady mixing.
The batter will be thick but pourable, resembling a slightly sticky pancake batter. Let it rest for 10 minutes at room temperature to allow the flour to fully hydrate, which prevents the cookies from cracking during cooking.
Step 2: Preheat and Prepare the Pizzelle Iron
Plug in your pizzelle iron and preheat it according to the manufacturer’s instructions, typically reaching 375°F. Most irons have an indicator light that turns off when the optimal temperature is reached. Lightly brush both sides of the iron with 1 tbsp vegetable oil using a pastry brush to prevent sticking.
This step is critical—an improperly heated iron will produce cookies that are either undercooked or over-browned. If your iron tends to stick, you may need to re-grease it between batches, but avoid excess oil as it can cause the batter to spread too much.
Step 3: Cook the Pizzelles
Using a small spoon or a cookie scoop, place a scant tablespoon of batter slightly off-center on each patterned plate of the iron. The amount may vary slightly depending on your iron’s design, but avoid overfilling—excess batter will spill over the edges and create a mess.
Close the iron and cook for 45-60 seconds or until the cookies are golden brown and the steam has stopped rising. Timing depends on your iron’s heat distribution and your color preference. Open the iron carefully—the cookies will be delicate and hot.
Remove the pizzelles with a fork or heat-resistant spatula and transfer them to a wire rack to cool completely. They will crisp up as they cool. If they remain soft, they may need an additional 10-15 seconds of cooking time in the next batch.
Step 4: Finish and Serve
Once completely cooled, dust the pizzelles lightly with 0.25 cup powdered sugar using a fine-mesh sieve. This adds a traditional sweet finish and enhances their presentation. Serve at room temperature for the best texture.
Store in an airtight container at room temperature for up to 2 weeks. If they lose their crispness, a quick 5-10 minute stint in a 300°F oven can revive them. For authentic flavor, pair with a dessert wine or espresso.
Pro Tips For Making Recipe For Pizzelles Italian Cookies
- Preheat the Iron: I learned this the hard way—always heat your pizzelle iron for at least 5 minutes before adding batter, or the cookies will stick and tear.
- Soften the Butter: Use room-temperature butter, about 65°F, so it blends smoothly into the batter without leaving lumps.
- Skip the Overfilling: Resist the urge to heap the batter—just a teaspoon per pattern keeps the cookies from overflowing and making a mess.
- Cool Completely: After baking, let them cool on a rack for 5 minutes so they crisp up properly—stacking them warm makes them soggy.
Troubleshooting This Recipe
Batter Too Thick
If your batter seems too stiff, add 1-2 tsp milk or water and whisk until smooth. The ideal consistency should ribbon off the whisk. Avoid over-thinning, as this causes the cookies to spread too much on the iron. 💡
Sticking to Iron
Even with oil, some irons need extra help. Try using a nonstick spray like Baker’s Joy between batches. If cookies still stick, your iron may not be hot enough—wait for the indicator light to turn off completely before cooking.
Cookies Not Crisp
Undercooked pizzelles stay soft. Extend cooking time by 10-15 seconds and ensure they cool completely on a wire rack. Humidity can also affect crispness—I always store mine with a silica packet in the container.
Uneven Coloring
Hot spots in the iron cause patchy browning. Rotate your iron 180 degrees halfway through cooking. If your model has adjustable heat, lower it slightly for more even results. A well-seasoned iron develops better heat distribution over time.
Batter Spreading
Overfilled patterns create messy edges. Use a small cookie scoop or 1 tbsp measure for consistent portions. Place batter slightly off-center so it spreads toward the edges as the iron closes.
Cracked Cookies
This usually means the batter was too dry or the iron wasn’t hot enough. Let your batter rest for the full 10 minutes before cooking, and verify your iron reaches 375°F. Resting hydrates the flour, preventing cracks. ✨
Nutrition Facts
Frequently Asked Questions
What can I use instead of anise extract?
Steep 1 tbsp crushed anise seeds in warm milk for 10 minutes, then strain. Almond extract also works for a different flavor.
Why are my pizzelles not crispy?
They likely need more time. Cook for 10-15 seconds longer and cool completely on a wire rack. Humidity can soften them, so store with a silica packet.
How do I prevent batter from sticking?
Preheat the iron to 375°F and brush with oil before each batch. Nonstick spray can also help between uses.
Can I make these ahead of time?
Yes! Batter keeps in the fridge for 24 hours. Baked cookies stay crisp in an airtight container for 2 weeks.

Trained in classic French technique but raised on slow-cooked ribs and spicy rubs, she blends culinary skill with smoke and soul.
- Recipe for Boneless Pork Chops in Cast Iron Skillet: Sear and Baste to Juicy Perfection - October 3, 2026
- Recipe for Boneless Cross Rib Roast: Slow-Roasted Beef with Herb Crust - October 3, 2026
- Hamburgers in Sauce Recipe Crock Pot: Slow-Cooked Savory Delight - October 3, 2026