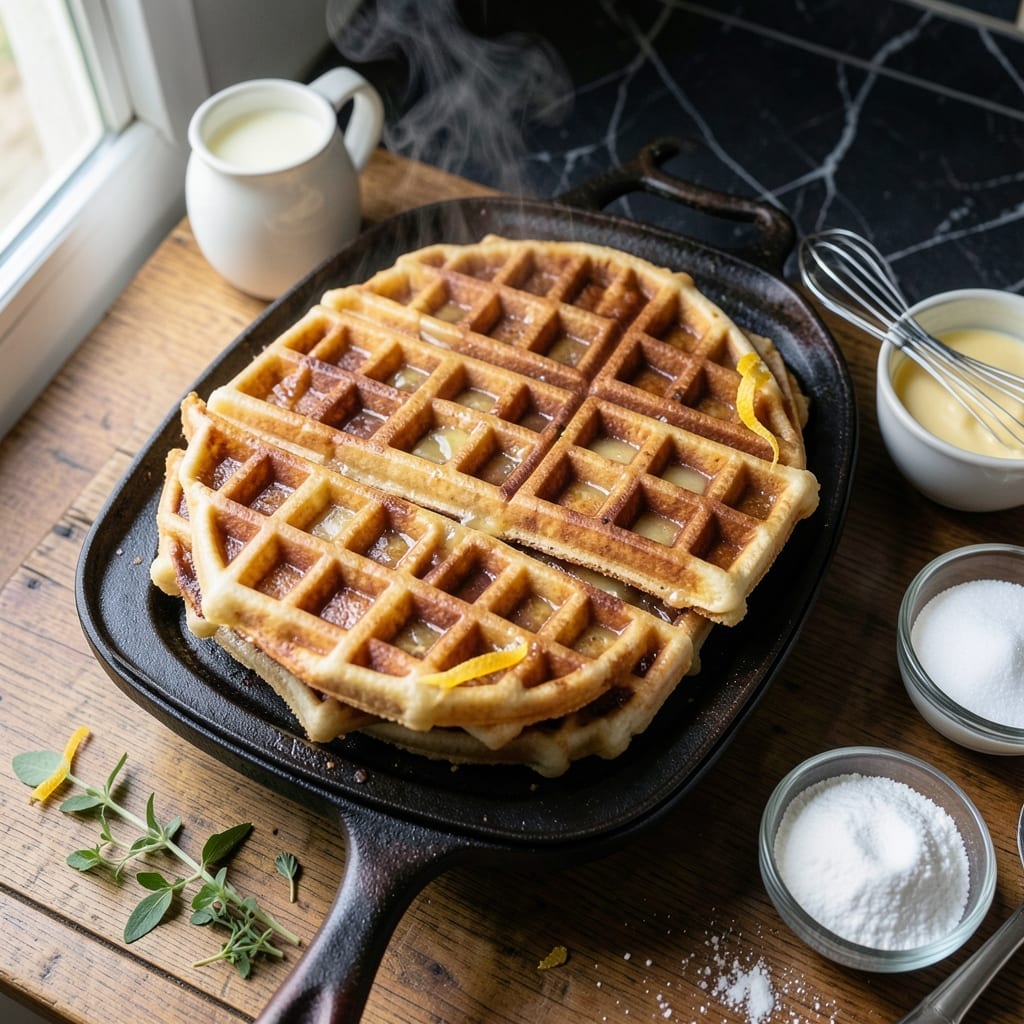
There’s nothing like the first crispy bite of a perfectly golden waffle fresh from the iron. This recipe delivers that ideal texture every time with a proven technique.
Simple ingredients come together to create waffles with crispy edges and fluffy interiors. The key is a hot iron and a batter that’s just thick enough to hold its shape.
Ingredients for Recipe for Waffle Machine
Classic pantry staples transform into waffles with crispy edges and fluffy centers.
| Ingredient | Amount | Notes |
|---|---|---|
| All-Purpose Flour 🌾 | 2 cups | Sifted for lighter texture |
| Baking Powder 🧂 | 1 tbsp | For fluffy lift |
| Granulated Sugar 🍚 | 2 tbsp | Balances richness |
| Salt 🧂 | ½ tsp | Enhances all flavors |
| Large Eggs 🥚 | 2 whole | Room temperature preferred |
| Whole Milk 🥛 | 1 ¾ cups | Full-fat for richness |
| Unsalted Butter 🧈 | ½ cup | Melted and cooled |
| Vanilla Extract 🌿 | 1 tsp | Pure for best flavor |
| Vegetable Oil 🫒 | 2 tbsp | For greasing iron |
[recipe_ingredient_scaler]
The flour is the foundation here. King Arthur or Gold Medal all-purpose both deliver consistent results. Baking powder freshness matters—if yours has been in the cupboard for over a year, replace it. The milk should be whole for the richest texture (2% works but isn’t ideal). Organic Valley has great whole milk if you can find it.
No whole milk? Oat milk at the same quantity works well. Need a sugar substitute? Maple syrup at half the amount adds sweetness with moisture. Out of vanilla extract? Vanilla bean paste gives even better flavor. The butter can be swapped for coconut oil at a 1:1 ratio for a dairy-free option.
Batter keeps 24 hours in the fridge. Leftover waffles freeze beautifully for up to 3 months. Reheat in the toaster for that fresh-from-the-iron crispness. Always preheat your waffle iron—this is non-negotiable for that golden crust.
Why You’ll Love This Recipe
- One-Bowl Wonder: I just dump, whisk, and pour—no fancy steps, and the batter comes together in minutes.
- Golden Crisp: The baking powder gives them that perfect lift, with a crispy outside and fluffy inside every time.
- Breakfast to Dessert: Honestly, I’ve served these for Sunday brunch and then again with ice cream for a late-night treat.
- Pantry Staples: All-purpose flour, eggs, and sugar—stuff I always have on hand, so no last-minute grocery runs.
Step-by-Step Instructions for Waffle Machine
Here’s the method. Straightforward, tested, works every time.
Step 1: Combine Dry Ingredients for Even Distribution
In a large mixing bowl, whisk together the 2 cups All-Purpose Flour, 1 tbsp Baking Powder, 2 tbsp Granulated Sugar, and 0.5 tsp Salt until fully combined. I always sift the flour first to break up any lumps and ensure a lighter texture in the final product.
This step creates the foundation for your batter. The baking powder will react with the liquid ingredients later to create those airy pockets that make waffles so delightful. Make sure there are no visible streaks of flour remaining in the bowl.
Step 2: Whisk Wet Ingredients Until Smooth
In a separate bowl, beat the 2 whole Large Eggs lightly, then add the 1.75 cups Whole Milk, melted and cooled 0.5 cup Unsalted Butter, and 1 tsp Vanilla Extract. Whisk until the mixture is completely smooth and the butter is fully incorporated.
Here’s the thing—the melted butter should be cooled to room temperature before adding to the eggs. If it’s too hot, it could start cooking the eggs, creating small lumps in your batter. The vanilla extract adds depth of flavor that balances the richness of the butter and milk.
Step 3: Create the Batter with Minimal Mixing
Pour the wet ingredients into the dry ingredients and gently fold them together using a silicone spatula. Mix just until the flour is incorporated and no dry streaks remain. It’s okay if the batter has a few small lumps—overmixing will develop the gluten in the flour, resulting in tough waffles.
I’ve found that the batter should be thick but pourable, similar to pancake batter. If it seems too thick, resist the urge to add more milk. The consistency will be perfect for creating crispy edges while maintaining a tender interior.
Step 4: Preheat and Grease the Waffle Iron
Preheat your waffle iron to medium-high heat. Once hot, brush the grids lightly with 2 tbsp Vegetable Oil using a pastry brush. This creates a thin, even layer that prevents sticking while helping achieve that promised crispy exterior.
Real talk: even non-stick waffle irons benefit from a light coating of oil. It enhances the browning process and makes the waffles easier to remove. The oil should sizzle slightly when it touches the hot iron, but not smoke excessively.
Step 5: Cook to Golden, Crispy Perfection
Pour about ½ cup of batter onto the center of the preheated waffle iron, spreading it slightly toward the edges. Close the lid and cook for 3-5 minutes or until the waffle is golden brown and crispy.
Don’t open the iron too early—you’ll know it’s ready when the steam stops escaping from the sides and the waffle releases easily. The exact time will depend on your specific waffle maker, so watch for visual cues rather than relying solely on time. Transfer to a wire rack to maintain crispness while you cook the remaining batter.
Pro Tips For Making Recipe For Waffle Machine
- Preheat the Iron: I learned this the hard way—always let your waffle machine heat up fully for at least 5 minutes before adding batter. Cold irons make pale, soggy waffles that stick like glue.
- Separate the Eggs: Whip the egg whites to soft peaks before folding them in—sounds like extra work, but it makes the waffles light and airy instead of dense and flat.
- Skip Overmixing: Stir the batter just until the flour disappears; a few lumps are fine. Overmixing develops gluten, and you’ll end up with tough, chewy waffles.
- Use a Scoop: Measure batter with an ice cream scoop for even portions—about 1/2 cup per waffle—and you’ll get consistent cooking times and no messy overflow.
Make-Ahead Tips for This Dish
Batter Prep Ahead
Mix your dry ingredients the night before and store in an airtight container. In the morning, just whisk the wet ingredients and combine. This saves 10 minutes of prep time and ensures you’re not rushing through measurements.
Fridge Storage
Your complete batter can rest in the fridge for up to 24 hours before using. I often mix mine after dinner for a stress-free breakfast. The baking powder will still activate properly when cooked.
Freezing Waffles
Cook a double batch and freeze extras between layers of parchment paper in a zip-top bag. They’ll keep for 3 months without freezer burn. I use this trick for quick breakfasts during busy weeks. ❄️
Reheating Method
Pop frozen waffles directly into your toaster on the highest setting for 2-3 minutes. This restores that fresh-from-the-iron crispness better than a microwave. No need to thaw first.
Iron Cleaning Tip
Let your waffle iron cool completely, then wipe with a damp cloth. For stuck-on bits, I use a soft brush with 1 tsp baking soda paste. Never immerse the iron in water. 💡
Morning Assembly
Keep your pre-mixed dry ingredients in a jar on the counter. Just add wet ingredients when ready to cook. This method works especially well for weekend brunch when you want to sleep in a bit.
Nutrition Facts
Frequently Asked Questions
Why does my batter stick to the iron?
Your iron may not be hot enough or properly greased. Always preheat to medium-high heat and brush with vegetable oil before adding batter. Even non-stick surfaces need a light oil coating.
Can I make the batter ahead of time?
Yes! Combine dry ingredients the night before or store mixed batter in the fridge for up to 24 hours. The baking powder stays active until cooking. Just whisk before using.
What’s the trick to extra crispy waffles?
Use whole milk and melted butter in your batter, and cook until steam completely stops. Transfer to a wire rack instead of a plate to maintain crispness.
How do I clean my waffle iron safely?
Let it cool completely, then wipe with a damp cloth. For stuck bits, use a soft brush with 1 tsp baking soda paste. Never submerge the iron in water.

Trained in classic French technique but raised on slow-cooked ribs and spicy rubs, she blends culinary skill with smoke and soul.
- Recipe for Boneless Pork Chops in Cast Iron Skillet: Sear and Baste to Juicy Perfection - October 3, 2026
- Recipe for Boneless Cross Rib Roast: Slow-Roasted Beef with Herb Crust - October 3, 2026
- Hamburgers in Sauce Recipe Crock Pot: Slow-Cooked Savory Delight - October 3, 2026