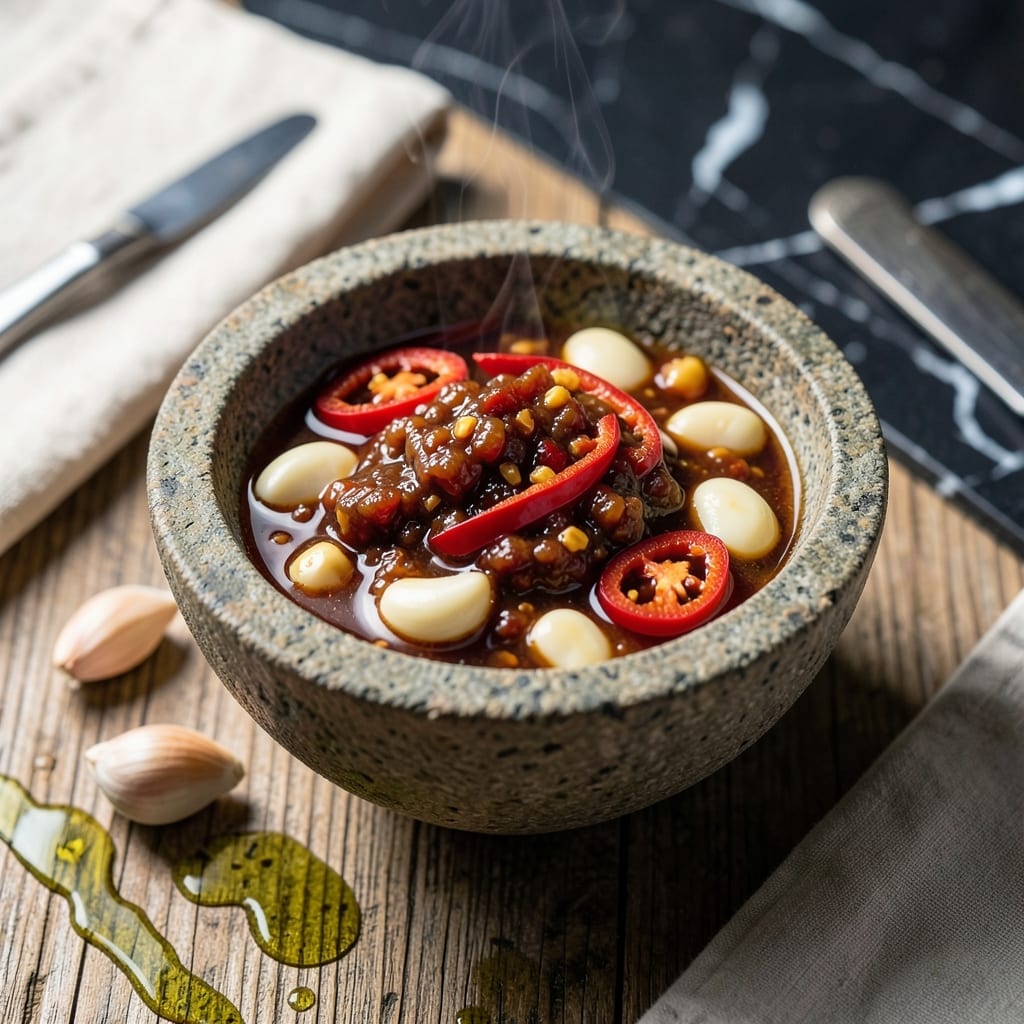
This chilli garlic sauce brings bold heat and aromatic depth to any dish. My professional training taught me that balance is everything—here, fiery chillies meet sweet garlic in perfect harmony.
Use it as a dipping sauce, marinade base, or stir-fry finishing touch. The simple ingredients come together quickly for restaurant-quality flavor at home.
Ingredients for Recipe of Chilli Garlic Sauce
Bold heat and sweet garlic meet in this quick, aromatic sauce. Simple stuff, big flavor.
| Ingredient | Amount | Notes |
|---|---|---|
| Red Chili Peppers 🌶️ | 10 whole | Fresh, stems removed, seeded |
| Garlic Cloves 🧄 | 8 cloves | Peeled, rough chopped |
| White Vinegar 💧 | ½ cup | For tangy brightness |
| Soy Sauce 🫒 | ¼ cup | Use tamari for gluten-free |
| Brown Sugar 🍚 | 3 tbsp | Light or dark variety |
| Water 💧 | ¼ cup | To adjust consistency |
| Salt 🧂 | 1 tsp | Sea salt preferred |
| Vegetable Oil 🫒 | 2 tbsp | Neutral flavored for frying |
[recipe_ingredient_scaler]
The chillies are non-negotiable for that signature heat. Asian markets usually have the freshest selection—look for firm, glossy peppers with no soft spots. Garlic should be plump and tight-skinned (the good stuff, not the sprouting kind). I grab mine from Trader Joe’s for consistency. The soy sauce adds umami depth—San-J tamari is my go-to for gluten-free versions.
No fresh chillies? Dried chili flakes at half the amount work in a pinch. Out of brown sugar? Coconut sugar or maple syrup can substitute, but the flavor profile shifts slightly. The vinegar can be swapped for rice vinegar (milder) or apple cider vinegar (fruitier). Skip the soy sauce? A splash of coconut aminos keeps it vegan while adding similar savoriness.
This keeps beautifully in the fridge for up to 3 weeks in a sealed jar. The flavors actually deepen over time. For longer storage, freeze in ice cube trays—perfect for single-serving portions. Always give it a good stir before using, as the ingredients may separate.
Why You’ll Love This Recipe
- Five-Minute Mix: I dump everything in a blender and it’s done before the rice finishes cooking.
- Sweet Heat: The brown sugar tames the red chilies just enough—hot but still balanced.
- Drizzle on Everything: It’s my secret weapon for noodles, dumplings, or even a fried egg.
- Budget Stretch: A jar lasts weeks, and the ingredients cost less than a takeout order.
Step-by-Step Instructions for Chilli Garlic Sauce
This method delivers a perfectly balanced sauce with just the right amount of heat and garlicky depth.
Step 1: Blend the Chili and Garlic Base
In a blender or food processor, combine the 10 whole Red Chili Peppers and 8 cloves Garlic Cloves. Pulse until you achieve a coarse paste—you want some texture, not a completely smooth puree. The natural oils from the garlic will start to release, creating that signature aromatic base.
Here’s the thing—fresh red chilies can vary in heat level, so taste a small piece first if you’re sensitive to spice. This blend forms the foundation of your sauce, so don’t rush the blending. Scrape down the sides as needed to ensure everything gets incorporated evenly.
Step 2: Cook the Aromatics in Oil
Heat the 2 tbsp Vegetable Oil in a saucepan over medium heat. Once the oil shimmers (but before it smokes), add your chili-garlic paste. Cook for 2-3 minutes, stirring constantly, until the mixture turns a deeper red and becomes fragrant.
This step is crucial for developing depth of flavor. You’re essentially bloom the raw allium compounds in the garlic and chilies, transforming them into something richer and more complex. Watch carefully—if it starts to darken too quickly, reduce the heat to prevent burning.
Real talk: If the mixture sticks slightly to the bottom of the pan, that’s okay. Those fond bits will dissolve into your sauce later, adding incredible flavor.
Step 3: Add Liquids and Sweeten
Carefully pour in the 0.5 cup White Vinegar, 0.25 cup Soy Sauce, and 0.25 cup Water. The vinegar will cause some sizzling—that’s normal. Stir well to combine, then add the 3 tbsp Brown Sugar and 1 tsp Salt.
Bring the mixture to a gentle simmer over medium-low heat. The brown sugar should dissolve completely, and the sauce will start to thicken slightly. This is where the magic happens—the sweet, tangy, salty, and spicy elements all start to harmonize.
I’ve found that light brown sugar gives a milder sweetness, while dark brown sugar adds a deeper molasses note. Either works beautifully in this sauce.
Step 4: Simmer and Reduce to Perfection
Reduce the heat to low and let the sauce simmer uncovered for 10-15 minutes. You’re looking for the sauce to thicken enough to coat the back of a spoon, but it should still be pourable. Stir occasionally to prevent sticking.
The sauce will darken slightly as it reduces, and the flavors will concentrate. Taste and adjust seasoning if needed—though remember the flavors will intensify slightly as it cools. The vinegar’s sharpness should mellow out, leaving a pleasant tang that balances the heat.
Step 5: Cool and Store
Remove the saucepan from heat and let the sauce cool to room temperature. As it cools, it will thicken slightly more. Transfer to a clean jar or airtight container once completely cooled.
This sauce keeps beautifully in the refrigerator for up to 2 weeks. The flavors actually improve after a day or two as they continue to meld together. For the best texture, give it a good stir before using, as the ingredients may settle slightly during storage.
Pro Tips For Making Recipe Of Chilli Garlic Sauce
- Toast the Garlic: Cook the minced garlic on medium-low heat until just golden—I learned this the hard way after burning three batches. Dark brown means bitter, and bitter garlic ruins the sauce.
- Seed the Chilies: Remove the seeds and membranes from the red chilies unless you want face-melting heat. The flesh gives flavor without the fire, and I skip this when I’m feeling brave (then regret it every time).
- Bloom the Sugar: Let the brown sugar dissolve fully in the vinegar and soy sauce before adding the chilies. Sounds fussy, but it prevents grainy texture and makes the sauce cling better to food.
- Rest Before Using: Give the finished sauce a solid 30 minutes to sit at room temperature. My grandmother swore by this, and she was right: the flavors meld and mellow, especially the raw edge of the vinegar.
Make-Ahead Tips for This recipe of chilli garlic sauce
Prep Ahead Strategy
I always blend the 10 Red Chili Peppers and 8 Garlic Cloves the night before. Store this coarse paste in an airtight container in the fridge for up to 24 hours—the flavors start developing immediately. 💡
Partial Cook Method
You can cook the aromatic base (chilies, garlic, oil) completely, then store it in the fridge for 2-3 days. Just finish with the vinegar, soy sauce, and sugar when ready. This saves 10 minutes on cooking day.
Freezer-Friendly Batches
This sauce freezes beautifully for up to 3 months. I portion into ice cube trays first, then transfer to freezer bags. Thaw 1-2 cubes at a time for single servings. Always leave ½ inch headspace in containers.
Flavor Melding Time
For best results, make the full sauce 1-2 days ahead. The flavors deepen significantly after 24-48 hours in the fridge. Just give it a good stir before using, as some separation is natural.
Quick Revival Tip
If your stored sauce thickens too much, thin with 1-2 tsp water or vinegar. Heat gently over low heat for 2-3 minutes to restore the perfect consistency. Never boil—it can make the sauce bitter. 🔥
Equipment Prep
Have your blender and saucepan ready before starting. I keep a fine-mesh strainer handy for any seeds that didn’t blend completely. A rubber spatula helps scrape every bit of flavor from the pan.
Nutrition Facts
Frequently Asked Questions
How long does this sauce stay fresh?
It keeps in the fridge for up to 2 weeks in an airtight container. For longer storage, freeze for 3 months in ice cube trays for easy portions.
Can I adjust the heat level?
Reduce chili quantity or remove all seeds for milder heat. For extra spice, add 1-2 tsp chili flakes or a dash of hot sauce. Taste and adjust gradually.
What dishes pair best with this sauce?
It’s perfect as a dipping sauce for dumplings or spring rolls. Also great stirred into stir-fries, drizzled over grilled meats, or mixed into noodles for extra flavor.
Why did my sauce turn out too thick?
Simmering too long can thicken it excessively. Thin with 1-2 tsp water or vinegar, then warm gently over low heat for 2-3 minutes.

Trained in classic French technique but raised on slow-cooked ribs and spicy rubs, she blends culinary skill with smoke and soul.
- Recipe for Boneless Pork Chops in Cast Iron Skillet: Sear and Baste to Juicy Perfection - October 3, 2026
- Recipe for Boneless Cross Rib Roast: Slow-Roasted Beef with Herb Crust - October 3, 2026
- Hamburgers in Sauce Recipe Crock Pot: Slow-Cooked Savory Delight - October 3, 2026