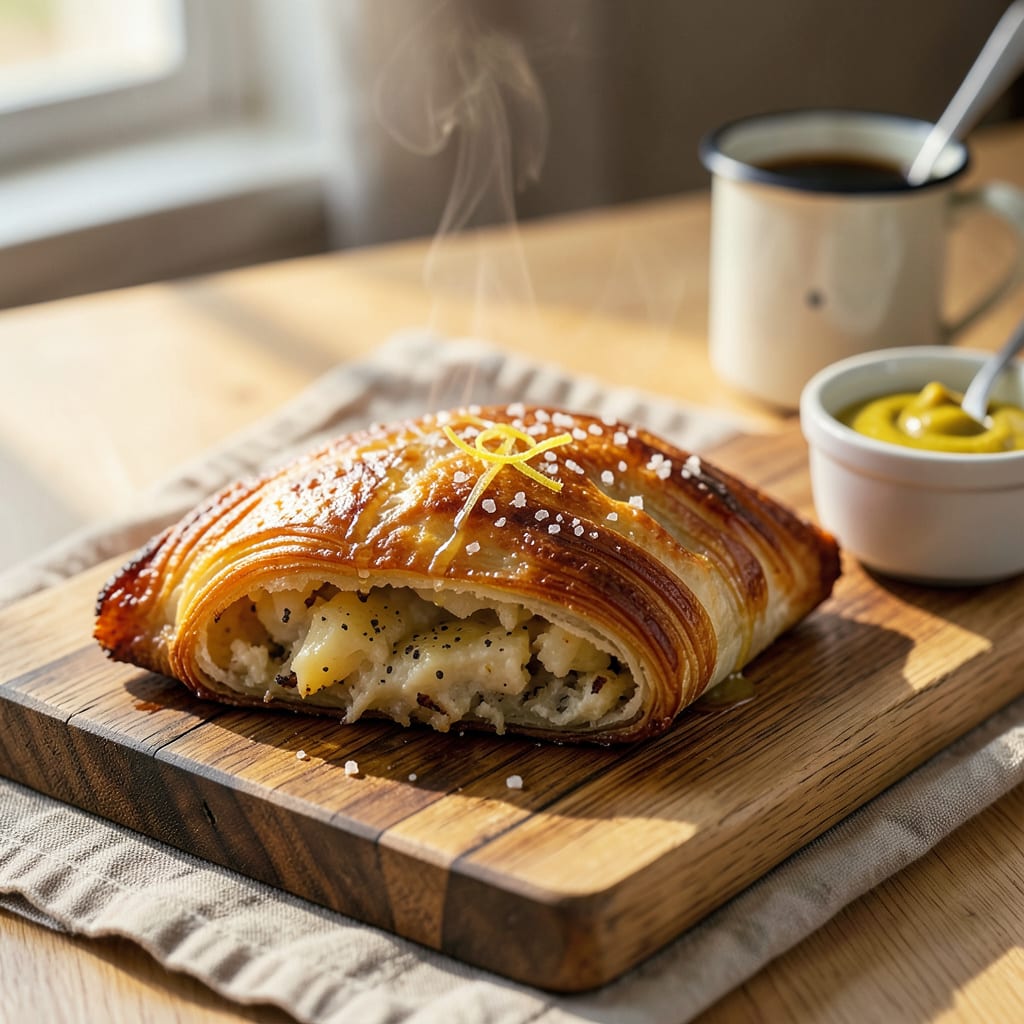
Let me tell you, reheating a knish in the air fryer is one of those small kitchen wins that changes everything. That first bite of crispy pastry giving way to warm, fluffy filling? It’s like eating it fresh from the bakery. I’ve tested every method, and nothing beats the air fryer for bringing store-bought or homemade knishes back to life.
A knish—that wonderful Jewish pastry stuffed with potato, onion, or cheese—deserves better than a sad microwave reheat. The air fryer’s hot circulating air works magic, restoring that perfect contrast between golden, crispy crust and soft interior. No soggy bottoms, no uneven heating, just knish perfection in minutes.
Here’s the thing—most people overcomplicate it. You don’t need fancy equipment or special skills. Just set your air fryer to the right temp, give it enough space to crisp up, and keep an eye out for that telltale golden color. I’ll walk you through the exact timing and visual cues that guarantee success every time.
Whether you’re reviving a single knish for lunch or a whole batch for a crowd, this method delivers. And if you want to take it up a notch? I’ve got a couple easy tricks for extra crunch and even heating that’ll make your knishes taste better than the original.
📚 In This Guide
- What You’ll Need
- Instructions
- Tips and Common Mistakes
What Youll Need
- ● 1-2 leftover knishes (homemade or store-bought, any filling—potato, kasha, or cheese work great! 🥔)
- ● Air fryer (3.5–6 quart capacity recommended for even heating)
- ○ Parchment paper (optional, but helps prevent sticking—cut to fit your air fryer basket)
- ● Cooking oil spray (avocado, olive, or canola oil—just a light mist for extra crispiness!)
- ● Tongs or silicone-tipped utensil (to safely flip/remove hot knishes)
- ● Oven mitts (air fryer baskets get toasty!)
- ● Plate or wire rack (for resting post-reheat—keeps the bottom crispy!)
- ○ Meat thermometer (optional, for checking internal temp—aim for 165°F if reheating meat-filled knishes)
- ● Timer (your phone works, but a kitchen timer keeps you on track! ⏰)
Instructions
Here’s exactly how to bring your knishes back to life with that perfect crispy crust and fluffy interior.
Preheat Your Air Fryer Properly
Start by preheating your air fryer to 350°F for 3-5 minutes. This step is crucial because it creates an immediate hot environment that will crisp up the exterior quickly without drying out the filling. I always recommend checking your air fryer’s manual for preheating specifics—some models heat faster than others.
While it’s preheating, take your knishes out of the refrigerator and let them sit at room temperature for about 5 minutes. This brief rest prevents the filling from being too cold when it hits the hot air, which could lead to uneven reheating. You’ll notice the knishes feel slightly less firm after this short rest.
Arrange Knishes for Optimal Airflow
Place the knishes in the air fryer basket in a single layer, leaving at least ½ inch of space between each one. This spacing allows the hot air to circulate freely around all sides, ensuring even crisping. If you’re reheating multiple knishes, you may need to work in batches—don’t overcrowd the basket or you’ll end up with steamed rather than crispy results.
For best results, I like to spray the knishes lightly with cooking spray or brush them with a tiny bit of oil. This isn’t mandatory, but it does enhance the crispiness of the crust. Just a quick spritz is all you need—you’re not deep frying here, just giving the exterior a little help to achieve that perfect golden finish.
Reheat Using the Right Time and Temperature
Air fry the knishes at 350°F for 4-6 minutes, then carefully flip them over. The exact timing depends on your air fryer model and how cold the knishes were when you started. You’re looking for a golden brown crust and you’ll hear a slight sizzling sound when they’re getting crispy.
After flipping, continue cooking for another 3-5 minutes. The knishes are done when the crust is uniformly crispy and the filling is heated through. To test, insert a toothpick into the center—it should come out warm to the touch. If you’re unsure, you can always cut one open to check, but I find the toothpick method works perfectly without sacrificing a whole knish.
Rest Briefly Before Serving
Remove the knishes from the air fryer and let them rest on a wire rack or plate for about 2 minutes before serving. This brief rest allows the filling to set slightly, preventing it from spilling out when you take that first glorious bite. You’ll notice the crust stays crispy during this time while the interior becomes perfectly creamy.
Serve immediately while hot and crispy. I love pairing reheated knishes with a simple side of mustard or applesauce for dipping. The contrast between the crispy exterior and the soft, flavorful filling is what makes a perfectly reheated knish so satisfying. Enjoy them right away for the best texture and flavor!
Tips and Common Mistakes
Getting that perfect crispy exterior while keeping the filling warm and fluffy is all about the details. Here’s what I’ve learned from reheating countless knishes.
The Temperature Factor: Preheating your air fryer to exactly 350°F for 3-5 minutes makes all the difference. This creates that instant hot environment needed to crisp the crust before the filling overheats. I’ve found that skipping this step leads to soggy results, even if you cook them longer. The consistent heat at this temperature gives you that golden finish without drying out the interior.
Arrangement Matters: When placing knishes in the basket in Step 2, that ½ inch spacing isn’t just a suggestion—it’s crucial for airflow. I learned this the hard way when I crowded them in and ended up with steamed rather than crispy knishes. If you’re doing multiple batches, keep them warm in a 200°F oven while you finish the rest. This maintains that perfect texture until serving.
Timing Secret: The 4-6 minutes initial cook time in Step 3 is when the magic happens. Listen for that slight sizzling sound—it tells you the crust is crisping properly. When you flip them, watch for the color to deepen to golden brown during those final 3-5 minutes. The toothpick test mentioned in the instructions is your best friend here; it’s more reliable than guessing based on time alone.
Resting is Critical: Those 2 minutes of resting time in Step 4 might seem unnecessary when you’re hungry, but they’re essential. This brief pause lets the filling redistribute and set slightly, so you don’t lose all that delicious filling in the first bite. I’ve ruined perfectly crisped knishes by skipping this step—trust me, it’s worth the wait.
Pro Tips for Reheat Knish In Air Fryer
- Getting that perfect crispy exterior while keeping the filling warm and fluffy is all about the details. Here’s what …
- The Temperature Factor: Preheating your air fryer to exactly 350°F for 3-5 minutes makes all the difference. This cre…
- Arrangement Matters: When placing knishes in the basket in Step 2, that ½ inch spacing isn’t just a suggestion—it’s c…
Frequently Asked Questions
Can I reheat a frozen knish directly in the air fryer?
Yes! No need to thaw—just add 2-3 extra minutes to the cook time (total ~10-12 mins at 375°F). For best results, spritz frozen knishes with oil or water to prevent drying. Always check the internal temp reaches 165°F for food safety.
How do I keep knishes from drying out in the air fryer?
Moisture is key! Lightly brush or spray knishes with water, oil, or melted butter before reheating. Avoid overcrowding the basket—leave ½-inch gaps for even airflow. If they’re store-bought, wrap in damp paper towels for 30 seconds in the microwave first.
What’s the best temperature and time to reheat knish in an air fryer?
375°F for 5-7 minutes is the sweet spot! Flip halfway for even crisping. Thicker knishes (or frozen) may need +2 mins. Pro tip: Preheat the air fryer for 3 minutes to mimic a fresh-baked texture.
Can I use an oven or microwave instead of an air fryer?
Yes, but results vary:
- Oven: 375°F for 12-15 mins (crispy but slower).
- Microwave: 1-2 mins (soft, not crispy—cover with a damp towel).
Why did my knish turn out soggy or burnt?
Soggy? Likely overcrowding or excess filling moisture. Burnt? Too high a temp (stick to 375°F max) or uneven oil application. For rescue: Soggy knishes can crisp up with 1-2 extra mins at 400°F—watch closely!
Reheating knish in an air fryer is the easiest way to bring back that fresh-from-the-bakery magic—crispy crust, warm filling, zero sogginess! 🎉 With just a few minutes and minimal effort, you’ll transform leftovers into a snack worth savoring. Whether you’re prepping for a quick bite or a cozy gathering, this method guarantees perfection every time.
Ready to try it? Grab your knish, fire up the air fryer, and dig in—your taste buds will thank you! For more air fryer hacks, check out our guide on reheating other baked goods next.

Trained in classic French technique but raised on slow-cooked ribs and spicy rubs, she blends culinary skill with smoke and soul.
- Recipe for Boneless Pork Chops in Cast Iron Skillet: Sear and Baste to Juicy Perfection - October 3, 2026
- Recipe for Boneless Cross Rib Roast: Slow-Roasted Beef with Herb Crust - October 3, 2026
- Hamburgers in Sauce Recipe Crock Pot: Slow-Cooked Savory Delight - October 3, 2026