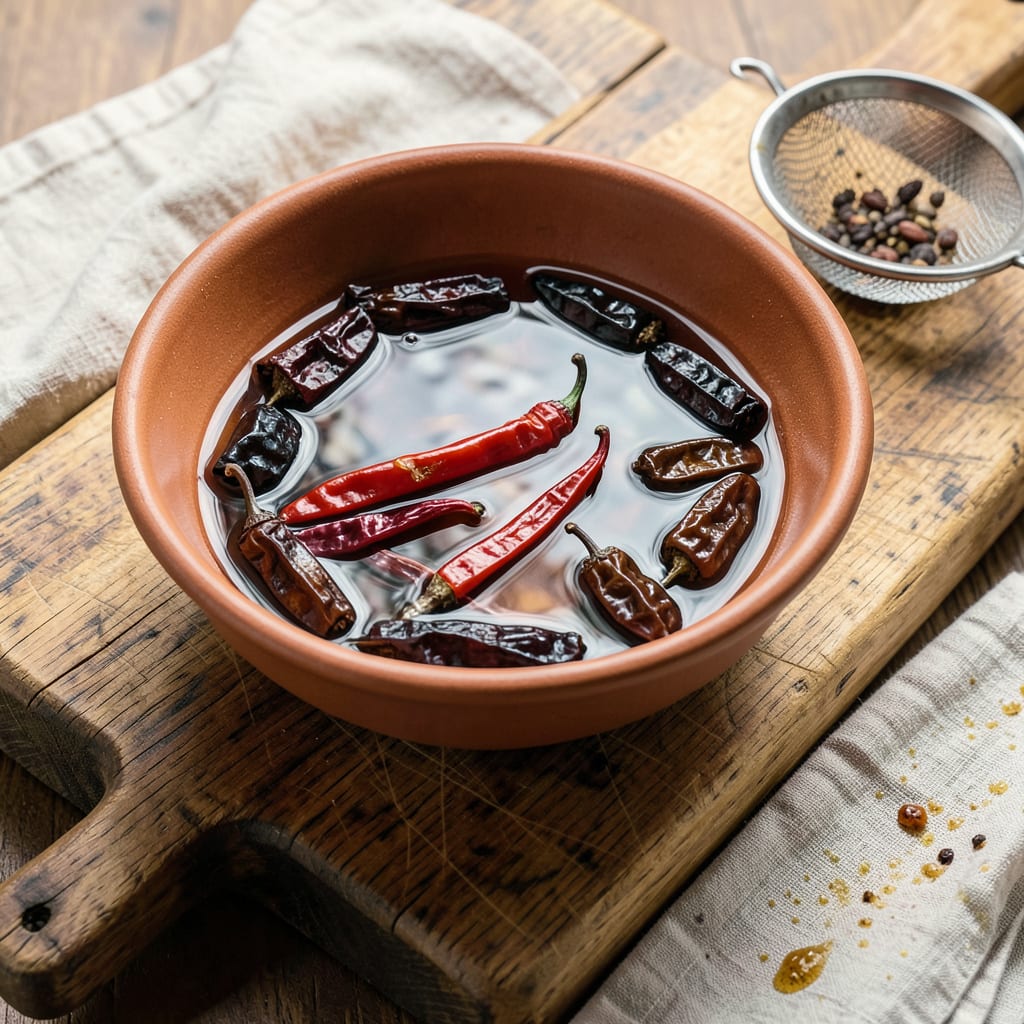
I’ll be real with you: dried chiles are the unsung heroes of deep, complex sauces—when you treat them right. That first whiff of toasted ancho or guajillo bringing smoky, fruity notes to life? That’s when you know you’re building flavor the right way. I’ve spent years perfecting how to wake these dried powerhouses up properly, and the difference between just soaking and properly rehydrating is night and day.
Here’s the thing—most people just toss dried chiles in hot water and call it done. But real magic happens when you consider the method: quick hot water soak for bright salsas, slow steaming for mole bases, or toasting before blending for adobo pastes that pack serious punch. Each technique pulls different flavors from the same chile, and that’s your secret weapon in the kitchen.
What you’re left with isn’t just rehydrated chiles—it’s the foundation for sauces that’ll make people ask for your recipe. We’re talking velvety smooth purees that add depth to everything from marinades to cocktails. I keep batches of this stuff in my freezer (ice cube trays are your best friend here) so I’m always 5 minutes away from restaurant-quality flavor.
Between you and me, this is how professional kitchens get that layered, smoky taste without hours of cooking. Whether you’re making a quick salsa or building a complex mole, starting with properly rehydrated chiles changes the game. Let’s get those flavors unlocked the right way.
📚 In This Guide
- What You’ll Need
- Instructions
- Tips and Common Mistakes
What Youll Need
- ● Dried chiles – 4–12 peppers (adjust based on recipe; e.g., ancho, guajillo, pasilla, or chipotle)
- ● Hot water – 2–4 cups (enough to fully submerge chiles; filtered or tap works)
- ● Heatproof bowl – 1 medium/large (glass, ceramic, or stainless steel preferred)
- ● Small plate or lid – 1 (to cover bowl and trap steam 🌡️)
- ● Tongs or slotted spoon – 1 (for safe handling of hot chiles)
- ○ Knife & cutting board – 1 each (optional, for seeding/stemming post-rehydration)
- ○ Blender or food processor – 1 (optional, if making a paste/sauce)
- ○ Vinegar or citrus juice – 1–2 tbsp (optional, for flavor boost)
- ○ Kitchen timer – 1 (optional but handy for precision ⏰)
Instructions
Here’s the simple process I use to bring dried chiles back to life with maximum flavor.
Select and Prepare Your Chiles
Start by choosing your dried chiles—whether it’s ancho, guajillo, pasilla, or another variety. I always inspect them first, discarding any that show signs of mold or excessive dryness. Give them a quick rinse under cool water to remove any dust or debris that may have accumulated during storage.
Next, remove the stems and seeds if you prefer milder heat. I like to keep some seeds for extra spice, but it’s entirely up to your heat tolerance. Tear the chiles into smaller pieces—this increases the surface area and helps them rehydrate more evenly. You’ll notice the aroma intensifying as you handle them, which is your first hint of the rich flavors to come.
Choose Your Rehydration Method
For the best results, I recommend using hot water for rehydration. Bring about 4 cups of water to a boil in a medium saucepan, then remove it from the heat. Add your prepared chiles to the hot water, making sure they’re fully submerged. Place a small plate or lid on top to keep them under the water if needed.
Let them soak for 15-20 minutes until they become soft and pliable. You’ll know they’re ready when they feel flexible like fresh peppers and the water takes on a deep, rich color. For a more concentrated flavor, you can use just enough water to cover the chiles—this creates a stronger base for your sauces later.
Drain and Reserve the Soaking Liquid
Once the chiles are fully rehydrated, carefully remove them from the soaking liquid using tongs or a slotted spoon. Don’t discard that flavorful liquid—it’s packed with the essence of the chiles and makes an excellent base for sauces or broths. I like to strain it through a fine-mesh sieve to remove any seeds or small pieces.
The rehydrated chiles should feel tender but still hold their shape. If they seem too tough, they may need another 5 minutes in the hot water. At this point, you can use them immediately in your recipe or store them in the refrigerator for up to 3 days in an airtight container with some of the soaking liquid to keep them moist.
Blend for Smooth Sauces (Optional)
If you’re making a sauce or paste, transfer the rehydrated chiles to a blender or food processor. Add just enough of the reserved soaking liquid to help them blend smoothly—usually about ½ cup does the trick. I start with less liquid and add more as needed to achieve my desired consistency.
Blend until completely smooth, stopping to scrape down the sides as necessary. The result should be a velvety puree with no visible pieces. For extra richness, you can blend in a clove of garlic or a small piece of onion with the chiles—this creates a more complex flavor base for your dishes.
Incorporate into Your Recipe
Now your rehydrated chiles are ready to use in any recipe calling for fresh or dried chiles. For sauces, I like to sauté the puree with aromatics like onions and garlic before adding other ingredients. This cooking step helps mellow any bitterness and deepens the flavors.
Remember that rehydrated chiles are more potent than fresh, so start with about ¾ the amount your recipe calls for if substituting. You can always adjust the flavor by adding more later. The rehydrated chiles will keep their vibrant color and rich flavor throughout cooking, giving your dishes that authentic, deep chile taste that’s hard to achieve any other way.
Tips and Common Mistakes
Getting the most flavor from your rehydrated chiles comes down to a few key details that make all the difference.
Rehydration Timing: The 15-20 minute soaking time in Step 2 is crucial for achieving that perfect pliable texture. I’ve found that smaller chile pieces rehydrate faster, so if you tear them into very small pieces, check them at the 12-minute mark. The water should turn a deep reddish-brown color, which tells you the chiles are releasing their full flavor potential. If the water stays pale, give them the full 20 minutes.
Liquid Gold: Don’t underestimate the value of that soaking liquid from Step 3. I always strain it through a fine-mesh sieve to remove any seeds or small pieces, then use it as a base for sauces or broths. This liquid carries concentrated chile flavor that would otherwise be wasted. For extra richness, I sometimes reduce it by half on the stovetop before using it in recipes.
Texture Check: When you’re testing the chiles in Step 3, they should feel tender but still hold their shape. If they seem too tough after the initial soak, that additional 5 minutes in hot water makes a surprising difference. I learned this the hard way after making a few batches where the chiles were still slightly chewy in my final sauce.
Flavor Balance: Remember the advice in Step 5 about using ¾ the amount when substituting rehydrated chiles for fresh. This is especially important with varieties like ancho or chipotle, which develop more intense flavors during rehydration. I always start with less, taste, and then add more if needed—it’s much easier to build flavor than to fix an overpowering dish.
Pro Tips for Rehydrating Dried Chiles
- Getting the most flavor from your rehydrated chiles comes down to a few key details that make all the difference.
- Rehydration Timing: The 15-20 minute soaking time in Step 2 is crucial for achieving that perfect pliable texture. I’…
- Liquid Gold: Don’t underestimate the value of that soaking liquid from Step 3. I always strain it through a fine-mesh…
Frequently Asked Questions
How long does it take to rehydrate dried chiles?
Most chiles soften in 15–30 minutes in hot water or broth. Larger varieties (like ancho or guajillo) may need up to 45 minutes. For speed, cover them with boiling water and let sit off-heat. Pro tip: Soak overnight in the fridge for hands-off rehydration!
Can I rehydrate chiles in something other than water?
Use chicken/vegetable broth, tomato juice, or even beer for extra flavor. Avoid vinegar or citrus—it can toughen the skins. For smoky depth, try steeping chiles in hot coffee (yes, really!). Just strain seeds if you prefer milder heat.
Why did my rehydrated chiles turn bitter?
Bitterness often comes from over-soaking (beyond 1 hour) or using the soaking liquid with seeds/pith. Fix it by: rinsing rehydrated chiles, removing seeds, or using fresh water for blending. Balance flavors with a pinch of sugar or salt in your sauce.
Do I need to remove seeds before rehydrating?
Not required, but seeds and membranes pack heat. For milder sauces, slit chiles open, scrape out seeds, and rinse briefly. Keep seeds for spicier dishes—just strain the soaking liquid if using it. Gloves recommended for hot varieties like habanero!
Can I skip rehydrating and blend dried chiles directly?
You can, but textures suffer! Dry-blending creates grainy, uneven sauces. If short on time, toast dried chiles first (30 sec in a dry pan), then grind into powder for rubs or quick infusions. For sauces, rehydrating is key for silky consistency.
Rehydrating dried chiles is your ticket to unlocking bold, complex flavors in sauces, marinades, and stews—without the hassle! 🌶️ Whether you soak, toast, or blend them, the key is patience and the right technique. Now that you’ve got the know-how, why not put it to the test?
Grab a handful of dried chiles, pick your favorite method, and start crafting a rich, smoky sauce base for your next dish. Your taste buds (and dinner guests) will thank you! 😉

Trained in classic French technique but raised on slow-cooked ribs and spicy rubs, she blends culinary skill with smoke and soul.
- Recipe for Boneless Pork Chops in Cast Iron Skillet: Sear and Baste to Juicy Perfection - October 3, 2026
- Recipe for Boneless Cross Rib Roast: Slow-Roasted Beef with Herb Crust - October 3, 2026
- Hamburgers in Sauce Recipe Crock Pot: Slow-Cooked Savory Delight - October 3, 2026