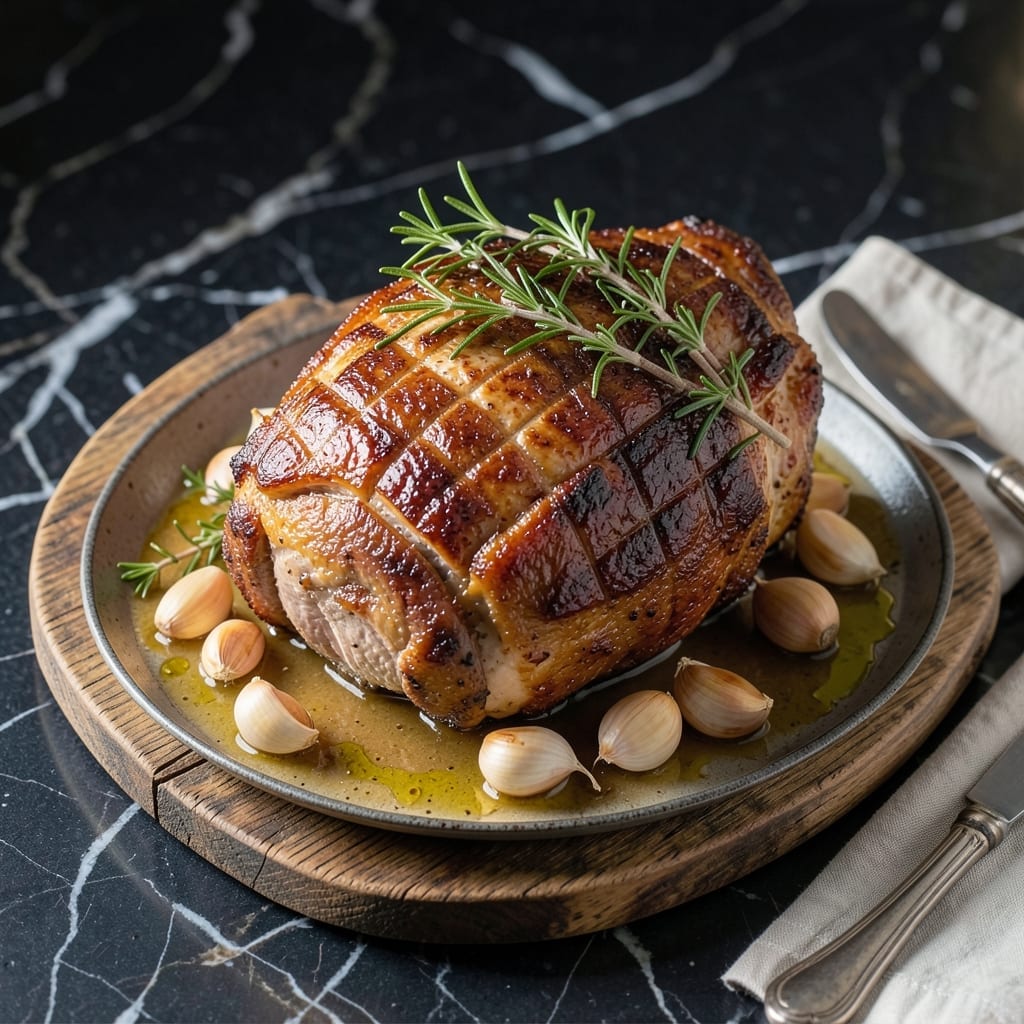
Slow-roasting pork shoulder transforms tough cuts into pull-apart tender meat with rich, caramelized flavor. This method delivers consistent results with minimal effort.
I developed this technique blending classic French training with my pitmaster roots. The low temperature ensures the collagen breaks down perfectly, creating that signature melt-in-your-mouth texture.
Ingredients for Roast Pork Shoulder
A handful of quality ingredients and time do the heavy lifting here. Nothing complicated.
| Ingredient | Amount | Notes |
|---|---|---|
| Pork Shoulder 🥩 | 4 lb | Bone-in, skin-on preferred |
| Kosher Salt 🧂 | 2 tbsp | Diamond Crystal preferred |
| Black Pepper 🌶️ | 1 tbsp | Freshly ground coarse |
| Garlic Cloves 🧄 | 8 cloves | Peeled, smashed lightly |
| Fresh Rosemary 🌿 | 4 sprigs | Woodsy stems included |
| Fresh Thyme 🍃 | 6 sprigs | Stems intact for removal |
| Yellow Onion 🧅 | 1 whole | Thickly sliced for roasting |
| Carrots 🥕 | 3 whole | Peeled, cut into chunks |
| Olive Oil 🫒 | 2 tbsp | Extra-virgin for richness |
| Apple Cider Vinegar 🍏 | 2 tbsp | Balances the richness |
| Dijon Mustard 🟡 | 1 tbsp | Whole grain acceptable |
| Chicken Stock 🥣 | 1 cup | Low-sodium preferred |
| Bay Leaves 🌿 | 2 whole | Dried, for depth |
[recipe_ingredient_scaler]
The pork shoulder is non-negotiable here. Bone-in, skin-on gives you the best texture and flavor—look for good marbling at your butcher or Whole Foods meat counter. I’ve had luck with Costco’s pre-packaged shoulders too (just trim excess fat if needed). The herbs should be fresh—rosemary and thyme are the backbone of that French-inspired crust. Don’t skimp on the kosher salt; it’s what makes the skin crisp up right.
No pork shoulder? Pork butt works identically—it’s just a different cut from the same primal. Out of fresh herbs? Dried at one-third the amount (but fresh really shines). For the stock, vegetable broth in a pinch, though chicken gives better depth. The vinegar can be swapped for white wine or lemon juice if that’s what you’ve got. Just keep the acidity to balance the fat.
Leftovers keep 4-5 days in the fridge, or freeze for 3 months. The flavor actually deepens overnight—perfect for sandwiches or tacos. Reheat gently with a splash of stock to keep it moist (don’t nuke it dry).
Why You’ll Love This Recipe
- Set It and Forget: The pork shoulder slow-roasts while I tackle my to-do list—just salt, pepper, and a quick rub of garlic and rosemary before it goes in.
- That Crust, Though: The rosemary and garlic form this insane golden crust that cracks with every slice. Honestly, it’s the reason I make this every other Sunday.
- Feeds My Crew Twice: One shoulder gives us dinner, then sandwiches for days. Between us, it’s the only way I get my teens to eat leftovers.
- Budget Hero: Pork shoulder stays cheap at the store, and I turn it into a meal that feels fancy. I’ll be real: it’s my secret to eating well without overspending.
Step-by-Step Instructions for Roast Pork Shoulder
Here’s my foolproof method for achieving that fall-apart texture you’re after.
Step 1: Season the Pork Shoulder Aggressively
Pat the 4 lb pork shoulder completely dry with paper towels—this is non-negotiable for crispy skin. I like to score the skin in a crosshatch pattern, cutting about ¼ inch deep. This helps the fat render and the seasoning penetrate.
Rub the pork shoulder all over with the 2 tbsp kosher salt and 1 tbsp black pepper, making sure to get into all the crevices. The salt should form a visible crust on the surface. Don’t be shy—this is a large piece of meat and needs bold seasoning.
Use your fingers to make small slits in the meat and press in the 8 cloves garlic cloves, 4 sprigs fresh rosemary, and 6 sprigs fresh thyme so the aromatics infuse from within. Let it sit at room temperature for 1 hour to absorb the flavors.
Step 2: Sear for Deep Flavor Development
Preheat your oven to 450°F. While it heats, warm the 2 tbsp olive oil in a large Dutch oven over medium-high heat. When the oil shimmers, carefully place the pork shoulder in the pot, skin-side down.
Sear undisturbed for 6-8 minutes until the skin is deep golden brown and crispy. You’ll hear a satisfying sizzle—that’s the sound of flavor building. Flip the pork shoulder and sear the other sides for 3-4 minutes each until uniformly browned.
Remove the pork shoulder and set it aside temporarily. The fond left in the pot is pure gold for your braising liquid.
Step 3: Build the Braising Liquid and Slow Roast
In the same Dutch oven, add the 1 whole yellow onion and 3 whole carrots to the hot oil. Cook for 5 minutes until the onions start to soften and brown slightly at the edges. This builds another layer of flavor in your braise.
Pour in the 2 tbsp apple cider vinegar and 1 tbsp Dijon mustard, stirring to deglaze the pot and lift all those browned bits. Add the 1 cup chicken stock and 2 whole bay leaves, then return the pork shoulder to the pot, skin-side up.
The liquid should come about ⅓ of the way up the pork. If it doesn’t, add a bit more stock. The pork shoulder doesn’t need to be submerged—this is a roast, not a stew. Cover the pot with a lid or foil.
Step 4: Cook Low and Slow to Perfection
Transfer the Dutch oven to the preheated oven and reduce the temperature to 325°F. Roast for 3 hours, then check the pork. It should be fork-tender at this point, but if it resists, give it another 30-60 minutes.
I start checking at the 3-hour mark by inserting a fork into the thickest part. When it slides in with no resistance and twists easily, it’s done. The internal temperature should read 195-205°F for that perfect pull-apart tenderness.
If the braising liquid reduces too much during cooking, add a splash of water to maintain moisture. The pork shoulder is forgiving, so don’t stress about exact timing—just watch for that perfect texture.
Step 5: Rest and Pull for Serving
Carefully transfer the pork shoulder to a cutting board, skin-side up. Let it rest for 20-30 minutes before pulling—this allows the juices to redistribute. The pork should be so tender that two forks easily shred it into chunks.
Discard the herb stems and bay leaves from the cooking liquid. Skim off excess fat if desired, though I often leave some for flavor. Use the braising liquid as a sauce for serving, or reduce it on the stovetop for a thicker consistency.
Serve the pulled pork warm, with the carrots and onions from the pot alongside. The meat should be moist, flavorful, and so tender that it practically melts in your mouth.
Pro Tips For Making Roast Pork Shoulder
- Dry the Meat: Pat the pork shoulder completely dry with paper towels before seasoning—this guarantees a crispy crust instead of a steamed exterior.
- Score the Fat: Cut 1/4-inch slits in the fat cap so the salt, garlic, and rosemary penetrate deeper; I learned this the hard way after years of bland outer layers.
- Start Hot: Roast at 450°F for the first 30 minutes to render fat and set the crust, then drop to 325°F to finish slow and tender.
- Rest Before Carving: Let it rest under foil for at least 20 minutes after roasting—skip this and all the juices will end up on the cutting board, not in the meat.
Wine and Beer Pairings for This Recipe
Rich Red Wines
For this slow-roasted pork, I love a bold Syrah from the Rhône Valley—its peppery notes complement the herb crust beautifully. A Zinfandel from California works too, with its jammy fruit balancing the caramelized pork fat. 🍷
Crisp White Options
Surprisingly, a full-bodied Chardonnay with oak aging stands up to the richness. The buttery notes mirror the pork’s texture. For acidity, try a Viognier—its floral aromas cut through the fat.
Beer Pairings
An amber ale with caramel malt notes enhances the pork’s depth. I also enjoy a dunkelweizen—its banana-clove esters contrast the savory crust. For hop lovers, a brown ale offers gentle bitterness. 🍺
Rosé Surprise
A dry Provence rosé with its crisp acidity refreshes your palate between bites. The subtle berry notes won’t compete with the pork’s robust flavor. Serve it slightly chilled for best results.
Nutrition Facts
Frequently Asked Questions
Can I use pork butt instead?
Pork butt comes from the same primal cut and works identically. It has slightly more marbling, which actually enhances the tenderness. Just follow the same cooking times and temperatures.
Why rest the meat before pulling?
Resting for 20-30 minutes lets juices redistribute. Skipping this step means dry meat as all the moisture will spill out when you pull it. Patience pays off with juicier results!
How do I know when it’s done?
It’s ready when a fork twists easily in the thickest part. The internal temp should reach 195-205°F. If it resists, give it another 30-60 minutes at 325°F.
What if my braising liquid evaporates too much?
Add a splash of water or stock to maintain moisture. The pork is forgiving, but you want at least some liquid to create that flavorful sauce. Check every hour after the first 2 hours.

Trained in classic French technique but raised on slow-cooked ribs and spicy rubs, she blends culinary skill with smoke and soul.
- Recipe for Boneless Pork Chops in Cast Iron Skillet: Sear and Baste to Juicy Perfection - October 3, 2026
- Recipe for Boneless Cross Rib Roast: Slow-Roasted Beef with Herb Crust - October 3, 2026
- Hamburgers in Sauce Recipe Crock Pot: Slow-Cooked Savory Delight - October 3, 2026