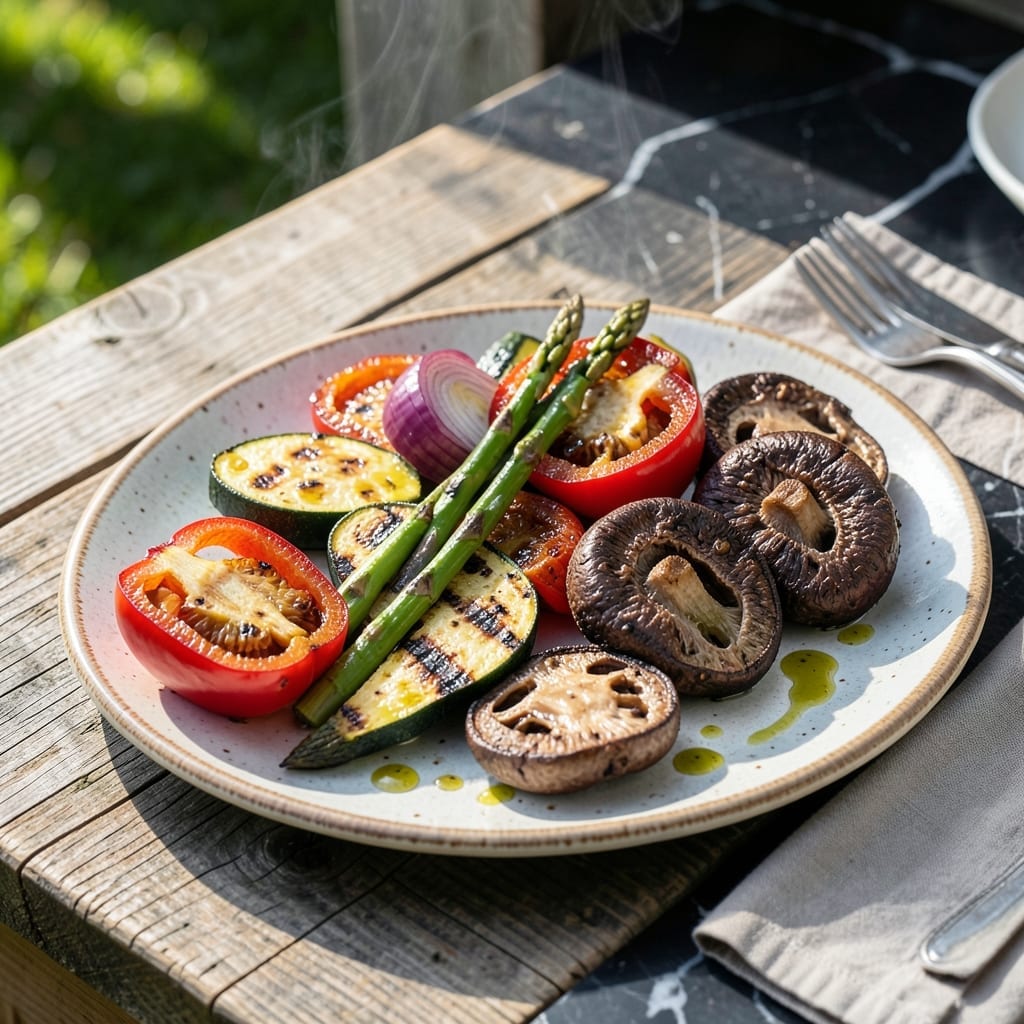
Fire-kissed vegetables transform with smoky depth that only open flames can deliver. This method brings out natural sweetness while adding charred complexity to every bite.
Using direct heat and careful timing, you’ll achieve tender interiors with caramelized edges. The grill does most of the work, making this dish as impressive as it is simple.
Ingredients for Roasted Veggies on Grill
Fresh seasonal vegetables meet open flame for smoky, caramelized perfection every time.
| Ingredient | Amount | Notes |
|---|---|---|
| Red Bell Peppers 🌶️ | 2 whole | Cored, seeded, quartered |
| Zucchini 🥒 | 2 whole | Sliced lengthwise into planks |
| Red Onion 🧅 | 1 whole | Cut into thick wedges |
| Portobello Mushrooms 🍄 | 4 whole | Stems removed, caps halved |
| Asparagus 🌱 | 1 lb | Woody ends trimmed |
| Extra-Virgin Olive Oil 🫒 | ⅓ cup | Divided for brushing |
| Balsamic Vinegar 🍷 | 2 tbsp | Aged for depth |
| Garlic Cloves 🧄 | 4 cloves | Minced for finishing |
| Fresh Rosemary Sprigs 🌿 | 3 whole | Leaves stripped, stems discarded |
| Fresh Thyme Sprigs 🌿 | 3 whole | Leaves stripped, stems discarded |
| Sea Salt 🧂 | 1 ½ tsp | Flaky variety preferred |
| Black Pepper 🌶️ | 1 tsp | Freshly cracked for best flavor |
| Smoked Paprika 🌶️ | ½ tsp | Enhances charred flavor |
[recipe_ingredient_scaler]
The vegetables are the star—opt for firm, fresh produce with vibrant color. Farmers markets or the organic section at Whole Foods yield the best results. Portobello mushrooms should have intact caps (no slimy spots), and asparagus stalks should snap crisply when bent. The olive oil matters here; California Olive Ranch or Bragg offer reliable quality for high-heat grilling.
No fresh herbs? Dried rosemary and thyme at half the amount work in a pinch. Swap balsamic for apple cider vinegar if needed, though the depth won’t be as rich. Red onions can be replaced with shallots (leave whole and peel after grilling). For extra char, sprinkle with liquid smoke post-grill, but use sparingly.
Prep vegetables just before grilling to prevent browning. Leftovers keep in an airtight container for 3-4 days in the fridge. Reheat on a grill pan or oven to revive that smoky edge. Doesn’t freeze well—best enjoyed fresh.
Why You’ll Love This Recipe
- No Fuss Grilling: Honestly, you just chop, toss with oil, and let the grill do the work—no babysitting required.
- Smoky Sweet Bite: That char on the red onions and portobellos? Ridiculously good with a hint of caramelized sugar.
- Feeds a Crowd: I throw these on for BBQs, weeknight dinners, even meal prep—everyone from picky kids to veggie lovers digs in.
- Budget Stretcher: A pound of zucchini and asparagus costs less than a fancy salad, and leftovers taste even better the next day.
Step-by-Step Instructions for Roasted Veggies on Grill
Master the technique for perfectly charred vegetables with deep, smoky flavor every time.
Step 1: Prepare and Season the Vegetables
Begin by prepping all vegetables as specified: quarter the 2 whole Red Bell Peppers, slice the 2 whole Zucchini lengthwise into planks, cut the 1 whole Red Onion into thick wedges, halve the 4 whole Portobello Mushrooms, and trim the woody ends from the 1 lb Asparagus.
In a large bowl, toss all prepped vegetables with ⅓ cup Extra-Virgin Olive Oil, 1.5 tsp Sea Salt, 1 tsp Black Pepper, and ½ tsp Smoked Paprika until evenly coated. The smoked paprika is crucial for that signature charred depth.
Step 2: Grill Over Direct Heat for Char
Preheat your grill to medium-high heat (about 400°F). Clean and oil the grates thoroughly to prevent sticking. Arrange the vegetables in a single layer, ensuring they have direct contact with the grates for optimal charring.
Grill the Red Bell Peppers and Red Onion for 8-10 minutes, turning occasionally, until they develop deep char marks and soften. The Zucchini and Portobello Mushrooms will need 6-8 minutes per side to achieve a tender interior with a caramelized exterior. The Asparagus cooks fastest—4-5 minutes with frequent turning for even char.
Step 3: Finish with Herbs and Balsamic Glaze
Strip the leaves from the 3 whole Fresh Rosemary Sprigs and 3 whole Fresh Thyme Sprigs, discarding the stems. Mince the 4 cloves Garlic Cloves finely. In a small bowl, combine the minced garlic with the 2 tbsp Balsamic Vinegar.
As the vegetables finish grilling, transfer them to a serving platter. Immediately brush with the remaining Extra-Virgin Olive Oil from your prep bowl, then drizzle with the balsamic-garlic mixture. Sprinkle the fresh rosemary and thyme leaves over the top while the vegetables are still hot—this allows the herbs to bloom and infuse the dish with their aromatic oils.
Step 4: Rest and Serve
Let the grilled vegetables rest for 3-5 minutes to allow the flavors to meld. This brief resting period ensures the Sea Salt and Smoked Paprika fully penetrate the vegetables, while the balsamic glaze sets slightly for a glossy finish.
Serve warm, with any accumulated juices spooned over the top. The ideal result features vegetables that are tender inside with a pronounced char on the outside, balanced by the bright acidity of the balsamic and the earthy depth of the fresh herbs.
Pro Tips For Making Roasted Veggies On Grill
- Preheat the Grill: Crank it to medium-high (around 400°F) and let it sit for 10 minutes—I learned this the hard way after too many batches of soggy zucchini.
- Cut Evenly: Slice all veggies to about the same thickness (1/2-inch for peppers and onions, 1/4-inch for zucchini) so they cook at the same rate—no more burnt asparagus and raw mushrooms.
- Oil the Grates: Use tongs and a folded paper towel dipped in oil to coat the grates right before adding the veggies. Sounds tedious, but it prevents sticking, especially with portobellos.
- Use a Grill Basket: Toss the smaller pieces (like diced onions or asparagus tips) in a grill basket to keep them from falling through—saves me from fishing charred bits out of the grill every time.
Storing and Reheating Leftovers
Refrigerator Storage
Let your grilled veggies cool completely before storing—I spread mine on a baking sheet first to speed this up. Transfer to airtight containers and refrigerate at 40°F or below for up to 4 days. The flavors actually deepen overnight. ❄️
Freezer Storage
For longer storage, freeze grilled vegetables in a single layer on a tray first to prevent sticking. Then transfer to heavy-duty freezer bags with all air removed. They’ll keep well for 3 months, though texture softens slightly upon thawing.
Oven Reheating
Preheat oven to 375°F and spread veggies on a baking sheet. Drizzle with 1 tbsp Extra-Virgin Olive Oil and reheat for 8-10 minutes, stirring halfway. This brings back that coveted charred flavor. 🔥
Grill Reheating
My preferred method for maximum smokiness. Heat grill to medium and place veggies in a grill basket. Warm for 3-4 minutes, turning once, until heated through. The direct flame revives the original fire-kissed taste.
Serving from Cold
Grilled vegetables taste great straight from the fridge, especially in salads. I love chopping them for grain bowls or blending into hummus. The smoky notes add depth to any dish, even cold.
Nutrition Facts
Frequently Asked Questions
What’s the best way to prevent veggies from sticking?
Clean and oil the grates thoroughly before cooking. Use a high-smoke-point oil like olive oil and brush it on the grates and veggies.
Can I use frozen vegetables instead?
Fresh is best for grilling, but frozen works in a pinch. Thaw completely and pat dry to remove excess moisture first.
How do I know when they’re done?
Look for deep char marks and tender interiors. Most take 6-10 minutes depending on thickness. Test with a fork.
What if my grill doesn’t have direct heat zones?
Create zones by piling coals to one side or turning off some burners. This gives you control over cooking temperature.

Trained in classic French technique but raised on slow-cooked ribs and spicy rubs, she blends culinary skill with smoke and soul.
- Recipe for Boneless Pork Chops in Cast Iron Skillet: Sear and Baste to Juicy Perfection - October 3, 2026
- Recipe for Boneless Cross Rib Roast: Slow-Roasted Beef with Herb Crust - October 3, 2026
- Hamburgers in Sauce Recipe Crock Pot: Slow-Cooked Savory Delight - October 3, 2026