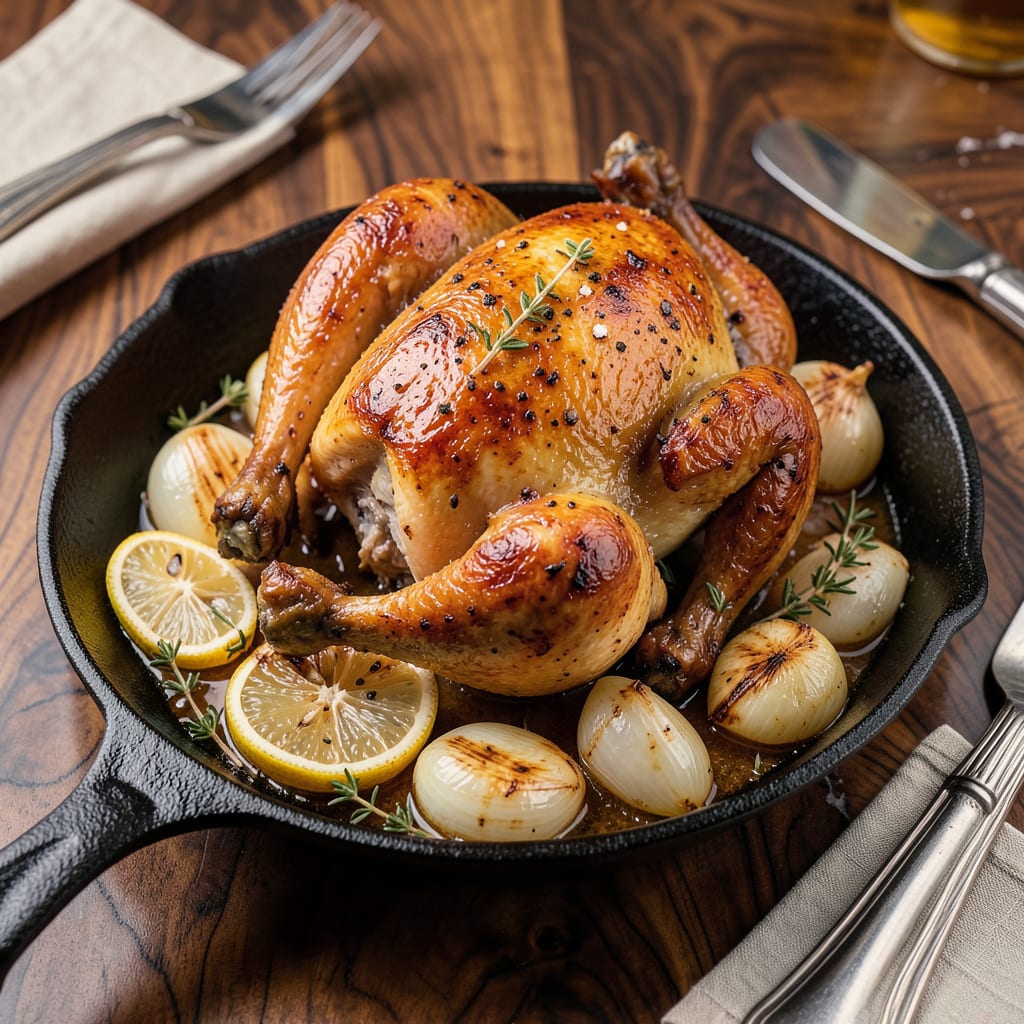
Let me tell you about the first time I roasted a chicken in my convection oven—it changed everything. The hot, circulating air created the crispest skin I’d ever made, while keeping the meat so juicy it practically fell off the bone. No more dry, sad chicken dinners in this house.
Here’s the thing—convection ovens cook faster and more evenly than regular ovens, but you’ve got to adjust your approach. I drop the temperature by 25°F and let that fan work its magic. The key is getting the skin super dry before it hits the oven, then letting the convection airflow do the heavy lifting for perfect browning.
You’ll end up with chicken that’s golden and crispy on the outside, tender and juicy inside—every single time. I like to toss some potatoes and carrots in the pan too, so they soak up all those delicious drippings while cooking alongside. One pan, one incredible meal.
Whether it’s your first time using convection or you’re looking to perfect your technique, this method delivers. The oven does most of the work while you get all the credit for that perfect roast chicken.
📚 In This Guide
- What You’ll Need
- Instructions
- Tips and Common Mistakes
What Youll Need
- ● Whole chicken – 1 (3–5 lbs / 1.4–2.3 kg), fresh or thawed (pat dry for crispier skin! 🍗)
- ● Convection oven – preheated to 375°F (190°C) (check your manual for fan settings!)
- ● Roasting pan – with rack (or use a wire rack on a baking sheet for airflow 🌬️)
- ● Oil or melted butter – 1–2 tbsp (olive, avocado, or neutral oil works best)
- ● Kosher salt – 1–2 tbsp (adjust to taste; coarse salt adheres better)
- ● Black pepper – 1 tsp (freshly ground for best flavor)
- ○ Aromatics (optional) – 1 lemon (halved), 4 garlic cloves, 1 onion (quartered), or fresh herbs (thyme, rosemary 🌿)
- ○ Kitchen twine – to tie legs (optional but helps even cooking)
- ● Meat thermometer – instant-read (critical for perfect doneness! 🌡️)
- ● Basting brush – for oil/butter application (or use your hands!)
- ● Aluminum foil – to tent if browning too fast
- ● Carving knife & board – for serving (sharp knife = cleaner slices! 🔪)
Step-by-Step Instructions for Roasting Chicken in Convection Oven
Get ready for the juiciest, crispiest chicken you’ve ever made—this method delivers perfect results every single time!
Prepare the Chicken for Maximum Flavor
Start by removing any giblets from the cavity and patting the chicken completely dry with paper towels. I mean REALLY dry—this is the secret to that incredible crispy skin we’re after. Pay special attention to the cavity and under the wings where moisture loves to hide.
Season aggressively inside and out with salt and pepper. I use about 1 tablespoon of salt for a 4-pound chicken, making sure to get it into all the nooks and crannies. Let it sit uncovered in the refrigerator for at least 1 hour—this drying process is what creates that beautiful golden crust.
Set Up Your Convection Oven for Perfect Cooking
Position your oven rack in the lower third of the oven and preheat to 375°F on the convection setting. The circulating hot air in a convection oven cooks food faster and more evenly, which means we’ll get that perfect crispy skin while keeping the meat incredibly juicy.
Place a roasting rack in a rimmed baking sheet—this allows hot air to circulate underneath the chicken, ensuring crispy skin all around. If you don’t have a roasting rack, you can use vegetables like onions, carrots, and celery as a makeshift rack while adding extra flavor to your pan drippings.
Roast to Golden Perfection
Place your prepared chicken breast-side up on the roasting rack. The convection setting will create a beautiful, even browning, so there’s no need to flip the bird. Roast for about 1 hour to 1 hour 15 minutes, depending on the size of your chicken.
You’ll know it’s done when the skin is deep golden brown and crispy, and an instant-read thermometer inserted into the thickest part of the thigh (not touching bone) reads 165°F. The juices should run clear when you pierce the thigh with a knife. The convection oven will cook it faster than traditional roasting, so start checking at the 1-hour mark.
Rest for Juicy, Tender Meat
Transfer the chicken to a cutting board and tent loosely with foil. Let it rest for 15-20 minutes before carving—this is absolutely crucial! During this rest, the juices redistribute throughout the meat instead of running out onto your cutting board when you slice it.
The internal temperature will actually rise a few degrees during this time (carryover cooking), and the meat will become even more tender. Use this time to make a quick pan sauce from the drippings or prepare your side dishes. The aroma filling your kitchen will be absolutely intoxicating!
Carve and Serve with Pride
Remove the legs and wings first by pulling them away from the body, then slice the breast against the grain into beautiful, even pieces. Each slice should reveal perfectly cooked meat with a golden, crispy exterior. The convection oven gives you that restaurant-quality finish that will impress everyone at your table.
Serve immediately while still warm, with plenty of that delicious crispy skin. The meat should be tender and juicy, with a flavor that’s concentrated and delicious. This method delivers on both promises—crispy skin AND juicy meat—every single time you make it!
Tips and Common Mistakes for Perfect Convection-Roasted Chicken
Let me share the game-changing secrets I’ve learned from years of perfecting this method—these small details make all the difference!
The Drying Process: That 1-hour uncovered refrigeration in Step 1 isn’t just waiting time—it’s where the magic happens! The dry air pulls moisture from the skin, creating that ultra-crispy texture we’re after. I’ve tested skipping this, and trust me, the skin just doesn’t get that perfect crackle. For even better results, place a small fan near your fridge to increase airflow during this drying period.
Temperature Precision: At 375°F in Step 2, convection ovens work differently than conventional ones. The circulating hot air means your chicken will cook about 25% faster. I always set my timer for exactly 1 hour, then start checking every 5 minutes. The moment that thermometer hits 165°F in the thickest part of the thigh, it’s done—no need to second-guess it!
Rack Positioning: Placing the rack in the lower third of the oven as directed in Step 2 is crucial for even cooking. This position allows the hot air to circulate perfectly around the chicken while keeping the skin from burning. I’ve found that moving it to the middle can cause the top to brown too quickly before the meat is fully cooked through.
Resting Technique: Those 15-20 minutes of resting in Step 4 aren’t just downtime—they’re when the meat becomes its most tender. Here’s what nobody tells you: tent the foil loosely so steam can escape. If you seal it tightly, the skin will lose its crispness. I use a skewer to prop up the foil just slightly—this keeps the heat in while allowing moisture to escape.
Pro Tips for Roasting Chicken In Convection Oven
- Let me share the game-changing secrets I’ve learned from years of perfecting this method—these small details make all…
- The Drying Process: That 1-hour uncovered refrigeration in Step 1 isn’t just waiting time—it’s where the magic happen…
- Temperature Precision: At 375°F in Step 2, convection ovens work differently than conventional ones. The circulating …
Frequently Asked Questions
How long does it take to roast a chicken in a convection oven?
In a convection oven, a 3-4 lb chicken typically roasts in 45-60 minutes at 375°F. For larger birds (5-6 lbs), add 10-15 minutes. Always check the internal temp—165°F in the thickest part of the thigh ensures doneness. Pro tip: Start checking 10 minutes early to avoid overcooking!
Do I need to adjust the temperature for convection roasting?
Yes! Convection ovens cook 25°F faster than conventional ovens. Reduce the temp by 25°F (e.g., if a recipe says 400°F, use 375°F). This prevents dryness while keeping the skin crispy. Bonus: Fan circulation means no need to flip the bird!
Can I use a regular roasting pan in a convection oven?
Just opt for a shallow, rimmed pan (like stainless steel or cast iron) to allow hot air circulation. Avoid glass or ceramic—they can block heat flow and slow cooking. For extra crispiness, place the chicken on a wire rack inside the pan.
Why is my convection-roasted chicken dry?
Dryness usually means overcooking or skipping brining. Try these fixes:
- Brining (even 30 minutes in saltwater helps!).
- Basting with butter or broth halfway through.
- Pull it out at 160°F—it’ll rise to 165°F while resting.
What’s the best alternative if I don’t have a convection setting?
No convection? No problem! Use the regular bake setting at 400°F, but:
- Roast 10-15 minutes longer per pound.
- Flip the chicken halfway for even browning.
- Broil for 2-3 minutes at the end for crispy skin.
Roasting chicken in a convection oven is the secret to achieving perfectly crispy skin and tender, juicy meat with less effort and time! 🍗 By harnessing the power of circulating hot air, you’ll cut cooking time by up to 25% while locking in flavor—just follow the temperature adjustments and prep tips we’ve shared.
Ready to impress at your next dinner? Grab a whole chicken, season it boldly, and let your convection oven do the rest! For extra inspiration, try experimenting with different herb blends or glaze recipes—your taste buds (and dinner guests) will thank you! 😉

Trained in classic French technique but raised on slow-cooked ribs and spicy rubs, she blends culinary skill with smoke and soul.
- Recipe for Boneless Pork Chops in Cast Iron Skillet: Sear and Baste to Juicy Perfection - October 3, 2026
- Recipe for Boneless Cross Rib Roast: Slow-Roasted Beef with Herb Crust - October 3, 2026
- Hamburgers in Sauce Recipe Crock Pot: Slow-Cooked Savory Delight - October 3, 2026