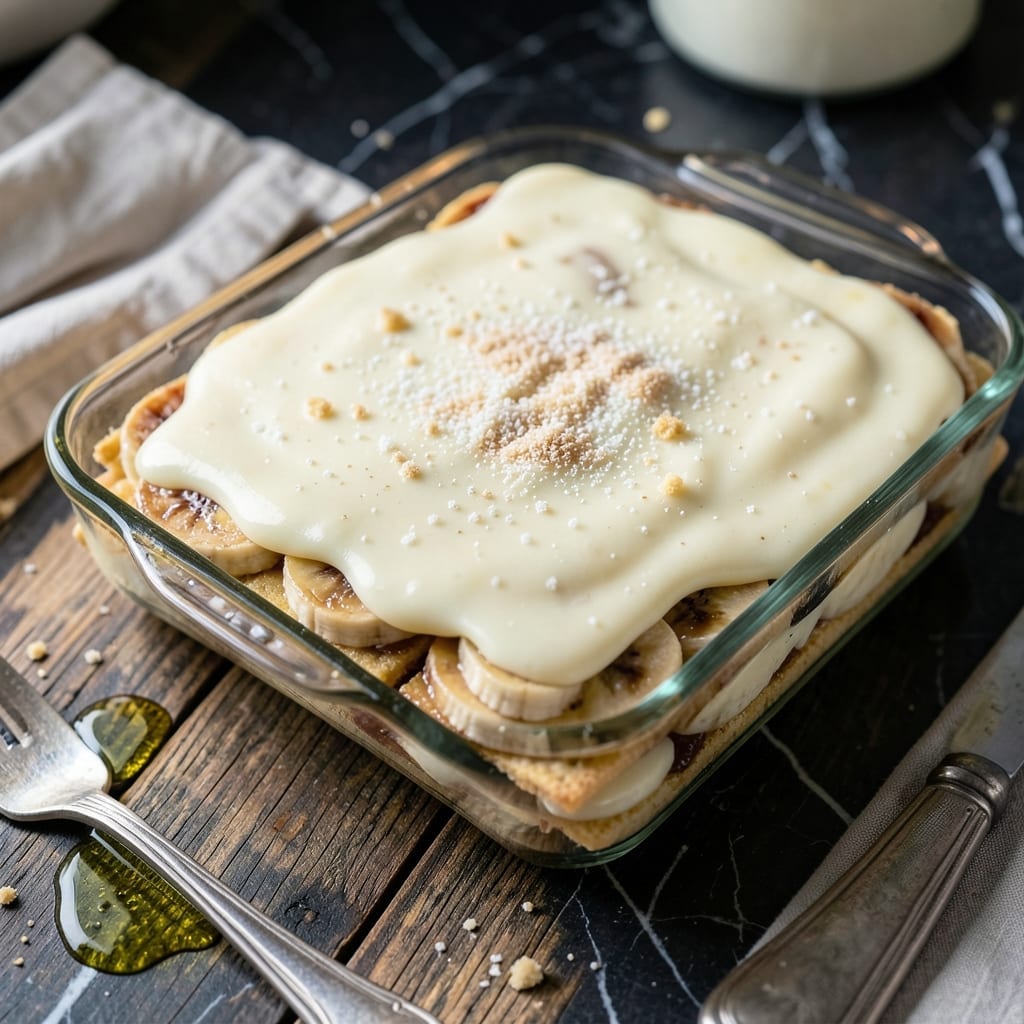
There’s a reason Rodney Scott’s banana pudding became legendary at his BBQ joint—it transforms simple ingredients into creamy, vanilla-kissed layers that taste like home.
This version captures that magic with a technique perfected over years: layering vanilla wafers with fresh bananas and custard so smooth it feels like a hug. The result is a dessert that’s rich yet balanced, with every bite delivering that signature comfort.
Ingredients for Rodney Scott Bbq Banana Pudding
Simple ingredients create legendary layers of creamy, vanilla-kissed comfort in this classic dessert.
| Ingredient | Amount | Notes |
|---|---|---|
| Vanilla Wafers 🍪 | 12 oz | About 40 wafers, Nilla brand preferred |
| Ripe Bananas 🍌 | 4 whole | Sliced just before layering |
| Whole Milk 🥛 | 2 cups | Full-fat for richness |
| Granulated Sugar 🍚 | 1 cup | Divided between custard and meringue |
| All-Purpose Flour 🌾 | ¼ cup | For thickening custard |
| Large Eggs 🥚 | 3 whole | Separated, yolks for custard, whites for meringue |
| Unsalted Butter 🧈 | 2 tbsp | Melted for custard |
| Vanilla Extract 🌿 | 2 tsp | Pure extract for best flavor |
| Salt 🧂 | ¼ tsp | Fine sea salt preferred |
| Heavy Cream 🥛 | ½ cup | Whipped for topping |
| Cream of Tartar 🧂 | ¼ tsp | Stabilizes meringue |
[recipe_ingredient_scaler]
The vanilla wafers are non-negotiable here—Nilla brand has that perfect snap and sweetness. Most grocery stores carry them, but Walmart or Target usually have the best prices. Bananas should be ripe with plenty of brown speckles (that’s when they’re sweetest). The milk needs to be whole milk for that ultra-creamy custard; skim just won’t cut it for this recipe.
No vanilla wafers? Shortbread cookies work in a pinch (Lorna Doone is a solid backup). Out of heavy cream? Whipped topping isn’t ideal but gets the job done. For a deeper vanilla flavor, scrape the seeds from a vanilla bean in addition to the extract. The flour can be swapped for cornstarch at 2 tbsp if that’s what you’ve got on hand.
Assemble up to 12 hours ahead—the wafers soften perfectly overnight. Keeps in the fridge for 3 days, but the meringue is best fresh. Leftover custard? Spoon it over fruit or toast. (Don’t waste a drop.)
Why You’ll Love This Recipe
- No Fuss Layers: I just alternate vanilla wafers, banana slices, and the custard—no baking, no stress.
- Sweet Nostalgia: That first bite with the soft wafers and creamy custard takes me straight back to childhood.
- Potluck Hero: I bring this to every gathering and it disappears before the main course.
- Budget Friendly: Five simple ingredients I already have on hand make this a wallet-friendly treat.
Step-by-Step Instructions for BBQ Banana Pudding
Master the technique behind this layered dessert, where custard meets meringue in perfect harmony.
Step 1: Prepare the Vanilla Wafer Base
Arrange a single layer of the 12 oz Vanilla Wafers in the bottom of a 9×13-inch baking dish. The cookies should fit snugly without overlapping, creating a sturdy foundation for the layers above. This base prevents the custard from making the dessert soggy.
I use Nilla brand for their consistent texture and flavor, which holds up well to the moisture of the custard and bananas. Set the dish aside while you prepare the custard—this ensures the wafers stay crisp until assembly.
Step 2: Cook the Custard to Silky Perfection
In a medium saucepan, whisk together the 2 cups Whole Milk, ¾ cup of the Granulated Sugar (reserving some for the meringue), the 0.25 cup All-Purpose Flour, and the 0.25 tsp Salt. Place over medium heat and cook, stirring constantly, until the mixture begins to thicken.
In a separate bowl, whisk the 3 Large Eggs yolks with the 2 tbsp Unsalted Butter and 2 tsp Vanilla Extract. Slowly temper the yolks by drizzling in about ½ cup of the hot milk mixture while whisking vigorously. Pour the tempered yolks back into the saucepan and continue cooking for 2-3 minutes until the custard coats the back of a spoon. Remove from heat and let cool slightly.
Step 3: Layer the Bananas and Custard
Slice the 4 whole Ripe Bananas just before layering to prevent browning. Arrange half of the banana slices over the vanilla wafers in the dish. Pour half of the warm custard over the bananas, spreading it evenly with a spatula.
Add another layer of Vanilla Wafers, followed by the remaining banana slices and the rest of the custard. Smooth the top with the spatula to create an even surface for the meringue. This layering technique ensures every bite has the perfect ratio of creamy custard, sweet bananas, and crisp wafers.
Step 4: Prepare and Add the Meringue Topping
In a clean bowl, beat the 3 Large Eggs whites with the 0.25 tsp Cream of Tartar until soft peaks form. Gradually add the remaining ¼ cup Granulated Sugar and continue beating until stiff, glossy peaks form. This meringue adds the signature cloud-like topping that browns beautifully in the oven.
Spread the meringue evenly over the custard layer, sealing the edges to the dish to prevent shrinking. Use the back of a spoon to create decorative peaks and swirls—this not only looks professional but ensures even browning.
Step 5: Bake and Chill to Perfection
Bake at 350°F for 15-20 minutes until the meringue is golden brown. Keep a close eye on it to avoid over-browning. Once baked, remove from the oven and let cool to room temperature.
Refrigerate for at least 4 hours or overnight to allow the layers to set. Before serving, whip the 0.5 cup Heavy Cream to soft peaks and dollop on top for an extra touch of richness. This chilling time is crucial for achieving the perfect creamy texture.
Pro Tips For Making Rodney Scott Bbq Banana Pudding
- Layer While Warm: I learned this the hard way—assemble the pudding while the custard is still warm, so the Vanilla Wafers soften just enough to meld with the bananas without turning to mush.
- Use Spotty Bananas: Skip the green ones; overripe bananas with brown speckles are sweeter and blend seamlessly into the pudding without that starchy bite.
- Whisk the Flour First: Mix the All-Purpose Flour into a small amount of cold milk before adding it to the hot mixture to prevent lumps that ruin the smooth texture.
- Chill 4 Hours Minimum: Sounds tedious, but giving it a full 4 hours in the fridge lets the flavors marry and the wafers absorb the custard without getting soggy too soon.
Essential Equipment for Perfect Results
Baking Dish
A 9×13-inch glass baking dish is essential for even heat distribution and that perfect golden meringue. I use Pyrex—it’s durable and lets me monitor the layers. Avoid metal pans; they can cause uneven browning on the meringue. 🔥
Whisk and Saucepan
For the custard, a medium heavy-bottomed saucepan prevents scorching. I swear by my All-Clad for its even heat. Pair it with a balloon whisk to break up any lumps in the custard base quickly.
Electric Mixer
Stiff meringue peaks require power. A stand mixer with a whisk attachment makes this effortless—I use my KitchenAid. If using a hand mixer, ensure it has at least 250 watts for proper volume.
Fine-Mesh Strainer
Straining the custard after cooking ensures silky smoothness. A fine-mesh strainer catches any cooked egg bits. I keep a OXO strainer in my drawer—it’s sturdy and easy to clean.
Offset Spatula
An offset spatula is perfect for spreading custard evenly and lifting meringue for swirls. I prefer stainless steel for durability. The angled blade gives better control than a regular spoon.
Cooling Rack
After baking, transfer the dish to a wire cooling rack to prevent the bottom from getting soggy. I use a foldable rack from Wilton—it saves space in my small kitchen.
Nutrition Facts

Trained in classic French technique but raised on slow-cooked ribs and spicy rubs, she blends culinary skill with smoke and soul.
- Recipe for Boneless Pork Chops in Cast Iron Skillet: Sear and Baste to Juicy Perfection - October 3, 2026
- Recipe for Boneless Cross Rib Roast: Slow-Roasted Beef with Herb Crust - October 3, 2026
- Hamburgers in Sauce Recipe Crock Pot: Slow-Cooked Savory Delight - October 3, 2026