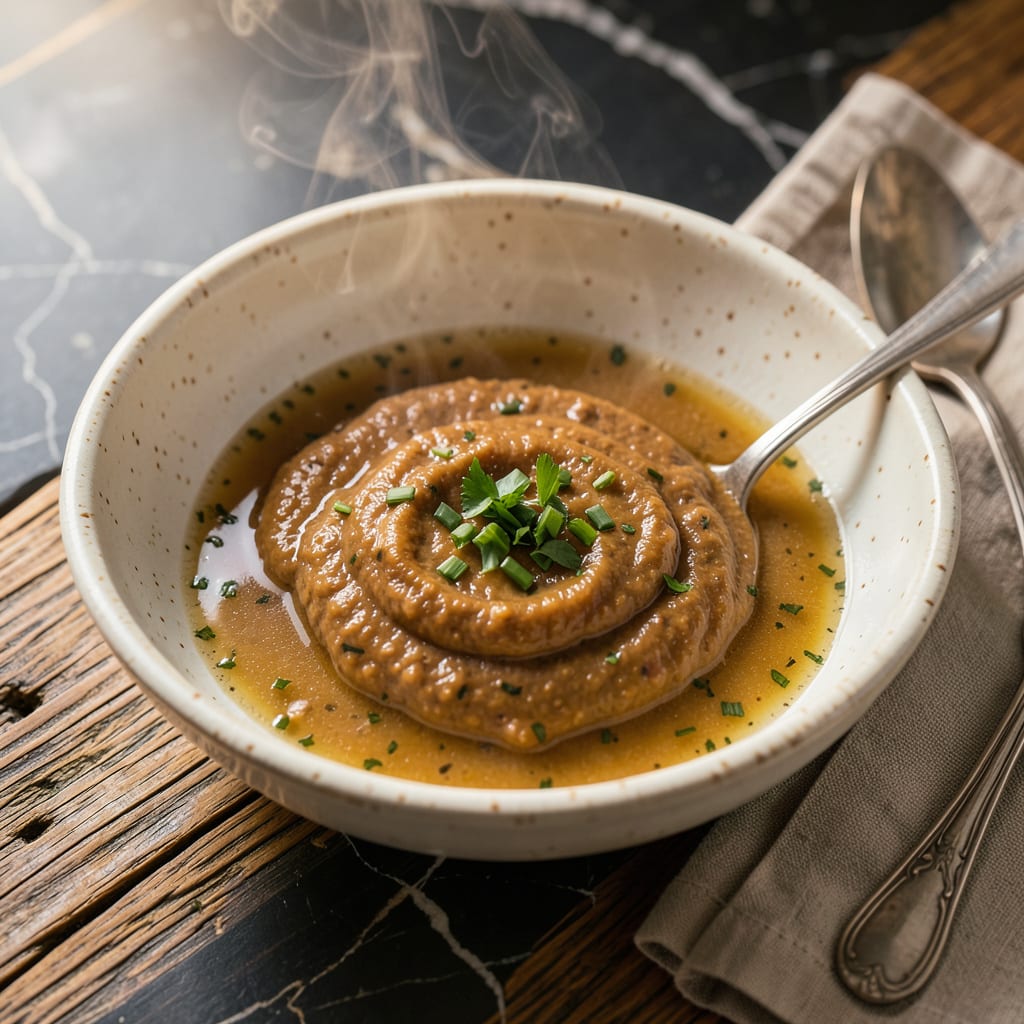
I’ll be real with you—mastering a proper roux changed my cooking game forever. This simple mix of fat and flour, cooked just right, transforms plain chicken broth into velvety sauces and gravies that taste like they simmered all day. Whether you’re thickening a soup or building the base for mac and cheese, getting this technique down means you’ll never rely on canned sauces again.
Here’s the thing—roux isn’t complicated, but timing matters. A light roux (2-3 minutes) keeps sauces delicate, while a dark roux (8-10 minutes) adds deep, nutty flavor. I learned the hard way that rushing this step leads to either raw flour taste or burnt bits. The magic happens when you slowly whisk in warm chicken broth, creating that perfect silky consistency that clings to every noodle or piece of meat.
What you end up with is a versatile foundation that works for everything from creamy soups to rich casseroles. Need it gluten-free? Swap the flour for cornstarch. Too thick? Thin it with more broth. The best part? This sauce actually tastes better the next day as flavors meld, making it ideal for meal prep.
Between you and me, once you nail this technique, you’ll start seeing roux opportunities everywhere. That bland chicken noodle soup? Now it’s restaurant-worthy. Dry Thanksgiving gravy? Never again. Let’s get that whisk moving.
📚 In This Guide
- What You’ll Need
- Instructions
- Tips and Common Mistakes
What Youll Need
- ● Ingredients: ½ cup (1 stick / 113g) unsalted butter (or clarified butter for a richer flavor 🧈)
- ● ½ cup (60g) all-purpose flour (sifted for a lump-free roux)
- ● 2 cups (480ml) low-sodium chicken broth (homemade or high-quality store-bought for best results)
- ● Salt (to taste, ~½ tsp—adjust based on broth saltiness)
- ○ Black pepper (freshly ground, ~¼ tsp, optional but recommended)
- ● Tools & Equipment: Heavy-bottomed saucepan (2–3 qt, to prevent burning)
- ● Whisk (essential for smooth blending 🥄)
- ● Wooden spoon (for stirring roux—avoids scratching pans)
- ● Measuring cups/spoons (precision matters!)
- ○ Fine-mesh strainer (optional, for ultra-smooth sauces)
- ● Ladle or heatproof spatula (to scrape every velvety bit)
- ● Prerequisites: Broth warmed (simmering but not boiling—speeds up incorporation)
- ● Butter softened (room temp for even melting)
- ● Patience! ⏳ (roux takes 5–15 mins to reach desired color)
Step-by-Step Instructions for Roux With Chicken Broth
Here’s how to create that perfect velvety base—simple steps, foolproof results.
Gather and Measure Your Ingredients
Before you start cooking, have everything ready. You’ll need equal parts fat and flour by weight (typically 4 tablespoons butter and 4 tablespoons all-purpose flour for a basic roux), plus 2 cups of chicken broth warmed to just below simmering. I like to use unsalted butter so I can control the salt level in my final dish.
Measure your ingredients precisely—this isn’t the time for eyeballing. The ratio of fat to flour determines your roux’s thickening power, and the broth temperature affects how smoothly it incorporates. Cold broth can cause lumps, while too-hot broth might cook the flour unevenly.
Cook the Fat and Flour Together
In a heavy-bottomed saucepan over medium heat, melt the butter completely. Let it foam and subside, but don’t let it brown—that’s for a different kind of roux. Add the flour all at once and immediately start whisking vigorously.
Keep whisking constantly for 2-3 minutes until the mixture becomes smooth and just starts to bubble. You’re looking for a pale, sandy-colored paste that smells slightly nutty but not browned. This cooking step removes the raw flour taste and creates the base for your velvety texture.
Gradually Incorporate the Warm Broth
Here’s where patience pays off. With the pan still over medium heat, begin adding the warm chicken broth ½ cup at a time, whisking constantly after each addition. Wait until the mixture is completely smooth before adding more liquid.
The mixture will thicken dramatically at first, then loosen as you add more broth. By the time you’ve incorporated all the liquid, you should have a smooth, velvety sauce that coats the back of a spoon. If you notice any lumps, keep whisking—they’ll dissolve with persistence.
Simmer to Develop Full Flavor
Once all the broth is incorporated, reduce the heat to low and let the sauce simmer gently for 5-10 minutes. Stir occasionally to prevent sticking, and watch for the sauce to thicken slightly as it cooks.
You’ll know it’s ready when the sauce has developed a richer color and the floury taste has completely disappeared. Taste and adjust the seasoning with salt and pepper if needed. The sauce should be thick enough to nap the back of a spoon but still pourable.
Use or Store Your Velvety Base
Your roux is now ready to use immediately in soups, sauces, or gravies. If you’re not using it right away, transfer it to an airtight container and refrigerate for up to 3 days. The sauce will thicken as it cools—just whisk in a little warm broth or water when reheating.
For the smoothest results in your final dish, strain the sauce through a fine-mesh sieve if you’ll be using it in delicate soups or sauces. This removes any potential tiny lumps and gives you that restaurant-quality silky texture every time.
Tips and Common Mistakes
Mastering this velvety base is all about technique—here’s what I’ve learned from years of making roux.
The Heat Factor: When cooking the butter and flour together in Step 2, that 2-3 minutes over medium heat is crucial. You want the mixture to bubble gently and develop a pale, sandy color—this removes the raw flour taste without browning. If your heat is too high, the roux can burn quickly; too low, and you’ll end up with a pasty, undercooked flavor. I always use a heavy-bottomed pan to distribute heat evenly and prevent hot spots.
Broth Temperature Matters: The instructions mention warming the chicken broth to just below simmering, and there’s a good reason. Cold broth added in Step 3 causes the roux to seize up and form lumps, while boiling-hot broth can cook the flour unevenly. I like to keep my broth in a small saucepan over low heat—around 180°F—so it stays warm but doesn’t scald. This makes incorporation smooth and lump-free every time.
Patience During Incorporation: Adding the broth ½ cup at a time in Step 3 might feel tedious, but it’s the secret to a silky texture. Each addition needs to be fully whisked in before adding more. I’ve found that rushing this step leads to stubborn lumps that are hard to whisk out later. If you do end up with lumps, don’t panic—just keep whisking vigorously. They’ll dissolve with persistence, especially if your broth is at the right temperature.
Simmering for Depth: That 5-10 minutes of simmering in Step 4 isn’t just about thickening—it’s where the magic happens. The sauce develops a richer color and deeper flavor as the raw flour taste cooks out completely. Stir occasionally and watch the edges of the pan; if the sauce starts to stick, lower the heat slightly. The sauce is ready when it coats the back of a spoon but still pours easily—this is the perfect consistency for most applications.
Pro Tips for Roux With Chicken Broth
- Mastering this velvety base is all about technique—here’s what I’ve learned from years of making roux.
- The Heat Factor: When cooking the butter and flour together in Step 2, that 2-3 minutes over medium heat is crucial. …
- Broth Temperature Matters: The instructions mention warming the chicken broth to just below simmering, and there’s a …
Frequently Asked Questions
Can I use store-bought chicken broth for a roux?
Store-bought low-sodium chicken broth works great—just check for additives that might alter flavor. For best results, opt for high-quality brands or homemade broth for deeper richness. If using salted broth, reduce added salt in your recipe to avoid over-seasoning.
How long does it take to make a roux with chicken broth?
A light roux (blonde) takes 3-5 minutes, while a dark roux (for gumbo) can take 20-30 minutes on medium-low heat. Adding chicken broth happens after the roux reaches your desired color—stir constantly to prevent burning! Patience is key for smooth, lump-free results. For gravy, use 1:1 (e.g., 2 tbsp roux + 2 cups broth). For soups, start with 1:4 (1/4 cup roux per 1 cup broth) and adjust for thickness. Pro tip: Whisk broth in slowly to avoid clumps! Don’t panic! Re-emulsify by whisking vigorously over low heat. If stubborn, blend in 1 tsp cornstarch slurry (mixed with cold water) or a splash of heavy cream. Prevent separation by ensuring broth is warm (not cold) when added. Not quite! Roux requires fat (butter, oil, or lard) to cook the flour. But you can make a slurry (flour + cold broth) for thickening—just simmer 5-10 minutes to remove raw flour taste. Ideal for quick fixes, though less rich than a classic roux.What’s the best roux-to-broth ratio for gravy or soup?
My roux separated after adding chicken broth—how do I fix it?
Can I make a roux with chicken broth instead of oil/butter?
Mastering a roux with chicken broth unlocks a world of rich, velvety sauces and hearty soups—all from just a few simple ingredients! 🍲 Whether you’re thickening a gumbo, elevating a gravy, or crafting a creamy bisque, this technique is your secret weapon for depth and texture.
Now that you’ve got the basics, why not put it to the test? Try whipping up a classic chicken and dumplings or a silky mac and cheese sauce—your taste buds (and dinner guests) will thank you! 😉 Ready to experiment? Grab that whisk and explore our favorite roux-based recipes next!

Trained in classic French technique but raised on slow-cooked ribs and spicy rubs, she blends culinary skill with smoke and soul.
- Recipe for Boneless Pork Chops in Cast Iron Skillet: Sear and Baste to Juicy Perfection - October 3, 2026
- Recipe for Boneless Cross Rib Roast: Slow-Roasted Beef with Herb Crust - October 3, 2026
- Hamburgers in Sauce Recipe Crock Pot: Slow-Cooked Savory Delight - October 3, 2026