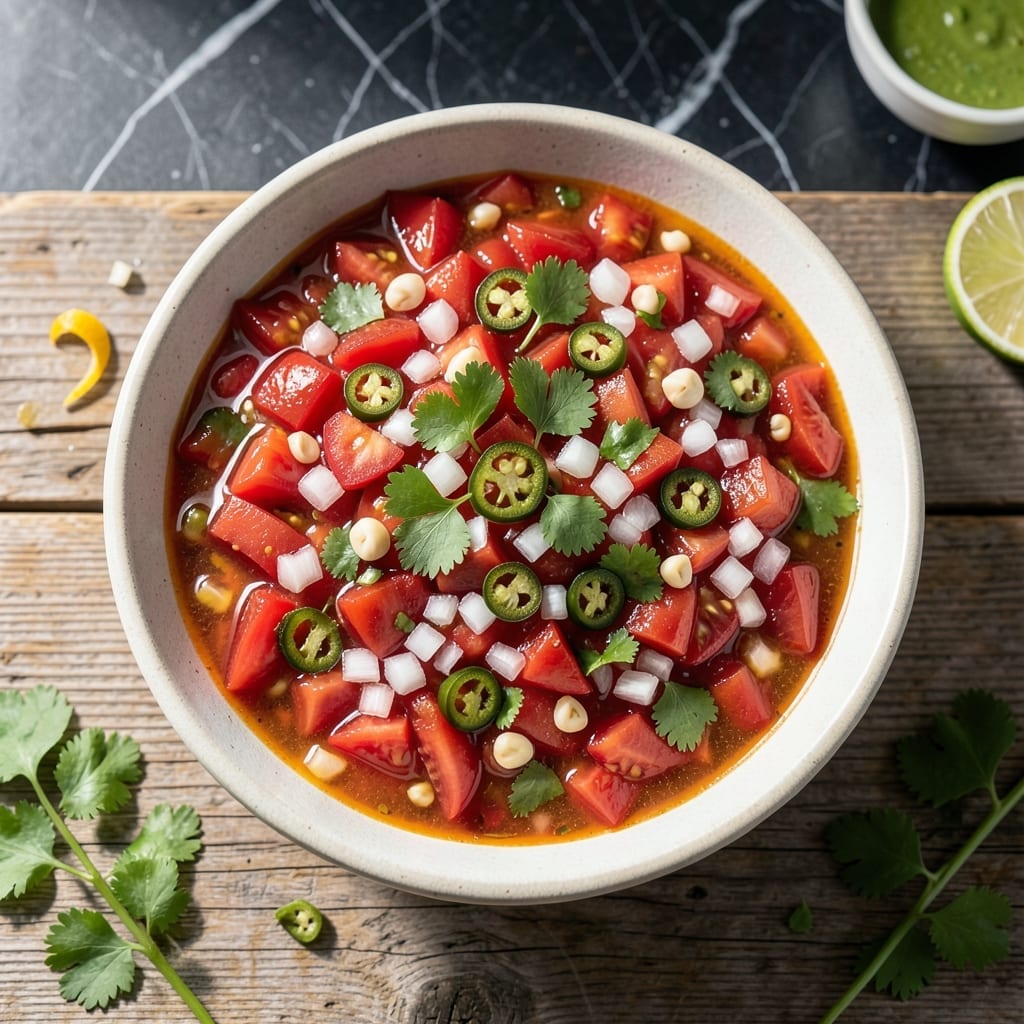
There’s nothing like the taste of homemade salsa made from garden-fresh tomatoes, preserved to enjoy year-round. This method captures summer’s peak flavor in every jar.
With simple ingredients and proper canning techniques, you’ll create a vibrant, restaurant-quality salsa that stays fresh and safe for months. No preservatives, just pure taste.
Ingredients for Salsa Recipe Canning Fresh Tomatoes
Ten ingredients transform garden tomatoes into vibrant, restaurant-quality salsa for your pantry.
| Ingredient | Amount | Notes |
|---|---|---|
| Fresh Roma Tomatoes 🍅 | 10 lb | Ripe, cored, peeled, chopped |
| White Onions 🧅 | 2 whole | Medium, finely diced |
| Jalapeño Peppers 🌶️ | 4 whole | Seeds removed, minced |
| Fresh Cilantro 🌿 | 1 cup | Chopped, packed |
| Garlic Cloves 🧄 | 6 cloves | Peeled, minced |
| Apple Cider Vinegar 🍏 | 1 cup | 5% acidity for safety |
| Lime Juice 🍈 | ½ cup | Freshly squeezed |
| Granulated Sugar 🍚 | ¼ cup | Optional, to balance acidity |
| Canning Salt 🧂 | 2 tbsp | Non-iodized preferred |
| Ground Cumin 🌿 | 1 tbsp | Toasted for depth |
[recipe_ingredient_scaler]
The tomatoes are the foundation—Roma or San Marzano varieties have the right meat-to-juice ratio for canning. Source from farmers markets at peak season (late summer) for maximum flavor. Avoid overripe or bruised fruit, as they can affect acidity levels. For consistent results, weigh tomatoes after peeling and coring. Ball or Kerr canning jars are standard for home preservation.
For heat control, adjust jalapeño quantity or leave some seeds in. Serrano peppers can substitute for more bite. No fresh cilantro? Dried coriander at one-third the amount offers a different but complementary flavor. The vinegar is non-negotiable for safety—never reduce or omit. If you must swap, use white vinegar with the same 5% acidity.
Processed salsa keeps in a cool, dark pantry for up to 12-18 months. Once opened, refrigerate and use within 1 week. For best quality, always use clean, sterile jars and lids. Label with date to track freshness.
Why You’ll Love This Recipe
- One Pot Wonder: I toss in the Roma tomatoes, onions, and jalapeños, and the blender does half the work for me.
- Fresh Pop: The cilantro and garlic hit just right—bright, zesty, and never dull.
- Meal Prep Hero: I can this salsa in batches and have flavor-ready jars for tacos, eggs, or chips all month.
- Pantry Savior: Honestly, it’s cheaper than store-bought and tastes way better, plus no weird preservatives.
Step-by-Step Instructions for Canning Fresh Tomato Salsa
This method ensures safe preservation and maximum flavor extraction from your summer harvest.
Step 1: Prepare and Process the Vegetables
Core, peel, and chop all 10 lb Fresh Roma Tomatoes. I recommend blanching them first—immerse in boiling water for 30-60 seconds, then transfer to an ice bath. The skins will slip right off, and the flesh will hold its shape better during cooking.
Finely dice the 2 whole White Onions and mince the 4 whole Jalapeño Peppers (after removing seeds for milder heat). Chop the 1 cup Fresh Cilantro and mince the 6 cloves Garlic Cloves. This prep ensures even distribution of flavors throughout the salsa.
Step 2: Cook the Salsa Base
Combine the prepared tomatoes, onions, jalapeños, cilantro, and garlic in a large, heavy-bottomed pot. Add the 1 cup Apple Cider Vinegar, 0.5 cup Lime Juice, 0.25 cup Granulated Sugar, 2 tbsp Canning Salt, and 1 tbsp Ground Cumin.
Bring to a gentle boil over medium-high heat, then reduce to medium-low and simmer for 20-25 minutes. Stir frequently to prevent sticking, and cook until the mixture thickens slightly and the tomatoes break down. You want a consistency that coats the back of a spoon but still has visible texture.
Step 3: Verify Acidity and Adjust Seasoning
Before canning, it’s critical to ensure proper acidity for safety. The apple cider vinegar and lime juice provide this, but taste and adjust if needed. If the salsa seems too sharp, the granulated sugar can be increased slightly—but don’t exceed 0.5 cup total, as it may affect preservation.
Check the seasoning balance. The canning salt should enhance the natural flavors without overpowering, and the ground cumin should add depth without dominating. This is your last chance to tweak the flavor profile before preserving.
Step 4: Fill Jars and Process for Shelf Stability
Ladle the hot salsa into clean, hot canning jars, leaving ½-inch headspace at the top. Remove any air bubbles by running a clean knife or bubble tool around the inside of the jar. Wipe the rims with a damp cloth to ensure a proper seal.
Process the jars in a boiling water bath for 15 minutes (adjust for altitude if necessary). After processing, place the jars on a towel-lined countertop to cool. You’ll hear the satisfying pop of the lids sealing as they cool—this confirms a successful seal. Let the jars sit undisturbed for 12-24 hours before checking the seals and storing.
Pro Tips For Making Salsa Recipe Canning Fresh Tomatoes
- Blanch the Tomatoes: Drop Roma tomatoes in boiling water for 30-60 seconds, then shock in ice water. The skins will slip right off, saving you time and ensuring a smooth texture in your canned salsa.
- Remove Tomato Seeds: After chopping, take a minute to scoop out excess seeds and gel from the tomatoes. I learned this the hard way—it prevents watery salsa that can spoil faster in the jar.
- Wear Gloves for Peppers: Sounds obvious, but I’ve burned my fingers more times than I’d like to admit. Always wear gloves when handling jalapeños, especially if you’re also chopping onions and cilantro right after.
- Acidify for Safety: Add 1 tablespoon of bottled lemon juice per pint jar before canning. My grandmother swore by this, and she was right: it keeps the color bright and guarantees safe preservation.
Make-Ahead Tips for salsa recipe canning fresh tomatoes
⏰ Week Before
Start by gathering your canning supplies and ingredients. Order or purchase canning jars, lids, and rings to ensure you have enough for your batch. Check your pantry for vinegar, salt, and spices, and make a list of fresh produce you’ll need, like tomatoes, onions, and peppers. Pro tip: 💡 Buy extra tomatoes—you’ll need about 2–3 pounds per quart of salsa!
🔪 Day Before
Prep your fresh ingredients to save time. Wash, core, and chop tomatoes, then store them in the fridge in airtight containers. Dice onions, peppers, and garlic, and keep them separate. Sterilize your canning jars by boiling them for 10 minutes, then let them dry overnight. This step ensures your salsa stays fresh and safe for months.
🍳 Day Of
Begin by combining your prepped ingredients in a large pot. Cook the salsa mixture for at least 10 minutes to blend flavors and reach the right consistency. While it simmers, prepare your canning setup: fill the water bath canner and heat it to 180°F (82°C). Pro tip: 🌡️ Use a thermometer for accuracy!
✨ Last-Minute Tasks
Once the salsa is ready, ladle it into sterilized jars, leaving ½-inch headspace. Wipe the rims, place the lids, and secure the rings. Process the jars in the water bath for 15–20 minutes (adjust for altitude). After processing, let them cool and check for seals before storing. Pro tip: 🎯 Label jars with the date for easy tracking!
Nutrition Facts

Trained in classic French technique but raised on slow-cooked ribs and spicy rubs, she blends culinary skill with smoke and soul.
- Recipe for Boneless Pork Chops in Cast Iron Skillet: Sear and Baste to Juicy Perfection - October 3, 2026
- Recipe for Boneless Cross Rib Roast: Slow-Roasted Beef with Herb Crust - October 3, 2026
- Hamburgers in Sauce Recipe Crock Pot: Slow-Cooked Savory Delight - October 3, 2026