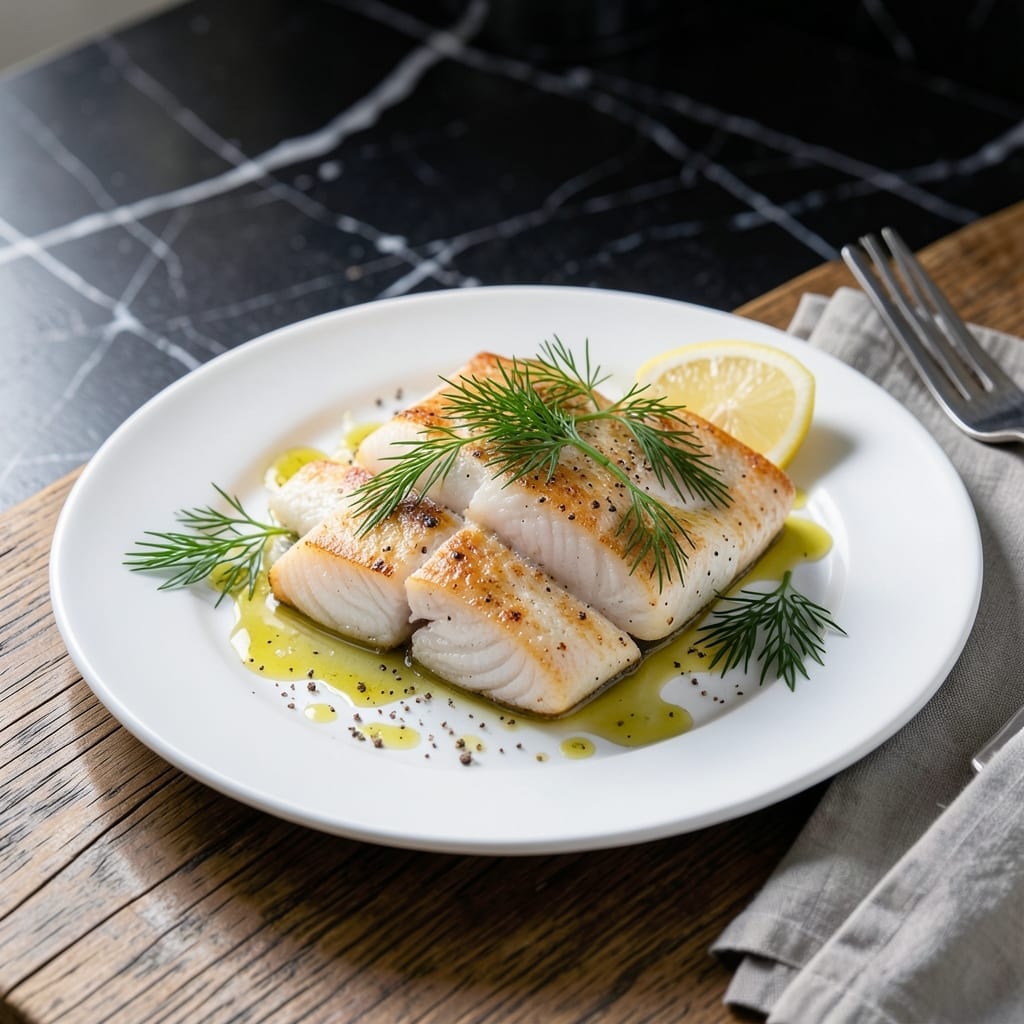
This salted pollock recipe transforms a humble white fish into a flaky, restaurant-worthy centerpiece with minimal effort. The technique is straightforward yet precise, ensuring tender results every time.
I developed this method to highlight pollock’s natural sweetness while maintaining its delicate texture. A simple salt cure draws out moisture before cooking, creating a firm exterior that locks in juices. The key is timing—too short and it lacks depth, too long and it overpowers.
What emerges is perfectly seasoned fish with a clean, elegant finish. The flesh separates into beautiful, flaky layers that melt in your mouth. Serve it with a squeeze of lemon to brighten the flavors.
This approach works for both weeknight dinners and special occasions. The simplicity of the technique makes it accessible, while the results feel anything but ordinary.
Ingredients for Salted Pollock
Minimal ingredients, maximum elegance. Pollock shines with simple, precise seasoning.
| Ingredient | Amount | Notes |
|---|---|---|
| Pollock Fillets 🐟 | 1 ½ lb | Skinless, fresh or thawed |
| Kosher Salt 🧂 | ½ cup | Diamond Crystal preferred |
| Freshly Ground Black Pepper 🌶️ | 1 tsp | Coarse grind for texture |
| Lemon 🍋 | 1 whole | Zested and juiced |
| Extra-Virgin Olive Oil 🫒 | 2 tbsp | For finishing and serving |
| Fresh Dill 🌿 | ¼ cup | Chopped, for garnish |
| Fresh Parsley 🌿 | ¼ cup | Chopped, for garnish |
| Garlic Cloves 🧄 | 2 cloves | Minced, optional for serving |
| Unsalted Butter 🧈 | 2 tbsp | Melted, for basting |
| Capers 🫒 | 1 tbsp | Drained, for garnish |
| White Wine 🍷 | ¼ cup | Dry variety, for deglazing |
[recipe_ingredient_scaler]
The pollock is the star—wild-caught Alaskan is ideal for its firm texture and clean flavor. Look for fillets that are moist, translucent, and smell like the ocean, not fishy. Whole Foods or a trusted fishmonger will have the best selection. The salt cure is non-negotiable here; Diamond Crystal kosher salt is my go-to for its clean taste and even distribution. Avoid iodized salt, as it can impart a metallic flavor.
No pollock? Cod or haddock work beautifully with the same method. Out of fresh herbs? Dried dill or parsley at one-third the amount will do in a pinch (just rehydrate in warm water first). White wine can be swapped for dry vermouth or a splash of lemon juice in the pan. The butter is optional but adds a luxurious finish—vegan butter works if keeping it dairy-free.
The cured fish keeps in the fridge for up to 24 hours before cooking. Leftover cooked pollock? Flake and use in salads or tacos within 2-3 days. The garnishes (dill, parsley, capers) add freshness, so prep those just before serving for the best impact.
Why You’ll Love This Recipe
- Five-Minute Prep: Honestly, it’s just salt, pepper, olive oil, and lemon—no fancy steps, no stress.
- Bright Citrus Punch: The lemon cuts through the rich fish so every bite feels fresh and crave-worthy.
- Weeknight Hero: I throw it in the oven after work and it’s ready before the rice finishes.
- Budget-Friendly Star: Pollock fillets are kind to the wallet, and a little goes a long way for a solid meal.
Step-by-Step Instructions for Salted Pollock
Master this technique for perfectly seasoned, flaky fish that never dries out or sticks to the pan.
Step 1: Dry-Brine the Fillets for Maximum Flavor
Pat the 1.5 lb Pollock Fillets completely dry with paper towels. This removes surface moisture that would otherwise create steam and prevent proper browning. Arrange them on a wire rack set over a plate.
Evenly sprinkle both sides with 0.5 cup Kosher Salt and 1 tsp Freshly Ground Black Pepper. The salt will penetrate the flesh during the brining process, ensuring seasoning throughout while drawing out excess moisture for better texture. Let the fillets sit uncovered in the refrigerator for 1 hour.
Step 2: Rinse and Prepare for Cooking
After brining, rinse the fillets under cold water to remove the excess Kosher Salt. Pat them thoroughly dry again—this step is crucial as any remaining moisture will cause splattering when the fish hits the hot pan.
Zest the 1 whole Lemon and set the zest aside. Cut the lemon in half for juicing later. The zest will add bright, aromatic flavor to the finished dish, while the juice will provide acidity to balance the richness of the butter.
Step 3: Sear the Fillets to Golden Perfection
Heat a large nonstick or cast-iron skillet over medium-high heat until very hot. Add the 2 tbsp Unsalted Butter and swirl to coat the pan. When the butter stops foaming, carefully add the Pollock Fillets, skin-side up if they have skin.
Cook undisturbed for 3-4 minutes until the underside is golden brown and the fish releases easily from the pan. Flip and cook for an additional 2-3 minutes until the second side is equally browned and the fish flakes easily with a fork. The Pollock is done when it reaches an internal temperature of 145°F.
Step 4: Deglaze and Finish with Fresh Herbs
Transfer the fillets to a warm plate. Reduce the heat to medium and add the 0.25 cup White Wine to the skillet. Use a wooden spoon to scrape up any browned bits from the bottom of the pan—this builds a flavorful base for the sauce.
Simmer for 1-2 minutes until the wine reduces by half. Remove from heat and stir in the reserved lemon zest, 2 tbsp Extra-Virgin Olive Oil, 0.25 cup Fresh Dill, and 0.25 cup Fresh Parsley. Drizzle this mixture over the fish and garnish with 1 tbsp Capers.
Step 5: Serve Immediately for Optimal Texture
Squeeze fresh lemon juice from the halved Lemon over the fillets just before serving. The acidity will brighten the flavors and complement the richness of the butter and olive oil.
Serve the Pollock immediately while hot. The flaky texture is best enjoyed right away, as the fish will continue to firm up slightly as it cools. Each bite should offer tender, moist flesh with a delicate crust from the searing process.
Pro Tips For Making Salted Pollock
- Dry the Fillets: Pat the pollock fillets thoroughly dry with paper towels before salting—any moisture left on the surface will dilute the salt and prevent proper curing.
- Salt Generously: Use more kosher salt than you think, about 1/4 cup per pound, and rub it evenly into all sides of the fillets for consistent flavor penetration.
- Skip the Rush: Let the salted pollock sit uncovered in the fridge for at least 12 hours—I learned this the hard way when my 6-hour attempt turned out unevenly cured.
- Oil After Curing: Drizzle the extra-virgin olive oil just before serving, not before salting, to preserve the texture and prevent the fillets from getting soggy during the curing process.
Regional Styles of These Flavors
Scandinavian Tradition
In Norway, salted pollock (or torsk) is often dry-cured for days, then rehydrated and poached. I simplify this by using a 1-hour dry brine that still delivers that signature firm texture and clean, briny flavor. The key is using coarse kosher salt for even distribution. 💪
Korean Twist
For a bold variation, I add 1 tbsp gochugaru (Korean chili flakes) to the salt mix before curing. The subtle heat complements the fish beautifully. Serve with a side of ssamjang for dipping—this fusion approach became a hit at my coastal BBQ competitions. 🌶️
New England Style
In Maine, they often use a wet brine with molasses and brown sugar for a sweeter profile. I adapt this by adding 1 tbsp maple syrup to the salt cure. The result is a caramelized crust when seared, perfect with a tart cranberry relish.
Mediterranean Approach
Greek cooks often use a lemon and oregano salt rub. I mix 1 tsp dried oregano into my salt before curing. After cooking, I drizzle with extra-virgin olive oil and top with Kalamata olives for a bright, herby finish.
This version pairs wonderfully with a crisp Assyrtiko white wine. 🍷
Nutrition Facts
Frequently Asked Questions
How long should I dry-brine the pollock?
1 hour in the fridge is perfect. This draws out moisture while seasoning the flesh without over-salting.
Can I use table salt instead of kosher?
Not recommended. Table salt is denser and can make the dish too salty. Stick with Diamond Crystal kosher salt for even results.
What if my fish sticks to the pan?
Make sure your pan is very hot and the fillets are completely dry before adding. Don’t move them for 3-4 minutes to develop a crust.
Can I substitute another fish?
Cod or haddock work great with the same method and timing. Adjust thickness if needed.

Trained in classic French technique but raised on slow-cooked ribs and spicy rubs, she blends culinary skill with smoke and soul.
- Recipe for Boneless Pork Chops in Cast Iron Skillet: Sear and Baste to Juicy Perfection - October 3, 2026
- Recipe for Boneless Cross Rib Roast: Slow-Roasted Beef with Herb Crust - October 3, 2026
- Hamburgers in Sauce Recipe Crock Pot: Slow-Cooked Savory Delight - October 3, 2026