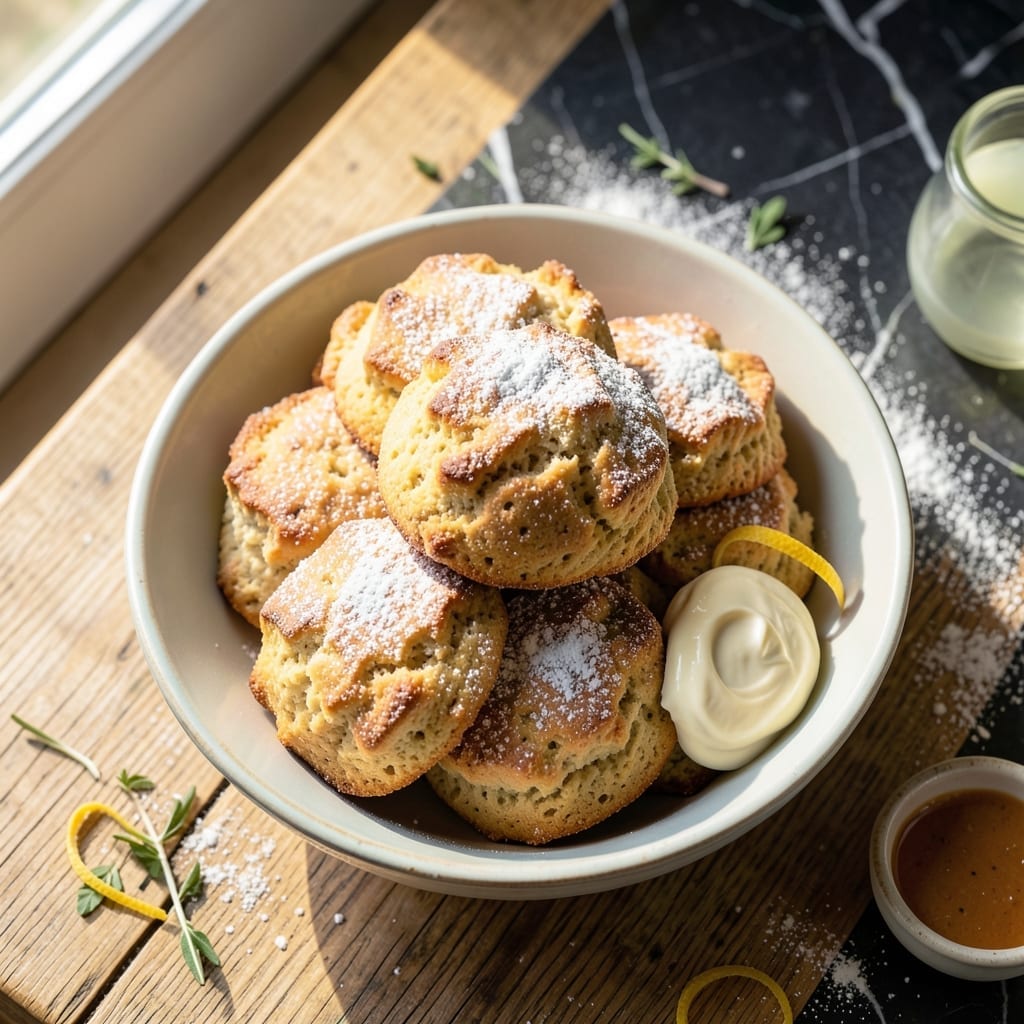
I’ve perfected a scone recipe that skips eggs without sacrificing texture or richness. These pastries deliver flaky layers and buttery depth, proving egg-free baking can be just as indulgent.
The secret lies in cold butter and a simple acid-base reaction—vinegar and baking soda create the lift eggs typically provide. The dough comes together quickly with minimal handling for the best rise.
Each bite offers tender, layered crumb with a golden crust. The result is a scone so satisfying, no one will guess it’s missing eggs.
Serve warm with jam or clotted cream for a classic treat that works for any occasion.
Ingredients for Scones Recipe Without Eggs
Cold vegan butter and vinegar work magic for flaky, golden layers in these scones.
| Ingredient | Amount | Notes |
|---|---|---|
| All-Purpose Flour 🌾 | 3 cups | Plus extra for dusting |
| Granulated Sugar 🍚 | ¼ cup | For sweetness and texture |
| Baking Powder 🧂 | 1 tbsp | Ensures proper rise |
| Baking Soda 🧂 | ½ tsp | For acid-base reaction |
| Vegan Butter 🧈 | ¾ cup | Cold, cubed for flakiness |
| White Vinegar 💧 | 1 tbsp | Or apple cider vinegar |
| Vanilla Extract 🌿 | 1 tsp | Pure for best flavor |
| Unsweetened Almond Milk 🥛 | ½ cup | Or any plant-based milk |
| Salt 🧂 | ½ tsp | Fine sea salt preferred |
| Dried Currants 🍇 | ½ cup | Optional, for texture |
| Turbinado Sugar 🍚 | 1 tbsp | For sprinkling on top |
[recipe_ingredient_scaler]
The vegan butter is non-negotiable for that classic flaky texture—Miyoko’s or Earth Balance are top picks. Keep it ice cold, and cube it yourself for even distribution. The flour should be all-purpose; King Arthur is a safe bet for consistent results. Don’t overwork the dough—this keeps the layers distinct. A quick chill before baking ensures the butter doesn’t melt prematurely.
No almond milk? Soy or oat milk work just as well. Out of vinegar? Lemon juice in the same amount does the trick. Want more flavor? Add lemon zest or a pinch of cinnamon. For extra richness, swap coconut oil for half the vegan butter. The currants can be swapped for raisins or chopped dried apricots.
Store in an airtight container at room temperature for 2 days, or freeze for up to 3 months. Reheat in a 350°F oven for 5-10 minutes to revive that just-baked warmth. Always dust with flour before shaping to prevent sticking.
Why You’ll Love This Recipe
- One Bowl Magic: I just dump everything in, mix, and shape—no extra bowls, no fuss.
- Buttery Crumb: The vegan butter makes them flaky and rich, with that perfect tender bite.
- Breakfast to Brunch: I serve them plain for breakfast or dress them up with jam for weekend brunch.
- Pantry Staples: All-purpose flour and sugar mean I can make these anytime without a special grocery run.
Step-by-Step Instructions for Scones Without Eggs
This method ensures flaky layers and rich flavor without relying on eggs for structure or moisture.
Step 1: Mix Dry Ingredients for Even Distribution
In a large bowl, whisk together the 3 cups All-Purpose Flour, 0.25 cup Granulated Sugar, 1 tbsp Baking Powder, 0.5 tsp Baking Soda, and 0.5 tsp Salt. I whisk vigorously for 30 seconds to break up any lumps and ensure the leavening agents are evenly dispersed throughout the flour.
This step is crucial for consistent rise and texture. The baking powder and baking soda need to be fully incorporated so they react uniformly with the liquid ingredients later. The sugar should also be well-distributed to avoid sweet pockets in the finished scones.
Step 2: Cut in Cold Vegan Butter for Flaky Texture
Add the 0.75 cup Vegan Butter (cold and cubed) to the dry ingredients. Using a pastry cutter or your fingers, work the butter into the flour mixture until it resembles coarse crumbs with pea-sized butter pieces visible. I prefer using my fingertips for this—they’re gentler than a cutter and let me feel the texture better.
Keep the butter as cold as possible during this process. The small butter pieces create steam pockets during baking, which is what gives these scones their signature flaky layers. If the butter starts to soften, place the bowl in the refrigerator for 5 minutes before continuing.
Step 3: Combine Wet Ingredients and Create the Dough
In a small bowl, whisk together the 0.5 cup Unsweetened Almond Milk, 1 tbsp White Vinegar, and 1 tsp Vanilla Extract. Let this mixture sit for 2 minutes to allow the vinegar to slightly curdle the almond milk, creating a buttermilk-like consistency that helps with rise.
Pour the wet mixture into the dry ingredients and stir gently with a wooden spoon just until the dough begins to come together. Then, add the 0.5 cup Dried Currants and fold them in. The dough will be shaggy and slightly sticky—that’s exactly what you want. Overmixing would develop gluten and make the scones tough instead of tender.
Step 4: Shape, Cut, and Prepare for Baking
Turn the dough out onto a lightly floured surface and pat it into a 1-inch thick rectangle. I flour my hands lightly to prevent sticking. Use a sharp knife to cut the rectangle into 8 equal wedges or squares. For best results, avoid twisting the knife as you cut—straight down and up preserves the layers.
Transfer the scones to a parchment-lined baking sheet, spacing them about 1 inch apart. Brush the tops lightly with a bit of almond milk and sprinkle with the 1 tbsp Turbinado Sugar. This adds a satisfying crunch and subtle caramelized flavor to the finished scones.
Step 5: Bake Until Golden and Flaky
Preheat your oven to 400°F and bake the scones for 15-18 minutes, or until the tops are golden brown and the edges look set. I start checking at the 15-minute mark because ovens can vary. The scones should have risen noticeably and developed a light, flaky texture.
Remove from the oven and let them cool on the baking sheet for 5 minutes before transferring to a wire rack. This brief cooling period allows the structure to set. Serve warm for the best texture, when the layers are at their flakiest and the currants are perfectly plump.
Pro Tips For Making Scones Recipe Without Eggs
- Chill the Dough: After mixing, refrigerate the dough for at least 20 minutes—vegan butter softens fast, and this keeps your scones from spreading into flat pancakes.
- Use Cold Vegan Butter: Cut the vegan butter into small cubes and keep it ice-cold until mixing; warm butter melts too soon and ruins the flaky layers you’re after.
- Don’t Overwork It: I learned this the hard way—knead the dough just until it comes together, or your scones will turn out tough and dense instead of tender.
- Brush with Plant Milk: Right before baking, brush the tops with a little unsweetened plant milk for a golden crust that looks as good as it tastes.
Essential Equipment for scones recipe without eggs
Mixing Bowls
A large, wide stainless steel mixing bowl is ideal for combining dry ingredients. I prefer Cuisinox—it’s lightweight yet durable. The wide shape gives you room to cut in butter without making a mess. Avoid glass bowls, as they don’t distribute cold evenly. 💡
Pastry Tools
A pastry cutter or bench scraper helps cut cold butter into flour quickly. I love my OXO pastry cutter—it has a comfortable grip and sharp blades. For shaping, a rolling pin ensures even thickness, but a wine bottle works in a pinch.
Baking Sheets
Use a heavy-duty baking sheet with a parchment liner to prevent sticking. My go-to is Nordic Ware—it heats evenly and doesn’t warp. Dark pans can cause over-browning, so stick to light-colored aluminum. Avoid nonstick sprays, as they can create a greasy texture on the bottoms.
Measuring Tools
Accurate measurements are critical for consistent results. I use stainless steel measuring cups and spoons from Winco. For flour, the spoon-and-level method prevents packing. A kitchen scale (like Escali Primo) is even better for precision.
Cooling Rack
Let scones cool on a wire rack after baking to prevent sogginess. I recommend a stainless steel rack with a grid pattern for sturdy support. This allows air to circulate underneath, keeping the bottoms crisp. Cool for at least 5 minutes before serving.
Chilling Tools
If your kitchen is warm, chill the dough for 15 minutes before baking. A rimmed baking sheet works well for this. I also keep a marble pastry board in the fridge—it stays cold and helps maintain butter temperature while shaping. 🌡️
Nutrition Facts
Frequently Asked Questions
Can I use regular milk instead of plant-based?
Yes, you can substitute regular milk in the same amount. The acid from vinegar will still create the needed reaction for rise and flakiness.
Why is cold butter important?
Cold butter creates steam during baking, which forms flaky layers. If it melts before baking, the texture will be dense instead of light and layered.
How do I prevent dry scones?
Avoid overmixing the dough and don’t overbake. Check at 15 minutes—they’re done when golden. Brushing with milk before baking adds moisture.
Can I add chocolate chips or nuts?
Fold in 1/2 cup of chocolate chips or chopped nuts with the currants. Chill the dough 10 minutes extra if adding chocolate to prevent melting.

Trained in classic French technique but raised on slow-cooked ribs and spicy rubs, she blends culinary skill with smoke and soul.
- Recipe for Boneless Pork Chops in Cast Iron Skillet: Sear and Baste to Juicy Perfection - October 3, 2026
- Recipe for Boneless Cross Rib Roast: Slow-Roasted Beef with Herb Crust - October 3, 2026
- Hamburgers in Sauce Recipe Crock Pot: Slow-Cooked Savory Delight - October 3, 2026