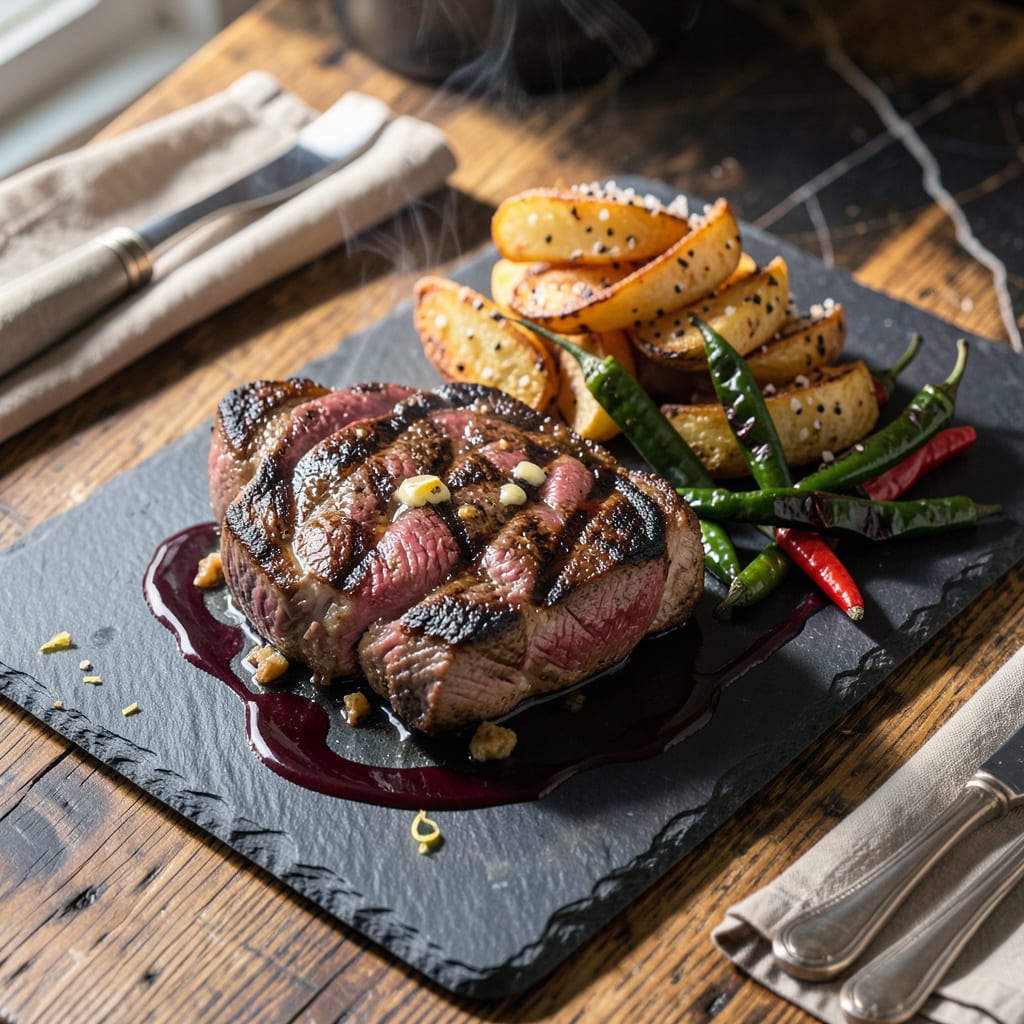
There’s nothing quite like the first sizzle of a perfectly seasoned steak hitting a screaming-hot pan. I’ve cooked more steaks than I can count—from backyard grill sessions to high-end restaurant kitchens—and the difference between good and perfect always comes down to two things: seasoning and technique. No fancy equipment needed, just a heavy pan, quality meat, and knowing when to let the steak do its thing.
I learned the hard way that great steak isn’t about complicated rubs or hours of marinating. The best crust forms when you keep it simple: coarse salt, fresh black pepper, and enough heat to create that coveted maillard reaction. The key is patience—letting the steak come to room temp first, then giving it an uninterrupted sear until that crust forms. That’s when the magic happens.
What you’re after is a juicy interior with a crust so crispy it shatters with your first bite. I’ve ruined my share of steaks by fidgeting with them too much in the pan. Now I know: sear hard, flip once, baste with butter and herbs, then let it rest. That 5-minute rest isn’t optional—it’s what keeps all those delicious juices where they belong.
Whether you’re cooking a weeknight ribeye or a special occasion filet, this method delivers every time. Serve it with something simple—maybe roasted garlic mashed potatoes or a crisp green salad—and let the steak be the star. The confidence comes when you hear that first sear and smell the butter browning. That’s how you know you’re doing it right.
📚 In This Guide
- What You’ll Need
- Instructions
- Tips and Common Mistakes
What Youll Need
- ● Steaks: 1–2 cuts (1–2 inches thick), like ribeye, NY strip, or filet mignon (bone-in or boneless). Pro tip: Choose USDA Prime or Choice for best marbling.
- ● Coarse salt: 1–2 tbsp kosher salt (Diamond Crystal or Morton’s) per steak. Avoid table salt—it’s too fine!
- ● Freshly ground black pepper: 1–2 tsp per steak (adjust to taste). A pepper mill ensures freshness.
- ○ Optional seasonings: Garlic powder, smoked paprika, or crushed red pepper (½ tsp each for extra flavor).
- ● Tools: Paper towels (to pat steaks bone-dry).
- ● Cast-iron skillet or heavy pan (10–12 inches for even searing).
- ● Tongs (avoid forks—they pierce the meat!).
- ● Meat thermometer (instant-read for perfect doneness).
- ● Wire rack + baking sheet (for resting steaks post-sear).
- ● Extras (nice-to-have): High-smoke-point oil (avocado or grapeseed, 1 tbsp for searing).
- ● Butter (2 tbsp for basting—add herbs like thyme or rosemary!).
- ● Aluminum foil (to tent steaks while resting).
Instructions
Here’s the method I use every time to get that restaurant-quality crust and juicy interior you’re after.
Choose the Right Cut and Prep It Properly
Start with steaks that are at least 1-inch thick—ribeye, New York strip, or filet mignon work beautifully. Pat them completely dry with paper towels, pressing firmly to remove all surface moisture. This is crucial because water creates steam, which prevents that perfect sear we’re aiming for.
I like to place the steaks on a wire rack set over a plate and let them sit uncovered in the refrigerator for 1-2 hours before cooking. This drying process gives you an even better crust. If you’re short on time, at least pat them thoroughly dry right before seasoning.
Season Generously and Evenly
About 40 minutes before cooking, season the steaks aggressively with kosher salt on all sides. I use about 1 teaspoon of salt per pound of meat—don’t be shy. The salt will draw out moisture initially, then reabsorb, creating a flavorful, well-seasoned crust.
Right before cooking, add freshly ground black pepper—this prevents the pepper from burning during cooking. For extra flavor, you can add garlic powder or smoked paprika, but simple salt and pepper let the beef’s natural flavor shine. Press the seasonings into the meat gently so they adhere well.
Bring to Room Temperature Before Cooking
Let the seasoned steaks sit at room temperature for 30-45 minutes before cooking. This ensures even cooking from edge to center. You’ll know they’re ready when the chill is gone—the surface should feel cool but not cold to the touch.
While the steaks temper, preheat your cooking surface. For a cast-iron skillet, heat it over medium-high heat until it’s screaming hot—a drop of water should dance across the surface. For grilling, preheat to high heat (about 450-500°F) and clean the grates thoroughly.
Cook Using the Right Technique
For pan-searing, add just enough high-smoke-point oil to coat the bottom of the pan. Place the steaks in the pan and don’t move them for 2-3 minutes—you want that deep brown crust to form. You’ll hear a steady sizzle; if it’s too quiet, your pan isn’t hot enough.
Flip the steaks and cook for another 2-3 minutes for medium-rare. For thicker cuts, finish in a 400°F oven for 5-10 minutes until the internal temperature reaches 125-130°F for medium-rare. Remember, the temperature will rise another 5-10 degrees while resting.
Rest Properly Before Serving
Transfer the steaks to a warm plate or cutting board and let them rest uncovered for 5-10 minutes. This allows the juices to redistribute throughout the meat instead of running out when you cut into them. You’ll see the internal temperature stabilize during this time.
Serve whole or sliced against the grain. The perfect steak should have a deep brown, crispy crust and a juicy, tender interior. If you’ve followed these steps, you’ll get that beautiful contrast in every bite—crusty exterior giving way to perfectly cooked meat inside.
Tips and Common Mistakes
Here’s what I’ve learned from years of perfecting steaks—small details that make a huge difference in texture and flavor.
Drying is Everything: That 1-2 hours in the fridge on a wire rack isn’t just for show. I once skipped this step and wondered why my crust was pale and soggy. The air circulation removes surface moisture completely, which is what gives you that glorious sear in Step 4. Even if you’re short on time, pat the steaks aggressively with paper towels until they feel completely dry to the touch.
Salt Timing Matters: The 40 minutes of salt exposure before cooking isn’t arbitrary. This is when the salt penetrates beyond the surface, creating flavor throughout the meat. I’ve tested shorter times, and the seasoning just doesn’t integrate as deeply. Press the salt into the meat firmly—you should see tiny beads of moisture form, then reabsorb.
Temperature Control: When you’re searing for those 2-3 minutes per side, resist the urge to peek or move the steak. I learned this the hard way after ruining three beautiful ribeyes by fidgeting with them. The crust forms when the meat makes continuous contact with the hot surface. If your pan isn’t screaming hot (water should dance immediately), wait another minute before adding the steak.
Resting is Non-Negotiable: Those 5-10 minutes of resting time in Step 5 aren’t just for show. Cutting into the steak too soon lets all the juices escape onto your plate instead of staying in the meat. I use this time to make a quick pan sauce with the fond left in the skillet—double win for flavor.
Pro Tips for Season Steaks
- Here’s what I’ve learned from years of perfecting steaks—small details that make a huge difference in texture and fla…
- Drying is Everything: That 1-2 hours in the fridge on a wire rack isn’t just for show. I once skipped this step and w…
- Salt Timing Matters: The 40 minutes of salt exposure before cooking isn’t arbitrary. This is when the salt penetrates…
Frequently Asked Questions
How long should I season steaks before cooking?
For best results, season thick-cut steaks (1.5″ or more) at least 40 minutes before cooking—this lets salt penetrate deeply for even flavor. Thinner cuts (under 1″) need just 10-15 minutes. Pro tip: Pat dry before seasoning for a crispier crust!
Can I use pre-made steak seasoning instead of salt and pepper?
Pre-made blends (like Montreal or coffee rubs) save time, but check the sodium content—some are salt-heavy. For control, mix your own: try smoked paprika, garlic powder, and coarse salt. Always taste-test first! Three common culprits: excess moisture (pat steaks very dry), crowding the pan (cook in batches), or low heat. Use a ripping-hot cast-iron skillet and avoid moving the steak once it hits the pan. Nope! Seasoning won’t penetrate frozen meat. Thaw steaks in the fridge overnight, then pat dry and season. For a time crunch, use the cold-water bath method (sealed bag + 30-60 mins in water). Skip salt and boost flavor with high-heat spices like black pepper, coriander, or chili powder. Acidic marinades (lemon + herbs) or umami-rich powders (mushroom or tomato) also work. Try a dry brine with potassium chloride for a salt-like effect.Why does my steak crust turn out weak or soggy?
Should I season frozen steaks before thawing?
What’s the best seasoning alternative for low-sodium diets?
Mastering how to season steaks is your golden ticket to restaurant-quality results at home. With the right salt, spices, and timing, you’ll unlock a flavor-packed crust and juicy interior every time—no fancy tools required! 🌟
Ready to fire up the grill or skillet? Grab your favorite cut, apply these tips, and experiment with bold flavors (smoked paprika, anyone?). For your next step, try dry-brining overnight or testing a new spice blend—your taste buds will thank you!

Trained in classic French technique but raised on slow-cooked ribs and spicy rubs, she blends culinary skill with smoke and soul.
- Recipe for Boneless Pork Chops in Cast Iron Skillet: Sear and Baste to Juicy Perfection - October 3, 2026
- Recipe for Boneless Cross Rib Roast: Slow-Roasted Beef with Herb Crust - October 3, 2026
- Hamburgers in Sauce Recipe Crock Pot: Slow-Cooked Savory Delight - October 3, 2026