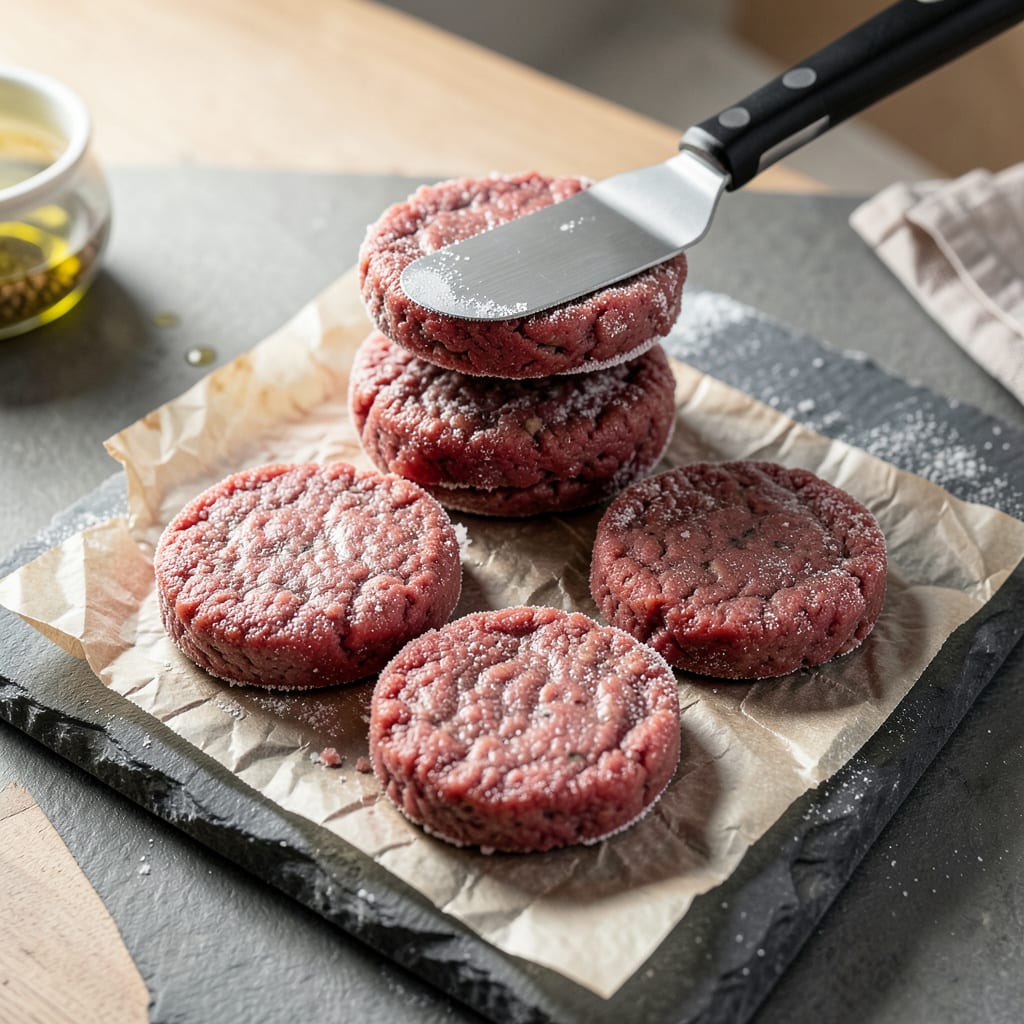
Nothing ruins burger night faster than frozen patties that crumble into a mess when you try to separate them. I’ve been there—standing at the grill with a pile of broken burger bits instead of perfect patties. After years of trial and error (and more than a few failed cookouts), I finally cracked the code for separating frozen burgers without the frustration.
The trick isn’t about muscle or fancy tools—it’s about working with the ice, not against it. I use a simple method that takes less than a minute and keeps every patty perfectly intact. No more wasted meat, no more uneven cooking, just perfect burgers ready for the grill or skillet. This technique works whether you’re dealing with store-bought patties or your own homemade frozen stash.
Once you’ve got those patties separated, we’ll talk about how to cook them right—whether you prefer a smoky char from the grill or a quick sear in a cast-iron skillet. The key is getting that ideal crust while keeping the inside juicy, and I’ll show you exactly how to nail the timing and temperature. No more dry, overcooked burgers or raw centers.
From separating to seasoning to serving, this method ensures you’ll have restaurant-quality burgers at home with minimal effort. We’ll even cover the best way to thaw them if you’ve got extra time, plus my go-to seasoning blend that takes basic burgers to the next level. Get ready for the easiest burger upgrade you’ve ever made.
📚 In This Guide
- What You’ll Need
- Instructions
- Tips and Common Mistakes
What Youll Need
- ● Frozen burger patties – 1 pack (any size, but 4–6 patties is standard 🍔).
- ● Sharp, thin-bladed knife – A chef’s knife or boning knife (6–8 inches) works best. Avoid serrated blades! 🔪
- ● Cutting board – Plastic or wood, large enough to fit the patties (at least 12×9 inches).
- ● Hot water – ~1 cup in a bowl or measuring cup (for the “dip trick”).
- ● Paper towels or clean kitchen towel – 2–3 sheets to blot excess moisture. 🧻
- ○ Plastic wrap or parchment paper (optional) – For re-stacking separated patties.
- ○ Metal spatula (optional) – Helps lift stubborn patties without tearing. 🥘
- ○ Timer (optional) – For precision if using the “30-second thaw” method. ⏰
Instructions for Separating Frozen Burgers
Here’s the foolproof method I use every time—no more crumbling patties or broken burgers!
Prepare Your Work Surface and Tools
Start by clearing a flat, stable surface in your kitchen. I like to use a large cutting board or a clean countertop. Place a sheet of parchment paper or wax paper on the surface—this prevents the burgers from sticking and makes cleanup a breeze.
Gather your tools: a sturdy metal spatula (the thin, flexible kind works best) and a butter knife. You’ll also want a small bowl of warm water nearby. I’ve found that having everything ready before you start makes the process smoother and prevents any last-minute scrambling.
Step 2: Apply the Warm Water Trick to Loosen the Patties
Dip your metal spatula in the warm water for about 10 seconds to warm it up. This is the secret weapon that makes all the difference! The warm metal will help release the frozen burgers from each other without tearing them apart.
Gently slide the warmed spatula between the top burger and the rest of the stack. Don’t force it—let the warmth do the work. You’ll feel the patty start to release as the thin layer of ice melts. If it’s not budging, dip the spatula again and try a different angle.
Separate with the Butter Knife Technique
Once you’ve lifted the top burger slightly with the spatula, switch to your butter knife. Slide it horizontally between the patties, using a gentle sawing motion. The dull edge of the butter knife won’t cut into the meat but will separate the frozen layers cleanly.
Work your way around the edge of the patty until it’s completely free. You’ll hear a satisfying “pop” when the vacuum seal breaks—that’s how you know you’ve done it right! Place the separated patty on your prepared surface and repeat the process with the remaining burgers.
Handle Stubborn Patties with the Tap Method
If you encounter a particularly stubborn stack where the patties just won’t separate, here’s what I do: Hold the stack firmly with one hand and use your other hand to gently tap the edge of the top patty with the flat side of your butter knife. The vibration helps break the ice crystals holding them together.
After a few taps, try sliding your warmed spatula between the patties again. You’ll often find they come apart much more easily. For extremely frozen burgers, you might need to let the stack sit at room temperature for 5-10 minutes before attempting this technique again.
Store or Cook Your Perfectly Intact Patties
Once all your burgers are separated, you can either cook them immediately or store them for later. If cooking right away, I recommend letting them sit at room temperature for about 10 minutes before grilling—this ensures even cooking throughout the patty.
For storage, place each patty on a tray lined with parchment paper and return to the freezer for 30 minutes to firm up. Then transfer to a freezer bag with parchment between each patty. This way, they’ll never stick together again, and you’ll have perfectly separated burgers ready for your next cookout!
Tips and Common Mistakes
Let me share the game-changing insights I’ve discovered through years of separating frozen burgers—these will save you time and frustration!
The Warm Water Secret: In Step 2, those 10 seconds of warming your spatula aren’t just important—they’re everything! I’ve found that using water that’s warm to the touch (about 110°F) works best. Too hot and you’ll start cooking the edges; too cool and the ice won’t release. The perfect temperature feels like warm bathwater—just right for melting that thin ice layer without damaging the patty.
Tool Selection Matters: Don’t underestimate the power of the right tools! A thin, flexible metal spatula is non-negotiable—it slides between patties without tearing. I learned this the hard way after ruining several burgers with a stiff pancake turner. And that butter knife? It should be dull enough to separate without cutting, but sturdy enough to handle the pressure. My favorite is an old table knife with a slightly rounded edge.
Patience Pays Off: When you hit stubborn patties in Step 4, remember that 5-10 minutes at room temperature can make all the difference. I used to force the separation and end up with broken burgers. Now I let physics work for me—the slight thaw softens the ice crystals just enough. Combine this with the tap method, and even the most frozen stacks will surrender!
Storage Pro Tip: That 30-minute refreeze in Step 5 isn’t just about preventing sticking—it creates the perfect texture for cooking later. The brief thaw during separation followed by quick refreezing actually improves the burger’s structure. I’ve tested this against immediately bagging, and the refrozen patties hold together better on the grill and develop a superior crust.
Pro Tips for Separate Frozen Burgers
- Let me share the game-changing insights I’ve discovered through years of separating frozen burgers—these will save yo…
- The Warm Water Secret: In Step 2, those 10 seconds of warming your spatula aren’t just important—they’re everything! …
- Tool Selection Matters: Don’t underestimate the power of the right tools! A thin, flexible metal spatula is non-negot…
Frequently Asked Questions
How long does it take to separate frozen burgers without thawing?
With the right technique (like using a hot, wet knife or running warm water over the package), you can separate burgers in under 2 minutes. For stubborn patties, try the spatula tap method—gently wedge between patties and twist. Pro tip: Work quickly to avoid partial thawing!
Can I use a microwave to separate frozen burgers?
Avoid microwaving—it starts cooking the edges! Instead, try the 10-second warm-water dip: Seal the package in a bag, submerge in warm (not hot) water, then peel apart. This loosens patties without thawing the centers. Microwaves = risky for texture and safety.
What’s the easiest way to prevent burgers from sticking together in the freezer?
Before freezing, layer parchment paper between patties or use a light dusting of cornstarch on each side. For store-bought burgers, repackage them with wax paper separators. Bonus: This also makes portioning a breeze later!
My burgers are tearing when I separate them—what am I doing wrong?
Tearing usually means the patties are too cold or you’re using dull tools. Try:
- Letting them sit at room temp for 5–10 minutes.
- Using a thin, sharp knife dipped in hot water.
- Gently rocking (not prying) the spatula between patties.
Is it safe to refreeze burgers after separating them?
Yes, but only if they’re still ice-cold (below 40°F). Repack separated patties in airtight containers with parchment layers to prevent refreezing sticks. Never refreeze if they’ve thawed completely—cook within 1–2 days instead.
Separating frozen burgers doesn’t have to be a messy struggle! With the right tools—like a thin spatula, warm water dip, or even a butter knife—you can keep patties intact and ready for the grill or pan. No more torn edges or crumbling beef—just perfect, restaurant-worthy burgers every time. 🍔
Now that you’ve mastered the trick, why not put it to the test? Fire up the grill, grab your favorite toppings, and enjoy a stress-free burger night. Pro tip: Bookmark this guide for your next cookout—your future self (and hungry guests) will thank you!

Trained in classic French technique but raised on slow-cooked ribs and spicy rubs, she blends culinary skill with smoke and soul.
- Recipe for Boneless Pork Chops in Cast Iron Skillet: Sear and Baste to Juicy Perfection - October 3, 2026
- Recipe for Boneless Cross Rib Roast: Slow-Roasted Beef with Herb Crust - October 3, 2026
- Hamburgers in Sauce Recipe Crock Pot: Slow-Cooked Savory Delight - October 3, 2026