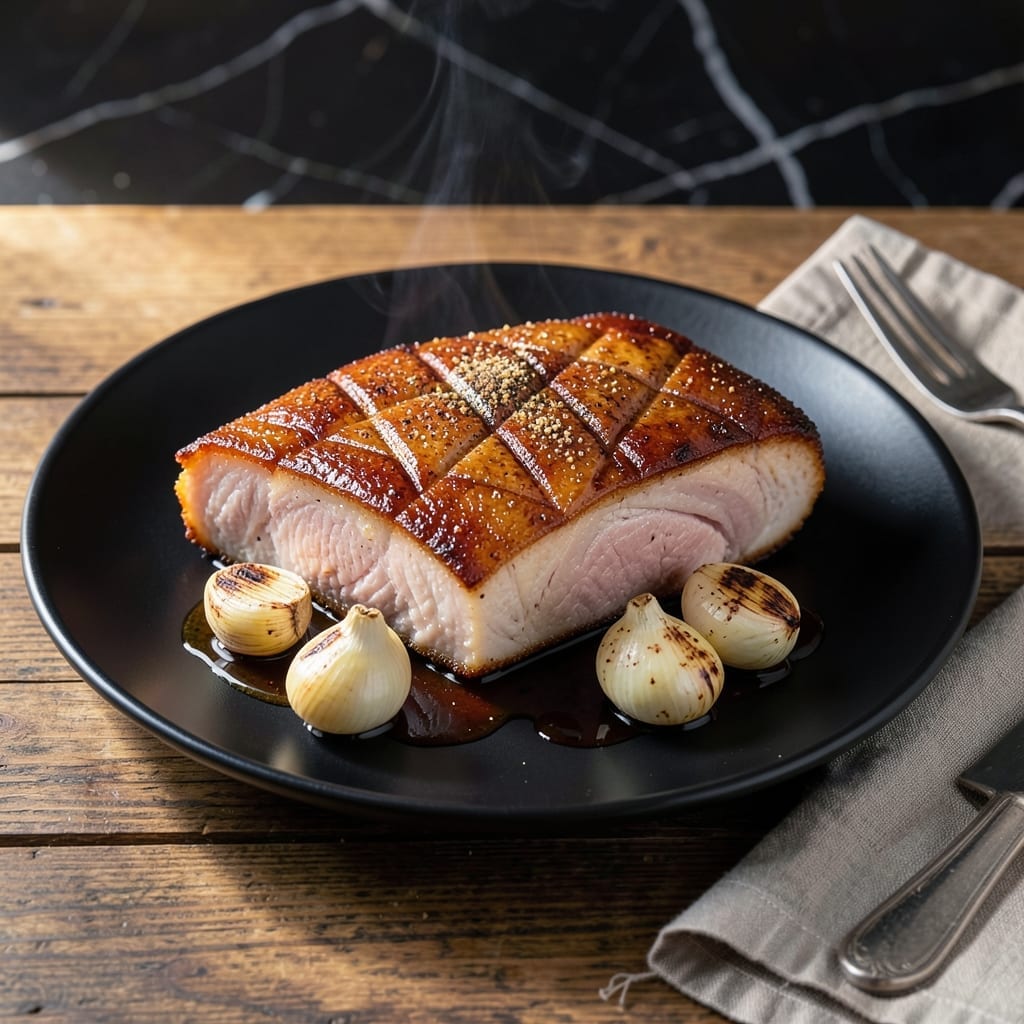
Achieving crispy edges and tender layers with skinless pork belly requires precision and patience. This method transforms a humble cut into a centerpiece-worthy dish with minimal effort.
The secret lies in scoring the fat cap and using a dry brine to enhance flavor and texture. Slow roasting at a low temperature renders the fat while keeping the meat impossibly juicy.
You’ll end up with pork belly that’s golden and crispy on the outside, meltingly tender within. Each bite delivers rich, savory depth that’s hard to resist.
Serve as a main course with your favorite sides or slice thin for sandwiches. Here’s how to make it perfectly every time.
Ingredients for Skinless Pork Belly
A few bold spices and a humble cut transform into something spectacular.
| Ingredient | Amount | Notes |
|---|---|---|
| Skinless Pork Belly 🥓 | 2 lb | Fat cap scored in diamond pattern |
| Kosher Salt 🧂 | 2 tbsp | Diamond Crystal preferred for dry brine |
| Freshly Ground Black Pepper 🌶️ | 1 tsp | Coarse grind for texture |
| Garlic Powder 🧄 | 1 tsp | Not garlic salt |
| Onion Powder 🧅 | 1 tsp | Balances savory depth |
| Smoked Paprika 🌶️ | 1 tsp | Adds subtle smokiness |
| Dried Thyme 🌿 | ½ tsp | Earthy complement to pork |
| Dried Rosemary 🍃 | ½ tsp | Crushed to release aroma |
| Brown Sugar 🍚 | 2 tbsp | Light or dark works |
| Olive Oil 🫒 | 1 tbsp | For initial searing |
| Apple Cider Vinegar 🍏 | 1 tbsp | Balances richness of pork |
| Fresh Garlic Cloves 🧄 | 4 cloves | Minced for dry brine |
[recipe_ingredient_scaler]
Pork belly is the star—ask your butcher for skinless or remove the skin yourself (it peels off easily). Look for pieces with even fat marbling, about 1.5-2 inches thick. Whole Foods or Costco usually carry it, but call ahead. The dry brine ingredients are pantry staples, but freshly ground spices make a noticeable difference in flavor depth.
No skinless pork belly? Pork shoulder with extra fat works in a pinch, though the texture won’t be identical. Swap brown sugar for maple syrup if needed. Diamond Crystal kosher salt is ideal for dry brining—if using table salt, reduce by half. The vinegar can be white wine or rice vinegar (whatever’s open). Fresh rosemary? Use half the amount since it’s more potent.
Pork belly keeps raw in the fridge for 3-4 days or freezes for 3 months. After cooking, it’s best served immediately but reheats decently—crisp the fat under the broiler for 2-3 minutes to revive the texture.
Why You’ll Love This Recipe
- Set and Forget: I toss the pork belly with salt, pepper, and those powders, then let the oven do the work—no babysitting required.
- Garlic-Onion Magic: The combo of garlic and onion powder gives it this deep, savory crust that’s ridiculous with every bite.
- Meal Prep MVP: I make a big batch on Sunday and it’s just as good reheated in tacos, rice bowls, or straight from the fridge.
- Budget Stretch: Skinless pork belly is cheaper than you’d think, and a little goes a long way to feed the whole table.
Step-by-Step Instructions for Skinless Pork Belly
This method guarantees crispy edges with melt-in-your-mouth layers every single time.
Step 1: Score and Dry Brine the Pork Belly
Pat the 2 lb Skinless Pork Belly completely dry with paper towels, focusing on the fat cap and crevices. Using a sharp knife, score the fat in a diamond pattern, cutting about ¼ inch deep. This scoring helps render fat evenly and creates more surface area for crisping.
In a small bowl, combine the 2 tbsp Kosher Salt, 1 tsp Freshly Ground Black Pepper, 1 tsp Garlic Powder, 1 tsp Onion Powder, 1 tsp Smoked Paprika, 0.5 tsp Dried Thyme, and 0.5 tsp Dried Rosemary. Rub this mixture all over the pork belly, pressing it into the scored lines and flesh side. Add the 2 tbsp Brown Sugar and 4 cloves Fresh Garlic Cloves (minced) to the rub, ensuring even coverage.
Place the pork belly on a wire rack set over a baking sheet and refrigerate uncovered for 12-24 hours. This dry brine draws out moisture while seasoning deeply, the first step toward achieving that perfect crispy exterior.
Step 2: Initial Sear for Flavor Foundation
Remove the pork belly from the refrigerator and let it sit at room temperature for 30 minutes. Preheat your oven to 300°F. Heat the 1 tbsp Olive Oil in a large oven-safe skillet over medium-high heat until shimmering.
Add the pork belly fat-side down and sear for 4-5 minutes until deeply browned. The fat should start to render and the edges should become golden and crisp. Flip and sear the flesh side for 2-3 minutes, then transfer to the oven. This initial sear builds a flavor foundation that enhances the final result.
Step 3: Slow Roast to Tender Perfection
Roast the pork belly in the oven for 2-2.5 hours, basting with the rendered fat and pan juices every 30 minutes. This basting keeps the meat moist while encouraging even browning. You’ll notice the fat cap gradually transforming into a deep amber, crispy layer.
About halfway through, add the 1 tbsp Apple Cider Vinegar to the pan juices. The acidity balances the richness of the pork and adds a subtle tang to the crispy exterior. The pork belly is done when a knife slides in easily and the internal temperature reaches 195°F.
Step 4: Rest and Serve for Maximum Crispiness
Remove the pork belly from the oven and transfer it to a cutting board. Let it rest for 10-15 minutes—this allows the juices to redistribute, ensuring every bite is juicy and flavorful. The fat cap will crisp up even more as it cools slightly.
Slice the pork belly against the grain into ½-inch thick pieces. Each slice should showcases alternating layers of crispy fat cap and tender meat. Serve immediately while the edges are at their crispiest, with some of the pan juices spooned over the top.
Pro Tips For Making Skinless Pork Belly
- Score the Fat Side: Even without skin, scoring the fat cap in a crosshatch pattern helps render the fat and lets the dry rub penetrate deeper—use a sharp knife and go about 1/4 inch deep.
- Dry It Well: Pat the pork belly completely dry with paper towels before seasoning; moisture is the enemy of crispy edges, and I learned this the hard way after ending up with steamed meat instead of caramelized.
- Low and Slow First: Start at 275°F for 2-3 hours to gently render the fat, then finish at 400°F for 20-30 minutes to crisp it up—skipping the low phase leaves you with chewy, undercooked fat.
- Rest Before Slicing: Let it rest 10-15 minutes after cooking, tented loosely with foil, so the juices redistribute—slicing too soon sends all that flavor onto the cutting board instead of your plate.
Best Sauces and Condiments for These Flavors
Sweet and Tangy
I love pairing this with a honey-sriracha glaze—mix ¼ cup honey with 2 tbsp sriracha and 1 tbsp soy sauce. Brush it on during the last 15 minutes of roasting for a sticky, spicy finish that complements the crispy fat beautifully. 💛
Classic BBQ Sauce
A good Kansas City-style BBQ sauce works wonders with pork belly. I recommend Stubb’s Original—its smoky sweetness balances the richness. Simmer 1 cup sauce with 1 tbsp apple cider vinegar to thin slightly before serving.
Asian-Inspired
For an umami kick, whisk 3 tbsp hoisin sauce, 1 tbsp rice vinegar, and 1 tsp grated ginger. Drizzle over slices before serving. The sweet-salty combination enhances the savory depth of the pork.
Herb Chimichurri
Blend 1 cup fresh parsley, 3 garlic cloves, ¼ cup olive oil, and 2 tbsp red wine vinegar. This bright, herby sauce cuts through the fat and adds freshness to each bite. I often forage wild parsley for this.
Spicy Mustard Glaze
Mix 3 tbsp Dijon mustard, 2 tbsp maple syrup, and 1 tsp cayenne. Brush on during the final roasting stage for a tangy, spicy crust. The heat contrasts perfectly with the tender meat.
Citrus Aioli
Combine ½ cup mayo, 1 tbsp lemon zest, and 1 minced garlic clove. Serve as a dipping sauce—its creamy acidity brightens the dish wonderfully. A coastal ride inspired this pairing for me. 🌊
Nutrition Facts
Frequently Asked Questions
Why is scoring the fat important?
Scoring creates more surface area for crisping and helps render fat evenly. Without it, the fat cap may stay chewy instead of becoming golden and crispy.
Can I skip the dry brine step?
No, it’s essential for flavor and texture. The 12-24 hour dry brine seasons deeply and draws out moisture, which is key for achieving that perfect crispy exterior.
How do I know when it’s done?
A knife should slide in easily and the internal temperature should reach 195°F. The fat cap will be deep amber and crispy.
What if my pork belly isn’t crispy?
If it’s not crispy enough, broil for 2-3 minutes at the end. Also, ensure you patted it completely dry before starting and scored the fat properly.

Trained in classic French technique but raised on slow-cooked ribs and spicy rubs, she blends culinary skill with smoke and soul.
- Recipe for Boneless Pork Chops in Cast Iron Skillet: Sear and Baste to Juicy Perfection - October 3, 2026
- Recipe for Boneless Cross Rib Roast: Slow-Roasted Beef with Herb Crust - October 3, 2026
- Hamburgers in Sauce Recipe Crock Pot: Slow-Cooked Savory Delight - October 3, 2026