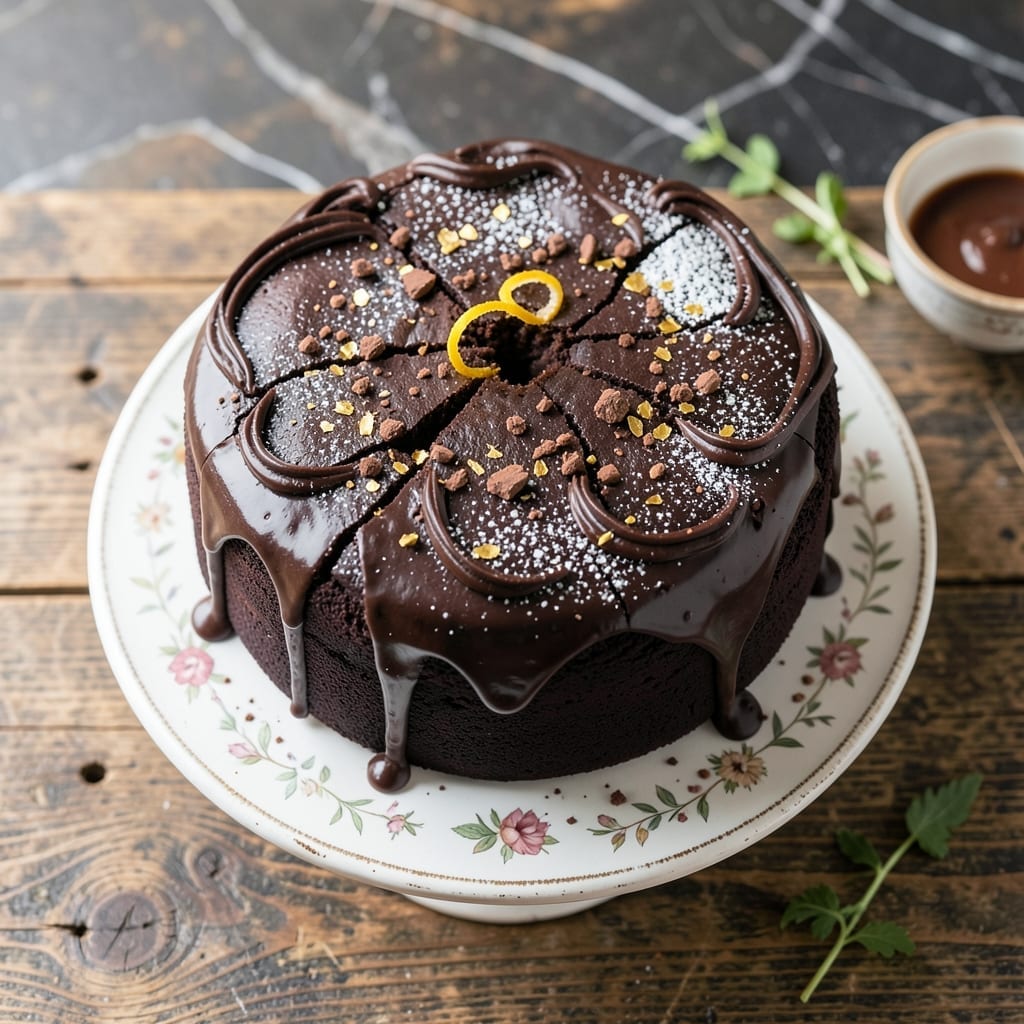
This chocolate truffle bomb cake delivers a molten center that surprises with every slice. I developed this recipe to combine rich chocolate cake with a gooey, decadent truffle filling that oozes out when cut.
The key is baking the cake at 350°F just until the edges are set while the center remains liquid. A simple technique of nesting a chocolate truffle in the batter creates that dramatic molten effect without complicated steps.
You’ll end up with a moist chocolate cake that reveals a luxurious truffle surprise when sliced. The contrast between the firm cake and flowing center makes this dessert unforgettable.
Serve warm for the best experience, as the truffle remains perfectly gooey. This is the kind of showstopper that impresses without requiring advanced skills.
Ingredients for Chocolate Truffle Bomb Cake
Twelve ingredients create this decadent cake with its signature molten chocolate truffle center.
| Ingredient | Amount | Notes |
|---|---|---|
| All-Purpose Flour 🌾 | 1 ½ cups | Sifted for light texture |
| Granulated Sugar 🍚 | 1 ½ cups | Fine grain preferred |
| Unsweetened Cocoa Powder 🍫 | ¾ cup | Dutch-process for richness |
| Baking Powder 🧂 | 1 ½ tsp | Ensures proper rise |
| Baking Soda 🧂 | ½ tsp | Balances acidity |
| Salt 🧂 | ½ tsp | Fine sea salt |
| Large Eggs 🥚 | 2 whole | Room temperature |
| Whole Milk 🥛 | 1 cup | Full-fat for moisture |
| Vegetable Oil 🫒 | ½ cup | Neutral flavor preferred |
| Vanilla Extract 🌿 | 2 tsp | Pure extract recommended |
| Semi-Sweet Chocolate Chips 🍫 | 1 ½ cups | Divided for batter and truffle |
| Heavy Cream 🥛 | ½ cup | For truffle filling |
| Unsalted Butter 🧈 | ½ cup | Melted for truffle center |
[recipe_ingredient_scaler]
The cocoa powder quality is non-negotiable here. Dutch-process cocoa from Hershey’s Special Dark or Guittard delivers that deep, rich chocolate flavor essential for both the cake and truffle. For the chocolate chips, Ghirardelli semi-sweet or Guittard are reliable choices—avoid chocolate morsels with waxy coatings. The heavy cream should be at least 36% fat for proper truffle consistency (trust me on the full-fat version).
No Dutch-process cocoa? Natural cocoa plus a pinch of baking soda can work, but expect a slightly different flavor profile. For a dairy-free version, coconut cream at one-to-one ratio replaces the heavy cream in the truffle. The semi-sweet chocolate can be swapped for dark chocolate (60-70%), but reduce the sugar by 2 tablespoons. Vegetable oil can be replaced with melted coconut oil if preferred.
Store the truffle filling mixture in the fridge for up to 3 days before use. The baked cake is best served immediately but can be kept at room temperature for 2 days. For longer storage, freeze unfrosted layers for up to 1 month—thaw before assembling and baking.
Why You’ll Love This Recipe
- One Bowl Wonder: I just dump all the dry ingredients—flour, sugar, cocoa, baking powder, soda—mix, and go. No fancy steps.
- Deep Chocolate Fix: The cocoa powder gives it that rich, almost fudgy depth. Honestly, it’s like eating a truffle in cake form.
- Birthday Hero: I’ve made this for last-minute celebrations, potlucks, even just because it’s Tuesday. Always disappears first.
- Stays Fresh: Leftovers? They’re somehow even better the next day. I’ll be real: I’ve hidden slices just to savor them longer.
Step-by-Step Instructions for Chocolate Truffle Bomb Cake
Master the technique for a showstopping dessert with a molten chocolate center in every slice.
Step 1: Prepare the Chocolate Cake Batter
Preheat your oven to 350°F and grease a standard bundt pan or 8-inch round cake pan. In a large mixing bowl, whisk together the 1.5 cups All-Purpose Flour, 1.5 cups Granulated Sugar, 0.75 cup Unsweetened Cocoa Powder, 1.5 tsp Baking Powder, 0.5 tsp Baking Soda, and 0.5 tsp Salt until fully combined.
In a separate bowl, beat the 2 whole Large Eggs lightly, then whisk in the 1 cup Whole Milk, 0.5 cup Vegetable Oil, and 2 tsp Vanilla Extract. Gradually add the wet ingredients to the dry ingredients, mixing just until smooth—overmixing will make the cake dense. Fold in 1 cup of the Semi-Sweet Chocolate Chips to distribute evenly throughout the batter.
Step 2: Create the Molten Truffle Centers
In a microwave-safe bowl, combine the remaining 0.5 cup Semi-Sweet Chocolate Chips, 0.5 cup Heavy Cream, and 0.5 cup Unsalted Butter. Microwave in 30-second intervals, stirring between each, until the mixture is completely smooth and glossy. This should take 1-2 minutes total depending on your microwave.
Let the truffle mixture cool slightly until thickened but still pourable, about 5 minutes. The consistency should be like a thick pudding. If it’s too thin, it will seep out during baking; if too thick, it won’t create the proper molten center. You want it to hold its shape when spooned but still be fluid enough to spread slightly.
Step 3: Assemble and Bake the Bomb Cake
Spoon half of the cake batter into your prepared pan, spreading it evenly. Create a shallow well in the center of the batter using the back of a spoon. Pour the truffle mixture into this well, leaving a 1-inch border of batter around the edges. This prevents the truffle from leaking out during baking.
Gently spoon the remaining cake batter over the truffle center, carefully sealing the edges to completely encase the molten filling. Smooth the top with a spatula. Bake for 35-40 minutes or until a toothpick inserted into the cake portion (not the center) comes out clean. The top should be set and spring back lightly when touched.
Step 4: Cool and Serve for Maximum Impact
Remove the cake from the oven and let it cool in the pan for exactly 10 minutes. This brief rest allows the structure to set just enough to maintain its shape when inverted. Run a thin knife around the edges if needed, then carefully invert the cake onto a serving plate.
Let it cool for an additional 5-10 minutes before slicing. When you cut into the cake, the truffle center should flow out like lava. Serve warm for the full molten experience, with each slice revealing that decadent chocolate surprise. The contrast between the moist cake and liquid truffle center is what makes this dessert truly spectacular.
Pro Tips For Making Chocolate Truffle Bomb Cake
- Sift the cocoa: I learned this the hard way—unsifted cocoa powder leaves lumps in your batter that no amount of mixing fixes. A quick pass through a fine-mesh sieve guarantees that rich, smooth chocolate base.
- Room temp ingredients: After my first dense, sunken cake disaster, I now pull the eggs, butter, and any dairy out 1 hour before baking. Cold ingredients can’t emulsify properly with the dry mix.
- Don’t overmix: Once you add the wet to the dry, stir just until the flour disappears—about 20-25 folds with a spatula. Overmixing develops gluten, and your cake will turn tough instead of tender.
- Test with a toothpick: My grandmother swore by this, and she was right: start checking for doneness at 25 minutes. A clean toothpick with a few moist crumbs means it’s done—pull it out immediately to avoid a dry crumb.
Pro Cooking Tips for This Recipe
Perfect Batter Consistency
Don’t overmix your batter—stop as soon as the flour disappears. I use a spatula to fold in the 1 cup chocolate chips by hand, which keeps the cake tender. The batter should look thick but pourable, like pancake batter. 💡
Truffle Temperature Control
Let your truffle mixture cool for 5 minutes before assembling. If it’s too hot, it’ll melt the surrounding batter and create a dense cake. I test it by touching the bottom of the bowl—it should feel warm, not hot.
Sealing the Surprise
When covering the truffle with the second half of batter, use a spoon to gently press the edges together. This seal prevents the molten center from escaping during baking. I often wet my spoon slightly to help smooth the top.
Baking Time Precision
Start checking at 35 minutes—overbaking is the enemy of the molten center. The edges should pull slightly from the pan, but the center will still jiggle. My 350°F oven usually hits the sweet spot at 38 minutes. 🌡️
Inversion Technique
After 10 minutes of cooling, run a thin knife around the edges before inverting. Place your serving plate on top, then flip confidently in one motion. If any truffle oozes out, it’s a sign of perfect doneness!
Serving Timing
Wait 5-10 minutes after inverting before slicing. This brief rest lets the cake set just enough to hold its shape while keeping the center gloriously gooey. Serve immediately for maximum drama.
Nutrition Facts
Frequently Asked Questions
What’s the secret to a perfect molten center?
Don’t overbake! Remove the cake when the edges are set but the center still jiggles slightly. The residual heat will finish cooking the cake while keeping the truffle center gloriously gooey.
Can I make this ahead of time?
Prepare the truffle mixture and cake batter separately up to 1 day ahead. Assemble and bake just before serving for that fresh-from-the-oven experience with the molten surprise intact.
Why did my truffle filling leak out?
This usually happens if the truffle mixture was too thin or the batter seal wasn’t tight. Make sure your truffle thickens for 5 minutes before assembling and press the batter edges together firmly.
Can I use a different pan size?
A bundt pan creates the classic shape, but an 8-inch round works too. Avoid 9-inch pans as the thinner batter may overcook before the center sets properly.

Trained in classic French technique but raised on slow-cooked ribs and spicy rubs, she blends culinary skill with smoke and soul.
- Recipe for Boneless Pork Chops in Cast Iron Skillet: Sear and Baste to Juicy Perfection - October 3, 2026
- Recipe for Boneless Cross Rib Roast: Slow-Roasted Beef with Herb Crust - October 3, 2026
- Hamburgers in Sauce Recipe Crock Pot: Slow-Cooked Savory Delight - October 3, 2026