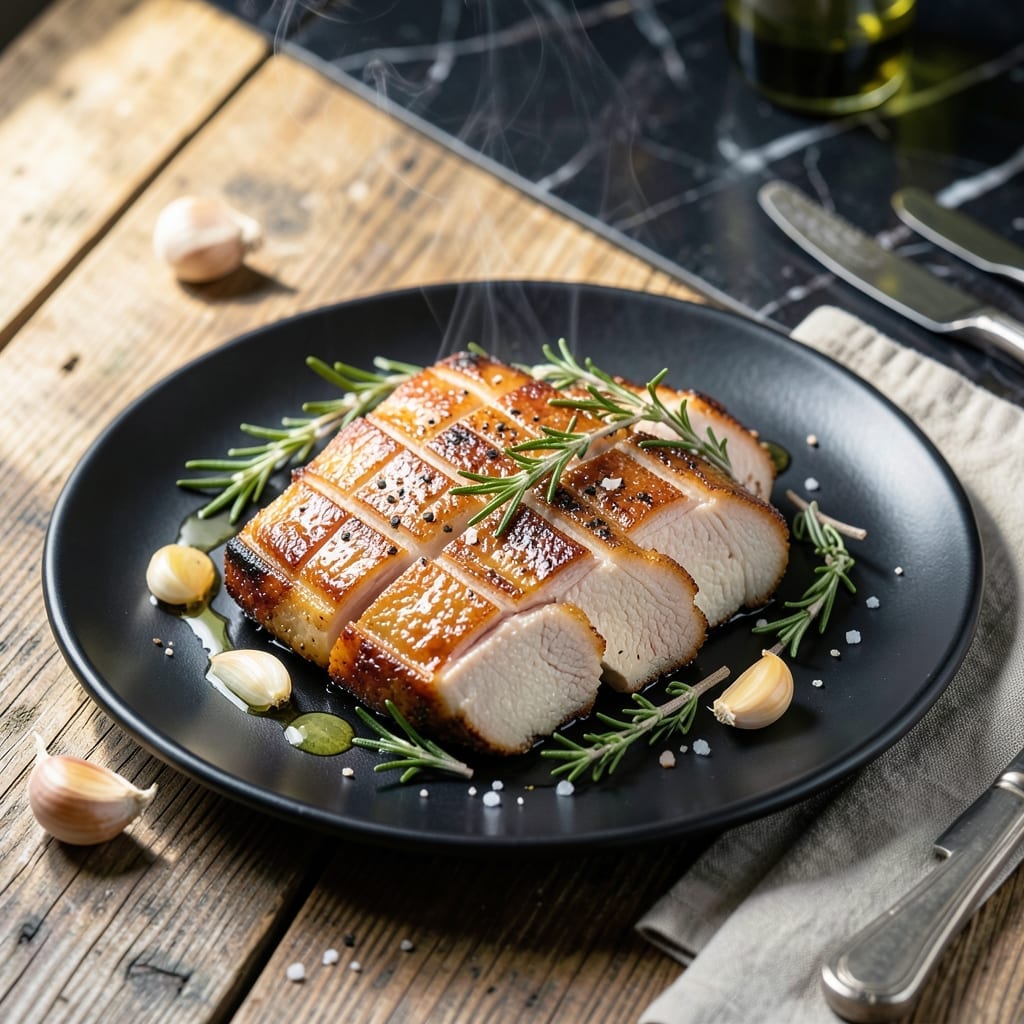
There’s nothing quite like perfectly cooked pork belly with its crispy layers and rich marbling. I developed this method to ensure every slice delivers that ideal balance of texture and flavor.
The secret lies in scoring the skin properly and using a two-stage cooking process. First, a low oven renders the fat, then a high heat finish creates that shatteringly crispy exterior we all crave.
What emerges is pork belly that’s tender inside with a golden, crackling top. The marbling melts into the meat, creating pockets of flavor in every bite. This technique works every time.
Serve it as a main course with steamed greens or alongside rice to soak up the juices. The results speak for themselves.
Ingredients for Sliced Pork Belly
Rich, marbled pork belly plus a few pantry staples for that perfect crispy finish.
| Ingredient | Amount | Notes |
|---|---|---|
| Pork Belly 🥓 | 2 lb | Skin-on, with visible marbling |
| Kosher Salt 🧂 | 2 tbsp | Diamond Crystal preferred |
| Black Pepper 🌶️ | 1 tsp | Freshly ground |
| Garlic Cloves 🧄 | 6 cloves | Minced for rub |
| Fresh Rosemary 🌿 | 2 tbsp | Chopped, stems removed |
| Fresh Thyme 🍃 | 2 tbsp | Chopped, stems removed |
| Olive Oil 🫒 | 1 tbsp | For skin scoring |
| Apple Cider Vinegar 🍏 | 2 tbsp | For crisping skin |
| Brown Sugar 🍚 | 1 tbsp | For caramelization |
| Dijon Mustard 🟡 | 1 tbsp | For rub binding |
| Bay Leaves 🌿 | 2 whole | For slow cooking |
| Chicken Stock 🍲 | 1 cup | Low-sodium preferred |
[recipe_ingredient_scaler]
The pork belly is the star here. Ask your butcher for skin-on, well-marbled pieces—the fat distribution is everything. Whole Foods or Costco usually carry good quality. Look for pieces with even layers of meat and fat (about 1-inch thick). If you’re buying pre-packaged, check that the skin hasn’t been removed. The marbling should be visible and abundant—this is what gives that melt-in-your-mouth texture.
No fresh herbs? Dried at one-third the amount works in a pinch, but fresh is ideal for the rub. Short on apple cider vinegar? White vinegar or lemon juice can substitute, though the flavor will be slightly different. For the stock, vegetable broth works too if you’re avoiding chicken. The brown sugar can be swapped for honey or maple syrup—just use the same amount.
Pork belly keeps 3-4 days in the fridge before cooking, or freeze for up to 3 months. Once cooked, store leftovers for 4-5 days—reheat in the oven to maintain crispiness. Always bring meat to room temperature before starting the cooking process.
Why You’ll Love This Recipe
- One Pan Wonder: I toss the pork belly with salt, pepper, and rosemary, then let the oven do the work—minimal cleanup, maximum flavor.
- Crispy Garlic Bites: The garlic cloves caramelize into sweet, sticky morsels that pair perfectly with the rich, fatty pork.
- Weeknight Hero: Honestly, it’s my go-to for busy evenings when I need something hearty without the fuss.
- Budget Feast: A small slab of pork belly stretches far, and leftovers taste even better the next day in sandwiches.
Step-by-Step Instructions for Sliced Pork Belly
Here’s the method for achieving perfectly crispy layers with rich marbling every time.
Step 1: Score and Season the Pork Belly
Pat the 2 lb Pork Belly completely dry with paper towels, then place it skin-side up on a cutting board. Use a sharp knife to score the skin in a crosshatch pattern, cutting through the skin but not into the meat. This allows the fat to render and the skin to crisp evenly.
Rub the scored skin with the 1 tbsp Olive Oil, then brush the 2 tbsp Apple Cider Vinegar evenly over the surface. In a bowl, mix the 2 tbsp Kosher Salt, 1 tsp Black Pepper, minced 6 cloves Garlic Cloves, 2 tbsp Fresh Rosemary, 2 tbsp Fresh Thyme, 1 tbsp Brown Sugar, and 1 tbsp Dijon Mustard. Press this mixture firmly onto the flesh side of the pork belly, ensuring full coverage. Let it sit uncovered in the refrigerator for 1 hour to dry the skin.
Step 2: Slow-Roast to Render Fat
Preheat your oven to 300°F. Place the pork belly on a wire rack set over a baking sheet, skin-side up. Add the 2 whole Bay Leaves to the baking sheet beneath the rack. Roast for 1.5 hours—this low and slow method renders the fat while keeping the meat tender.
Check halfway through; if the skin isn’t browning evenly, rotate the tray. The pork belly is ready for the next step when the skin begins to puff and the meat yields slightly to pressure. This step is crucial for ensuring the layers stay intact while developing that signature crispness.
Step 3: Crisp the Skin Under High Heat
Increase the oven temperature to 425°F. Return the pork belly to the oven and roast for an additional 20-25 minutes, until the skin is deep golden brown and crackling crisp. Watch closely during this phase—the sugar in the rub can cause the skin to darken quickly.
The pork belly is done when the skin is blistered and shatters under slight pressure. Remove it from the oven and let it rest for 10 minutes before slicing. This rest period allows the juices to redistribute, ensuring every slice is moist and flavorful.
Step 4: Braise and Slice for Serving
While the pork belly rests, pour the 1 cup Chicken Stock into a saucepan and bring to a simmer. Slice the pork belly into ½-inch thick strips, cutting through both the crispy skin and tender meat. The slices should hold their shape, with visible layers of marbling and a glossy, caramelized crust.
Arrange the slices in a shallow dish and pour the warm chicken stock around them, avoiding the crispy skin. Let them sit for 5 minutes to absorb some of the liquid, enhancing the richness of each bite. Serve immediately while the skin remains crisp.
Pro Tips For Making Sliced Pork Belly
- Score the Skin: Use a sharp knife to make shallow cuts in the pork belly skin before seasoning—this helps the fat render out and gives you that crispy texture everyone wants.
- Salt Generously: Kosher salt should be applied aggressively, especially on the skin side; I learned this the hard way after my first few attempts came out bland.
- Low and Slow: Start at 300°F for the first hour, then drop to 275°F—this prevents the outside from burning before the inside gets tender.
- Rest Before Slicing: Let the pork belly rest for at least 15 minutes after cooking, or the juices will spill out and leave your slices dry.
Serving Suggestions for This sliced pork belly
Plating Elegance
I love arranging the ½-inch thick slices slightly overlapping on a warm platter, skin-side up to showcase that crispy texture. The marbling should glisten under the light—this is your visual payoff. Drizzle a touch of reduced chicken stock around the edges for a professional finish. 💫
Family-Style Service
For casual gatherings, serve the pork belly on a wooden board with small bowls of pickled vegetables and crusty bread. The contrast of textures—crispy, tender, tangy—makes every bite exciting. I always include a sharp knife for guests to slice their own pieces.
Asian-Inspired Accompaniments
Pair with steamed jasmine rice and quick-pickled cucumbers for an Asian fusion twist. The rice soaks up the rendered fat beautifully. I also love adding a side of sriracha-lime dipping sauce—just mix 2 tbsp sriracha with 1 tbsp lime juice and 1 tsp honey.
Classic Comfort Pairings
For a hearty meal, serve with creamy mashed potatoes and sautéed greens. The cool creaminess balances the rich pork perfectly. I often add roasted root vegetables like carrots and parsnips to round out the plate.
Beverage Recommendations
A crisp Sauvignon Blanc cuts through the fat with its acidity, while a dark amber ale complements the caramelized flavors. For non-alcoholic options, sparkling water with a lime wedge works wonders to cleanse the palate. 🍺
Garnish Ideas
Fresh herbs like chopped cilantro or thyme sprigs add a pop of color and freshness. A sprinkle of flaky sea salt over the crispy skin enhances the flavor. I also like adding a few edible flowers for special occasions.
Nutrition Facts
Frequently Asked Questions
What’s the best thickness for pork belly slices?
Aim for ½-inch thick slices. This ensures each piece has enough skin to stay crispy while keeping the meat tender and juicy. Any thinner and the skin may burn before the inside cooks.
Why does my pork belly skin stay chewy?
Insufficient drying or low heat causes this. Pat the skin thoroughly dry before seasoning and roast at 425°F for the final crisping stage. Scoring the skin in a crosshatch pattern also helps render fat evenly.
Can I skip the resting time?
No, resting for 10 minutes is crucial. It lets juices redistribute, preventing dry meat when sliced. Skipping this step often results in tough, uneven slices.
How do I store leftovers without losing crispiness?
Store in an airtight container for up to 4 days. Reheat in the oven at 375°F for 5-10 minutes to revive the crispy skin. Microwaving makes it soggy.

Trained in classic French technique but raised on slow-cooked ribs and spicy rubs, she blends culinary skill with smoke and soul.
- Recipe for Boneless Pork Chops in Cast Iron Skillet: Sear and Baste to Juicy Perfection - October 3, 2026
- Recipe for Boneless Cross Rib Roast: Slow-Roasted Beef with Herb Crust - October 3, 2026
- Hamburgers in Sauce Recipe Crock Pot: Slow-Cooked Savory Delight - October 3, 2026