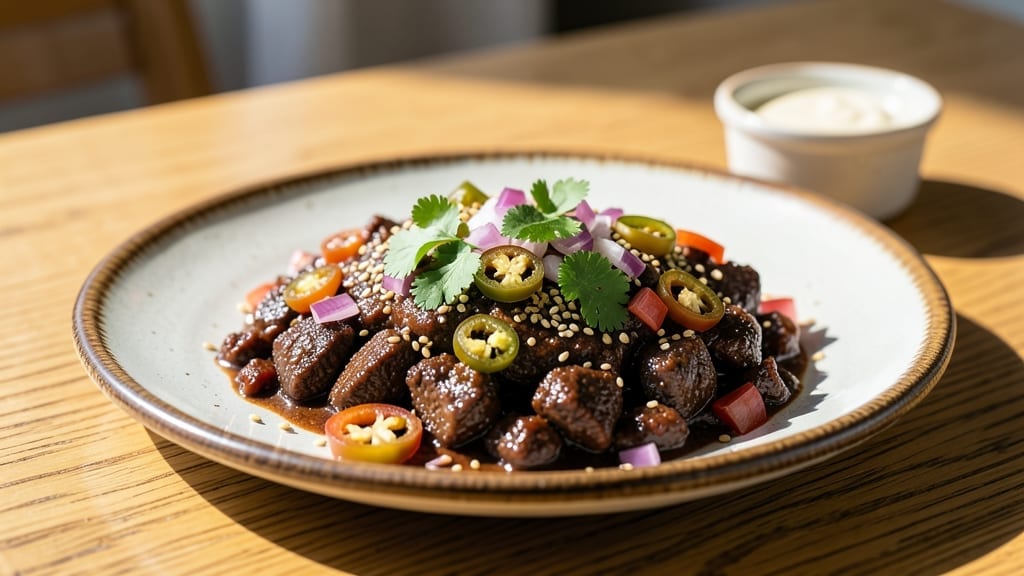
This smoked beef chili recipe delivers the kind of deep, smoky flavor that transforms a simple pot of chili into something unforgettable—like the first time I tasted my grandfather’s slow-smoked version at his backyard cookout.
The secret lies in properly smoking the beef first, which infuses the dish with layers of rich, woodsy aroma that lingers long after the last bite. I’ve perfected this method over years of pitmaster trials, balancing heat, texture, and that essential smoky backbone that makes this chili stand apart.
The foundation starts with a slow-smoked beef chuck roast—cooked low and slow until tender enough to shred with a fork—before building the chili with a rich blend of spices, beans, and a deep tomato base.
What sets this apart is the two-stage cooking process: first, the beef smokes until it’s fall-apart tender, then simmers in a pot with aromatics, chili powder, and cumin until the flavors meld into a harmonious, hearty stew. The result?
A chili that’s bold, smoky, and deeply satisfying, with each spoonful carrying that unmistakable charred depth.
By the time you’re done, you’ll have a restaurant-quality bowl of chili that’s perfect for game day, cold nights, or whenever you crave a meal that feels like a hug in a pot.
The smoky beef shreds easily, the beans stay tender, and the sauce is thick enough to coat every bite without being heavy.
Serve it with cornbread, shredded cheese, or a dollop of sour cream to balance the heat—though I’ll admit, I often eat it straight from the pot with a spoon.
This recipe is designed to be foolproof yet flexible, so you can adjust the heat level or swap in different beans based on what you have on hand.
The key is patience—letting the flavors develop over time is what makes this chili truly special. Let’s get started on creating a bowl that’ll have everyone asking for seconds.
Ingredients for smoked beef chili
Pantry staples meet smoky magic—just a few key ingredients transform into restaurant-quality chili.
| Ingredient | Amount | Notes |
|---|---|---|
| Beef Chuck Roast 🥩 | 3 lb | Bone-in preferred for flavor |
| Yellow Onion 🧅 | 1 whole | Large, roughly chopped |
| Garlic Cloves 🧄 | 6 cloves | Peeled, smashed slightly |
| Canned Tomato Sauce 🍅 | 2 cups | San Marzano preferred |
| Chili Powder 🌶️ | 2 tbsp | Smoked variety for depth |
| Ground Cumin 🌿 | 1 tbsp | Toasted for aroma |
| Dried Oregano 🍃 | 1 tbsp | Mexican preferred |
| Cayenne Pepper 🔥 | ½ tsp | Adjust for heat |
| Black Pepper 🌶️ | 1 tsp | Freshly ground |
| Kosher Salt 🧂 | 1 ½ tsp | Adjust to taste |
| Dark Brown Sugar 🍯 | 1 tbsp | Enhances smokiness |
| Beef Broth 💧 | 2 cups | Low-sodium preferred |
| Pinto Beans 🍲 | 1 lb | Dried or canned (rinsed) |
| Wood Chips 🌳 | 1 cup | Hickory or oak, soaked |
| Extra-Virgin Olive Oil 🫒 | 1 tbsp | For searing beef |
[recipe_ingredient_scaler]
The beef is non-negotiable. Chuck roast with bone-in gives the best flavor and texture—Costco or local butchers usually have it pre-cut, but if you’re buying a whole roast, ask for a well-marbled piece. The wood chips? Hickory or oak from Traeger or Smokey Mountain brands work best. Soak them for at least 30 minutes before using—dry chips burn too fast. I always double-check the meat’s internal temp hits 195°F before shredding; that’s when it’s truly fall-apart tender. The onions and garlic should be fresh—no sad, shriveled bulbs here (they won’t caramelize right).
No hickory chips? Mesquite or applewood will work, though hickory’s the classic choice. Short on time? Smoked paprika at double the amount mimics the smoky depth. Using canned beans? Rinse them well to cut excess sodium. The tomato sauce can be homemade (simmer crushed tomatoes with garlic and olive oil) or high-quality jarred like Rao’s. For extra richness, stir in 2 tbsp of beef tallow at the end—trust me, it’s worth the effort. The brown sugar might seem odd, but it balances the heat and enhances the smoky flavor without making it sweet.
This chili tastes even better the next day—like a 24-hour flavor infusion. Store leftovers in the fridge for 5-6 days or freeze for 3 months. I portion mine into glass jars with a layer of olive oil on top to preserve freshness. For serving, I always keep shredded cheddar, sour cream, and chopped cilantro on hand—optional, but they take it to the next level. The beans stay tender if you simmer gently; avoid boiling them dry. If you’re making this ahead for a crowd, cook the beans separately and add them back at the end to keep them intact.
Why You’ll Love This Recipe
- Smoker’s Secret Shortcut: That 15-minute prep of soaking wood chips and marinating the beef while the smoker heats up? Game-changer. I used to spend an hour just chopping, but now I’m prepping while the coffee brews—no rush, just flavor building.
- Smoky-Sweet Payoff: The smoked chili powder and oak wood chips turn simple beef chuck into something almost restaurant-worthy. That deep, campfire-meets-kitchen aroma? It’s the kind of taste that makes you pause mid-bite and think, “Damn, I made this.”
- Feed a Crowd, Feed Yourself: This isn’t just for game days or holidays—it’s my go-to for potlucks, lazy Sundays, or when my roommates show up unannounced. One batch feeds six, and the leftovers? Even better the next day. (Yes, I’ve eaten it cold off a tortilla.)
- Budget Beef, Big Flavor: Three pounds of chuck roast might sound pricey, but the smoker transforms tough cuts into melt-in-your-mouth perfection. And with dried beans and pantry staples, it’s cheaper than takeout—plus, it’ll last a week in the fridge. Win.
Step-by-step instructions for smoked beef chili
Here’s the method that delivers rich, smoky depth and tender beef every time.
Prepare the Beef for Smoking
Start by trimming any large fat deposits from the 3 lb beef chuck roast, leaving about ¼ inch of fat for flavor. Cut the roast into 1½-inch chunks and place them in a bowl. In a small bowl, whisk together 2 tbsp chili powder, 1 tbsp ground cumin, 1 tbsp dried oregano, ½ tsp cayenne pepper, 1 tsp black pepper, and 1½ tsp kosher salt. Rub this spice blend all over the beef chunks until evenly coated.
In a separate bowl, combine 1 lb pinto beans, 1 cup beef broth, and 1 tbsp dark brown sugar. Stir well and let sit for 15 minutes—this helps the beans soften during smoking. Meanwhile, soak 1 cup wood chips in water for at least 30 minutes. This ensures they smolder properly without burning.
Smoke the Beef and Beans Together
Set up your smoker to maintain a temperature of 225°F. Once the smoker reaches this temperature and you see steady blue smoke, add the soaked wood chips. Place the beef chunks and bean mixture in a disposable aluminum pan and smoke for 3-4 hours, stirring the beans occasionally. The beef should become fork-tender, and the beans should begin to soften.
Here’s the thing—don’t rush this step. The low-and-slow process breaks down the tough beef fibers and infuses the beans with deep smoky flavor. You’ll know the beef is ready when it pulls apart easily with two forks. If the beans aren’t fully tender, continue smoking for another 30-60 minutes.
Build the Chili Base
While the beef and beans smoke, heat 1 tbsp extra-virgin olive oil in a large Dutch oven over medium heat. Add the chopped yellow onion and cook for 5 minutes until softened. Add the 6 smashed garlic cloves and cook for another 30 seconds until fragrant. Be careful not to burn the garlic—it should smell sweet and nutty, not bitter.
Stir in 2 cups canned tomato sauce and bring to a simmer. Reduce heat to low and let it cook uncovered for 10 minutes to deepen the flavors. This step develops the rich, tangy foundation of your chili. If the sauce seems too thick, add 2 cups beef broth to loosen it slightly.
Combine and Simmer to Perfection
Remove the smoked beef and beans from the smoker and transfer them to your Dutch oven with the tomato mixture. Stir everything together and bring to a gentle boil. Then reduce heat to low and let it simmer uncovered for 1-1½ hours. This slow cooking allows all the flavors to meld together beautifully. Stir occasionally to prevent sticking.
The chili is ready when the flavors are deep and complex, with the beef completely tender and the beans fully cooked. Taste and adjust seasoning if needed—you might want to add a pinch more salt or a dash of cayenne for heat. The sauce should coat the back of a spoon with a rich, velvety texture.
Rest and Serve
Let the chili rest for 15-20 minutes off the heat before serving. This allows the flavors to settle and the textures to set. The chili will thicken slightly as it rests, and the beef will reabsorb any juices that might have separated during cooking.
Serve your smoked beef chili hot, with all the smoky, spicy goodness intact. Each bite should deliver tender beef, hearty beans, and a rich tomato base that lingers on your palate. Pair it with crusty bread or cornbread to soak up every last drop of that delicious sauce.
Pro Tips For Making Smoked Beef Chili
- Trim the Fat Right: Leave that ¼-inch fat layer on your beef chuck—it’s what carries the smoky flavor into every bite. I used to trim it all off, and the chili just didn’t taste as rich. The fat renders during smoking, so let it work for you.
- Soak Those Wood Chips: Skip the dry wood chips—soak them for at least 30 minutes first. I learned this after my smoker filled with acrid smoke instead of sweet aroma. Wet chips smolder steadily, giving you that clean, deep smoke without burning.
- Don’t Crowd the Smoker: Give your beef chunks room to breathe in that disposable pan. I crammed mine in once, and the edges dried out before the center cooked. Spread them in a single layer—even if it looks sparse, the low heat will tenderize them evenly.
- Simmer Uncovered Always: That 1-1½ hour simmer? Keep the lid off. I covered mine halfway through, and the sauce turned gluggy instead of velvety. The evaporation concentrates the flavors—just stir occasionally to keep it from sticking.
Essential equipment for perfect results
Your Smoker is Your Best Friend
You don’t need a fancy setup—just a reliable smoker that maintains 225°F consistently. I’ve used everything from a Traeger pellet grill to a simple Weber Smokey Mountain, and the key is temperature control.
If you’re on a budget, a charcoal kettle smoker with a thermometer works wonders. Just invest in a quality thermometer like ThermoWorks Smoke—it’s a game-changer for tracking internal temps. 🔥
The Right Wood Chips Matter
Hickory or oak wood chips are your best bet for that classic smoky depth, but don’t overlook mesquite or applewood for variety. I always soak them in water for 30 minutes to prevent burning.
Brands like Traeger or Smokey Mountain are solid choices, but even store-bought chips from the grocery store work if soaked properly. Avoid pre-soaked chips—they often contain additives that can alter flavor.
Aluminum Pan Hack
Using a disposable aluminum pan inside your smoker keeps things clean and makes stirring the beans easier. I line it with foil for extra ease, but the pan itself is non-negotiable—it ensures even heat distribution.
A 10×15-inch pan fits perfectly in most smokers and gives you room to toss everything together without overcrowding. This little trick saves you from having to clean a smoker tray afterward. ✨
Dutch Oven Essentials
Your Dutch oven is where the magic happens, and a heavy-bottomed one like Le Creuset or Lodge is ideal. It distributes heat evenly and handles the long simmering without warping. If you’re working with a tight budget, a stainless steel stockpot with a tight-fitting lid will do the job.
Just make sure it’s large enough to hold your beef, beans, and tomato mixture comfortably—6-quart capacity is perfect for this recipe.
Thermometer Non-Negotiable
A dual-probe thermometer is a must for checking both the smoker temp and the internal temp of your beef. I use a Meater+ for its accuracy and ease of use.
The beef should hit 195°F before shredding—any lower, and it’ll be tough; any higher, and you risk drying it out. Trust me, this small investment prevents countless disappointments. 💡
Nutrition facts
Frequently asked questions
Why does smoking the beef first make such a big difference in flavor?
Smoking the beef at 225°F for 3-4 hours infuses it with deep, woodsy aroma from the hickory or oak wood chips, creating layers of smoky richness that can’t be replicated through stovetop cooking alone. This process tenderizes the tough chuck roast while developing complex flavors that carry through the entire dish. The result is a beef with unmatched depth that transforms even the simplest chili into something extraordinary.
Can I use dried beans instead of canned for this recipe?
If using dried pinto beans, soak them overnight first, then simmer them separately until tender before adding to the chili. The key is to cook them until they’re fork-tender before combining with the smoked beef and tomato mixture. Dried beans absorb flavors better and create a more authentic texture, though canned beans work in a pinch if you’re short on time.
What’s the best way to check if the beef is done smoking?
Use a meat thermometer to verify the beef reaches 195°F internally, which ensures it’s fork-tender and fully cooked. Alternatively, you can test by prying apart two chunks with a fork—if they separate easily with minimal resistance, it’s ready. Overcooking can dry out the beef, so pull it off the smoker as soon as it hits the right temperature.
How do I adjust the heat level if I prefer less spice?
Start by reducing the ½ tsp cayenne pepper to ¼ tsp or omit it entirely. You can also increase the dark brown sugar to 2 tbsp to balance the heat naturally. For an extra cooling touch, stir in ½ cup sour cream or ¼ cup Greek yogurt at serving time. The smoky depth will still shine through even with milder spices.

Trained in classic French technique but raised on slow-cooked ribs and spicy rubs, she blends culinary skill with smoke and soul.
- Smoked Brisket Recipe: Low and Slow to Fall-Apart Tenderness - November 2, 2026
- Smoked Turkey Breast Recipe: Juicy Pink Center With Crispy Skin Every Time - November 2, 2026
- Leftover Smoked Pulled Pork Chili Recipe: Rustic Flavor Revival in One Pot - November 2, 2026