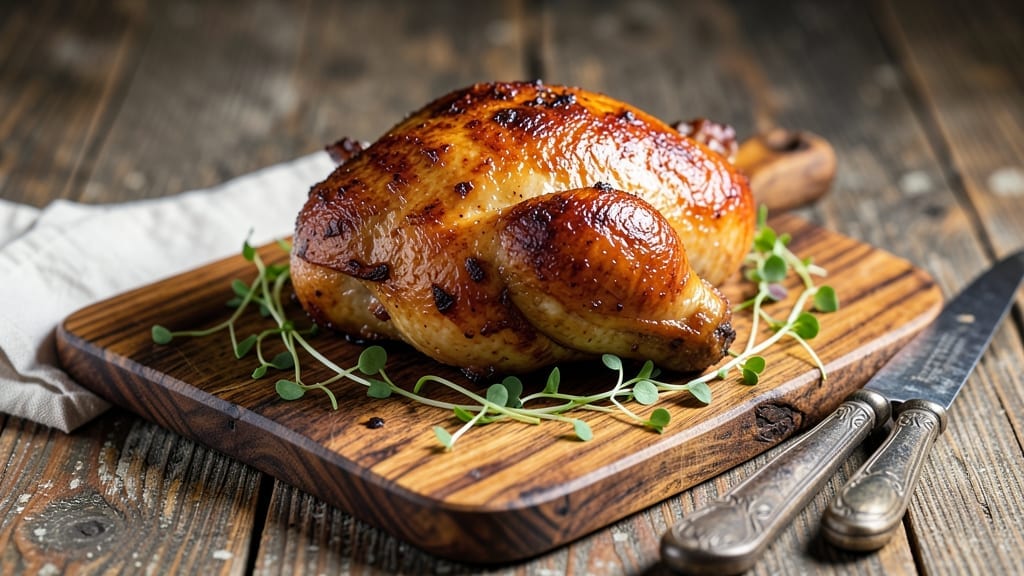
This smoked beer can chicken recipe delivers restaurant-quality flavor with minimal effort—juicy, smoky meat infused with the perfect balance of hops and caramelized crust. After years of perfecting my grandmother’s Sunday roast chicken, I adapted this technique to create a dish that’s foolproof for weeknight dinners or backyard gatherings.
The beer can method ensures even cooking and maximum flavor penetration, transforming simple chicken into something extraordinary.
The secret lies in the smoking process—using a beer can as a heat diffuser creates a self-basting effect that keeps the chicken incredibly moist while developing deep, smoky notes. You’ll need just a few pantry staples (beer, seasoning, and a whole chicken) and about 2 hours of hands-off time.
This method works beautifully with any beer, but I recommend a malty amber ale for the best flavor profile.
By the time you’re done, you’ll have perfectly golden, juicy chicken with crispy skin and tender meat that practically falls apart. The aroma alone will have everyone gathering around the table, and the rich, smoky flavor pairs perfectly with classic sides like coleslaw or roasted potatoes.
It’s the kind of meal that makes cooking feel like a celebration.
Whether you’re feeding a family or hosting friends, this recipe scales effortlessly and delivers restaurant-quality results every time. The best part? No fancy equipment needed—just your grill, a beer can, and a little patience. Let’s get started on creating your next showstopper dinner.
Ingredients for smoked beer can chicken
Just a whole chicken, a beer can, and these bold flavors transform ordinary into extraordinary.
| Ingredient | Amount | Notes |
|---|---|---|
| Whole Chicken 🍗 | 4 lb | Fresh, preferably free-range |
| Amber Ale Beer 🍺 | 1 can | Malty, non-alcoholic if preferred |
| Kosher Salt 🧂 | 2 tbsp | Diamond Crystal preferred |
| Coarse Black Pepper 🌶️ | 1 tbsp | Freshly cracked |
| Garlic Powder 🧄 | 1 tbsp | Freshly ground preferred |
| Onion Powder 🧅 | 1 tbsp | No added MSG |
| Smoked Paprika 🌶️ | 1 tsp | High-quality, not pre-mixed |
| Wood Chips 🌳 | 1 cup | Hickory or apple preferred |
| Olive Oil 🫒 | 2 tbsp | Extra-virgin, for basting |
| Fresh Rosemary 🌿 | 1 sprig | Freshly chopped |
| Fresh Thyme 🌿 | 1 sprig | Freshly chopped |
[recipe_ingredient_scaler]
The chicken is the star—4 lbs gives you generous portions, but don’t skimp on quality. Free-range has more flavor, and Trader Joe’s or Whole Foods carry excellent options. Pat it dry before seasoning—this is non-negotiable for crispy skin. The beer can? Any amber ale works—I grab New Castle when I’m in a hurry, but Samuel Adams Noble Experiment adds serious depth. Look for malty, caramel notes on the label. For the wood chips, hickory gives classic smokiness, while apple adds sweetness—mix both for complexity.
No amber ale? Stout or porter deepens the flavor, though it’ll be darker. Running out of fresh herbs? Dried rosemary and thyme at half the amount work, but fresh is worth the extra minute. The smoked paprika is crucial—Penzeys or McCormick brands are reliable. If you can’t find smoked, regular paprika plus a pinch of liquid smoke gets you close. The olive oil matters too—extra-virgin has more flavor than light oils. Pro tip: Chill the chicken for 30 minutes before cooking to prevent over-browning.
This chicken reheats beautifully—350°F for 20 minutes with a splash of chicken broth. Keeps for 4 days in the fridge, 3 months frozen. I always make extra because it’s that good. Store leftovers in a sealed container with the drippings—the juices are liquid gold. For serving, let it rest 10 minutes before carving. That’s when all the magic happens.
Why You’ll Love This Recipe
- I’ll be real: this isn’t just for Sunday dinners. Shred the rest for tacos, use it in sandwiches, or even toss it into a pasta dish. That 4-day fridge life means you’ve got backup for busy nights, and freezing it for 3 months? Game over for meal prep laziness.
- No-Fuss Feast: Honestly, this is the kind of recipe that lets you focus on conversation, not cooking. Just pat that 4 lb whole chicken dry, rub it with that 2 tbsp kosher salt and 1 tbsp garlic powder mix, and let it rest while you prep the smoker. The 1 hour in the fridge does all the work for you—no chopping herbs or stressing over timing.
- Beer-Infused Magic: That can of amber ale isn’t just for drinking—it’s the secret weapon. The malty sweetness from the beer turns the smoke into something ridiculously good, while the smoked paprika and fresh herbs give it that perfect balance of depth and brightness. Trust me, the crispy skin and juicy meat? Chef’s kiss.
- Leftovers That Shine: I’ll be real: this isn’t just for Sunday dinners. Shred the rest for tacos, use it in sandwiches, or even toss it into a pasta dish. That 4-day fridge life means you’ve got backup for busy nights, and freezing it for 3 months? Game over for meal prep laziness.
Step-by-step instructions for smoked beer can chicken
Here’s how to transform a simple whole chicken into smoky, beer-infused perfection.
Prepare the Chicken and Seasoning Blend
Begin by removing the chicken from its packaging and placing it on a clean cutting board. Pat it completely dry with paper towels—this is crucial for crispy skin. Using your fingers, gently loosen the skin over the breast meat and rub the 2 tablespoons olive oil underneath. This basting technique ensures maximum flavor penetration and helps create that coveted golden crust.
In a small bowl, combine the 2 tablespoons kosher salt, 1 tablespoon coarse black pepper, 1 tablespoon garlic powder, 1 tablespoon onion powder, and 1 teaspoon smoked paprika. Rub this aromatic blend all over the chicken, including inside the cavity. Tuck the 1 sprig fresh rosemary and 1 sprig fresh thyme into the cavity for maximum herb infusion. Let the seasoned chicken rest uncovered in the refrigerator for 1 hour—this allows the flavors to meld and the skin to dry further, setting the stage for perfect browning.
Set Up the Smoker and Prepare the Beer Can
While the chicken rests, prepare your smoker by filling the water pan (if using) and adding the 1 cup wood chips to the smoke tube or chip tray. Light the chips according to your smoker’s instructions and preheat to 225°F. The reason for this relatively low temperature is to ensure slow, even cooking that renders fat and develops deep flavor without drying out the meat.
Open the 1 can amber ale beer and pour it into a small heatproof container or directly into the smoker’s water pan if your setup allows. The beer will infuse the smoke with malty sweetness and add moisture to the cooking environment. Once the smoker reaches temperature and you see steady, thin smoke (not thick white vapor), your chicken is ready to smoke.
Smoke the Chicken with the Beer Can Method
Place the seasoned chicken breast-side up on the smoker grates, positioning it directly over the beer can (if using a can holder) or near the beer-infused water pan. The beer’s steam will help keep the chicken moist while the smoke penetrates deeply. Close the smoker lid and resist the urge to peek—each time you open it, you lose heat and delay the cooking process.
Smoke the chicken for 3 hours, maintaining a consistent 225°F temperature. After this initial period, check the internal temperature by inserting a meat thermometer into the thickest part of the thigh (avoid touching bone). You’re looking for 165°F at this stage. The chicken should have a beautiful golden-brown color and the skin should be crisping in places. If the skin isn’t browning sufficiently, you can increase the smoker temperature to 250°F for the final 30 minutes to encourage caramelization.
Finish and Rest for Maximum Juiciness
Once the chicken reaches the target temperature, remove it from the smoker and transfer it to a cutting board. Let it rest for 15-20 minutes before carving. This resting period is absolutely critical—it allows the juices to redistribute throughout the meat, preventing them from pooling and making each bite incredibly moist and flavorful. The skin should be crispy, the meat should pull away from the bone easily, and the aroma should make your mouth water.
To serve, carve the chicken at the joints and present it whole or sliced. The beer-infused smoke will give it a unique depth of flavor that’s both savory and slightly sweet, while the crispy skin provides satisfying texture. The herbs and spices will have melded perfectly, creating a harmonious balance that makes this chicken truly special.
Pro Tips For Making Smoked Beer Can Chicken
- Don’t Skimp on the Salt: I learned this the hard way—using 1 tablespoon instead of 2 means your seasoning gets lost in the smoke. The 2 tablespoons of kosher salt (Diamond Crystal) is non-negotiable here, especially since you’re not adding extra salt later. Trust me, the beer’s malty notes need that salt to shine.
- Crack the Pepper Fresh: Pre-ground black pepper loses its bite fast, and this recipe calls for freshly cracked—meaning you have to do it yourself. A quick 10-second grind with a pepper grinder right before seasoning makes a real difference in the final bite. (Yes, even if you’re impatient like me.)
- Watch the Beer Can Placement: If your smoker’s water pan isn’t near the chicken, the beer’s steam won’t do its job of keeping the meat moist. Position the beer can (or pan) directly under or beside the chicken so the rising vapor wraps around it like a blanket. No shortcut here—this is how you avoid dry thighs.
- Increase Heat for the Crust: After 3 hours at 225°F, if the skin’s still pale, crank the smoker to 250°F for the last 30 minutes. The higher heat caramelizes the sugars in the beer and oil, giving you that golden, shatteringly crisp skin everyone raves about. (Your future self will thank you.)
Serving suggestions for this recipe
Whole Chicken Presentation
I always carve the chicken at the joints and arrange it on a large wooden board or platter for that rustic, inviting look. The golden-brown skin should be crispy, and the juices will glisten—this is the moment I know it’s perfect.
A drizzle of reduced beer pan sauce (simmer the beer can contents with 1 tbsp honey and 1 tsp apple cider vinegar for 5 minutes) adds a glossy finish. Scatter fresh rosemary sprigs and thyme around the edges for a pop of color. 🌿
Classic Side Pairings
For a complete meal, serve with creamy coleslaw—I mix 4 cups shredded cabbage with ½ cup mayonnaise, 1 tbsp apple cider vinegar, and 1 tsp celery seed.
The tangy crunch cuts through the smoky richness. Another crowd-pleaser is garlic mashed potatoes—just add an extra 1 tbsp butter and 1 clove roasted garlic to your usual recipe. 🥔
Quick Weeknight Options
Short on time? Swap the coleslaw for roasted sweet potatoes—toss 2 cups cubed sweet potatoes with 1 tbsp olive oil and ½ tsp smoked paprika, then roast at 400°F for 25 minutes.
Or, serve with a simple green salad dressed with balsamic vinegar and olive oil to keep it light. Both options balance the meal beautifully. 🍠
Dessert Pairings
End the meal with something sweet to contrast the smoky flavors. I love serving apple crisp with a scoop of vanilla ice cream—its warm, spiced apples complement the beer-infused chicken perfectly.
Or, try a dark chocolate-dipped strawberry for a simple yet elegant finish. The bitterness of the chocolate highlights the savory notes of the chicken. 🍎
Make-Ahead Tips
Prep ahead by slicing the chicken into serving-sized pieces and storing them in an airtight container with the drippings. Reheat at 350°F for 15 minutes to restore crispiness.
I often make extra because leftovers reheat like they were just cooked—trust me, it’s worth it. The beer-infused flavors only get better with time. 💛
Nutrition facts
Frequently asked questions
Why does the beer can method work so well for smoking chicken?
The beer can method creates a self-basting effect by infusing the smoke with moisture from the beer’s steam. This keeps the chicken juicy while developing deep, smoky flavors. The malty sweetness of the beer also enhances the seasoning blend, creating a perfect balance of savory and slightly sweet notes that complement the crispy skin.
Can I use a different type of beer instead of amber ale?
While amber ale is ideal for its malty sweetness, you can substitute with stout or porter for a deeper flavor. Even non-alcoholic beer works well—just choose a malty variety to maintain the beer’s infusion benefits. The key is to use a beer you enjoy drinking, as its character will directly influence your chicken’s taste.
What if my smoker doesn’t have a water pan? How can I still get moist chicken?
Place the beer can directly on the smoker grates or in a heatproof container underneath the chicken. The beer’s steam will still rise and keep the chicken moist. Alternatively, add a few ice cubes to the beer can before placing it in the smoker—this creates extra moisture in the cooking environment.
Is it safe to use the beer can directly in the smoker?
Yes, but use caution! Never place the beer can directly on the heat source—always use a can holder or heatproof container. The beer can will heat up significantly, so let it cool before handling. The can itself becomes part of the smoking process, infusing the chicken with beer aroma while maintaining safety.
What should I do if the chicken skin isn’t browning enough?
Increase the smoker temperature to 250°F for the final 30 minutes to encourage caramelization. Alternatively, baste the chicken with 1 tablespoon olive oil every 30 minutes during smoking. Both methods help develop that perfect golden-brown crust while keeping the meat juicy.

Trained in classic French technique but raised on slow-cooked ribs and spicy rubs, she blends culinary skill with smoke and soul.
- Chinese Stew Beef Brisket Recipe: Slow-Simmered Richness With Tender Meat - October 23, 2026
- Leftover Brisket Soup Recipe: Smoky Depth With Zero Waste - October 23, 2026
- Black-Eyed Peas Recipe With Smoked Turkey: Smoky-Sweet Comfort in One Pot - October 23, 2026