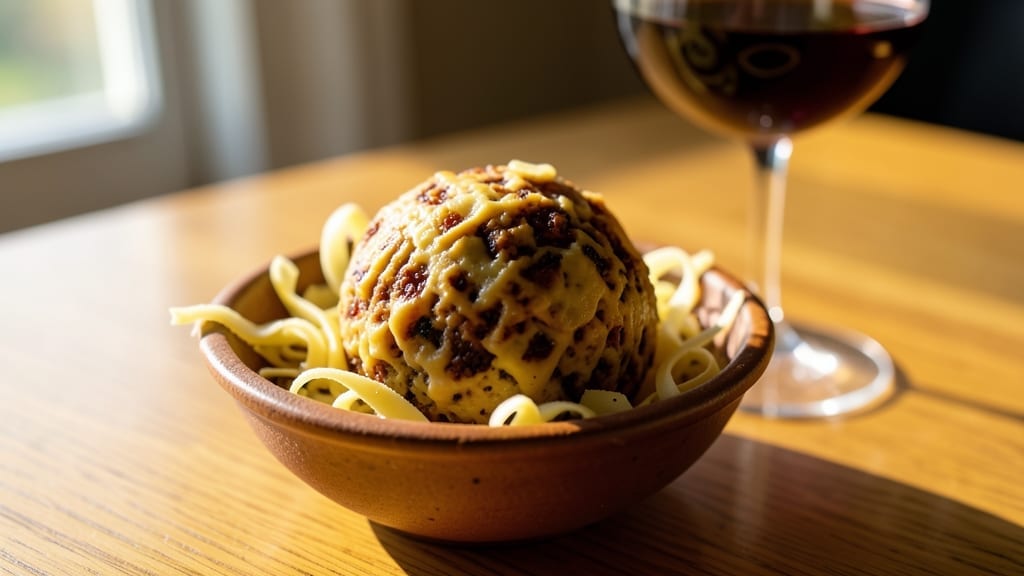
This smoked cheese ball recipe transforms ordinary appetizers into crispy, savory bite-sized masterpieces that disappear faster than you can say “pass the crackers.” The secret lies in balancing sharp cheddar with creamy cream cheese, then baking until golden and rolling in smoked paprika for that irresistible crunch and aroma.
I developed this version after years of perfecting the art of cheese balls—where crispy edges meet tender, melty centers in every bite.
The beauty of this recipe is its precision without fuss: just 15 minutes of prep, 20 minutes of baking, and optional smoked elements like bacon or liquid smoke to elevate the flavor.
What makes it truly special is the texture—crispy on the outside, gooey and rich on the inside—paired with a smoky depth that makes it impossible to stop at one piece. This is the kind of appetizer that turns casual gatherings into memorable events.
By the time you’re done, you’ll have a cheese ball so crispy and flavorful, it’ll have your guests reaching for seconds (or thirds). The smoked paprika finish adds a subtle warmth that complements the sharp cheddar perfectly, while the bacon bits bring a salty crunch.
Serve with crackers, sliced apples, or even as a standalone snack—it’s that good.
For extra flair, brush the baked cheese balls with melted butter before rolling in the smoked paprika. This ensures maximum crispiness and a glossy finish that makes them look as impressive as they taste. Trust me, once you try this recipe, you’ll never buy store-bought cheese balls again.
Ingredients for smoked cheese ball
Crispy, smoky, and packed with cheesy goodness—just these ingredients transform into irresistible bite-sized perfection.
| Ingredient | Amount | Notes |
|---|---|---|
| Sharp Cheddar Cheese 🧀 | 16 oz | Aged for maximum sharpness |
| Cream Cheese 🧈 | 8 oz | Full-fat for best texture |
| Parmesan Cheese 🧀 | 1 cup | Freshly grated from block |
| Unsalted Butter 🧈 | ½ cup | Cold, cubed for mixing |
| Smoked Paprika 🌶️ | 1 tbsp | For smoky aroma and color |
| Garlic Powder 🧄 | 1 tsp | Enhances savory depth |
| Onion Powder 🧅 | 1 tsp | Adds subtle sweetness |
| Black Pepper 🌶️ | ½ tsp | Freshly ground for heat |
| Bacon Bits 🥓 | ¼ cup | Crispy, chopped into pieces |
| All-Purpose Flour 🌾 | ¼ cup | For coating and crispiness |
| Liquid Smoke 🔥 | ½ tsp | Optional for extra smokiness |
| Salt 🧂 | ½ tsp | Kosher or sea salt |
| Heavy Cream 🥛 | ¼ cup | For binding and richness |
[recipe_ingredient_scaler]
The cheeses are the stars here. Sharp cheddar gives that tangy kick, while cream cheese keeps things creamy and rich. I always grab Parmigiano-Reggiano from the deli counter—pre-grated tastes like sawdust. For the bacon bits, Trader Joe’s or Costco have the best pre-cooked, crispy kind. If you’re feeling fancy, toast your own bacon and chop it yourself—game changer. The smoked paprika is what gives these balls that irresistible aroma, so don’t skimp on quality. Penzeys or the bulk bins at Whole Foods have the best stuff.
No smoked paprika? Liquid smoke at half the amount works in a pinch, but it’s not the same. Swap bacon for crumbled sausage or chopped pecans if you’re avoiding meat. Running low on heavy cream? Sour cream or Greek yogurt adds tanginess, though the texture might be slightly different. The flour is just for coating—if you don’t have any, crushed cornflakes or panko work too. For extra crispiness, brush the baked balls with melted butter before rolling in the smoked paprika. Trust me, it’s worth the extra minute.
These keep beautifully in the fridge for 5-7 days if you can resist eating them all at once. For longer storage, freeze them on a tray first, then transfer to a container. They reheat perfectly in the oven at 350°F for 5-10 minutes—just until they’re warm and crispy again. I always make a double batch because they disappear faster than you can say “pass the crackers.” Serve with crackers, sliced apples, or even as a standalone snack—no judgment here.
Why You’ll Love This Recipe
- No-Fuss Assembly: I mix everything in one bowl—no chopping, no measuring madness—just dump, blend, and roll. The cold butter and heavy cream keep it from turning into a melted mess, so even if you’re not a pro, these hold their shape like a champ.
- Smoky-Sweet Surprise: That smoked paprika and bacon bits? Game-changer. The first bite hits with sharp cheddar, then the smoky warmth lingers, and the crispy flour crust? Pure satisfaction. It’s like a campfire flavor in every bite, but make it fancy.
- Always Ready: Make a batch on Sunday, and you’ve got a snack for game day, movie nights, or even a last-minute appetizer when guests drop by. They’re great cold, warm, or at room temp—no fuss, no stress.
- Budget Cheese Win: Sharp cheddar and cream cheese are pantry staples, and a little bacon and flour stretch far. You’re looking at under $10 for a recipe that feeds four (or one very greedy person). Plus, leftovers? Still delicious after five days—no waste here.
Step-by-step instructions for smoked cheese ball
Here’s how to create the perfect bite-sized cheese ball with a crispy exterior and creamy center.
Mix the Cheese Base
In a large mixing bowl, combine the 16 oz sharp cheddar cheese and 8 oz cream cheese. Use a hand mixer or stand mixer fitted with the paddle attachment to beat on medium speed until completely smooth and creamy. The mixture should be uniform with no visible lumps—this ensures a smooth texture throughout the cheese ball.
Next, add the ½ cup unsalted butter, ¼ cup heavy cream, 1 tbsp smoked paprika, 1 tsp garlic powder, 1 tsp onion powder, ½ tsp black pepper, ½ tsp salt, and ½ tsp liquid smoke. Mix again until fully incorporated. The smoked paprika and liquid smoke will give your cheese ball that signature smoky flavor, while the heavy cream adds richness and helps bind the ingredients together.
Here’s the thing—if the mixture feels too soft, you can refrigerate it for 10-15 minutes to firm up slightly. This makes it easier to handle when shaping, especially if you’re working in a warm kitchen. The cheese should hold its shape when rolled between your palms but still be pliable enough to form a smooth ball.
Fold in the Parmesan and Bacon
Using a rubber spatula, gently fold in the 1 cup freshly grated parmesan cheese and ¼ cup bacon bits. Be careful not to overmix—just combine until the parmesan and bacon are evenly distributed throughout the cheese mixture. The parmesan adds a sharp, salty depth, while the bacon bits provide a delightful crunch that contrasts beautifully with the creamy center.
I like to press the bacon bits into the cheese mixture slightly as I fold them in. This ensures they stay embedded rather than floating to the top. If you notice the mixture is still too soft to handle, pop it back in the refrigerator for another 5-10 minutes to firm up. You want it to be cool enough to shape but not so cold that it cracks when you roll it.
Shape and Coat for Crispiness
Divide the cheese mixture into 4 equal portions (about 4 oz each). Roll each portion into a ball, then flatten slightly into a disc shape. This makes it easier to coat evenly with the ¼ cup all-purpose flour. The flour creates a crispy, golden-brown crust when baked, which is key to achieving that satisfying crunch.
Place each disc on a parchment-lined baking sheet and roll them in the flour, pressing gently to ensure full coverage. You want a thin, even layer of flour on all sides. If the flour clumps together, sift it lightly before using. Once coated, return the baking sheet to the refrigerator for 15-20 minutes to chill completely. This step is crucial—it prevents the cheese from spreading too much in the oven and ensures that crispy crust forms properly.
Bake to Golden Perfection
Preheat your oven to 350°F. Bake the cheese balls for 15-18 minutes, rotating the baking sheet halfway through the baking time. You’re looking for a deep golden brown color on all sides, with the edges beginning to crisp up. The cheese should be warm but not melted—it will continue to set as it cools.
Here’s where it gets fun: as soon as they come out of the oven, let the cheese balls cool on the baking sheet for 5 minutes. This allows the crust to set slightly and makes them easier to handle. If you try to move them too soon, the crust might crack or the cheese might ooze out. Patience here ensures a clean, professional-looking finish.
Once cooled, transfer the cheese balls to a serving plate. They should have a crispy, golden-brown exterior with a creamy, flavorful interior. The bacon bits should be visible in some spots, adding texture and a smoky-sweet contrast. Serve immediately or store in an airtight container in the refrigerator for up to 5 days. They’re even better the next day as the flavors meld together!
Pro Tips For Making Smoked Cheese Ball
- CHILL THE MIX BETWEEN STEPS: After mixing the sharp cheddar and cream cheese, I learned the hard way that warm cheese spreads like glue in the oven. If your kitchen’s toasty or the mixture feels too soft, pop it in the fridge for 10-15 minutes before shaping. It’ll firm up just enough to handle without cracking—trust me, your future cheese ball will thank you.
- GRATE PARMESAN FRESH: The recipe calls for freshly grated parmesan, and for good reason. Pre-shredded cheese clumps like a snowball in summer. Grab a box grater and work over the bowl you’re mixing in—it saves cleanup and guarantees that sharp, salty punch. (Yes, even if you’re impatient like me.)
- PRESS BACON INTO THE CHEESE: Don’t just scatter those bacon bits on top like confetti. Press them into the cheese mixture as you fold—they’ll stay embedded and deliver that smoky crunch with every bite. I used to skip this, and half the bacon would end up floating to the surface like a sad, greasy raft.
- SIFT THAT FLOUR: Clumpy flour coating = uneven crust. Sift the ¼ cup all-purpose flour before rolling the cheese discs, and use your fingers to press it into every nook. This isn’t the prettiest method, but it’s the thing that matters most for that perfect golden crust. (And yes, your oven’s fan will thank you too.)
Perfect pairings for this dish
Crunchy Cracker Companions
These cheese balls shine when paired with thin, crispy crackers that won’t get soggy. I reach for Waterford Crystal crackers or Triscuits—their delicate texture lets the smoky, cheesy goodness shine.
For a heartier option, Ritz crackers or water crackers add satisfying crunch. Pro tip: Serve with warm honey butter for a sweet-savory contrast that balances the sharp cheddar. 🥨
Fresh Fruit Accents
Sweet and tangy fruit cuts through the richness beautifully. Sliced apples (like Fuji or Honeycrisp) with a sprinkle of cinnamon or pears add juicy freshness. I also love pairing these with grape clusters or figs—their natural sweetness complements the smoky paprika.
Try a drizzle of balsamic glaze for extra sophistication. 🍎
Beer Pairings
A cold amber ale or wheat beer cleanses the palate between bites. I especially enjoy Blue Moon or Allagash White—their citrusy notes play nicely with the bacon and smoked flavors.
For something bolder, a smoked porter enhances the cheese’s depth. Avoid heavy stouts that might overpower the delicate balance of spices. 🍺
Wine Complements
For wine lovers, a dry Riesling or Pinot Noir pairs perfectly. The Riesling’s acidity cuts through the richness, while the Pinot Noir’s fruitiness complements the smoky notes. I also love a light-bodied Chardonnay with a touch of oak—it bridges the gap between creamy cheese and crispy crust.
Skip bold reds that might clash with the paprika’s warmth. 🍷
Dipping Sauces
Add spicy mustard or marinara sauce for dipping—both add exciting contrasts. I mix Dijon mustard with a little honey for a sweet-spicy dip, or serve tomato-basil sauce for a classic Italian touch.
For something unexpected, try spicy mayo with a dash of hot sauce. These sauces transform your cheese balls into a full appetizer experience. 🌶️
Nutrition facts
Frequently asked questions
Why does the cheese mixture need to chill before shaping?
Chilling the mixture for 10-15 minutes firms it up slightly, making it easier to handle without sticking to your hands. This step prevents the cheese from spreading too much in the oven and ensures a cleaner, more defined shape. It’s especially helpful if your kitchen feels warm or humid!
Can I skip the flour coating for a different texture?
If you want extra crispiness, brush the baked balls with melted butter before rolling in crushed cornflakes or panko instead. For a lighter touch, try almond flour or crushed graham crackers. The flour is just for that classic crunch—adjust to your preference!
What’s the best way to reheat leftover cheese balls?
Pop them in a 350°F oven for 5-10 minutes until warm and crispy again. Avoid microwaving—it makes the crust soggy. If you’re short on time, a toaster oven works perfectly for quick reheating. They taste even better the next day!
How do I prevent the cheese from oozing out when baking?
Roll the coated discs tightly into balls before baking, then press them gently into the flour again. Chilling the mixture for 15-20 minutes afterward helps set the shape. If they still leak, press a small piece of parchment paper into the center before rolling—it’ll act as a barrier!
Can I make these cheese balls ahead of time?
Yes! Shape and chill them up to 24 hours ahead, then bake just before serving. Store them in an airtight container at room temperature for up to 4 hours before baking. For longer prep, freeze the unbaked discs on a tray, then transfer to a bag. Bake straight from frozen, adding 5-7 minutes to the baking time.

Trained in classic French technique but raised on slow-cooked ribs and spicy rubs, she blends culinary skill with smoke and soul.
- Smoked Brisket Recipe: Low and Slow to Fall-Apart Tenderness - November 2, 2026
- Smoked Turkey Breast Recipe: Juicy Pink Center With Crispy Skin Every Time - November 2, 2026
- Leftover Smoked Pulled Pork Chili Recipe: Rustic Flavor Revival in One Pot - November 2, 2026