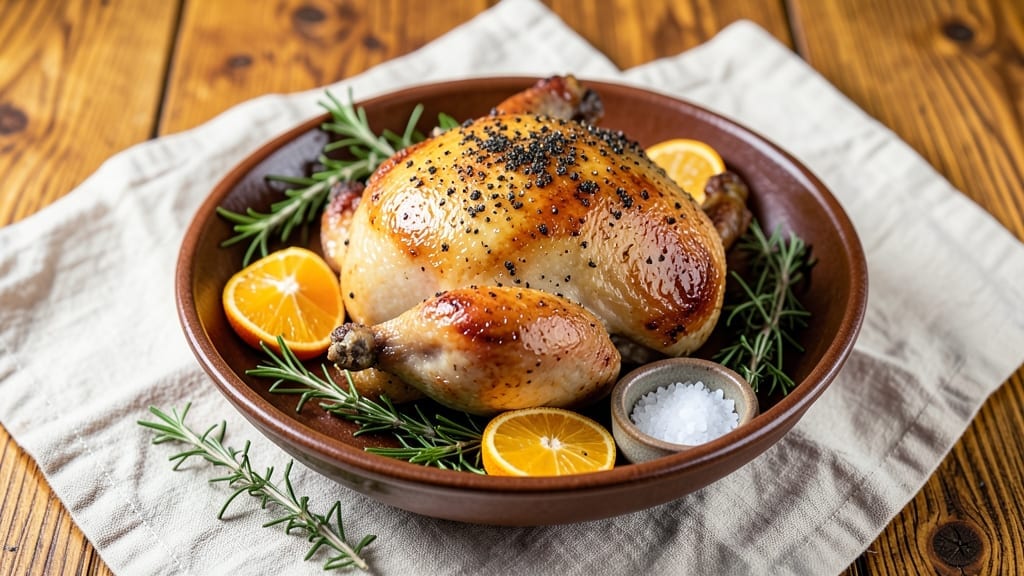
This smoked fried turkey recipe combines two legendary techniques—smoking and deep-frying—to deliver a bird with crispy, golden skin and juicy, tender meat that rivals any holiday centerpiece.
The secret lies in a two-stage process: first, a slow smoke to infuse deep flavor, then a hot fry for that coveted crackling crust. I perfected this method after years of experimenting with backyard cookouts, where the marriage of smoke and fat became my signature approach.
The beauty of this technique is precision timing—smoke the turkey low and slow to develop rich, wood-fired notes, then fry it at the perfect temperature to lock in moisture while creating that irresistible crunch.
No dry, rubbery meat here; every bite delivers the smoky depth of a pitmaster’s work paired with the indulgence of fried chicken. The key is patience: letting the smoke work its magic before the final crisp, ensuring both texture and flavor hit the mark.
What you’ll end up with is a turkey that’s restaurant-quality—juicy enough to carve with ease, crisp enough to make guests reach for seconds, and infused with the kind of smoky aroma that transforms any table.
The method is detailed, but the result is worth every step. Whether you’re hosting Thanksgiving or just craving something extraordinary, this recipe delivers a showstopper that’s equal parts tradition and innovation.
Ready to elevate your turkey game? The process starts with the right bird, the perfect wood, and a few professional tricks I’ve honed over years of smoking and frying. Let’s get to work—your guests won’t believe it’s homemade.
Ingredients for smoked fried turkey
Smoke, fry, and wow your guests with this restaurant-quality turkey masterpiece.
| Ingredient | Amount | Notes |
|---|---|---|
| Whole Turkey Breast (bone-in, skin-on) 🦃 | 6 lb | About 8-10 lbs total weight |
| Peanut Oil 🫒 | 4 cups | High smoke point preferred |
| Applewood Wood Chips 🌳 | 1 package | Soaked in water 2-4 hours |
| Pitmaster's Rub (homemade or store-bought) 🧂 | ¼ cup | Brown sugar included for caramelization |
| Unsalted Butter 🧈 | ½ cup | Melted for basting |
| Butterfly Pepper (optional) 🌶️ | 1 tbsp | For smoky heat infusion |
| Poultry Seasoning 🌿 | 1 tbsp | Herbes de Provence works too |
| Granulated Sugar 🍚 | 2 tbsp | For skin crispiness |
| Apple Cider Vinegar 🍎 | 2 tbsp | For moisture retention |
| Kosher Salt 🧂 | 1 tbsp | Diamond Crystal preferred |
| Black Pepper (freshly ground) 🌶️ | 1 tsp | Coarse grind preferred |
| Panko Breadcrumbs 🍞 | 1 cup | For extra crunch coating |
| Aluminum Foil 🔥 | 1 sheet | Heavy duty for smoking |
[recipe_ingredient_scaler]
The turkey matters most—look for bone-in, skin-on breasts weighing about 8-10 lbs total. Williams Sonoma or ButcherBox carry excellent quality, but your local butcher can custom-cut the perfect piece. The skin should be tight and shiny, not loose or discolored. Applewood chips are non-negotiable for that classic smoky flavor—soak them in cold water for at least 2 hours before using. If you’re short on time, hickory chips work but taste more bitter. For the rub, I use a homemade blend with brown sugar, smoked paprika, and garlic powder—McCormick Gourmet has a great pre-made version if you’re in a rush.
No peanut oil? Vegetable or canola oil works in a pinch, though peanut has a higher smoke point for that perfect crisp. Panko breadcrumbs are essential for the final coating—regular breadcrumbs won’t give the same crunch. Short on apple cider vinegar? White wine vinegar at half the amount gets you close. The sugar is crucial for caramelization—turbinado sugar gives an extra crispy texture. For the optional butterfly pepper, chipotle powder adds smoky heat if you can’t find fresh. Always use freshly ground black pepper—pre-ground loses its punch quickly.
This bird needs space—smoke it at 225°F for 4-5 hours (about 1 hour per pound), then fry at 350°F for 12-15 minutes. Keep the peanut oil hot but not smoking—use a thermometer to monitor. The turkey reheats beautifully—wrap tightly in foil and store in the fridge for up to 3 days. For leftovers, portion into containers before refrigerating so you can grab slices for sandwiches. The skin crispiness fades after 2 days, but the meat stays juicy. Freeze portions for up to 3 months—thaw overnight in the fridge before reheating.
Why You’ll Love This Recipe
- No Fry Day Required: Honestly, I used to avoid fried turkey like the plague—until I discovered this combo. Smoking it first at 225°F for 2-2.5 hours with applewood wood chips gives it that deep, woodsy flavor without the mess of deep-frying alone. The skin still gets that perfect crisp in the peanut oil, but the smoke adds a complexity that makes it feel special without hours of prep.
- Crispy Skin, Juicy Secret: That crispy skin? It’s not just from frying—it’s from the 2 tbsp granulated sugar in the rub and the 30-minute dry-brining session. The sugar caramelizes while the skin crisps in the 350°F peanut oil, but the turkey stays juicy because of the apple cider vinegar and the 15-minute rest after smoking. Trust me, the contrast is addictive.
- Leftovers That Shine: I always make this for Thanksgiving, but the best part? The leftovers. Wrap slices tightly in foil and they stay moist for up to 3 days. Reheat gently, and it’s still tender with that smoky kick. My kids even ask for turkey sandwiches the next day—no sad, dry meat here.
- One Sheet, One Pan, Done: The aluminum foil pan under the turkey isn’t just for show—it reflects heat and keeps the meat from drying out during the 2-2.5 hours of smoking. No need to rotate or babysit the turkey. After frying, just sprinkle panko breadcrumbs for extra crunch, and you’ve got a showstopper with minimal cleanup. One pan, one spatula, and zero stress.
Step-by-step instructions for smoked fried turkey
Here’s how to merge two great techniques for a turkey that’s both perfectly crispy and impossibly juicy.
Prepare and Season the Turkey
Remove the turkey breast from the refrigerator and let it sit at room temperature for 30 minutes before cooking. Pat the skin completely dry with paper towels—this is absolutely critical for crispiness. The drier the skin, the better it will brown and crisp in the oil.
In a small bowl, combine the ¼ cup pitmaster’s rub, 1 tbsp poultry seasoning, 2 tbsp granulated sugar, 2 tbsp apple cider vinegar, 1 tbsp kosher salt, and 1 tsp black pepper. Mix thoroughly until fully incorporated. If using, finely chop the 1 tbsp butterfly pepper and add it to the mix for a subtle smoky heat. Rub this mixture all over the turkey breast, pressing firmly so the seasoning adheres to the skin. Let it sit uncovered on a wire rack for 30 minutes to allow the skin to dry further and the seasoning to penetrate.
Create the Smoking Setup
While the turkey seasons, prepare your smoking setup. Soak the 1 package applewood wood chips in water for 2-4 hours to prevent flare-ups. Set up a smoker or a grill with a smoker box, and preheat it to 225°F. Once the smoker reaches temperature, add the soaked wood chips and let the smoke fill the chamber for 10 minutes before introducing the turkey.
Line a large roasting pan with the 1 sheet aluminum foil, shiny side up. This will help reflect heat and keep the turkey moist during the smoking process. Place the turkey breast skin-side up on the foil-lined pan, ensuring it sits flat and stable for even cooking.
Smoke the Turkey Low and Slow
Place the turkey in the smoker and cook for 2-2.5 hours until the internal temperature reaches 150°F. The goal here is to infuse the turkey with deep smoke flavor while keeping it tender. Avoid opening the smoker during this time—each time you do, you lose heat and extend the cooking time.
After 2 hours, remove the turkey from the smoker and let it rest for 15 minutes. This resting period allows the juices to redistribute, ensuring a moist and flavorful result. While it rests, prepare a basting mixture by melting the ½ cup unsalted butter in a small saucepan over low heat. Stir in 2 tbsp apple cider vinegar and 1 tsp black pepper for added flavor.
Fry for Crispy Skin
Heat 4 cups peanut oil in a deep fryer or heavy pot to 350°F. You’ll know the oil is ready when a wooden chopstick inserted into the oil sizzles immediately. Working quickly, carefully lower the turkey breast into the hot oil, skin-side down. Fry for 8-10 minutes until the skin is deep golden brown and crispy. Flip the turkey and fry for another 6-8 minutes until the internal temperature reaches 165°F and the skin is evenly crisped.
Use a slotted spoon to carefully lift the turkey from the oil and drain it on a wire rack set over a baking sheet. Immediately baste the hot turkey with the melted butter mixture, letting it drip down the sides for extra flavor and moisture. Sprinkle 1 cup panko breadcrumbs evenly over the crispy skin to add an extra layer of crunch.
Rest and Serve
Let the turkey rest for 10-15 minutes before slicing. This resting time is crucial—it allows the juices to settle back into the meat, ensuring every bite is moist and flavorful. During this time, preheat your serving platter in the oven to keep the turkey warm.
Slice the turkey against the grain into ½-inch thick pieces and serve immediately. The result should be a turkey with a crispy, golden-brown skin that gives way to juicy, tender meat infused with smoky flavor. Pair it with your favorite sides and enjoy the perfect blend of techniques in one dish.
Pro Tips For Making Smoked Fried Turkey
- Preheat Oil Properly: I learned this the hard way—skipping the chopstick test means oil that’s either too cool (greasy skin) or too hot (burnt crust). Heat the 4 cups peanut oil to 350°F and confirm it’s ready by watching for immediate sizzling when you drop in a wooden stick. No guesswork.
- Soak Wood Chips Right: Dry wood chips turn into a fire hazard. Soak the 1 package applewood wood chips for 2-4 hours—not 30 minutes, not overnight—just long enough to dampen them without turning them into a swamp. This keeps your smoker steady at 225°F without flare-ups.
- Don’t Flip Too Soon: The first fry side sets the texture. Let the turkey skin crisp for 8-10 minutes skin-side down before flipping—any less, and you’ll end up with patchy golden bits instead of that perfect even crust. Patience here makes all the difference.
- Use Foil Like a Pro: That 1 sheet aluminum foil isn’t just for cleanup—shine the foil upward in the pan to reflect heat and lock in moisture during smoking. Trust me, your turkey will stay juicier than if you skipped it, even if it looks a little weird.
Wine and beer pairings for this dish
Bold Reds for Smoky Depth
Pair your smoked fried turkey with a bold Cabernet Sauvignon from Napa Valley—the wine’s dark fruit notes and tannins cut through the turkey’s smoky richness beautifully. I reach for a 2018 Louis M. Martini when hosting; its oak and black cherry flavors complement the applewood smoke without overpowering it.
The acidity also cleanses the palate between bites of crispy skin and juicy meat. 🍷
Crisp Whites for Balance
A Chardonnay with a touch of oak, like Kistler Russian River Valley, provides the perfect contrast to the turkey’s richness. The buttery notes from the wine’s aging harmonize with the fried skin’s crunch, while its bright acidity refreshes your taste buds.
I always serve this with a side of apple cider vinegar glaze to enhance the pairing.
Smoky Lager Pairing
For beer lovers, a German-style Rauchbier (smoked beer) is a must—brands like Schlenkerla or Weihenstephaner infuse malt with beechwood smoke, mirroring your turkey’s flavor profile. The beer’s malty sweetness balances the turkey’s saltiness, while its subtle smoke adds another layer of complexity.
A crisp Pilsner like Paulaner also works if you prefer something lighter. 🍺
Fruity Rosé for Lighter Occasions
If your gathering leans toward a more relaxed vibe, a dry Provence rosé like Whispering Angel brings a bright, fruity contrast to the turkey’s depth. The wine’s red berry notes and citrus finish cut through the fried fat, making each bite feel lighter.
It’s a crowd-pleaser that won’t compete with the turkey’s smoky, savory profile.
Bourbon for Bold Palates
For those who prefer spirits, a smoky bourbon like Buffalo Trace or Evan Williams adds a caramelized depth that echoes the turkey’s charred edges. Sip it neat or on the rocks to balance the dish’s saltiness and smoke.
The bourbon’s oak and vanilla notes also complement the applewood chips used in smoking. 🥃
Nutrition facts
Frequently asked questions
Why smoke the turkey before frying?
Smoking first infuses the meat with deep, wood-fired flavor while keeping it tender. This creates a foundation of smoky richness that the frying process enhances—giving you that perfect balance of crispy skin and juicy, flavorful meat. The low-and-slow smoke also ensures even cooking before the final crispy finish.
Can I use a different type of wood for smoking?
Applewood is ideal for its mild, sweet smoke that pairs beautifully with poultry, but hickory or pecan work too. Just avoid strong-flavored woods like mesquite, which can overpower the turkey’s natural taste. If using another wood, soak the chips for 2-4 hours to prevent flare-ups.
How do I prevent the oil from splattering when frying?
Always fry over medium-high heat and use a deep, heavy pot with a lid. Never overcrowd the oil—fry the turkey in batches if needed. A wire rack or cooling rack over a baking sheet helps drain excess oil while keeping the turkey elevated. Keep a lid nearby to smother any splatters if they occur.
What if my turkey isn’t crispy after frying?
Check your oil temperature—it should be 350°F. If too cool, the skin won’t crisp. Pat the skin dry thoroughly before frying, and avoid flipping too soon. For extra crispiness, sprinkle panko breadcrumbs over the hot turkey right after frying. Let it rest 5 minutes before serving to set the crunch.

Trained in classic French technique but raised on slow-cooked ribs and spicy rubs, she blends culinary skill with smoke and soul.
- Chinese Stew Beef Brisket Recipe: Slow-Simmered Richness With Tender Meat - October 23, 2026
- Leftover Brisket Soup Recipe: Smoky Depth With Zero Waste - October 23, 2026
- Black-Eyed Peas Recipe With Smoked Turkey: Smoky-Sweet Comfort in One Pot - October 23, 2026