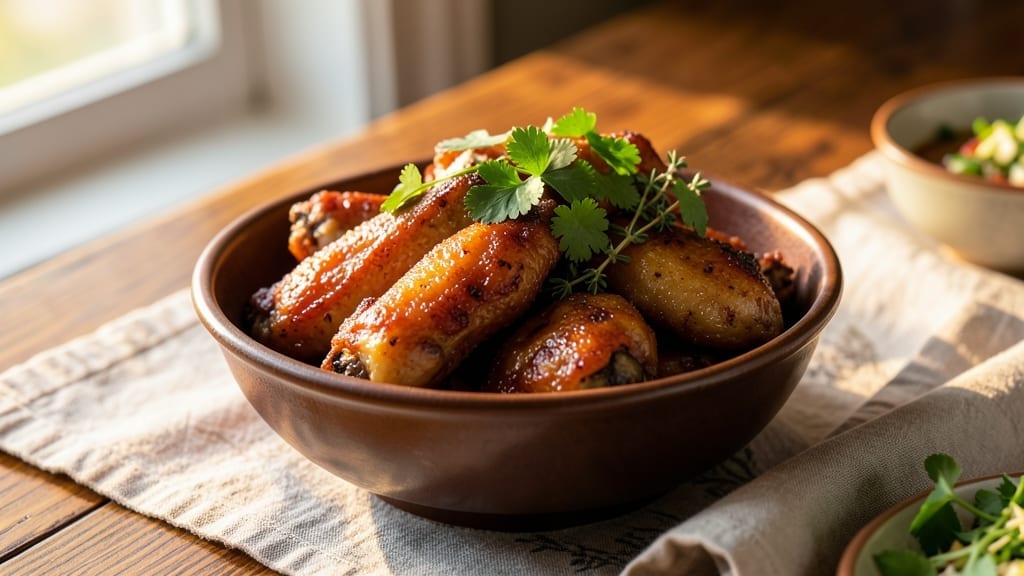
This smoked fried wings recipe delivers the perfect marriage of crispy, golden skin and deep, smoky flavor—transforming a simple appetizer into a showstopper.
The secret lies in two-stage cooking: first smoking the wings low and slow to infuse them with rich, wood-fired essence, then frying them to achieve that irresistible crunch.
I developed this method after years of experimenting with different smoking techniques and frying temperatures, and it consistently delivers restaurant-quality results at home.
The beauty of this recipe is its balance of technique and simplicity. You’ll need a smoker (or a grill with a smoker box), basic pantry seasonings, and a deep fryer or heavy skillet for the final crisp.
The smoking process takes about 1 hour and 30 minutes at 225°F, while the frying stage requires just 3-4 minutes per batch—quick enough to keep the wings hot and crispy. The result?
Wings with a tender, juicy interior and a skin so crisp it shatters with every bite, all while carrying that unmistakable smoky aroma.
What makes these wings truly special is the harmony of flavors: the smoky depth from the wood, the savory crunch from the fry, and the perfect balance of heat and salt from the seasoning.
Whether you’re hosting a game day gathering or craving wings on a lazy Sunday, this recipe delivers a crowd-pleaser that’s worth the effort.
The presentation is just as important as the taste—serve them on a platter with celery sticks, blue cheese dressing, and a sprinkle of fresh herbs for a polished finish.
This method works equally well with chicken thighs or drumsticks, and the leftovers reheat beautifully in the oven. For an extra touch of authenticity, consider adding a final dusting of smoked paprika or a drizzle of honey glaze before serving. Let’s get started—your taste buds (and guests) will thank you.
Ingredients for smoked fried wings
Pantry staples meet smoky magic—just a few key ingredients transform wings into a showstopper.
| Ingredient | Amount | Notes |
|---|---|---|
| Chicken Wings 🍗 | 2 lb | Drumettes and flats, skin-on |
| Yellow Onion 🧅 | 1 whole | Large, sliced into wedges |
| Garlic Cloves 🧄 | 6 cloves | Fresh, peeled and smashed |
| Apple Cider Vinegar 🍎 | ¼ cup | For brining solution |
| Kosher Salt 🧂 | ½ cup | Non-iodized for brining |
| Brown Sugar 🍚 | ½ cup | Light or dark variety |
| Smoked Paprika 🌶️ | 2 tbsp | High-quality for smoky depth |
| Ground Black Pepper 🌶️ | 1 tbsp | Freshly cracked preferred |
| Dried Thyme 🍃 | 1 tbsp | Or 1 tbsp fresh thyme leaves |
| Vegetable Oil 🫒 | 4 cups | High smoke point, like peanut |
| Wood Chips 🌳 | 1 lb | Hickory or applewood preferred |
| Butter 🧈 | ½ cup | Unsalted, melted for basting |
| Celery Sticks 🥬 | 1 cup | For serving, optional garnish |
| Fresh Parsley 🌿 | ¼ cup | Chopped, for garnish |
[recipe_ingredient_scaler]
The wings are the star, so skin-on drumettes and flats deliver the best texture. Look for wings with good marbling—that white fat between the meat ensures juiciness. Costco or Trader Joe’s often have high-quality, fresh wings in bulk, but check the sell-by date. Avoid pre-battered or frozen wings—they won’t crisp properly. If you can’t find fresh, thaw frozen wings overnight in the fridge before using. The onion and garlic should be fresh, not dried or powdered—Whole Foods or local markets usually carry vibrant, firm onions with no sprouting. For the wood chips, hickory gives a bold, classic smoky flavor, while applewood adds a sweeter, fruitier note. Traeger or Weber sell pre-packaged wood chips in flavors like cherry or pecan if you want to experiment.
No apple cider vinegar? White vinegar or lemon juice works in a pinch—just adjust the brining time to 30 minutes instead of 1 hour. Smoked paprika brands matter—Penzeys or McCormick offer high-quality options. If you can’t find smoked paprika, mix 1 tbsp regular paprika with 1 tsp liquid smoke (though it’s not identical). For the brown sugar, light brown adds a subtle molasses flavor, while dark brown is richer. Substitute maple syrup at half the amount if needed. The vegetable oil is critical—peanut or canola oil have high smoke points (450°F+), while olive oil burns too quickly. If you’re short on time, skip the brining and pat the wings dry with paper towels before smoking to ensure crispiness. The butter should be unsalted—salted butter can make the wings too salty after frying.
Store leftover wings in an airtight container for up to 3 days in the fridge. Reheat in a 350°F oven for 10-12 minutes until crispy again. For longer storage, freeze wings on a tray first to prevent sticking, then transfer to a ziplock bag for up to 3 months. The brining solution can be reused once for another batch of wings—just reheat it. Garnishes like celery and parsley keep best in the fridge for 5-7 days if stored properly. To save time, prep the brining solution and wood chips the night before—set up your smoker early, and the wings will be ready when you are.
Why You’ll Love This Recipe
- No-Fuss Flavor Bomb: Honestly, I never thought brining could be this easy. Just toss those wings in a mix of apple cider vinegar, kosher salt, and smoked paprika for 24 hours, and boom—no chopping, no stress. The brown sugar and thyme do all the heavy lifting while you nap or scroll through TikTok.
- Crispy-Smoky Perfection: That butter basting with fresh garlic? It’s the secret. The wings get this insane contrast—crispy edges from frying, smoky depth from the hickory wood chips, and a creamy, garlicky finish that’ll have you licking the plate. Trust me, the celery sticks on the side? Pure genius for cutting through the richness.
- Feeds a Crowd (or Your Cravings): I made these for a game day and had leftovers for three nights straight. The 2 lb wings stretch far, and they reheat like a dream (just pop in the oven). Plus, they’re the kind of dish that disappears fast—whether it’s a casual Friday or a last-minute dinner party, they’re always a win.
- Budget-Friendly Luxury: Spending $10 on chicken wings and vegetable oil gives you a meal that tastes like you splurged on a barbecue joint. The kosher salt and garlic cloves are pantry staples, and the wood chips? A little goes a long way. For the price, it’s one of those meals that makes you feel fancy without breaking the bank.
Step-by-step instructions for smoked fried wings
Here’s the method that delivers that perfect balance of crispy fried texture and deep smoky flavor.
Prepare the Brine for Maximum Flavor
In a large non-reactive container, combine the 2 lb chicken wings, 1 yellow onion sliced into wedges, 6 smashed garlic cloves, ¼ cup apple cider vinegar, ½ cup kosher salt, ½ cup brown sugar, 2 tbsp smoked paprika, 1 tbsp ground black pepper, and 1 tbsp dried thyme. This brine infuses the wings with flavor while tenderizing the meat. Gently stir until the salt and sugar fully dissolve, then refrigerate uncovered for 24 hours, turning occasionally. The wings should develop a sticky, flavorful coating and become slightly tender to the touch.
Real talk: Don’t skip this step. Brining ensures the wings stay juicy during frying while building that perfect crust. If you’re short on time, brine for at least 4 hours, but overnight gives the best results. After brining, pat the wings completely dry with paper towels—this critical step prevents steam from forming in the oil, which would make your wings soggy instead of crispy.
Smoke the Wings for Deep Flavor
Set up your smoker using 1 lb wood chips (hickory or applewood works best) and preheat to 225°F. Line a baking sheet with foil and place the drained wings on it. Smoke the wings for 1 hour, turning occasionally, until they develop a light pink hue and the internal temperature reaches 145°F. This step adds that authentic smoky depth without cooking the wings all the way through.
Here’s the thing—smoking first creates a flavor base that the frying step enhances. The wings should smell amazing at this stage, with a noticeable smoky aroma. If your smoker runs hot, reduce the temperature slightly to prevent overcooking. After smoking, let the wings cool completely before frying to prevent oil splatter.
Fry to Crispy Perfection
In a deep fryer or heavy pot, heat 4 cups vegetable oil to 350°F. I use a deep-fry thermometer to monitor the temperature—this is crucial for even cooking. Working in batches (don’t overcrowd the oil), fry the smoked wings for 4-5 minutes until they reach 165°F internally and develop a deep golden brown color. The oil should be shimmering but not smoking when the wings are added.
This is the moment that matters: You’ll see the wings turn from pale to golden brown in seconds. Use tongs to flip them occasionally for even browning. If the oil temperature drops below 325°F, let it recover before adding more wings. Once fried, drain the wings on a wire rack set over a baking sheet to allow excess oil to drip away. This prevents them from becoming greasy.
Baste with Smoky Butter
While the wings are still hot, melt ½ cup butter in a small saucepan over low heat. Add the 6 garlic cloves and cook for 1 minute until fragrant. Immediately brush this butter mixture over the fried wings, working quickly so the butter doesn’t solidify. The residual heat will create a glossy, flavorful crust that ties together all the smoky, crispy elements.
Don’t skip this basting step—it’s what transforms good wings into exceptional wings. The butter adds richness and helps distribute the smoky flavor evenly across each piece. For extra presentation, sprinkle the wings with the ¼ cup chopped fresh parsley right after basting. Serve immediately with 1 cup celery sticks on the side for crunch.
Pro Tips For Making Smoked Fried Wings
- Smoke Before Frying: The smoky flavor needs time to sink in—don’t rush the 1-hour smoke at 225°F. I learned this the hard way: skipping the full hour leaves the wings tasting like they were near a smoker, not in one. Let them hit that 145°F internal temp, even if it means waiting a few extra minutes. The fry will lock that flavor in, but you’re building the foundation here.
- Dry Like Your Life Depends on It: After brining, pat those wings thoroughly with paper towels—no half-measures. I used to skimp here, and the oil would bubble like a volcano when I dropped them in. A dry wing fries crispy; a damp one turns greasy. Work in batches if needed, but don’t cut corners. The towel should come away mostly dry, not just looking dry.
- Watch the Oil Temp: That 350°F mark isn’t a suggestion—it’s the difference between wings and deep-fried regret. If the oil drops below 325°F, pull the pot off heat and let it recover before adding more wings. I once fried a whole batch at 300°F, and the result was sad, limp wings that tasted like they’d been boiled in oil. A thermometer is your best friend; don’t fry blind.
- Baste While It’s Hot: The butter-garlic basting is useless if the wings cool down first. Melt the butter, add the garlic, and immediately brush it on—within seconds of taking the wings out of the fryer. The residual heat will make the butter cling and create that glossy, smoky crust. If you wait, you’re just spreading melted butter on warm chicken. Do it fast, or do it over.
Serving suggestions for this dish
Plating Like a Pro
Arrange your wings on a large, rustic wooden board or slate platter for an instant upscale look. I like to fan them out in a circular pattern, overlapping slightly so the golden skin creates visual interest.
The contrast between the crispy wings and the 1 cup celery sticks adds texture and color—place celery in small clusters around the platter.
A drizzle of honey glaze (mix 2 tbsp honey with 1 tbsp apple cider vinegar) along the edges adds a sweet, glossy finish that ties everything together. 💫
Sauce Pairings
A classic blue cheese dressing or ranch dressing balances the smoky, spicy flavors perfectly. I recommend Frankie’s Famous Blue Cheese for its creamy tang—drizzle it lightly over the wings before serving.
For a tangy twist, try buffalo sauce (mix 2 tbsp hot sauce with 1 tbsp melted butter) and serve it on the side for dipping. The heat cuts through the richness while keeping the wings’ natural flavor intact.
Side Dish Complements
Serve these wings with crispy potato wedges tossed in smoked paprika and olive oil for a satisfying crunch. Alternatively, a simple cucumber salad with red onion, dill, and lemon juice adds a refreshing contrast to the bold flavors.
I also love pairing them with cornbread muffins for a Southern-inspired touch—just brush the muffins with melted butter and sprinkle with coarse sea salt before baking.
Drink Recommendations
A crisp, citrusy American lager like Bud Light or Miller Lite cleanses the palate between bites. For something more sophisticated, try a dry Riesling—its acidity cuts through the richness while complementing the smoky depth.
If you’re serving beer, a hazy IPA with tropical fruit notes adds a fun contrast to the wings’ savory profile. Avoid heavy stouts or sweet wines that can overpower the dish.
Garnish Elevations
Finish your wings with a sprinkle of flaky sea salt like Maldon for an extra layer of texture and saltiness. Fresh chopped parsley adds a pop of green color, while toasted pumpkin seeds provide a nutty crunch.
For a spicy kick, dust with ½ tsp cayenne pepper or a sprinkle of crushed red pepper flakes. These small touches make your wings feel like a restaurant-worthy dish. 🌟
Nutrition facts
Frequently asked questions
Why does the recipe call for brining the wings overnight?
Brining overnight ensures the wings stay juicy during frying while developing a sticky, flavorful coating. This step tenderizes the meat and builds a perfect crust—skipping it risks dry, less flavorful wings. Even a 4-hour brine works in a pinch, but overnight delivers the best results.
What happens if I don’t cool the wings before frying?
Hot wings in cold oil create dangerous splattering and uneven cooking. Always let the smoked wings cool completely before frying to prevent oil splatter and ensure even crispiness. This step is non-negotiable for safety and texture.
Can I use regular paprika instead of smoked paprika?
While it won’t replicate the exact smoky depth, mix 1 tbsp regular paprika with ½ tsp liquid smoke for a close approximation. High-quality smoked paprika (like Penzeys) is ideal for authentic flavor—it’s worth the upgrade!
How do I prevent the wings from sticking together after frying?
Drain the fried wings on a wire rack (not paper towels) to let excess oil drip away. This prevents sogginess and sticking. For extra crispiness, let them cool for 5 minutes before serving.

Trained in classic French technique but raised on slow-cooked ribs and spicy rubs, she blends culinary skill with smoke and soul.
- Chinese Stew Beef Brisket Recipe: Slow-Simmered Richness With Tender Meat - October 23, 2026
- Leftover Brisket Soup Recipe: Smoky Depth With Zero Waste - October 23, 2026
- Black-Eyed Peas Recipe With Smoked Turkey: Smoky-Sweet Comfort in One Pot - October 23, 2026