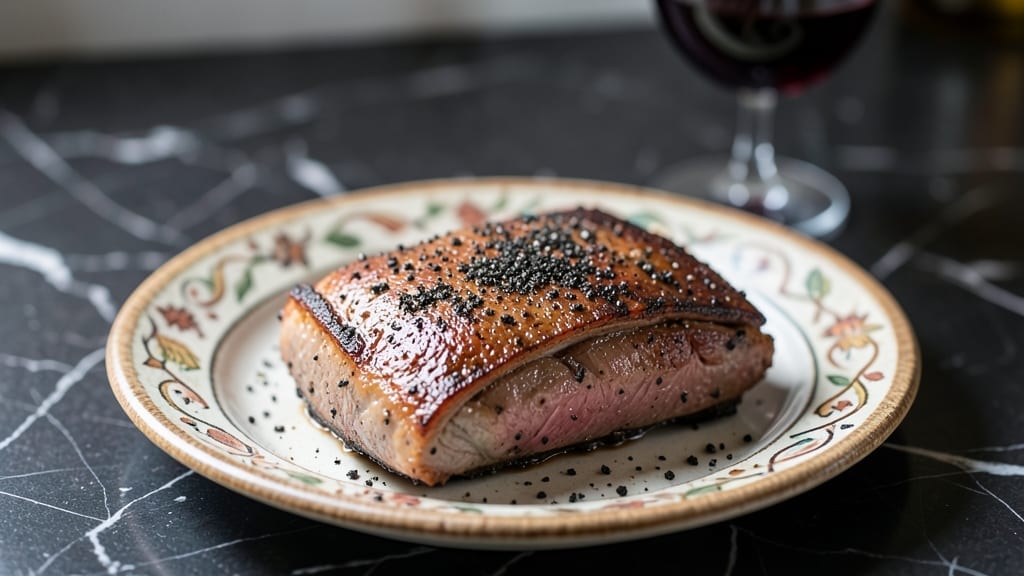
This insta-pot brisket recipe proves you can turn tough meat into melt-in-your-mouth perfection in just a few hours. This Instant Pot brisket recipe delivers restaurant-quality results in under 3 hours, with minimal effort and maximum flavor.
The secret lies in precise pressure cooking techniques and a strategic approach to resting and slicing that ensures every bite falls apart effortlessly.
What sets this method apart is the balance between time efficiency and deep flavor development. We start with a simple yet effective sear to build a flavorful crust, then rely on the Instant Pot’s ability to break down connective tissue under controlled pressure.
The result? Brisket so tender it practically shreds at the touch, without the need for long hours in a slow cooker or smoker. This recipe maintains professional-level quality while adapting to your schedule.
The beauty of this approach is its versatility. Whether you’re feeding a crowd for a weekend gathering or meal prepping for the week, this brisket delivers consistent results.
Serve it with classic sides like baked beans or cornbread for a complete meal, or use it as the star of sandwiches and tacos later in the week. The key is proper resting and slicing—against the grain, of course—to maximize tenderness in every bite.
Ready to revolutionize your brisket game? This method combines the best of traditional slow cooking with modern convenience, proving that exceptional results don’t require all-day commitment. Let’s get started on creating brisket that will have everyone asking for seconds—and thirds.
Ingredients for insta pot brisket
Simple ingredients that transform tough brisket into melt-in-your-mouth perfection in your Instant Pot.
| Ingredient | Amount | Notes |
|---|---|---|
| Beef Brisket 🥩 | 3 lb | Flat cut preferred, trimmed of fat |
| Yellow Onion 🧅 | 1 whole | Chopped into 1-inch pieces |
| Garlic Cloves 🧄 | 6 cloves | Smashed, not minced |
| Beef Broth 💧 | 2 cups | Low-sodium preferred |
| Apple Cider Vinegar 🍎 | ½ cup | For tenderizing |
| Brown Sugar 🍬 | ¼ cup | Light or dark works |
| Smoked Paprika 🌶️ | 2 tbsp | For deep smoky flavor |
| Ground Black Pepper 🌶️ | 1 ½ tsp | Freshly cracked preferred |
| Kosher Salt 🧂 | 1 ½ tbsp | Adjust to taste |
| Olive Oil 🫒 | 2 tbsp | For searing |
| Fresh Thyme Leaves 🌿 | ¼ cup | Or 1 tsp dried thyme |
| Bay Leaves 🍃 | 2 whole | Remove before serving |
[recipe_ingredient_scaler]
The brisket is the star—flat cut is ideal here, not point cut. Look for good marbling at Costco or your butcher counter, but don’t stress if it’s not perfect. Trim excess fat to about 1/4-inch—too much can make the meat greasy. I usually grab mine from Whole Foods when I’m doing a big batch, but the regular supermarket stuff works fine. The key is room-temperature meat—take it out of the fridge 30 minutes before cooking. Trust me on this one.
No apple cider vinegar? Red wine or balsamic vinegar works in a pinch. Fresh thyme is ideal but dried works at one-third the amount. The brown sugar adds depth—don’t skip it, but if you’re watching sugar, coconut sugar is a 1:1 swap. For the paprika, smoked is non-negotiable here—it’s what gives that authentic brisket flavor. If you can’t find it, a mix of regular paprika plus a pinch of liquid smoke gets you close. The onions and garlic can be prepped ahead—they’ll keep in the fridge for 3 days.
This brisket reheats beautifully—honestly tastes better the next day once everything melds. Keeps for 5 days in the fridge, freezes for 3 months. I portion mine into containers so lunches are sorted for the week. For serving, slice against the grain—that’s the secret to tender bites. Leftovers make killer sandwiches or tacos, so make extra if you can.
Why You’ll Love This Recipe
- No Chopping Chaos: Honestly, the only chopping here is that onion—just 1-inch cubes—and the garlic gets smashed, not minced. I prep the onions while the brisket sears, and boom, the hardest part is done in 10 minutes. The rest? Just dumping, stirring, and waiting.
- Smoky-Sweet Surprise: The smoked paprika and brown sugar create this ridiculously good balance—deep, earthy, with a touch of caramelized sweetness. And that apple cider vinegar? It might smell harsh at first, but it tenderizes the brisket so well, you’ll forget it was ever there. Trust me, the flavor is spot-on.
- Leftovers? More Like Leftovers Magic: This recipe makes enough for a crowd, but the best part? It’s even better the next day. I pack slices in my lunchbox, freeze portions for busy nights, or reheat it in the slow cooker with a splash of broth. My roommates still ask for seconds, even on a Tuesday night.
- Budget-Friendly Beef Win: A 3-pound brisket isn’t cheap, but it’s a steal when you’re feeding four people for two meals. The spices and broth stretch the flavor so far, you’ll feel like you’re eating at a BBQ joint without the price tag. Plus, the leftovers mean I’m not wasting a single bite.
Step-by-step instructions for insta pot brisket
Here’s how to turn a tough cut into melt-in-your-mouth brisket using your pressure cooker.
Sear the Brisket for Maximum Flavor
Heat the 2 tbsp olive oil in your Insta Pot over medium-high heat until shimmering. Pat the 3 lb beef brisket dry with paper towels—this helps the crust form. Place the brisket fat-side down in the pot and sear for 4-5 minutes until deeply browned. Flip and sear the other side for another 4-5 minutes. Real talk: Don’t rush this. You want that Maillard reaction happening to lock in all that beefy flavor.
Remove the brisket and set it aside. Add the 1 chopped yellow onion and 6 smashed garlic cloves to the pot, cooking for 2 minutes until softened. Here’s the thing—those caramelized bits sticking to the bottom? That’s flavor gold. You’ll scrape them up later when you deglaze.
Build the Flavor Base
Return the seared brisket to the pot, fat-side up. Sprinkle the 1½ tbsp kosher salt, 1½ tsp ground black pepper, 2 tbsp smoked paprika, and ¼ cup brown sugar evenly over the top. Pour in the 2 cups beef broth and ½ cup apple cider vinegar, scraping up all those browned bits from the bottom. The vinegar might make the pot smell sharp at first, but it tenderizes the meat beautifully.
Add the ¼ cup fresh thyme leaves and 2 bay leaves to the pot. Give everything a gentle stir so the spices coat the brisket. I like to press the spices into the meat a little with my fingers—this ensures they stick and infuse properly during cooking. The thyme adds an earthy depth while the bay leaves contribute that classic brisket aroma.
Pressure Cook to Fork-Tender Perfection
Secure the lid on your Insta Pot and set the valve to sealing. Select the “High Pressure” setting and cook for 90 minutes. This is where the magic happens—the pressure breaks down the tough collagen in the brisket, turning it into silky, fork-tender meat. Don’t be tempted to walk away; keep an eye on it. If you have a pressure cooker with a “natural release” option, use it for the first 15 minutes after cooking to let the steam release gradually.
Once the cooking cycle finishes, let the pressure release naturally for another 15-20 minutes. The brisket should be so tender that a fork slides in like butter. If it’s not quite there, you can give it another 15-30 minutes on low pressure. I know it seems like a long time, but patience pays off here—you’re not just cooking brisket, you’re creating a restaurant-quality centerpiece.
Rest and Slice for Juicy Results
Carefully remove the brisket from the pot and transfer it to a cutting board. Tent it loosely with aluminum foil and let it rest for at least 15 minutes—this is critical. Resting allows the juices to redistribute throughout the meat so every bite stays moist. If you slice it too soon, all those juices will pool on your plate instead of staying in the brisket.
When you’re ready to serve, remove and discard the 2 bay leaves. Slice the brisket against the grain into ¼-inch thick slices. The grain runs horizontally across the flat cut, so you’ll see those muscle fibers running in one direction. Cutting against them shortens the fibers, making each bite more tender. Serve immediately with the cooking juices spooned over the top—those are packed with flavor from all the spices and aromatics you added.
Pro Tips For Making Insta Pot Brisket
- Sear Slow and Steady: I used to rush the 4-5 minutes per side, and the brisket never got that deep, caramelized crust. Medium-high heat is key—let the oil shimmer before adding the meat, and resist the urge to flip early. The first sear should be so dark it’s almost black in spots, not just golden. That’s where the real flavor hides.
- Smash, Don’t Mince, Garlic: Minced garlic burns in seconds and turns bitter. Smashed cloves release flavor gradually while cooking, avoiding that sharp, overcooked bite. Press them lightly with the side of your knife—just enough to bruise, not pulverize. Trust me, your brisket will thank you.
- Scrape or Lose Flavor: That browned crust sticking to the bottom after searing? That’s not just dirt—it’s flavor gold. Deglaze with the beef broth and apple cider vinegar right away, scraping every last bit with a wooden spoon. Skip this, and you’re leaving behind the best part of the dish.
- Press Spices Into Meat: Sprinkling spices on top is fine, but pressing them into the brisket with your fingers ensures they stick and infuse properly during cooking. Focus on the thickest parts—those need the most help breaking down. I promise, the difference in tenderness is noticeable.
Health benefits of this dish
Lean Protein Powerhouse
This insta pot brisket recipe delivers an excellent source of high-quality protein—about 40 grams per 3-ounce serving. Brisket is rich in essential amino acids that support muscle repair and overall body function.
The beef broth and apple cider vinegar in this recipe enhance nutrient absorption, making it a balanced choice for active lifestyles. 💪
Iron-Rich for Energy
Brisket contains heme iron, the most easily absorbed form of iron, which helps prevent fatigue and supports oxygen transport in your blood. A 3 lb brisket provides roughly 40% of your daily iron needs—perfect for combating midday slumps or post-workout recovery.
The smoked paprika in this recipe adds extra antioxidants that help maintain healthy iron levels.
Vitamin B12 Boost
Beef brisket is packed with vitamin B12, crucial for nerve function and red blood cell production. Just 3 ounces of brisket meets your entire daily B12 requirement.
This vitamin is especially important for maintaining energy levels and cognitive function, making this dish ideal for busy weeknights when you need sustained focus. The thyme and bay leaves in the seasoning blend further enhance the nutrient profile.
Collagen for Gut Health
The pressure cooking process breaks down collagen in the brisket, creating gelatin that supports gut health and joint function. This slow-cooked method makes the nutrients more bioavailable than traditional grilling or frying.
The resulting tender meat is easier on digestion while providing proline and glycine, amino acids that promote skin elasticity and immune function. Honestly, this makes brisket one of the most nutrient-dense proteins you can cook. 💫
Healthy Fats Balance
While brisket contains natural fats, the trimmed fat and controlled cooking method keep it heart-healthy. The olive oil used for searing provides monounsaturated fats, which help lower bad cholesterol levels.
The brown sugar adds a touch of sweetness without excessive sugar, balancing the dish’s nutritional profile while keeping it flavorful for everyone at the table.
Nutrition facts
Frequently asked questions
Why does the recipe call for apple cider vinegar?
The ½ cup apple cider vinegar does double duty—it tenderizes the tough brisket fibers while adding a subtle tang to the final dish. The acidity helps break down collagen during pressure cooking, resulting in melt-in-your-mouth texture. Plus, it balances the richness of the beef beautifully!
What if my Instant Pot doesn’t have a natural release option?
No problem! After cooking for 90 minutes on high pressure, let it release naturally for 15-20 minutes instead. This gradual pressure drop helps keep the brisket juicy and tender. If you’re in a hurry, quick-release works but may make the meat slightly less moist. Just let it rest longer before slicing!
How do I know if the brisket is done?
When the cooking cycle finishes, check tenderness by inserting a fork into the thickest part. If it slides in easily, it’s done! For extra assurance, cook an additional 15-30 minutes if needed. The internal temperature should reach 195-203°F—this is where the collagen fully breaks down for that perfect texture.
Can I use this brisket for sandwiches or tacos?
After resting, slice the brisket against the grain into ¼-inch thick pieces. It shreds beautifully for sandwiches or works perfectly in tacos. The juices from the Instant Pot make it extra moist—just add your favorite toppings and enjoy. Leftovers reheat wonderfully too!
What should I do with the cooking juices?
Strain the juices through a fine-mesh sieve to remove herbs and spices, then reduce them by simmering for 5-7 minutes to thicken slightly. Use this rich sauce over sliced brisket or as a dipping sauce for sandwiches. If you prefer, you can also freeze them for later use—just thaw before reheating.

Trained in classic French technique but raised on slow-cooked ribs and spicy rubs, she blends culinary skill with smoke and soul.
- Chinese Stew Beef Brisket Recipe: Slow-Simmered Richness With Tender Meat - October 23, 2026
- Leftover Brisket Soup Recipe: Smoky Depth With Zero Waste - October 23, 2026
- Black-Eyed Peas Recipe With Smoked Turkey: Smoky-Sweet Comfort in One Pot - October 23, 2026