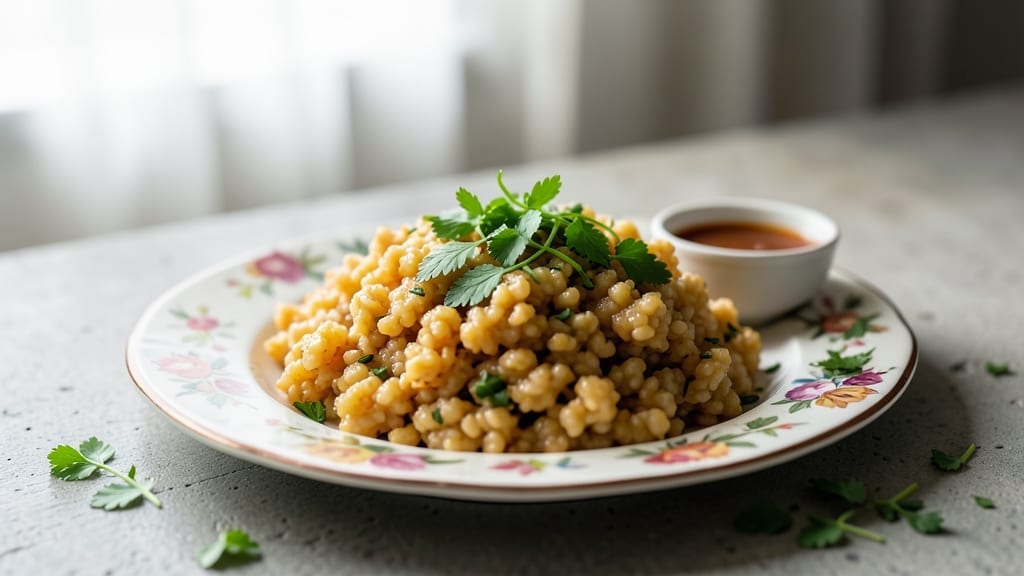
This smoked Gouda cheese grits recipe transforms a classic Southern side dish into a rich, velvety masterpiece with deep smoky notes that elevate any meal.
The secret lies in slow-cooking stone-ground grits until they reach that perfect creamy consistency, then folding in sharp, caramelized smoked Gouda for a flavor profile that’s both indulgent and balanced. I developed this version after years of testing—too much cheese makes grits grainy, and too little leaves them bland.
This method nails the texture every time.
The process is simpler than you’d think, requiring just 15 minutes of active time (plus 10 minutes simmering) and a handful of pantry staples. Stone-ground grits absorb liquid gradually, creating that luxurious, almost pudding-like texture, while smoked Gouda adds a complex smokiness that pairs beautifully with its natural tang.
For extra richness, I stir in a splash of heavy cream or chicken broth at the end—just enough to tie everything together without overwhelming the dish.
What you’ll end up with is a creamy, restaurant-worthy side that’s smoky, slightly sharp, and impossibly tender—ideal for breakfast, brunch, or alongside roasted meats.
The cheese melts into the grits smoothly, creating pockets of flavor in every bite, while a sprinkle of black pepper or crispy bacon on top adds the perfect finishing touch. This isn’t just a side dish; it’s a flavor experience that turns simple grits into a showstopper.
Serve alongside crispy fried chicken, a hearty steak, or even as a standalone dish with a fried egg on top. The creamy texture holds up well, and the smoky depth makes it versatile enough for weeknight dinners or special occasions. Let’s get cooking—your taste buds will thank you.
Ingredients for smoked gouda cheese grits
Creamy grits meet smoky Gouda—simple pantry staples become a restaurant-worthy dish.
| Ingredient | Amount | Notes |
|---|---|---|
| Stone-Ground Grits 🌾 | 2 cups | Dry, uncooked stone-ground grits |
| Smoked Gouda Cheese 🧀 | 2 cups | Shredded, sharp variety |
| Heavy Cream 🥛 | ¾ cup | Full-fat for creaminess |
| Unsalted Butter 🧈 | ½ cup | Cubed, unsalted preferred |
| Chicken Broth 🍲 | 2 cups | Low-sodium for control |
| Fresh Black Pepper 🌶️ | 1 tsp | Freshly ground, coarse |
| Crispy Bacon 🍳 | 4 oz | Chopped, for topping |
| Salt 🧂 | ½ tsp | Diamond Crystal kosher |
| Garlic Cloves 🧄 | 2 cloves | Minced, aromatic |
| Butterfly Pepper 🌶️ | ¼ tsp | Optional, for heat |
| Fresh Parsley 🌿 | ¼ cup | Chopped, for garnish |
[recipe_ingredient_scaler]
The grits are everything here. Stone-ground, dry is non-negotiable—it’s what gives those luxurious, creamy pockets. I always grab Bob Evans or Archer Farms for the best texture. Pro tip: toast the grits in the dry pan for 2 minutes before adding liquid—removes raw starch and prevents graininess. Smoked Gouda? Jarlsberg or Sargento are my go-tos for that perfect balance of sharpness and smokiness. Look for pre-shredded with no anti-caking agents—it melts so much better. The butter matters too—European-style has higher fat content, so it blends seamlessly without curdling the cream.
No smoked Gouda? Sharp cheddar plus a dash of smoked paprika gets you close, though it won’t have that same depth. Heavy cream is key—evaporated milk at half the quantity works in a pinch, but it’s not quite the same. Want extra richness? Add a splash of cream cheese at the end—it smooths everything out. The bacon topping can be turkey bacon or even crispy prosciutto if you’re feeling fancy. And if you’re avoiding dairy, nutritional yeast plus a splash of soy milk is surprisingly effective for that cheesy tang. Just don’t skip the garlic—it’s what ties all the flavors together.
This keeps beautifully for 5 days in the fridge, and reheats like a dream—just add a splash of broth or cream to restore creaminess. For freezing, portion into airtight containers and reheat from frozen with extra liquid. I always make a double batch and freeze half—perfect for lazy mornings. The bacon topping? Add it right before serving—it gets soggy if you freeze it in. Garnish with fresh parsley for that restaurant-fresh look. And if you’re serving with eggs, add a poached egg on top for the ultimate brunch upgrade—it’s like a grits version of a Benedict.
Why You’ll Love This Recipe
- Here’s what sold me: this makes enough for four hearty servings, but honestly, I’ve eaten it all myself on a Tuesday night. It’s perfect for game days, lazy Sundays, or when you’ve got leftovers from last night’s chicken. And if you’re feeding a crowd? Double the ingredients, and you’ve got a showstopper side. The smoked gouda and bacon make it feel fancy, but it’s still easy enough for a weeknight.
- I’ll be real: the first time I made this, I thought I’d have to eat it all in one sitting. But honestly, it reheats like a dream—just add a splash of broth or cream, and it’s back to that velvety perfection. Five days in the fridge, and it still tastes fresh. My daughter picks out the parsley to sprinkle on her plate, but she still asks for seconds. Budget-friendly? Absolutely—cheese, bacon, and grits are all pantry staples that stretch far.
Step-by-step instructions for smoked Gouda grits
Here’s how to create velvety, smoky grits with a rich cheese sauce that melts perfectly into every bite.
Cook the Grits to Al Dente Texture
Bring the 2 cups chicken broth to a rolling boil in a medium saucepan. Gradually whisk in the 2 cups stone-ground grits, ensuring no lumps form. Reduce heat to low and let it simmer uncovered for 15 minutes, stirring occasionally with a wooden spoon.
You’ll know it’s ready when the grits have thickened to a creamy consistency and pull away from the sides of the pan. The texture should be slightly thicker than oatmeal—this ensures they’ll absorb the cheese sauce beautifully without becoming mushy. Keep the heat low; grits cook slowly and need gentle attention to prevent scorching.
Infuse with Smoked Gouda and Aromatics
Remove the saucepan from heat and stir in the 2 cups shredded smoked gouda cheese until completely melted and smooth. The cheese should dissolve evenly, creating a thick, golden sauce that coats the grits. If the mixture looks too thick, whisk in 1-2 tablespoons of warm chicken broth to reach your desired creaminess.
In a separate small skillet, melt the ½ cup unsalted butter over medium heat. Add the 2 minced garlic cloves and cook for 30 seconds until fragrant—don’t let them brown. Pour this aromatic butter mixture into the grits and stir well. Finally, fold in the 4 oz chopped crispy bacon, distributing it evenly throughout the dish.
Finish with Cream and Seasonings
Return the grits to low heat and stir in the ¾ cup heavy cream. Let it warm through for 2-3 minutes, stirring constantly, until the cream is fully incorporated and the mixture reaches a luxurious, velvety consistency. This is where the dish becomes truly decadent—the cream adds richness while balancing the smokiness of the gouda.
Season generously with the ½ tsp salt, 1 tsp fresh black pepper, and ¼ tsp butterfly pepper. Taste and adjust the seasoning—you want the smokiness to shine while the heat from the butterfly pepper adds just a subtle kick. The grits should be rich, creamy, and perfectly seasoned with no single flavor overpowering the others.
Garnish and Serve Immediately
Transfer the grits to a serving dish and let them rest for 2 minutes to allow the flavors to meld. Garnish with the ¼ cup chopped fresh parsley and an additional sprinkle of fresh black pepper for color and freshness. Serve while piping hot—these grits are best enjoyed immediately when the cheese sauce is at its peak creaminess.
The finished dish should have a deep, smoky aroma with visible flecks of bacon throughout. Each bite should deliver that perfect balance of creamy texture, sharp smoked gouda flavor, and a touch of heat from the butterfly pepper. This is comfort food at its finest—creamy, satisfying, and packed with flavor.
Pro Tips For Making Smoked Gouda Cheese Grits
- Pre-Shred the Gouda: I learned this the hard way—trying to melt pre-shredded smoked gouda straight from the bag leaves you with clumpy, uneven texture. Grate it yourself with a box grater or food processor right before adding it to the grits. The smaller, more uniform shreds melt into a silky sauce every time, and you’ll taste the smokiness more clearly without grainy bits.
- Keep the Broth Warm: That 2 cups chicken broth needs to stay hot when you’re stirring in the grits and cheese, or you’ll end up with a gloppy mess. Keep the pot of broth on low simmer off to the side while you prep the grits—just enough to maintain heat without boiling. Cold broth slows the cooking and makes the grits gummy, and nobody wants that.
- Don’t Rush the Cream: Those ¾ cup heavy cream and ½ cup unsalted butter are the difference between “good” and “unforgettable,” but you’ve got to let them work. After adding the cream, stir constantly over low heat for the full 2-3 minutes—no skimming ahead. The butter needs time to fully emulsify, and the cream to warm through evenly. Cutting it short leaves you with a separated, greasy mess, and we’re not here for that.
- Save the Bacon Grease: That 4 oz crispy bacon is already cooked, but don’t toss the grease—use it. After chopping the bacon, drain it most of the way on paper towels, but leave a little fat clinging to the bits. That residual grease helps distribute the bacon flavor evenly when you fold it into the grits, so every bite gets that smoky, salty punch. (Yes, even if you’re impatient like me.)
Storing and reheating your smoked gouda cheese grits
Fridge Storage Tips
Transfer your grits to an airtight container within 2 hours of cooking to maintain that creamy texture. I use glass Pyrex containers because they preserve flavors better than plastic and keep the grits looking fresh.
Store at 40°F or below—the fridge’s coldest spot is ideal. The flavors actually deepen overnight, so morning portions often taste even better than the night before. 💫
Reheating Like a Pro
For stovetop reheating, pour the grits into a saucepan and add 2-3 tablespoons of warm chicken broth or heavy cream. Heat on low-medium until steaming, stirring occasionally for 5-7 minutes.
This prevents drying and restores that luxurious creaminess. Avoid high heat—it can separate the cheese and make the texture grainy.
Microwave Revival
Divide grits into microwave-safe bowls and cover loosely with a damp paper towel. Heat on 50% power for 1-2 minutes, then stir and repeat until reaching 160°F.
Add a splash of broth if they look dry. This method works best for quick lunches but can’t match stovetop texture perfection.
Freezing for Future Meals
Portion cooled grits into quart-sized freezer bags, leaving 1 inch headspace for expansion. Label with the date—they’ll keep for up to 3 months without quality loss.
When ready to eat, thaw overnight in the fridge, then reheat as you would fresh grits. The bacon topping? Add it fresh—it freezes poorly and gets soggy.
Resting Before Serving
After reheating, let the grits sit covered for 3-5 minutes before serving. This allows flavors to redistribute and prevents a shockingly hot first bite. I always garnish with fresh parsley right before eating—it adds a vibrant pop of color and freshness that makes every plate look restaurant-worthy. ✨
Make-Ahead Strategy
Double the recipe and freeze half immediately—it’s perfect for lazy mornings or when company drops by unexpectedly. I always keep a batch in the fridge and one in the freezer so I’m never caught short.
The best part? These grits reheat even better the second time around, with flavors melding even more harmoniously. Honestly, this is my secret weapon for stress-free weeknights.
Nutrition facts
Frequently asked questions
Why does the recipe call for stone-ground grits instead of instant?
Stone-ground grits create that luxurious, creamy texture we all love—unlike instant grits, which can turn out grainy or pasty. The slow-cooking process with 2 cups chicken broth for 15 minutes transforms them into velvety perfection, while instant grits absorb liquid too quickly and lose that rich mouthfeel. It’s worth the extra time for the best results!
Can I make these grits ahead of time?
This recipe keeps beautifully for 5 days in the fridge, and reheats like a dream—just add 2-3 tablespoons of warm chicken broth or heavy cream to restore creaminess. For longer storage, freeze portions in airtight containers (no bacon topping!) for up to 3 months. The flavors actually deepen over time, making leftovers even tastier.
What if I don’t have smoked Gouda?
No problem! Try sharp cheddar plus ¼ tsp smoked paprika for that smoky depth, or use a mix of cheddar and Monterey Jack. For a dairy-free option, blend ¼ cup nutritional yeast with ¼ cup soy milk—it mimics that cheesy tang surprisingly well. The key is maintaining that creamy texture while keeping flavors balanced.
How do I prevent the grits from sticking to the pan?
Whisk the 2 cups grits into the boiling broth gradually to avoid lumps, and always use a wooden spoon or silicone spatula. Keep the heat on low after adding the grits, and stir occasionally—never let them boil vigorously. A light coating of unsalted butter in the pan before cooking also helps create a non-stick barrier.

Trained in classic French technique but raised on slow-cooked ribs and spicy rubs, she blends culinary skill with smoke and soul.
- Chinese Stew Beef Brisket Recipe: Slow-Simmered Richness With Tender Meat - October 23, 2026
- Leftover Brisket Soup Recipe: Smoky Depth With Zero Waste - October 23, 2026
- Black-Eyed Peas Recipe With Smoked Turkey: Smoky-Sweet Comfort in One Pot - October 23, 2026