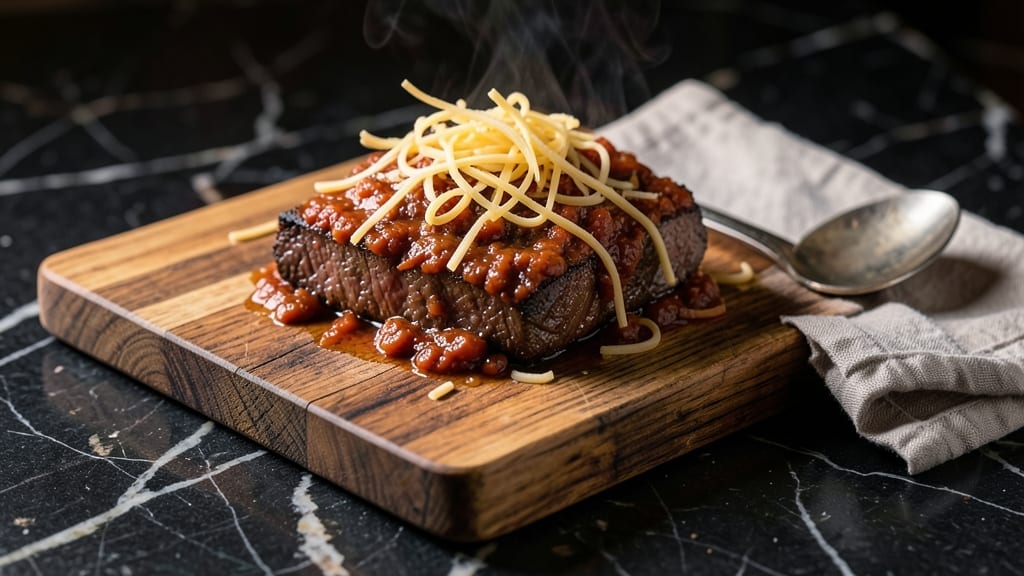
This smoked tri-tip chili recipe transforms tough beef into melt-in-your-mouth richness, where deep smoky flavors marry perfectly with spiced chili. The key? Slow-smoking the tri-tip first, then shredding it into a hearty chili base that simmers into bold, complex harmony.
I developed this after realizing French technique could elevate my backyard smoke sessions—now it’s a crowd-pleaser every time.
The process starts with a dry rub on the tri-tip, then smokes it low and slow until tender. While it rests, we build the chili base with onions, garlic, and spices that deepen as they simmer.
The result isn’t just chili—it’s a restaurant-quality dish where smoky beef meets spiced vegetables in every bite. Ready in under 3 hours, this recipe delivers depth without complexity.
By the end, you’ll have tender, shredded beef swimming in a rich, smoky broth with perfectly caramelized edges. The aroma alone will draw everyone to the table, and the texture—juicy beef, tender vegetables, and a sauce that clings to every spoonful—makes it worth every minute.
Serve with cornbread or crusty rolls to soak up every last drop.
This isn’t just chili—it’s a showstopper that proves slow cooking and bold flavors can come together in one unforgettable dish. Whether you’re feeding a crowd or treating yourself to a weekend project, this recipe delivers professional results with minimal fuss. Let’s get started!
Ingredients for smoked tri tip chili
Just the right mix of smoky beef and spiced vegetables for a chili that tastes like a backyard feast.
| Ingredient | Amount | Notes |
|---|---|---|
| Tri-Tip Roast 🥩 | 3 lb | Center-cut for tenderness |
| Yellow Onions 🧅 | 2 whole | Medium, diced for caramelizing |
| Garlic Cloves 🧄 | 6 cloves | Peeled, minced for depth |
| Canned Kidney Beans 🌾 | 2 cans | 15 oz each, drained and rinsed |
| Canned Black Beans 🌾 | 2 cans | 15 oz each, drained and rinsed |
| Diced Tomatoes 🍅 | 2 cans | 28 oz can, fire-roasted preferred |
| Tomato Paste 🍅 | ½ cup | For rich, concentrated flavor |
| Chili Powder 🌶️ | 2 tbsp | Smoked variety for depth |
| Ground Cumin 🌿 | 1 ½ tbsp | Toasted for warmth |
| Paprika 🌶️ | 1 tbsp | Smoked for smoky aroma |
| Dried Oregano 🍃 | 1 tsp | Mexican preferred |
| Salt 🧂 | 1 ½ tsp | Diamond Crystal kosher |
| Black Pepper 🌶️ | 1 tsp | Freshly cracked |
| Beef Broth 💧 | 2 cups | Low-sodium preferred |
| Dark Brown Sugar 🍚 | 1 tbsp | For subtle sweetness |
[recipe_ingredient_scaler]
The tri-tip is the star—look for center-cut at Costco or your local butcher for the best marbling. A 3-pound roast serves six generously, but don’t skimp on quality. The beans? Low-sodium canned saves time, but rinse them well to cut excess salt. Fire-roasted diced tomatoes add smoky depth without extra effort. For the spices, Penzeys or bulk bins at natural markets give the most flavor—avoid pre-mixed chili powders, which often lack freshness.
No tri-tip? Chuck roast works in a pinch, but it’ll be tougher. Swap kidney beans for pinto beans if that’s what’s on hand. Short on tomato paste? Extra diced tomatoes (another can) will do, but you’ll lose that concentrated richness. The brown sugar balances the heat—white sugar is fine, but dark adds a caramel note. For extra smokiness, add half a chipotle pepper in adobo sauce, minced (trust me, it’s worth it). If you’re short on time, pre-chopped onions from the store save minutes, though fresh always tastes better.
This chili tastes even better the next day as flavors meld. Store in airtight containers for 5-6 days in the fridge or freeze portions for up to 3 months. I always double the batch—leftovers make perfect lunches or a quick dinner reheated with a splash of broth. The tri-tip rub can be prepped a day ahead, so no last-minute stress. Serve with crusty bread or cornbread to soak up every last bit of that smoky sauce.
Why You’ll Love This Recipe
- Tri-Tip Triumph: That smoky, tender tri-tip pulling apart like butter? It’s the star of the show—no fancy cuts required. The 3 lb center-cut roast cooks low and slow for 3-4 hours, and the result is meat so juicy it practically melts in your mouth. No dry, tough tri-tip here—just restaurant-quality texture with minimal effort.
- Smoky Depth in Minutes: The magic happens when you toast those spices—2 tbsp chili powder, 1.5 tbsp cumin, and smoked paprika—right in the Dutch oven. That 1-minute toast? Game-changer. The aroma alone will make your kitchen smell like a tailgate, and the depth of flavor is ridiculously good. Even the fire-roasted diced tomatoes add a caramelized kick that ties everything together.
- Leftovers That Last: Between the beans, broth, and slow-cooked meat, this chili stretches way further than your average recipe. One pot feeds a crowd, and the fridge holds it for 5-6 days—perfect for meal prep or lazy weeknights. Freeze portions too, and you’ve got a secret weapon for game days or impromptu potlucks. No sad, soggy leftovers here.
- Budget-Friendly Luxury: Tri-tip might sound fancy, but a 3 lb roast is cheaper than you think, especially when you’re using affordable pantry staples like canned beans and broth. The smoked spices and slow-cooked richness make it feel like a splurge, but honestly? It’s the kind of dish that makes you feel like you’re treating yourself without breaking the bank. Plus, the dark brown sugar adds just enough sweetness to balance the spices—no extra cost, just pure satisfaction.
Step-by-step instructions for smoked tri-tip chili
Here’s the method that delivers deep, smoky beef flavor with perfectly tender meat and rich, spiced chili.
Smoke the Tri-Tip Roast for Maximum Flavor
Prepare your smoker for 225°F using oak or hickory wood chips. Place the 3 lb tri-tip roast fat-side up on the smoker grate. Smoke for 3-4 hours until the internal temperature reaches 195-200°F and the meat is fork-tender. You’ll know it’s ready when it pulls apart easily and has a deep mahogany bark.
While smoking, I like to add a handful of wood chips every 45 minutes to maintain steady smoke. The tri-tip should develop a beautiful crust while remaining juicy inside. Once done, transfer the meat to a cutting board and let it rest for 15 minutes before slicing against the grain into ½-inch thick strips. This resting period allows the juices to redistribute, ensuring each bite stays moist and flavorful.
Build the Chili Base with Aromatics and Spices
In a large Dutch oven, heat 2 tablespoons olive oil over medium heat. Add the 2 diced yellow onions and cook for 8-10 minutes until softened and beginning to caramelize. Add the 6 minced garlic cloves and cook for 30 seconds until fragrant—don’t let them brown or they’ll turn bitter.
Stir in the 2 tablespoons chili powder, 1½ tablespoons ground cumin, 1 tablespoon paprika, 1 teaspoon dried oregano, 1½ teaspoons salt, and 1 teaspoon black pepper. Toast the spices for 1 minute until aromatic. This step develops the deep, complex flavors that define this chili. Add the ½ cup tomato paste and cook for 2 minutes, stirring constantly to prevent burning.
Combine Beef, Beans, and Liquid for Depth
Add the sliced tri-tip to the Dutch oven along with the 2 cans drained kidney beans, 2 cans drained black beans, 2 cans diced tomatoes, and 2 cups beef broth. Stir well to combine, ensuring the meat is fully coated in the sauce. Bring the mixture to a gentle simmer over medium-low heat, then reduce heat to low and let it cook uncovered for 1½ hours. This slow cooking allows the flavors to meld and the meat to absorb the rich, smoky broth.
I stir occasionally but not constantly—just enough to prevent sticking. The chili should reduce slightly, becoming thicker and more concentrated in flavor. Taste after 1 hour and adjust seasoning if needed. If it’s too thick, add a splash of water or broth to reach your desired consistency.
Finish with Sweetness and Rest for Perfect Texture
Stir in the 1 tablespoon dark brown sugar and simmer for an additional 15 minutes. This step adds a subtle sweetness that balances the smoky, spicy flavors. The sugar also helps caramelize the edges of the beans and meat, adding depth to each bite.
Remove the chili from heat and let it rest for 10 minutes. This resting period allows the flavors to fully develop and the textures to set. Serve warm, garnished with additional chili powder or fresh cilantro if desired. Each spoonful should deliver tender tri-tip, smoky spices, and a perfect balance of sweet and savory notes.
Pro Tips For Making Smoked Tri Tip Chili
- Smoke to 200°F: DESCRIPTION: The tri-tip won’t pull apart properly if you stop at 190°F—wait until that internal thermometer hits 195-200°F, even if it means an extra 30 minutes. I’ve ruined perfectly good tri-tip by rushing this, and the chili suffers when the meat’s still tough. Oak or hickory wood chips every 45 minutes keep the smoke steady, but don’t overdo it—you want flavor, not a campfire.
- Caramelize Onions Slow: DESCRIPTION: Those 2 diced onions won’t develop that sweet, jammy depth if you rush them. Cook them at medium heat for 8-10 minutes, stirring occasionally, until they’re golden—not crispy, not burnt. I used to walk away for “just a minute,” and my chili always tasted flat. Keep an eye on them, and resist the urge to crank the heat.
- Toast Spices Hard: DESCRIPTION: That 1-minute spice toast isn’t just for show—it’s where the magic happens. Smoked chili powder, cumin, and paprika need to bloom and release their oils. Skip it, and your chili will taste like dust. Stir constantly, and don’t let the spices darken too much, or they’ll turn bitter. (Yes, even if you’re impatient like me.)
- Rest Meat Before Slicing: DESCRIPTION: The 15-minute rest after smoking isn’t optional—it’s the difference between juicy tri-tip strips and dry, stringy shreds. Slice against the grain into ½-inch strips only after resting, and you’ll thank yourself later. I learned this the hard way when my first batch turned out chewy. Patience here makes all the difference.
Dietary considerations for this recipe
Gluten-Free Adaptation
This chili is naturally gluten-free since it relies on tri-tip beef, beans, and tomatoes—no wheat or barley-based ingredients. Just double-check your chili powder and spice blends for hidden gluten, as some brands add fillers.
I always opt for Penzeys spices, which are certified gluten-free. The beef broth is also critical—stick to low-sodium, gluten-free varieties like Better Than Bouillon or Homestyle. 🌟
Lower-Sodium Swaps
If you’re watching sodium, reduce the 1½ tsp salt to ½ tsp and boost flavor with extra smoked paprika or 1 tsp liquid smoke. Use homemade beef broth (or low-sodium store-bought) and rinse the beans thoroughly to cut excess salt.
I also add ½ tsp garlic powder and ½ tsp onion powder for depth without sodium. The dark brown sugar helps balance any saltiness too.
Dairy-Free Option
This recipe is already dairy-free, but if you’re avoiding even trace amounts, ensure your beef broth and spices are certified dairy-free. Some chili powders contain whey or milk powder as fillers—check labels! For extra richness, stir in 1 tbsp olive oil at the end instead of dairy.
The smoky depth from the tri-tip and spices will keep it satisfying without cheese or sour cream. 💛
Vegetarian Substitutions
For a vegetarian version, swap the tri-tip for extra-firm tofu (pressed and cubed) or mushrooms (like portobello or cremini). Sauté the tofu in 1 tbsp olive oil with 1 tsp smoked paprika and ½ tsp garlic powder before adding to the chili.
Mushrooms absorb flavors beautifully—just cook them until tender before mixing in. The beans and tomatoes still provide hearty texture, so the dish stays filling. 🌱
Kid-Friendly Tweaks
Kids often shy away from spice, so reduce the chili powder to 1 tbsp and omit the dark brown sugar (or use white sugar). Add ½ cup corn kernels (fresh or frozen) for sweetness and texture.
I also stir in 1 cup shredded cheddar cheese at the end for a familiar, comforting touch. The smoky tri-tip still shines, but the milder flavors make it approachable for little ones. 👶
Spicy Heat Adjustments
If you love heat, add ½ tsp cayenne pepper or 1 minced chipotle pepper (from a can of adobo sauce) with the spices. For a smoky kick, increase the smoked paprika to 2 tbsp.
To tone it down, skip the cayenne entirely and use ½ tsp mild chili powder instead. I like to serve diced avocado or sour cream on the side so guests can control their spice level. 🌶️
Nutrition facts
Frequently asked questions
How do I know when the tri-tip is perfectly smoked?
The tri-tip is ready when it reaches an internal temperature of 195-200°F and pulls apart easily with a fork. Look for a deep mahogany bark on the surface while keeping the inside juicy. If it shreds cleanly, you’ve got it! Resting for 15 minutes afterward ensures tender, flavorful slices.
Can I skip smoking the tri-tip and just use pre-cooked beef?
Smoking is key for that authentic, deep smoky flavor! If you can’t smoke, use leftover roasted beef or even slow-cooked chuck roast. Just slice it ½-inch thick and add it to the chili during the last 30 minutes of simmering to prevent mushiness. The texture won’t be identical, but it’ll still taste amazing.
Why does the chili need to rest after cooking?
Resting for 10 minutes lets the flavors meld and the textures set, so every spoonful is perfectly balanced. Think of it like letting bread rise—it just tastes better with time! Skipping this step can make the chili taste flat or overly liquid. Trust me, the wait is worth it.
What if my chili is too thick or too thin?
Too thick? Add ½ cup beef broth and simmer for 5-10 minutes. Too thin? Stir in 1-2 tablespoons tomato paste or let it reduce uncovered on low heat. Taste as you go—adjustments are easy! The goal is a rich, saucy consistency that clings to the tri-tip.
Can I make this chili ahead of time?
The chili actually tastes better the next day as flavors deepen. Store in airtight containers for 5-6 days in the fridge or freeze portions for up to 3 months. Reheat gently on the stove—just add a splash of broth if it’s too thick. Leftovers make perfect lunches or dinner!

Trained in classic French technique but raised on slow-cooked ribs and spicy rubs, she blends culinary skill with smoke and soul.
- Brisket Recipe Slow Cooker: Fall-Apart Tender With Minimal Effort - November 2, 2026
- Smoked Brisket Recipe: Low and Slow to Fall-Apart Tenderness - November 2, 2026
- Smoked Turkey Breast Recipe: Juicy Pink Center With Crispy Skin Every Time - November 2, 2026