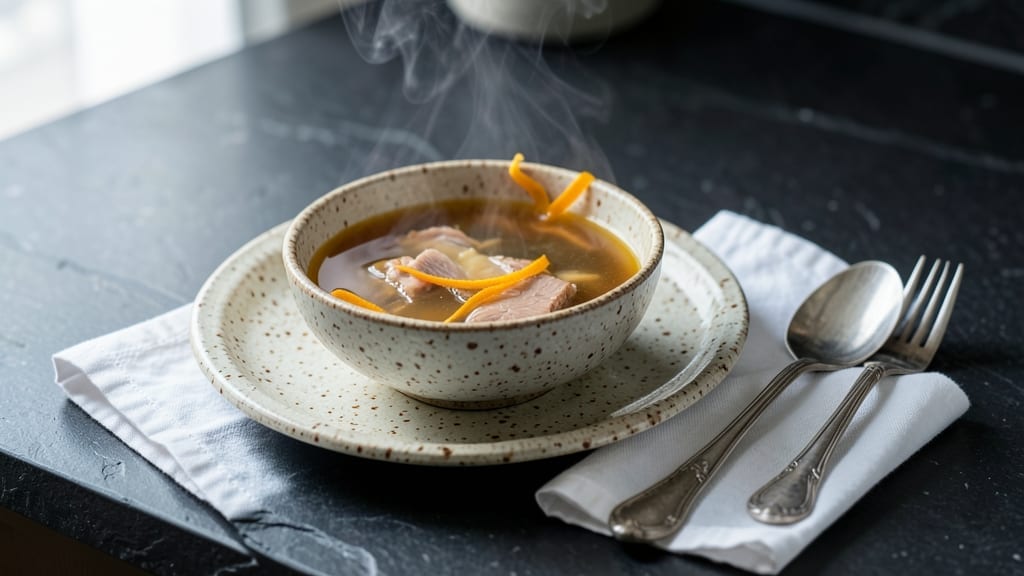
Transforming turkey leftovers into this smoked turkey broth is the ultimate way to turn scraps into liquid gold—packed with deep, smoky richness that’ll make your whole kitchen smell like Thanksgiving.
I first discovered this technique after a family cookout when I realized how much flavor was hiding in those bones and skin, just waiting to be unlocked with smoke and time.
The secret lies in smoking the turkey remnants low and slow, then simmering them until every last drop of flavor dissolves into a velvety, aromatic broth. No fancy equipment needed—just patience and a smoker (or even your oven on low).
This method extracts more flavor than boiling alone, giving you a broth so rich it’ll elevate any dish from ordinary to extraordinary.
By the end, you’ll have a deep, golden broth that’s perfect for soups, gravies, or even as a base for risotto. The smoky notes linger beautifully, turning simple meals into something special. Ready to turn your turkey leftovers into something even better?
Here’s how to make it happen—step by step, with tips to maximize every drop of flavor. Let’s get started!
Ingredients for smoked turkey broth
Just turkey leftovers and a few pantry staples—transforming scraps into smoky, velvety broth magic.
| Ingredient | Amount | Notes |
|---|---|---|
| Turkey Bones and Skin 🦃 | 4 cups | From 1 whole turkey, picked clean |
| Yellow Onion 🧅 | 1 whole | Quartered, skin on for color |
| Carrots 🥕 | 4 whole | Scrubbed, cut into 2-inch pieces |
| Celery Stalk 🌿 | 4 whole | Cut into 2-inch pieces, leaves included |
| Garlic Cloves 🧄 | 6 cloves | Smash slightly for deeper flavor |
| Fresh Thyme Sprigs 🌿 | 4 whole | Stems included for aroma |
| Fresh Rosemary Sprig 🌿 | 1 whole | Woody stems for smoky depth |
| Apple Cider Vinegar 🍎 | ½ cup | Brightens and tenderizes bones |
| Wood Chips (Hickory or Apple) 🌳 | 1 cup | Soaked for 30 minutes |
| Water 💧 | 8 cups | Filtered preferred for clarity |
| Sea Salt 🧂 | 1 ½ tbsp | Kosher or coarse grain |
| Black Peppercorns 🌶️ | 1 tsp | Crushed lightly for heat |
| Bay Leaves 🍃 | 2 whole | Dried, for earthy depth |
| Olive Oil 🫒 | 2 tbsp | For bone charring |
[recipe_ingredient_scaler]
The turkey bones are the star—pick them clean of meat, but leave that crispy skin for maximum flavor. Costco or Whole Foods often sell turkey carcasses post-Thanksgiving if you don’t have leftovers. For the veggies, organic carrots and celery have better flavor, but regular works. The wood chips? Hickory gives classic smokiness, while apple adds sweetness—pick based on your preference. I always grab extra thyme and rosemary since they’re cheap at Trader Joe’s and freeze beautifully for next time.
No wood chips? Smoked paprika at 1 tbsp mimics the effect, though it’s not identical. Short on apple cider vinegar? White vinegar or lemon juice work in a pinch, but the apple adds subtle sweetness. The bay leaves can be dried or fresh—just double the amount if using dried. For the bones, if they’re still greasy, pat them dry first. That helps the smoking process. If you’re using a smoker, low and slow (225°F) for 3-4 hours extracts the most flavor—no need to rush.
This broth gets better with time. Strain and store in glass jars in the fridge for up to 5 days, or freeze for 6 months. I portion mine into ice cube trays for easy use in recipes. The fat rises to the top—skim and save it for roasting potatoes or cooking rice. The first batch always makes me want to double it—it’s that good.
Why You’ll Love This Recipe
- Turkey Leftovers Magic: That pile of turkey bones after Thanksgiving? Suddenly it’s your secret weapon. Just 15 minutes of charring and you’re turning scraps into liquid gold—no fancy equipment, just a sheet pan and oven.
- Smoky, Sweet, Savory: The wood chips and charred turkey skin? That’s the magic. The smashed garlic cloves and rosemary stems add layers—earthy, bright, and just a little smoky. It’s the kind of broth where you take a sip and think, “How did this happen?”
- Freezer-Friendly Goldmine: One batch feeds soups, risottos, and gravies for weeks. Freeze it in portions, and suddenly you’ve got a pantry full of flavor. My kids even ask for it in their mac and cheese—yes, even on a Tuesday night.
- Budget’s Best Kept Secret: You’re paying for the turkey anyway, so might as well get the broth for free. That half cup of apple cider vinegar? Tenderizes the bones and keeps costs down. A gallon of this for less than a takeout meal? Chef’s kiss.
Step-by-step instructions for smoked turkey broth
Here’s how to transform turkey leftovers into a deeply flavorful, restaurant-quality broth.
Prepare the Bones and Char Them for Depth
First, spread the 4 cups turkey bones and skin on a baking sheet. Place them in a 400°F oven for 15-20 minutes, turning occasionally, until they develop a deep golden-brown char. This step unlocks rich, caramelized flavors that infuse the broth. I like to use the skin side down first since it chars more quickly.
While the bones char, prepare a large stockpot by placing the 1 cup wood chips (hickory or apple) in a cheesecloth pouch or directly in the pot. The wood chips will provide that essential smoky backbone. Don’t skip soaking them first—just rinse them quickly if you’re in a hurry, but soaking for 30 minutes in water really helps them release their flavor more evenly.
Build the Aromatic Base with Vegetables and Herbs
In the same stockpot, add the 2 tbsp olive oil over medium-high heat. Once shimmering, add the quartered 1 yellow onion, 4 carrots cut into 2-inch pieces, and 4 celery stalks cut into 2-inch pieces (leaves included). Sauté for 8-10 minutes until the vegetables soften and the onion becomes translucent. This step develops their natural sweetness and deepens the broth’s flavor profile.
Add the 6 smashed garlic cloves, 4 fresh thyme sprigs (stems included), and 1 fresh rosemary sprig (woody stems for smoky depth). Cook for another 2 minutes until fragrant. Here’s the thing—don’t let the garlic burn. Watch it closely; it only takes seconds to go from aromatic to bitter. The rosemary stems are especially important—they add a subtle piney note that elevates the broth.
Simmer the Broth for Maximum Flavor Extraction
Add the charred turkey bones and skin to the pot, along with the ½ cup apple cider vinegar. The vinegar brightens the broth and helps tenderize the bones. Pour in the 8 cups water and bring everything to a rolling boil. Once boiling, reduce heat to low and skim off any foam or impurities that rise to the surface during the first 10 minutes of simmering.
Add the 1½ tbsp sea salt, 1 tsp crushed black peppercorns, and 2 bay leaves. The broth should simmer gently—you’ll see small bubbles breaking the surface. Here’s the critical part: maintain this gentle simmer for 3-4 hours. I know it’s tempting to rush, but slow cooking is what transforms simple ingredients into something extraordinary. The longer it simmers, the more collagen breaks down from the bones, creating that velvety texture.
Strain and Finish for Perfect Clarity
After simmering, remove the stockpot from heat and let the broth sit for 10 minutes to allow any settled particles to sink. Line a fine-mesh strainer with cheesecloth or a coffee filter if you prefer extra clarity, then carefully strain the broth into a clean container. Discard the solids—you’ve extracted all their flavor.
Taste and adjust seasoning if needed. The broth should be rich and flavorful but not overpowering with salt. If it’s too thin, you can reduce it further by simmering uncovered for another 15-20 minutes. For extra depth, you might want to add a splash of apple cider vinegar at the end—just a tablespoon or two—to brighten the flavor. Let it cool completely before storing in the refrigerator or freezing for up to 3 months.
Pro Tips For Making Smoked Turkey Broth
- CHAR THE BONES RIGHT: I learned this the hard way—skipping the char means missing that deep, toasty backbone. Spread the skin side down first, then flip occasionally. The bones should look like they’ve been kissed by a flame, not burned to ash. If they’re uneven, just move the tray around the oven.
- SMASH THAT GARLIC: Don’t just chop those 6 cloves—smash them with the flat side of your knife first. The exposed flesh releases flavor faster, and you won’t waste time waiting for whole cloves to soften. Trust me, your broth will taste like it’s been simmering for hours, not minutes.
- SKIM LIKE IT’S YOUR JOB: The first 10 minutes of simmering are prime time for scum (the foam that rises). Use a fine-mesh skimmer or a ladle to remove it aggressively—don’t half-ass it. Leftover impurities make the broth cloudy and bitter. I know it’s tedious, but it’s the difference between “meh” and “wow.”
- SOAK THOSE WOOD CHIPS: Yes, even if you’re in a hurry, give those 1 cup wood chips a 30-minute soak in water. Dry chips burn and turn the broth acrid. Soaked chips release smoke gradually, giving you that clean, campfire-like depth without overpowering the turkey. (And if you’re really rushed, a quick rinse works—but it won’t taste the same.)
Essential equipment for smoked turkey broth
Your Smoker Setup
You don’t need a fancy smoker to make this broth—just a reliable pellet smoker like the Traeger Timberline 345 or even a basic charcoal smoker. I’ve made this with both, and honestly, the key is maintaining that 225°F temperature consistently.
If you’re using a grill, prop it open and use indirect heat with a drip pan for the wood chips. For extra smoke flavor, I like to add 2-3 cups of hickory wood chips to the firebox during the simmering phase—just watch your temperature closely.
Essential Tools
Beyond your smoker, here’s what I can’t live without: a digital meat thermometer like the Thermoworks Smoke to monitor internal temps, a fine-mesh strainer for clarifying, and a cheesecloth for extra-smooth broth.
I also keep a large stockpot with a lid on hand—stainless steel is ideal, but enameled cast iron works too. If you’re short on space, a Dutch oven can double as your simmering pot.
Budget-Friendly Swaps
No wood chips? No problem. Use 1 tbsp smoked paprika per 2 cups of broth for that smoky kick. I’ve also used liquid smoke (just ½ tsp per batch) when I’m in a pinch.
For the smoker, if you don’t have a thermometer, use the hand test: hold your hand about 6 inches above the grill—if you can keep it there for 3-4 seconds, it’s around 225°F.
And if you’re using an oven for charring, a baking sheet and broiler are all you need.
Pro Tips for Clarity
For the clearest broth, I strain it through double layers of cheesecloth or even a coffee filter for that restaurant-quality finish.
If you want to go the extra mile, chill the broth overnight in the fridge—fat rises to the top, and you can skim it off for golden turkey fat to use later on roasted potatoes or mashed potatoes. I save mine in a jar and call it “liquid gold.”
Smoke Control
If your smoker runs hot, add a cooling rack above the firebox to diffuse the heat. I also like to wrap the wood chips in aluminum foil with a few holes poked in it—this slows the burn and keeps the smoke gentle.
And if you’re using a pellet smoker, set it to 225°F and let it stabilize for 15 minutes before adding your bones. This ensures even heat distribution and no hot spots that could burn your broth.
Nutrition facts
Frequently asked questions
Why does smoking the turkey bones add so much flavor?
The smoking process creates deep, caramelized flavors by breaking down the bones’ proteins and rendering fat at 225°F for hours. This slow charring unlocks rich, smoky notes that traditional boiling can’t achieve. The wood chips—like hickory or apple—infuse the broth with aromatic smoke, elevating every sip. Think of it as turning scraps into liquid gold!
Can I use dried herbs instead of fresh thyme and rosemary?
Yes, but adjust the amount! Use 1 tbsp dried thyme and 1 tsp dried rosemary for every 1 sprig fresh listed. Dried herbs are more concentrated, so reduce the quantity to avoid overpowering the broth. The woody stems of fresh rosemary add extra depth, though dried works in a pinch.
What if my broth is too thin after simmering?
Simmer uncovered for 15-20 minutes to reduce it to your desired consistency. If you want to thicken it further, strain out the broth and whisk in a 1-2 tbsp of the rendered fat from the top—it adds richness without diluting the flavor. Just be careful not to over-reduce, or it may become too concentrated.
How do I know when the broth is fully infused with flavor?
The broth is ready when it smells irresistible and has a deep, golden hue after 3-4 hours of simmering. Taste it—it should be rich but not salty. If it lacks depth, add a splash of apple cider vinegar or a pinch of salt, then simmer another 30 minutes. Patience is key; the longer it cooks, the more collagen breaks down for that velvety texture.

Trained in classic French technique but raised on slow-cooked ribs and spicy rubs, she blends culinary skill with smoke and soul.
- Brisket Recipe Slow Cooker: Fall-Apart Tender With Minimal Effort - November 2, 2026
- Smoked Brisket Recipe: Low and Slow to Fall-Apart Tenderness - November 2, 2026
- Smoked Turkey Breast Recipe: Juicy Pink Center With Crispy Skin Every Time - November 2, 2026