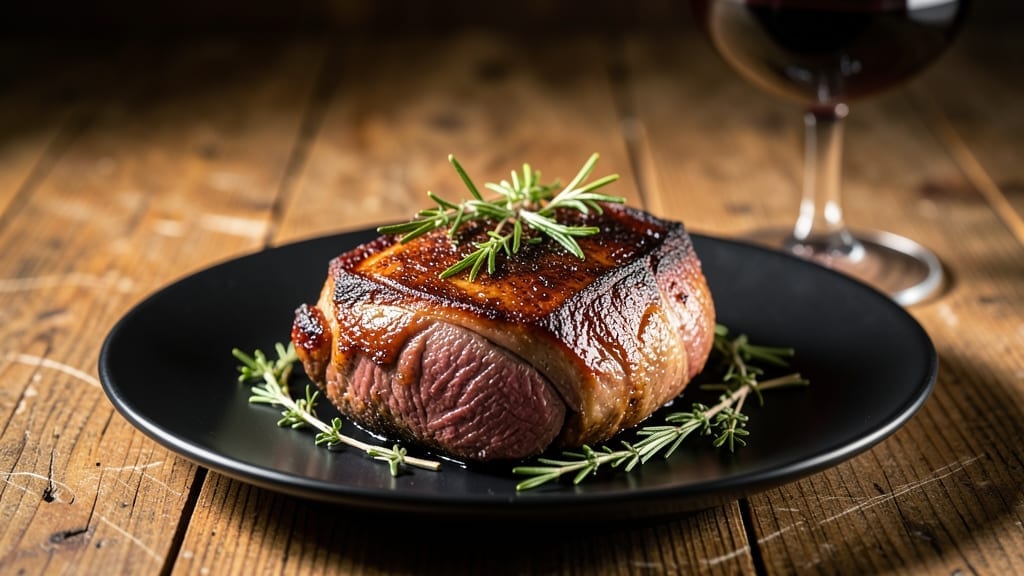
This smoker beef roast recipe turns tough cuts into melt-in-your-mouth perfection, delivering a deep, caramelized crust and a juicy interior that falls apart with the slightest touch.
The key lies in patience—low temperatures and slow cooking break down connective tissue while rendering fat into flavorful drippings that baste the meat throughout. I’ve perfected this method over years of trial and error, ensuring every bite delivers that ideal balance of tenderness and smoky depth.
This recipe starts with a simple yet critical step: a dry brine that enhances natural flavors without altering texture. Using a mix of hardwoods like oak or hickory creates that signature smoky aroma, while precise temperature control—around 225°F—keeps the meat tender.
The magic happens when you let the roast rest after smoking, allowing juices to redistribute for that restaurant-quality result you crave.
What you’ll end up with is a roast so juicy it practically drips onto your plate, with a dark, caramelized bark that adds layers of complexity. The internal temperature should reach 195°F for maximum tenderness, and the resting period ensures every slice stays moist.
This isn’t just a meal—it’s an experience that turns a simple Sunday dinner into a showstopper.
Pair it with roasted root vegetables or a fresh green salad to balance the richness, and you’ve got a complete, crowd-pleasing feast. The technique is straightforward, but the results are anything but ordinary—this is how you elevate home cooking to professional levels.
Let’s get started on creating your perfect smoked beef roast.
Ingredients for smoker beef roast
A few key ingredients transform a tough cut into restaurant-quality perfection.
| Ingredient | Amount | Notes |
|---|---|---|
| Beef Chuck Roast 🥩 | 4 lb | Bone-in preferred for flavor |
| Kosher Salt 🧂 | 2 tbsp | Diamond Crystal preferred |
| Freshly Ground Black Pepper 🌶️ | 1 ½ tbsp | Cracked peppercorns preferred |
| Yellow Onion 🧅 | 1 whole | Quartered, skin on |
| Garlic Cloves 🧄 | 8 cloves | Smashed, skin on |
| Fresh Rosemary 🌿 | ½ cup | Needles only, chopped |
| Fresh Thyme 🌿 | ¼ cup | Leaves only, chopped |
| Oak Wood Chips 🌳 | 1 cup | Soaked for 30 minutes |
| Hickory Wood Chips 🌳 | ½ cup | Soaked for 30 minutes |
| Apple Cider Vinegar 🍎 | 2 tbsp | For basting liquid |
| Beef Broth 💧 | 1 cup | Low-sodium preferred |
| Extra-Virgin Olive Oil 🫒 | 2 tbsp | For drizzling |
| Red Wine 🍷 | ½ cup | Bold Cabernet Sauvignon |
| Mustard Seeds 🌶️ | 1 tsp | Yellow or brown |
| Bay Leaves 🍃 | 2 whole | Fresh preferred |
[recipe_ingredient_scaler]
The beef is everything—chuck roast with bone-in delivers the best flavor and texture. Costco or local butchers usually carry it pre-cut, but if you’re buying a whole roast, ask for a section with good marbling. The fat renders down during smoking, creating that irresistible caramelized crust. For the wood chips, Traeger or Cookshack sell pre-soaked packs, but I always soak my own for extra moisture. Fresh herbs make a difference here—Whole Foods or your local market will have the best quality.
No oak chips? Hickory alone works, but the combination gives that classic BBQ depth. Short on red wine? Extra beef broth plus a splash of balsamic mimics the acidity. The mustard seeds might seem odd, but they add a subtle tang that balances the richness. For the dry brine, I use Diamond Crystal kosher salt—it dissolves better than table salt. If you can’t find fresh rosemary or thyme, dried works at one-third the amount, but fresh is worth the extra trip to the store.
This roast tastes even better the next day—plan ahead! Store leftovers wrapped tightly in butcher paper for 5-6 days in the fridge, or freeze portions for up to 3 months. The bark stays crispy if you reheat it in the oven at 300°F for 15 minutes. I always make extra because it reheats so well—perfect for sandwiches or tacos later in the week.
Why You’ll Love This Recipe
- No Hands Required: Honestly, once you season it and get it on the smoker, you’re basically done. The magic happens at 225°F while you’re doing whatever—watching TV, grading papers, or just zoning out. The fat-side-up trick means you don’t even need to baste constantly; the rendered fat does the work for you.
- Smoky, Herby, Addictive: That combo of oak and hickory smoke with the rosemary-thyme paste? It’s like a hug for your taste buds. The garlic and onion in the basting liquid add a bright, savory punch, and the red wine cuts through the richness—so every bite is complex but never overpowering.
- Budget-Friendly Luxury: A chuck roast is one of the most affordable cuts, but it transforms into something restaurant-worthy with just a little smoke and patience. The fresh herbs and wine elevate it, but you’re not spending gourmet prices—just good, honest flavor that feels like a splurge.
Step-by-step instructions for smoker beef roast
Master the low-and-slow technique for melt-in-your-mouth beef with deep caramelization and perfect bark.
Prepare the Beef and Seasoning
Begin by trimming any excess fat from the 4 lb beef chuck roast, leaving about ¼ inch for flavor and moisture retention. Pat the meat completely dry with paper towels—this is critical for developing that coveted smoky bark. In a small bowl, combine the 2 tbsp kosher salt and 1½ tbsp freshly ground black pepper, then generously coat the roast on all sides, pressing the seasoning into the meat so it adheres well.
Next, create a simple herb paste by finely chopping the ½ cup fresh rosemary and ¼ cup fresh thyme leaves, then mix with the 2 tbsp extra-virgin olive oil until you have a thick, aromatic paste. Spread this evenly over the seasoned roast, ensuring full coverage. This step not only adds flavor but also helps the seasoning stick during the long cook.
In a separate bowl, combine the 1 quartered yellow onion and 8 smashed garlic cloves with the ½ cup red wine and 1 cup beef broth. Add the 1 tsp mustard seeds and 2 bay leaves, then let this mixture sit for 15 minutes to allow the flavors to meld. This will become your basting liquid later.
Set Up the Smoker and Prep the Wood
Soak the 1 cup oak wood chips and ½ cup hickory wood chips in water for at least 30 minutes to prevent burning. Preheat your smoker to 225°F, using a combination of the soaked wood chips for a balanced smoke flavor. Place a water pan in the smoker to maintain moisture and prevent the bark from drying out.
Once the smoker reaches temperature and you see steady, thin blue smoke (not thick white smoke), it’s time to add the beef. Place the roast fat-side up on the smoker grates—this allows the rendered fat to baste the meat as it cooks. The fat-side-up position also helps create that beautiful caramelized crust.
Here’s the thing—resist the urge to open the smoker during the first 2 hours. Every time you peek, you lose heat and moisture, extending cook time. Trust the process and let the smoke work its magic.
Smoke and Baste for Deep Flavor
Smoke the roast for 4-5 hours, maintaining a consistent 225°F temperature. About halfway through, remove the roast and brush it generously with the onion-garlic-wine basting liquid you prepared earlier. This step infuses the meat with layers of flavor while keeping it moist. Return the roast to the smoker and continue cooking.
After another 2 hours (total 6-7 hours of smoking), check the internal temperature using a meat thermometer. When it reaches 195°F, the roast is nearing perfection. If the bark starts to darken too quickly, you can tent it loosely with aluminum foil to slow the process—just make sure to remove it periodically to allow smoke penetration.
Real talk: This is where patience pays off. The low-and-slow method breaks down the connective tissue, transforming tough beef into tender, fork-tender perfection. The 2 tbsp apple cider vinegar can be added to the basting liquid now if you want to brighten the flavor profile.
Rest and Slice for Maximum Juiciness
Once the internal temperature hits 203°F and the meat is fork-tender, remove the roast from the smoker and let it rest for 30-45 minutes before slicing. Tent it loosely with foil to retain heat. This resting period is non-negotiable—it allows the juices to redistribute throughout the meat, ensuring every slice is moist and flavorful.
Slice the roast against the grain into ¼-inch thick pieces. The meat should pull apart easily, with a deep mahogany bark on the outside and a pink, smoke-ringed interior. Serve immediately with any accumulated juices from the resting pan, which can be reduced by simmering for a quick pan sauce if desired.
You’ve just created a showstopping centerpiece that delivers on the promises of juicy, caramelized perfection. Each bite should offer a harmonious blend of smoky, herby, and slightly tangy flavors—proof that low-and-slow smoking is worth every minute.
Pro Tips For Making Smoker Beef Roast
- Skip the Vinegar Early: I learned this the hard way—adding the 2 tbsp apple cider vinegar to the basting liquid too soon makes the rosemary and thyme paste bitter before it even hits the smoker. Wait until the roast has smoked for 4-5 hours and the bark is starting to form before mixing it in. That’s when the acidity actually brightens the deep, smoky flavors instead of fighting them.
- Press That Salt: Rubbing the 2 tbsp kosher salt and 1.5 tbsp cracked pepper into the beef chuck roast isn’t just about coverage—it’s about making sure the seasoning sticks. Press hard enough that the crystals lodge into the meat’s crevices, especially around the edges where the bark forms. Trust me, the difference between “good” and “showstopping” starts here.
- Don’t Crowd the Smoker: I used to think more wood chips meant more smoke flavor, but overloading the smoker with the 1 cup oak and ½ cup hickory wood chips at once clogs the airflow and chokes the heat. Split them into two batches—add half when you start, then top off after 2 hours. Steady, thin blue smoke is what you’re after, not a cloud.
- Slice Against the Grain (But Wait): The recipe says to slice against the grain, and it’s right—but only after the roast has rested for the full 30-45 minutes. Cutting too soon means the fibers tear unevenly, and you’ll end up with chewy slices. Let those juices settle first, then go for it. Your future self (and your guests) will notice the difference.
Troubleshooting perfect results
Temperature Control
If your smoker struggles to maintain 225°F, invest in a quality thermometer like Thermoworks Smoke to monitor both smoker and meat temps simultaneously. Fluctuations beyond ±10°F can lead to uneven cooking or dry bark.
I once let my smoker dip to 200°F for an hour—it took an extra 2 hours to recover and finish the roast properly. 🌡️
Bark Burns Too Fast
When the bark darkens too quickly, tenting with foil for 30 minutes slows the process while still allowing smoke penetration. Just remove the foil periodically to avoid soggy bark.
I use heavy-duty aluminum foil from Reynolds—it’s thicker and holds up better than cheap brands. Over-tenting will steam your meat instead of smoking it.
Undercooked Center
The stall between 160°F and 175°F can make it seem like your roast isn’t progressing. If you’re at 6-7 hours and only hitting 180°F, wrap the roast in butcher paper (not foil) and increase temperature to 250°F for 1 hour.
This “Texas Crutch” method finishes the job without drying out the meat.
Dry Meat Texture
Dry meat often comes from opening the smoker too frequently or insufficient moisture. Always use a water pan and check moisture levels—it should be ½ full with water.
I add 1 cup apple cider vinegar to the water pan during the last 2 hours of cooking to keep the bark moist while adding tangy depth. Never skip the resting period—it’s what keeps your roast juicy.
Wood Chip Issues
Burning wood chips create bitter smoke that ruins your roast’s flavor. Always soak chips for 30+ minutes and use a mesh bag to prevent them from falling into the firebox.
I prefer Traeger brand wood chips—they burn evenly and don’t clump. If your smoker runs out of chips early, add fresh soaked chips to maintain smoke without burning.
Nutrition facts
Frequently asked questions
Why does the recipe specify smoking at 225°F
instead of higher heat?
Smoking at 225°F is key for tenderness—it breaks down tough connective tissue over 6-7 hours without drying out the meat. Higher heat would burn the exterior before the center cooks. This slow process renders fat into flavorful drippings that keep the roast juicy throughout.
Can I use a different wood type instead of oak and hickory?
Hickory alone works well, or try mesquite for a bolder flavor. Just avoid fruitwoods like cherry—they can overpower the beef. The oak adds sweetness that balances hickory’s intensity. Soaking chips for 30 minutes ensures even smoking without burning.
What if my smoker can’t maintain 225°F
consistently?
Use a digital thermometer like Thermoworks Smoke to monitor temps. If it drops below 215°F, add more wood chips or adjust airflow. A 2-hour dip to 200°F might only add 30 minutes back to cook time. Patience is everything—consistency is more important than speed.
How do I know when the roast is done without cutting into it?
Use a meat thermometer to check the thickest part of the roast. It’s done at 203°F—the probe should pull away cleanly. The bark should be deep mahogany, not blackened. If unsure, wait 15 minutes before checking again. Overcooking ruins tenderness!
Can I make this recipe ahead of time?
Yes! The roast actually tastes better the next day. Store leftovers wrapped tightly in butcher paper for 5-6 days in the fridge, or freeze portions for 3 months. Reheat at 300°F for 15 minutes to restore juiciness. The bark stays crispy when reheated properly.

Trained in classic French technique but raised on slow-cooked ribs and spicy rubs, she blends culinary skill with smoke and soul.
- Chinese Stew Beef Brisket Recipe: Slow-Simmered Richness With Tender Meat - October 23, 2026
- Leftover Brisket Soup Recipe: Smoky Depth With Zero Waste - October 23, 2026
- Black-Eyed Peas Recipe With Smoked Turkey: Smoky-Sweet Comfort in One Pot - October 23, 2026