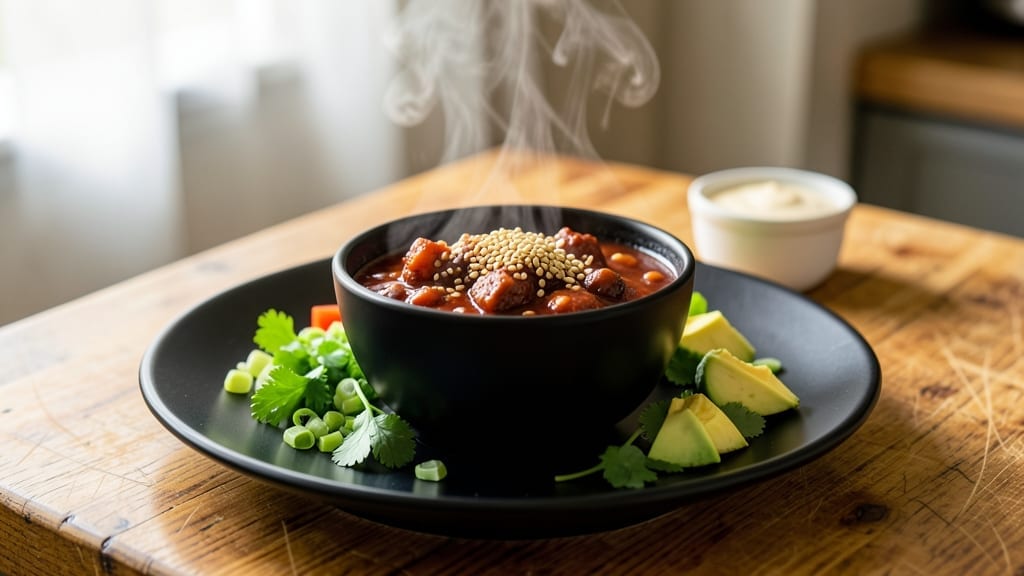
This smoker chili recipe transforms tough cuts of beef into melt-in-your-mouth tenderness while infusing deep, smoky flavor that builds all day. The key lies in low-and-slow cooking with hardwood—oak or hickory—until the meat practically falls apart, creating a rich, hearty stew that tastes like a backyard cookout.
I developed this method after years of experimenting with different wood blends and cooking times, and it consistently delivers restaurant-quality results at home.
The process starts with a dry rub of chili powder, cumin, and paprika that clings to the meat, then smokes at 225°F for 6-8 hours until the beef reaches 195°F internally.
After browning the meat in a cast-iron skillet, it all comes together in a pot with tomatoes, beans, and spices, simmering until the flavors meld into a deep, smoky, and slightly sweet chili. The long cook time breaks down collagen, turning tough cuts into fork-tender pieces.
What you’ll end up with is a bold, smoky chili with layers of flavor—charred edges from the smoker, caramelized spices, and a thick, velvety texture that coats every spoonful.
The aroma alone will have everyone gathering around the table, and each bite delivers that perfect balance of heat, smokiness, and richness. This isn’t just chili; it’s a showstopping centerpiece for game day, family dinners, or potlucks.
Serve it with crusty bread for soaking up the juices, a dollop of sour cream to cool the heat, or a sprinkle of cheddar cheese for extra richness.
The leftovers only get better the next day, making this a foolproof recipe for feeding a crowd or meal prepping for the week. Let’s get started on creating this deep-smoked masterpiece that’ll have everyone asking for seconds.
Ingredients for smoker chili
Hardwood-smoked beef and slow-cooked spices create a rich, velvety chili with layers of depth.
| Ingredient | Amount | Notes |
|---|---|---|
| Chuck Roast Beef 🥩 | 3 lb | Tough cut for collagen breakdown |
| Yellow Onion 🧅 | 2 whole | Chopped, medium dice |
| Garlic Cloves 🧄 | 8 cloves | Peeled, crushed |
| Chili Powder 🌶️ | ¼ cup | High-quality smoked blend |
| Ground Cumin 🌿 | 2 tbsp | Toasted for depth |
| Paprika 🌶️ | 1 tbsp | Smoked variety preferred |
| Dried Oregano 🍃 | 1 tbsp | Mexican oregano ideal |
| Black Peppercorns 🌶️ | 1 tbsp | Freshly cracked |
| Bay Leaves 🍃 | 2 whole | Dried, standard size |
| Canned Tomato Sauce 🍅 | 2 cups | San Marzano preferred |
| Kidney Beans 🥫 | 1 can | 15 oz, drained |
| Black Beans 🥫 | 1 can | 15 oz, drained |
| Beef Broth 💧 | 2 cups | Low-sodium preferred |
| Dark Brown Sugar 🍚 | 1 tbsp | For subtle sweetness |
| Apple Cider Vinegar 🍎 | 1 tbsp | For depth of flavor |
| Olive Oil 🫒 | 2 tbsp | For searing meat |
| Salt 🧂 | 1 ½ tsp | Diamond Crystal preferred |
[recipe_ingredient_scaler]
The chuck roast is non-negotiable—its collagen-rich composition transforms into tender, fork-pulling meat after hours on the smoker. Costco or local butchers offer the best value for this cut, though most grocery stores carry it pre-packaged. Look for marbling (those white fat streaks) as a quality indicator, and avoid pre-trimmed cuts if possible. For the dry rub, Penzeys or local spice merchants carry premium blends, but standard grocery store chili powder works if it’s fresh. Toast your cumin seeds in a dry skillet for 30 seconds before grinding to unlock deeper flavor notes—this small step elevates the entire dish.
No smoked paprika? A blend of regular paprika plus a pinch of liquid smoke (just a teaspoon) mimics the effect. Substituting beans? Pinto beans or lentils work in equal measure, though kidney and black beans provide the classic texture. The tomato sauce can be fresh (crushed San Marzano tomatoes) or high-quality canned—Rao’s or Muir Glen are reliable choices. For vinegar, balsamic vinegar adds complexity if apple cider isn’t available. The beef broth should be low-sodium to avoid over-salting; homemade is ideal but store-bought works in a pinch. If using pre-rubbed beef, cut the chili powder by half to avoid overpowering the dish.
This chili develops flavor over time—day-old versions taste even better as the spices meld. Store in an airtight container in the fridge for up to 5 days or freeze portions for 3 months. For smoker prep, arrange wood chips (oak or hickory) in a soaker hose or foil pouch to control smoke output. The rub should cling to the beef like a second skin—pat the meat dry before applying. For leftovers, reheat on the stovetop over medium-low heat, stirring occasionally to prevent scorching. The texture becomes even more luxurious after resting, making it perfect for meal prep or game day gatherings.
Why You’ll Love This Recipe
- Smoker’s Secret Shortcut: Honestly, this isn’t your average chili prep—it’s all about letting the smoker do the heavy lifting. Just pat that 3 lb chuck roast dry, slather it with olive oil, and let the spices cling while you fire up the smoker. No chopping frenzy, no constant stirring; the 30-minute room temp rest and 5-hour cook time on 225°F mean you’re basically setting it and forgetting it.
- Smoky Depth Explosion: That oak or hickory wood plus the toasted cumin and smoked chili powder? It’s like a flavor bomb. The 20-minute sear on the smoker gives that deep mahogany crust, while the crushed garlic and onions cook right in the meat’s juices—no separate sautéing needed. The apple cider vinegar and dark brown sugar? They cut through the richness just enough to make every bite sing.
- Freezer-Friendly Feast: Between the beans, broth, and tender chuck, this chili is the ultimate meal prep hero. Double the batch, freeze half, and you’ve got a 3-month stash of comfort food. My kids always ask for seconds, and honestly, I don’t blame them—it’s the kind of dish that tastes even better the next day, reheated and smelling like a backyard cookout.
- Budget’s Best Kept Secret: You’re getting ridicuously good flavor from a tough cut like chuck roast, which is way cheaper than steak but breaks down into melt-in-your-mouth texture. The canned tomatoes, beans, and broth keep costs low, and the spices? A little goes a long way. It’s the kind of dish where you spend less but end up with a pot so good, you’ll forget to check the price tag.
Step-by-step instructions for smoker chili
This method transforms tough chuck roast into rich, smoky chili with deep flavor layers developed over hours.
Prepare the Chuck Roast for Maximum Flavor
Pat the 3 lb chuck roast beef completely dry with paper towels, removing any surface moisture. This step is critical—wet meat steams instead of searing, preventing that deep caramelization we want. Place the meat in a large bowl and add 2 tbsp olive oil, massaging it evenly over all surfaces to create a barrier that promotes browning.
In a small bowl, combine ¼ cup chili powder, 2 tbsp ground cumin, 1 tbsp paprika, 1 tbsp dried oregano, 1 tbsp freshly cracked black peppercorns, 1½ tsp salt, and 2 bay leaves. Sprinkle this mixture evenly over the oiled meat, pressing it into the surface so it adheres completely. Let the seasoned roast sit at room temperature for 30 minutes while you prepare the smoker—this ensures even cooking and maximum flavor penetration.
Build the Smoker Base and Sear the Meat
Set your smoker to 225°F using oak or hickory wood chips for a classic chili flavor profile. Once the temperature stabilizes and you see clean, blue smoke, place the seasoned chuck roast beef directly on the smoker grates. Sear it for 20 minutes per side until a deep mahogany crust forms. This initial sear locks in juices and creates the foundation for our rich chili base.
After searing, transfer the roast to a large Dutch oven or heavy pot. Add 2 chopped yellow onions and 8 crushed garlic cloves, stirring to coat them in the rendered meat juices. This creates a flavorful base that will infuse the chili as it cooks. Return the pot to the smoker and continue cooking undisturbed for 3 hours, maintaining the 225°F temperature. The meat should be fork-tender by this point, breaking apart easily when tested.
Develop the Chili Base with Smoked Aromatics
Remove the roast from the smoker and shred it directly in the pot using two forks, discarding the bay leaves. Stir in 2 cups canned tomato sauce, 2 cups beef broth, 1 tbsp dark brown sugar, and 1 tbsp apple cider vinegar. The vinegar brightens the flavors while the sugar adds subtle depth that balances the smokiness. Return the pot to the smoker and cook for an additional 2 hours, stirring occasionally to prevent sticking.
After 2 hours, add 1 can drained kidney beans and 1 can drained black beans, stirring to incorporate them evenly. The beans should heat through completely while absorbing the rich, smoky flavors. Taste the mixture and adjust seasoning with additional salt if needed—this chili should be bold but balanced, with the smoky depth complementing the natural sweetness of the tomatoes and beans.
Finish and Rest for Optimal Texture
Transfer the chili to a large serving bowl, ensuring all the beans and meat are fully coated in the smoky sauce. Let it rest at room temperature for 15 minutes before serving—this allows the flavors to meld completely and the texture to thicken slightly. The chili should be thick enough to coat the back of a spoon but still spoonable, with visible chunks of meat and beans throughout.
Serve immediately with crusty bread or over rice to soak up the rich, smoky goodness. The long smoking process creates a depth of flavor that builds with each bite, making this chili perfect for feeding a crowd or meal prepping. Store leftovers in the refrigerator for up to 5 days or freeze for 3 months—the flavors only improve with time.
Pro Tips For Making Smoker Chili
- Smash That Garlic: I used to crush those 8 cloves with my palm like a caveman, but now I smash them with the flat side of my knife first—just enough to bruise the skin. This releases the oils before they hit the smoker, so they caramelize into the onions and meat instead of burning into bitter dust. (Yes, it’s weird, but it works.)
- Don’t Rush the Sear: That 20 minutes per side at full heat isn’t optional—it’s the difference between chili that tastes like it came from a can and chili that’s got that deep, smoky crust. If your smoker’s running hotter than 225°F, give it a little more time. Trust me, the patience pays off when you shred that mahogany-colored meat later.
- Toast the Cumin First: Skip the toasted cumin step, and your chili will taste flat. Dry-toast those 2 tbsp in a skillet over medium heat for 30 seconds until it smells nutty and aromatic. Then mix it into the chili powder blend—this adds a warmth that cuts through the smokiness like a knife. (I know, I know, it’s one more pot to wash.)
- Stir the Beans Gently: Dumping those kidney and black beans straight in and letting them simmer violently will turn them mushy. Stir them in low and slow while the chili’s still at 225°F, just until they’re heated through. This keeps them tender but holds their shape—because nobody wants chili that’s a puree, right?
Regional styles of smoker chili
Texas-Style Smoky Chili
This version leans into bold, no-holds-barred flavor—think mesquite smoke and extra chili powder—that’s been a backyard staple in Texas for generations. I use 2 tbsp extra chili powder and add ½ tsp ground cayenne for heat, then finish with a splash of hot sauce like Crystal before serving.
The meat is smoked with hickory chips for that classic Texas char, and I always serve it with cornbread to soak up the juices. This version is all about that bold, no-fuss taste that’s perfect for tailgating or family cookouts. 🔥
Carolina-Style BBQ-Inspired
In the Carolinas, chili often gets a BBQ twist—think vinegar-based sauce and extra sweetness to balance the smokiness. I swap out 1 cup of beef broth for ½ cup apple cider vinegar and add 1 tbsp molasses to the mix.
The meat is smoked with peach wood for a sweeter, fruitier note, and I top it with crumbled blue cheese and pickled jalapeños for a tangy kick. This version is a crowd-pleaser at Southern gatherings! 🌟
Arizona-Style Green Chile
Down in Arizona, roasted green chiles take center stage, turning this into a vibrant, slightly sweet chili. I replace 1 cup of tomato sauce with 1 cup roasted green chiles (like New Mexico green chiles) and add 1 tbsp ground cumin and 1 tsp smoked paprika for depth.
The meat is smoked with oak for a clean, woodsy flavor, and I finish with sour cream and cilantro for a refreshing contrast. This version is lighter but just as flavorful—perfect for hot summer days. 🌶️
New Mexico-Style Red Chile
New Mexico’s red chile adds a deep, earthy sweetness that’s hard to beat. I use 1 cup roasted red chile powder (like Santa Fe brand) mixed into the tomato sauce, along with 1 tsp ancho chile powder for complexity.
The meat is smoked with applewood for a subtle fruitiness, and I top it with shredded cheddar and green onions. This version is rich, slightly sweet, and packed with layers of chile heat—ideal for chilly evenings. 💛
Cajun-Inspired Spicy Kick
For a Cajun-inspired twist, I add 1 tbsp Cajun seasoning (like Tony Chachere’s) to the rub and stir in 1 tbsp hot sauce (like Crystal or Tabasco) at the end.
The meat is smoked with mesquite for a bold, smoky punch, and I finish with green onions and lime wedges for brightness. This version is spicy, smoky, and tangy**—perfect for those who love heat! 🌶️⚡
Nutrition facts
Frequently asked questions
Why does this recipe use chuck roast instead of ground beef?
The 3 lb chuck roast is the secret to rich, tender chili. This tough cut breaks down beautifully during the 6-hour smoke at 225°F, creating deep collagen-rich flavor that ground beef simply can’t match. The result is a meatier texture with bold, smoky layers that ground beef would dilute.
Can I use a different type of wood for smoking?
Oak or hickory are ideal for classic chili flavor, but you can experiment! Applewood adds subtle sweetness while pecan creates a nutty profile. Avoid fruit woods like cherry unless you want a pronounced sweetness that might overpower the spices. Just test a small batch first to see how it pairs with your rub.
What if my chili is too thick after smoking?
Simmer the chili on your stovetop for 10-15 minutes, stirring occasionally, to reduce thickness. You can also add ½ cup beef broth gradually until you reach your desired consistency. The key is patience—don’t rush the process, as this helps balance the flavors while thinning the sauce.
How do I adjust the spice level?
For milder chili, reduce the chili powder to ¼ cup and omit cayenne. For extra heat, add ½ tsp cayenne or stir in 1 tbsp hot sauce at the end. Always taste before serving and adjust gradually—you can always add more spice, but you can’t take it away!
Can I make this recipe in a slow cooker instead of a smoker?
While you can adapt this for a slow cooker, the smoker’s low-and-slow heat creates that unmatched smoky depth. If using a slow cooker, sear the meat first, then cook on low for 8-10 hours with the same spices. However, you’ll miss the authentic smoky aroma that makes this recipe special.

Trained in classic French technique but raised on slow-cooked ribs and spicy rubs, she blends culinary skill with smoke and soul.
- Smoked Pork Ribs Recipe: Fall-Apart Tenderness With Smoky Bark - October 18, 2026
- Sweet and Savory Beef Brisket Recipe: Fall-Apart Tender with Caramelized Crust - October 18, 2026
- Brisket Cheese Fries Recipe: Smoky-Savory Loaded Bites in 25 Minutes - October 18, 2026