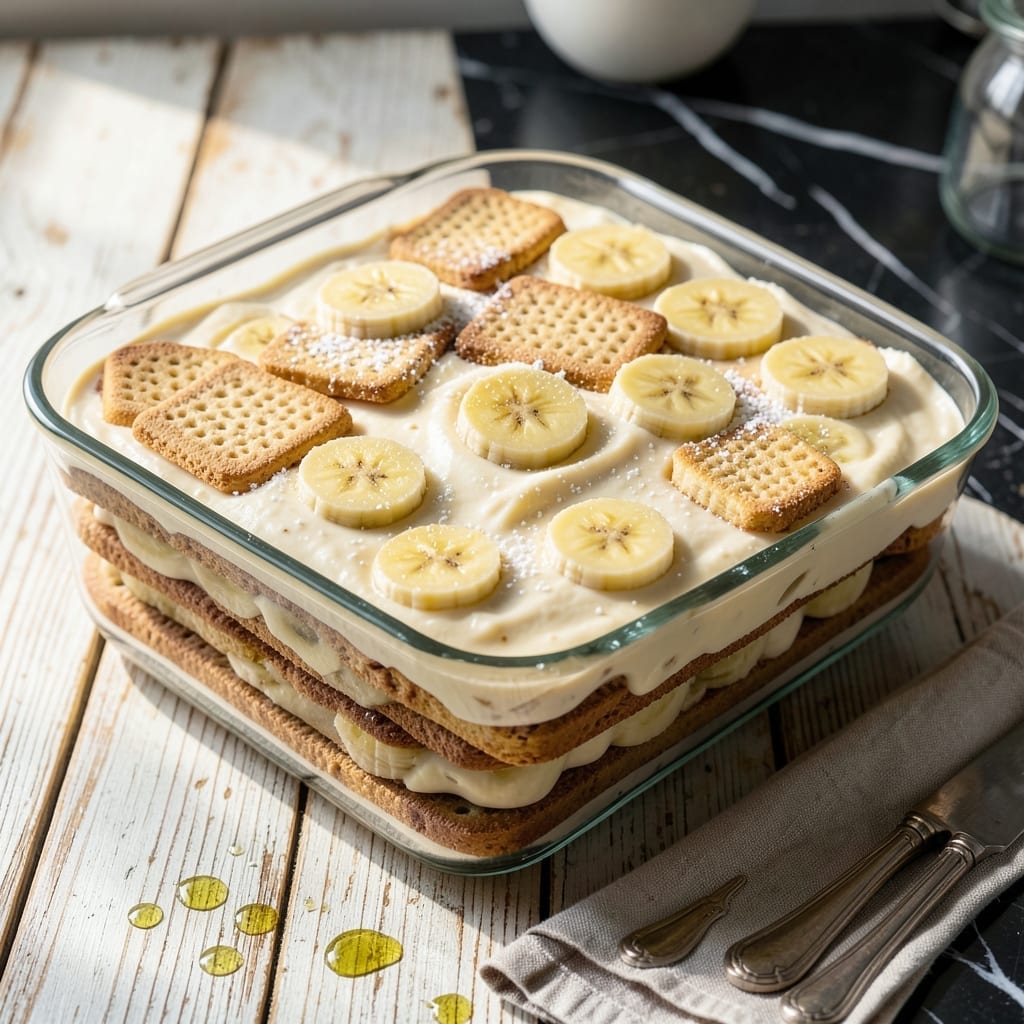
There’s a reason this classic dessert has stood the test of time—it’s the perfect balance of creamy custard, fresh bananas, and crisp vanilla wafers. I developed this version after years of testing, ensuring each layer holds its texture without turning soggy.
The secret lies in the custard, which needs just the right amount of vanilla and a slow cooking process to achieve that silky consistency. Assembly order matters too: wafers first, then bananas, then custard, repeated until the dish is full.
After chilling for at least 4 hours, the flavors meld together beautifully while the wafers soften just enough. It’s a dessert that tastes like nostalgia and feeds a crowd with ease.
Serve it at potlucks or family gatherings—it’s always the first to disappear.
Ingredients for Southern Living Banana Pudding
Simple, nostalgic ingredients layer up into that classic dessert everyone loves.
| Ingredient | Amount | Notes |
|---|---|---|
| Vanilla Wafers 🍪 | 14 oz | About 45-50 wafers, divided |
| Ripe Bananas 🍌 | 6 whole | Medium size, sliced into rounds |
| Granulated Sugar 🥄 | 1 ½ cups | Divided for custard and meringue |
| All-Purpose Flour 🌾 | ¼ cup | For thickening custard |
| Salt 🧂 | ¼ tsp | Balances sweetness |
| Large Eggs 🥚 | 4 whole | Separated, yolks for custard, whites for meringue |
| Whole Milk 🥛 | 2 cups | Full-fat for creaminess |
| Vanilla Extract 🌿 | 2 tsp | Pure extract for best flavor |
| Unsalted Butter 🧈 | 2 tbsp | For richness in custard |
| Cream of Tartar 🧂 | ½ tsp | Stabilizes meringue |
[recipe_ingredient_scaler]
The vanilla wafers are non-negotiable—Nilla Wafers are the gold standard, but store-brand vanilla wafers work too (just avoid the chocolate ones). Bananas should be ripe with some brown speckles—they’re sweeter and mash less. For the milk, whole milk gives you that ultra-creamy custard, but 2% is fine in a pinch. Grab eggs that are as fresh as possible for a stable meringue.
No cream of tartar? Lemon juice or white vinegar at the same amount will work. Want to skip the meringue? Whipped cream or a dusting of cinnamon on top is an easy swap. Vanilla extract is key here—imitation vanilla just won’t cut it for that authentic Southern taste. If you’re making this ahead, hold off on slicing the bananas until assembly to prevent browning.
This pudding needs at least 4 hours in the fridge to set properly. It’ll keep for 3 days covered—though it’s best the first day. Leftovers? Doubt there’ll be any, but they freeze surprisingly well for up to 1 month (thaw in the fridge overnight).
Why You’ll Love This Recipe
- No-Fuss Layers: I just alternate vanilla wafers, bananas, and custard—no baking, no stress.
- Sweet Nostalgia: That first bite with the soft wafers and fresh bananas? Tastes like my grandma’s kitchen.
- Potluck MVP: Honestly, it’s my go-to for picnics, BBQs, or just because Tuesday needs dessert.
- Budget Friendly: A handful of pantry staples and ripe bananas—feeds a crowd without breaking the bank.
Step-by-Step Instructions for Southern Living Banana Pudding
Here’s how I layer this classic dessert for that perfect creamy texture and buttery crunch.
Step 1: Prepare the Vanilla Wafer Base and Banana Layer
Start by arranging a single layer of vanilla wafers on the bottom of a 9×13-inch baking dish. I like to place them slightly overlapping to ensure every bite has that buttery crunch. Use about half of the 14 oz Vanilla Wafers for this first layer.
Next, slice all 6 whole Ripe Bananas into ¼-inch rounds and arrange them evenly over the vanilla wafers. The bananas should cover the wafers completely, creating a solid layer. This prevents the custard from making the cookies soggy too quickly.
Step 2: Make the Creamy Custard Filling
In a medium saucepan, whisk together 1 cup of the Granulated Sugar, the 0.25 cup All-Purpose Flour, and 0.25 tsp Salt. Gradually whisk in the 2 cups Whole Milk until smooth—this prevents lumps from forming.
Place the saucepan over medium heat and cook, stirring constantly, until the mixture thickens to the consistency of pudding, about 5-7 minutes. Watch for it to coat the back of a spoon thickly.
In a separate bowl, lightly beat the 4 whole Large Eggs. Slowly temper the eggs by whisking in about ½ cup of the hot milk mixture, then pour the tempered eggs back into the saucepan. Continue cooking for 2 more minutes, stirring constantly, until the custard is thick and glossy.
Remove from heat and stir in the 2 tbsp Unsalted Butter and 2 tsp Vanilla Extract until the butter is fully melted and incorporated. The custard should be rich, smooth, and fragrant with vanilla.
Step 3: Assemble the Pudding Layers
Pour half of the warm custard over the banana layer, spreading it evenly to the edges. Then, add another layer of vanilla wafers, using most of the remaining cookies. Top with the rest of the sliced bananas, if any remain, and pour the remaining custard over the top.
Gently press down on the layers to ensure the custard seeps into all the gaps. This helps every bite taste balanced with custard, bananas, and wafers.
Step 4: Prepare and Add the Meringue Topping
For the meringue, beat the 4 egg whites with the 0.5 tsp Cream of Tartar until soft peaks form. Gradually add the remaining ½ cup Granulated Sugar, beating until stiff, glossy peaks form—this should take about 4-5 minutes with a hand mixer.
The meringue is ready when it holds a peak when you lift the beaters and the sugar is fully dissolved (rub a bit between your fingers to check for grittiness). Spread the meringue evenly over the custard layer, sealing it to the edges of the dish to prevent shrinking.
Step 5: Bake to Golden Perfection
Bake at 350°F for 15-20 minutes, or until the meringue is golden brown and slightly puffed. Keep an eye on it—meringue can brown quickly. Let it cool for at least 1 hour before serving to allow the layers to set.
For best results, chill in the refrigerator for 4 hours or overnight. This lets the flavors meld and the vanilla wafers soften just enough. Serve cold with a sprinkle of crushed vanilla wafers on top for extra crunch.
Pro Tips For Making Southern Living Banana Pudding
- Chill the Layers: After assembling each layer of wafers, bananas, and custard, refrigerate for at least 20 minutes before adding the next. I learned this the hard way—without it, the wafers turn to mush before the pudding sets.
- Use Very Ripe Bananas: The spotted, almost-too-soft bananas are the ones you want here. They’re sweeter and mash slightly into the custard, giving that classic Southern Living texture.
- Cook the Custard Slow: Keep the heat at medium-low when thickening the custard with flour and sugar—high heat makes it lumpy or scorched. Stir constantly, and don’t walk away even for a second.
- Crumble Extra Wafers: Sounds weird, but it works: crush a handful of vanilla wafers and sprinkle them on top before chilling. It adds a crunch that balances the creamy layers perfectly.
Storing and Reheating This Recipe
Refrigerator Storage
Let this dessert cool completely at room temperature for about 1 hour before covering. I use plastic wrap pressed directly onto the meringue to prevent a skin from forming. It stays fresh in the fridge at 40°F or below for up to 3 days. ❄️
Freezer Storage
For longer storage, freeze the pudding in an airtight container for up to 1 month. I recommend covering the meringue with parchment paper first to prevent freezer burn. Thaw overnight in the refrigerator before serving.
Reheating Not Recommended
This dessert is best served cold straight from the fridge. Reheating can cause the custard to separate and the meringue to weep. If you must warm it, use the microwave at 50% power for 20-30 seconds per serving.
Make-Ahead Tips
You can assemble this the day before serving. Prepare the custard and layers, but wait to add the meringue until you’re ready to bake. This prevents the wafers from getting too soggy. Bake and chill as directed.
Serving After Storage
If the meringue weeps slightly after storage, just give it a quick stir before serving. The flavors will still be delicious. I often add fresh banana slices on top when serving leftovers for a bright, fresh touch.
Nutrition Facts
Frequently Asked Questions
Can I use a different cookie instead of vanilla wafers?
Stick with vanilla wafers for authentic texture and flavor. Graham crackers or shortbread can work in a pinch, but they won’t soften the same way.
Why did my custard turn out lumpy?
Lumps usually mean the flour wasn’t fully whisked into the milk before heating. Always mix dry ingredients with milk before turning on the heat to prevent this.
Can I make this without meringue?
Skip the meringue and top with whipped cream or a sprinkle of cinnamon. Some even prefer it this way for a simpler presentation.
How far in advance can I assemble this?
Assemble everything except the meringue up to 1 day ahead. Add and bake the meringue just before serving to keep the wafers from getting too soggy.

Trained in classic French technique but raised on slow-cooked ribs and spicy rubs, she blends culinary skill with smoke and soul.
- Recipe for Boneless Pork Chops in Cast Iron Skillet: Sear and Baste to Juicy Perfection - October 3, 2026
- Recipe for Boneless Cross Rib Roast: Slow-Roasted Beef with Herb Crust - October 3, 2026
- Hamburgers in Sauce Recipe Crock Pot: Slow-Cooked Savory Delight - October 3, 2026