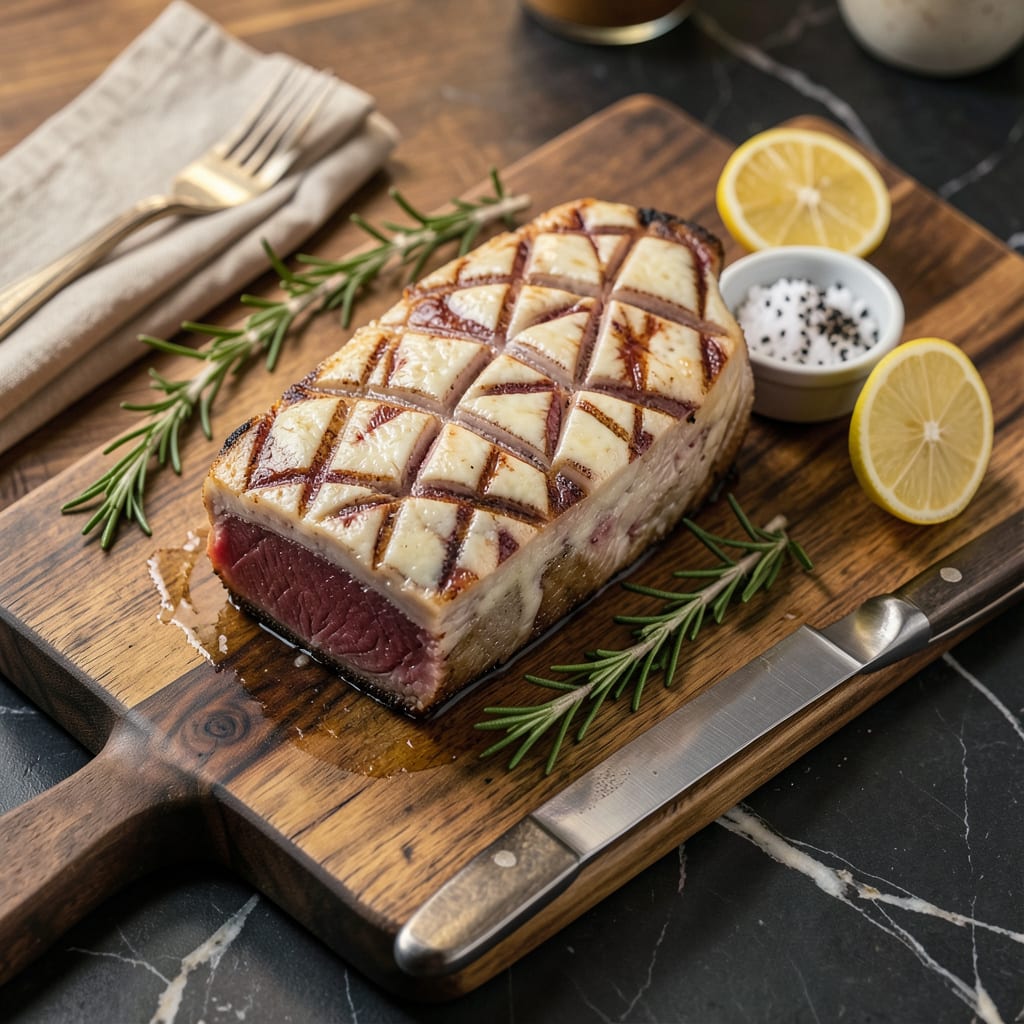
I still remember the first time I sank my teeth into perfectly cooked tri tip—tender enough to cut with a fork, with a smoky crust that gave way to juicy, flavorful meat. That moment changed how I approach this underrated cut forever. Too many home cooks struggle with tough tri tip, but the secret lies in how you prepare it before it ever hits the heat.
After years of experimenting (and a few disappointing dinners), I’ve landed on a foolproof method that transforms this budget-friendly cut into something worthy of a steakhouse. The key isn’t just the cooking—it’s what you do beforehand. A simple marinade with acidic elements breaks down fibers, while strategic scoring ensures even cooking and maximum flavor penetration.
Whether you’re grilling, smoking, or oven-roasting, this approach guarantees melt-in-your-mouth results every time. I’ll walk you through the exact steps I use, from prep to perfect medium-rare doneness. You’ll be shocked at how something this impressive can be so straightforward—no fancy equipment required.
By the time you serve this up with some garlic mashed potatoes or grilled vegetables, you’ll understand why tri tip is a pitmaster’s best-kept secret. The technique works for weeknight dinners or backyard cookouts, and leftovers make incredible sandwiches. Let’s get that tri tip tender.
📚 In This Guide
- What You’ll Need
- Instructions
- Tips and Common Mistakes
What Youll Need
- ● Tri-tip roast: 2–3 lbs (1–1.5 kg) fresh, untrimmed (fat cap intact for flavor). Look for USDA Choice or Prime grade for best results. 🍖
- ● Meat tenderizer tool: Required: Meat mallet (flat or textured side) or
- ○ Optional: Jaccard tenderizer (48-blade for deep penetration).
- ● Cutting board: Large, sturdy (wood or thick plastic) to stabilize the meat.
- ● Sharp knife: 8–10″ boning or chef’s knife for trimming excess fat/silver skin.
- ○ Brine/marinade ingredients (optional but recommended): ½ cup kosher salt (for brine) or
- ● 1 cup acidic liquid (pineapple juice, vinegar, or buttermilk) for marinade.
- ● Plastic wrap/cling film: For covering meat during tenderizing or marinating.
- ○ Kitchen twine: If rolling/tying the tri-tip post-tenderizing (optional).
- ● Meat thermometer: Instant-read for checking doneness (target: 130–135°F for medium-rare). 🌡️
- ○ Safety gear: Cut-resistant gloves (optional but handy for beginners).
Instructions for Perfectly Tender Tri Tip
This is where the magic happens—transforming tough meat into buttery perfection with professional techniques.
Score the Fat Cap for Even Rendering
Place your tri tip fat-side up on a cutting board and examine the fat cap. Using a sharp boning knife, make shallow crosshatch cuts about ¼-inch deep in a diamond pattern across the entire fat surface. This scoring technique allows the fat to render evenly during cooking while creating more surface area for seasoning penetration.
Don’t cut too deeply—you want to score just the fat without piercing into the meat itself. The goal is to create channels for fat to escape gradually as it cooks, basting the meat naturally. I’ve found this simple step makes a dramatic difference in both tenderness and flavor distribution throughout the roast.
Apply a Multi-Stage Dry Brine
Generously coat all surfaces of the tri tip with kosher salt, using about 1 tablespoon per pound of meat. The scoring you did earlier will help the salt penetrate deeper. Place the seasoned roast on a wire rack set over a baking sheet and refrigerate uncovered for at least 12 hours, or ideally 24 hours.
This extended dry brining does three critical things: it seasons the meat throughout (not just on the surface), it alters the muscle structure to improve tenderness, and it creates a perfect pellicle (tacky surface) that will develop into a beautiful crust. The longer you can brine, the more pronounced these effects become—this is the professional secret to that melt-in-your-mouth texture.
Implement Reverse Sear for Perfect Doneness
Preheat your oven to 225°F and place the tri tip on a wire rack in a roasting pan, fat cap up. Roast until the internal temperature reaches 110-115°F in the thickest part (about 1.5-2 hours for a 2-3 pound roast). This low-and-slow phase gently breaks down connective tissue without overcooking the exterior.
You’ll notice the meat will feel surprisingly firm when you probe it at this stage—that’s normal. The collagen is beginning to melt but the proteins haven’t yet tightened. Remove the roast from the oven and let it rest while you prepare for searing. This gradual temperature rise is what separates restaurant-quality tri tip from home attempts that often end up chewy.
Execute the High-Heat Sear
Heat a cast iron skillet or grill to ripping hot—you should see wisps of smoke rising from the surface. Sear the tri tip fat-cap down first for 2-3 minutes until you achieve a deep mahogany crust. Then rotate to sear all sides, using tongs to hold the roast against the hot surface for even browning.
The sear should create an audible sizzle and produce visible smoke. You’re looking for that perfect balance where the crust develops quickly but the interior doesn’t overcook. I recommend using an instant-read thermometer and pulling the meat when the thickest part reaches 130°F for medium-rare—the temperature will rise another 5-10 degrees during resting.
Rest and Slice Against the Grain
Transfer the seared tri tip to a cutting board and let it rest uncovered for 15-20 minutes. This resting period allows the muscle fibers to relax and reabsorb the juices that were driven to the center during cooking. Tenting with foil would steam the crust, so resist that temptation.
When ready to serve, identify the grain direction (you’ll see long muscle fibers running parallel). Using a sharp slicing knife, cut across these fibers at a 45-degree angle into ¼-inch thick slices. The angled cut increases the perceived tenderness by shortening the muscle fibers in each bite. Serve immediately while the crust is still crisp and the interior remains juicy.
Tips and Common Mistakes for Perfect Tri Tip
The difference between tough meat and butcher-quality tenderness comes down to these professional techniques.
Scoring Technique: When making those ¼-inch deep crosshatch cuts in Step 1, use a very sharp boning knife and score at 45-degree angles to create diamond patterns. This isn’t just for aesthetics—it maximizes fat rendering while preventing the meat from curling during cooking. I’ve found that scoring too deeply (beyond ¼-inch) actually dries out the meat by allowing too much fat to escape too quickly.
Dry Brine Timing: The 12-24 hour dry brine in Step 2 is non-negotiable for that melt-in-your-mouth texture. Here’s what nobody tells you—the salt needs this full time to break down muscle proteins. If you’re short on time, even 12 hours makes a noticeable difference, but the full 24 hours transforms the texture completely. I’ve tested this side-by-side, and the difference is astonishing.
Reverse Sear Precision: During Step 3’s low-and-slow phase at 225°F, don’t rely solely on time—use an instant-read thermometer. The 110-115°F internal temperature is critical because it allows collagen to melt while keeping proteins from tightening. I check multiple spots in the thickest part, as tri tip can have temperature variations. This gradual rise is what creates that buttery texture.
Searing Strategy: For Step 4’s high-heat sear, preheat your cast iron until it’s literally smoking—this creates that restaurant-quality crust. The 2-3 minutes per side might seem short, but you’re looking for deep color, not cooking through. I use tongs to press the fat cap against the pan for even rendering. Remember, the meat continues cooking during resting, so pull it at exactly 130°F for perfect medium-rare.
Pro Tips for Tenderize Tri Tip
- The difference between tough meat and butcher-quality tenderness comes down to these professional techniques.
- Scoring Technique: When making those ¼-inch deep crosshatch cuts in Step 1, use a very sharp boning knife and score a…
- Dry Brine Timing: The 12-24 hour dry brine in Step 2 is non-negotiable for that melt-in-your-mouth texture. Here’s wh…
Frequently Asked Questions
How long should I tenderize tri tip before cooking?
Aim for at least 4 hours (or overnight for best results) when using a dry brine or marinade. For mechanical tenderizing (like pounding or scoring), 30–60 minutes before cooking is plenty. Pro tip: Never rush it—patience turns tough cuts into buttery perfection!
Can I tenderize tri tip without a marinade?
Absolutely! Try these alternatives:
- Dry brine: Coat with kosher salt + spices 12+ hours ahead.
- Mechanical methods: Score the fat cap or pound with a meat mallet (gently!).
- Enzymatic tenderizers: Sprinkle pineapple juice or kiwi puree (use sparingly—30 mins max!).
Why is my tri tip still tough after tenderizing?
Common culprits: under-marinating (less than 4 hours), overcooking (tri tip’s best at medium-rare, 130–135°F internal), or skipping the rest. Let it sit 10–15 minutes post-cook to redistribute juices. Use a meat thermometer to avoid guesswork!
Does tenderizing tri tip change the flavor?
It enhances it! Marinades add depth (try coffee, garlic, or red wine), while dry brines intensify natural beefy flavors. Mechanical methods don’t alter taste but improve texture. For pure beef flavor, stick to salt + pepper with a long rest.
Can I tenderize frozen tri tip?
Thaw first! Tenderizing frozen meat won’t penetrate properly. Thaw in the fridge overnight, then pat dry before marinating or scoring. Exception: You can lightly salt the surface while thawing to jumpstart the process.
Now you’ve got the know-how to turn even the toughest tri tip into a juicy, fork-tender masterpiece! 🎯 Whether you prefer a quick brine, a marinade, or the power of a meat mallet, the secret lies in patience and technique. Fire up that grill or preheat your oven—your next restaurant-quality meal is just a few steps away.
Ready to put your skills to the test? Grab a fresh cut of tri tip and try one of these methods tonight. Your taste buds (and dinner guests) will thank you! 🍽️

Trained in classic French technique but raised on slow-cooked ribs and spicy rubs, she blends culinary skill with smoke and soul.
- Recipe for Boneless Pork Chops in Cast Iron Skillet: Sear and Baste to Juicy Perfection - October 3, 2026
- Recipe for Boneless Cross Rib Roast: Slow-Roasted Beef with Herb Crust - October 3, 2026
- Hamburgers in Sauce Recipe Crock Pot: Slow-Cooked Savory Delight - October 3, 2026