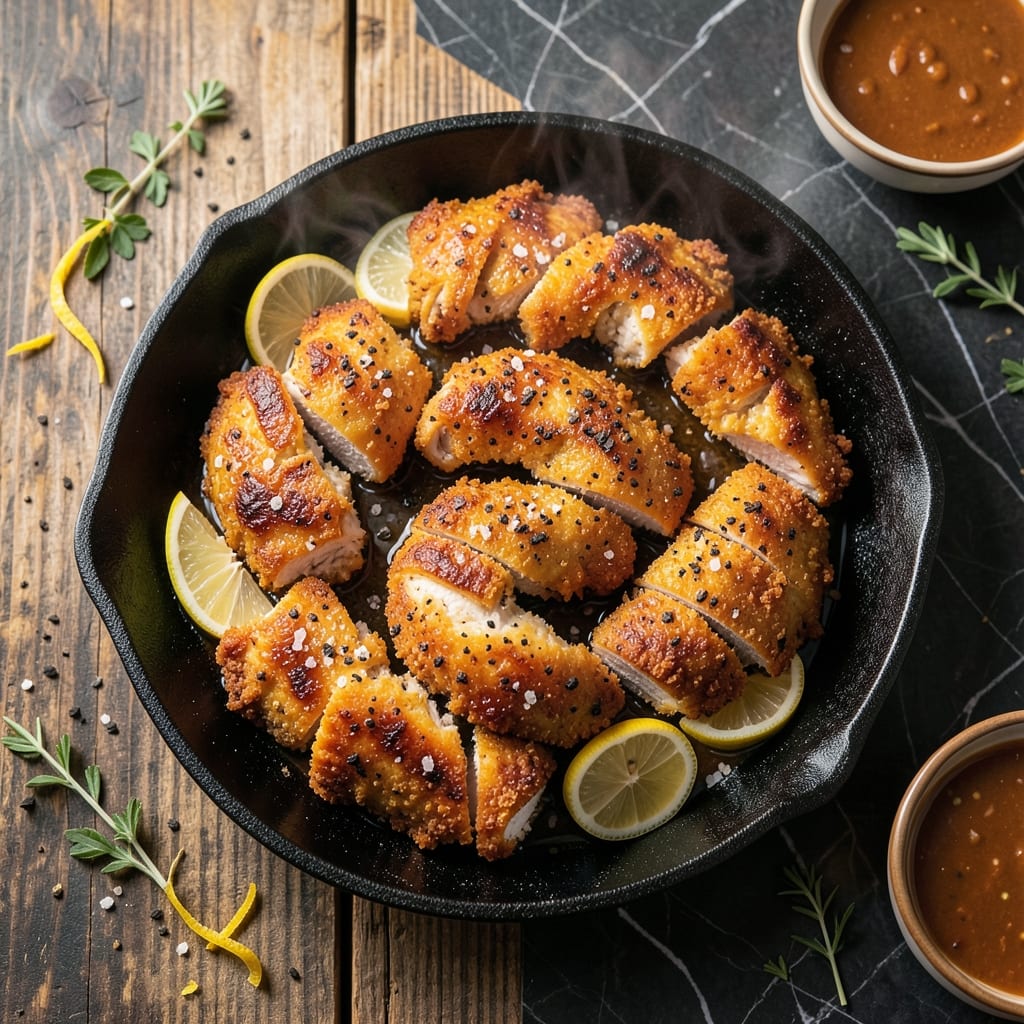
There’s something special about country fried chicken that brings comfort to any meal. This version delivers a crispy, golden coating that stays perfectly crunchy, paired with a creamy gravy that ties everything together.
The secret lies in a buttermilk marinade and a double-dredging technique, ensuring every bite is packed with flavor and texture. It’s a method that’s been perfected over time, and it shows in the results.
Once fried to a deep golden brown, the chicken is smothered in a rich, peppered gravy that’s both hearty and smooth. The combination is a classic for a reason—it’s satisfying and deeply flavorful.
Serve it hot, with mashed potatoes or biscuits to soak up every last drop. This is comfort food at its best.
Ingredients for Texas Roadhouse Country Fried Chicken
Everything you need for crispy, creamy comfort that satisfies every time.
| Ingredient | Amount | Notes |
|---|---|---|
| Chicken Breast 🍗 | 1 ½ lb | Boneless, skinless, cut into cutlets |
| Buttermilk 🥛 | 2 cups | For marinating chicken |
| All-Purpose Flour 🌾 | 2 cups | Divided for dredging |
| Cornstarch 🌾 | ¼ cup | For extra crispiness |
| Salt 🧂 | 1 ½ tsp | Kosher or sea salt |
| Black Pepper 🌶️ | 1 tsp | Freshly ground preferred |
| Paprika 🌶️ | 1 tsp | Sweet or smoked variety |
| Garlic Powder 🧄 | 1 tsp | For seasoning flour |
| Onion Powder 🧅 | 1 tsp | For seasoning flour |
| Large Eggs 🥚 | 2 whole | Beaten for egg wash |
| Vegetable Oil 🫒 | 4 cups | For frying chicken |
| Whole Milk 🥛 | 2 cups | For creamy gravy |
| All-Purpose Flour 🌾 | ¼ cup | For thickening gravy |
| Chicken Broth 🍲 | 1 ½ cups | Low-sodium preferred |
| Heavy Cream 🥛 | ½ cup | For rich gravy texture |
[recipe_ingredient_scaler]
The chicken is the star here. Boneless, skinless breasts cut into even cutlets ensure consistent cooking—avoid pre-cut tenders as they dry out faster. Buttermilk is non-negotiable for that signature tang and tenderness. Whole milk buttermilk from the dairy case works best, but powdered in a pinch (just reconstitute it properly). For the flour, all-purpose is standard, but swap in self-rising if you want a slightly lighter crust.
No buttermilk? Milk plus 1 tbsp vinegar per cup works in a hurry. Out of cornstarch? Baking powder at half the amount adds lift to the coating. For the gravy, whole milk is ideal but 2% works fine—just don’t use skim. Want extra richness? Substitute half-and-half for the heavy cream. The chicken broth can be homemade or quality boxed, just avoid overly salty varieties.
Fry in batches and keep warm in a 200°F oven while finishing. Gravy thickens as it cools, so thin with a splash of milk if needed. Leftovers? Store chicken and gravy separately—keeps in the fridge for 3-4 days but best eaten fresh for that perfect crunch.
Why You’ll Love This Recipe
- One Bowl Wonder: I just dump buttermilk, flour, and cornstarch in one bowl—no fancy prep, no extra dishes.
- Crispy, Creamy Bite: The cornstarch in the coating gives it that shatter-crisp crust with juicy chicken underneath.
- Feeds a Hungry Table: I’ve served this for Sunday suppers and game nights—always disappears first.
- Budget Stretcher: Chicken breast stays affordable, and the buttermilk marinade makes cheap cuts taste amazing.
Step-by-Step Instructions for Country Fried Chicken With Creamy Gravy
Here is the tested method that delivers crispy coating and rich gravy every time.
Step 1: Marinate and Season the Chicken
Cut the 1.5 lb Chicken Breast into ½-inch thick cutlets. Submerge them completely in the 2 cups Buttermilk in a shallow dish. Cover and refrigerate for at least 4 hours or overnight.
The buttermilk tenderizes the meat while adding subtle tang. I check that each piece is fully coated—this prevents dry spots and ensures even seasoning. The longer marinating time develops deeper flavor and juicier texture.
Step 2: Create the Seasoned Dredge and Coat
In a large bowl, whisk together the 2 cups All-Purpose Flour, 0.25 cup Cornstarch, 1.5 tsp Salt, 1 tsp Black Pepper, 1 tsp Paprika, 1 tsp Garlic Powder, and 1 tsp Onion Powder until evenly distributed. The cornstarch is key for extra crispiness.
Beat the 2 whole Large Eggs in a separate shallow dish. Remove chicken from buttermilk, letting excess drip off, then dip in egg wash. Coat each piece thoroughly in the seasoned flour mixture, pressing gently to adhere. Place on a wire rack and let rest for 10 minutes to set the coating.
Step 3: Fry to Golden Perfection
Heat the 4 cups Vegetable Oil in a deep skillet to 350°F over medium-high heat. Use a thermometer for accuracy—oil that’s too cool will make greasy coating, too hot will burn the exterior before the chicken cooks through.
Fry the chicken in batches to avoid crowding, for 4-5 minutes per side until golden brown and internal temperature reaches 165°F. Drain on a wire rack set over a baking sheet to maintain crispiness. The rack prevents steam buildup that would make the coating soggy.
Step 4: Make the Creamy Gravy
After frying, carefully pour off all but ¼ cup of the oil from the skillet. Whisk in the 0.25 cup All-Purpose Flour over medium heat and cook for 1-2 minutes until light golden brown. This creates a roux that thickens the gravy.
Slowly pour in the 1.5 cups Chicken Broth and 2 cups Whole Milk, whisking constantly to prevent lumps. Bring to a simmer and cook for 3-4 minutes until thickened. Stir in the 0.5 cup Heavy Cream and simmer for 1 minute more. Season with additional salt and pepper to taste.
Step 5: Serve Immediately
Ladle the hot gravy over the crispy chicken just before serving. The contrast between the crunchy coating and silky gravy is what makes this dish special. I always serve it with mashed potatoes to soak up every bit of the rich sauce.
For best results, eat immediately while the coating is still at its crispiest and the gravy is hot. The gravy will thicken slightly as it cools, so keep it warm over low heat if you’re serving a crowd.
Pro Tips For Making Texas Roadhouse Country Fried Chicken
- Brining Time Matters: Soak the chicken in buttermilk for at least 4 hours—overnight if you can. I learned this the hard way when my first batch turned out dry because I rushed it.
- Double Dredge: Dip the chicken in the flour-cornstarch mix, then back in buttermilk, then flour again. Sounds tedious, but it’s how you get that signature Texas Roadhouse crunch.
- Skip the Overcrowding: Fry in batches so the oil stays hot. After burning my second piece from cramming too many in the pan, I finally figured out patience pays off.
- Rest Before Serving: Let the chicken rest 5 minutes on a rack after frying. My grandmother swore by this, and she was right: it keeps the crust crispy instead of soggy.
Essential Equipment for Perfect Results
Deep Fry Equipment
For authentic results, use a heavy cast iron skillet—I swear by my Lodge 12-inch for even heat distribution. A deep fry thermometer (Taylor or Habor brands) is essential to maintain 350°F oil temperature. Never guess with hot oil. 🌡️
Dredging Station Setup
You’ll need 3 shallow dishes (I use Pyrex glass pie plates) for buttermilk, egg wash, and seasoned flour. A wire cooling rack over a baking sheet keeps fried chicken crispy while draining. Tongs help flip pieces without piercing the coating.
Gravy Making Tools
A whisk is non-negotiable for lump-free gravy—OXO’s balloon whisk works perfectly. Use the same skillet for gravy to capture fond (browned bits). A fat separator helps if you want to skim excess oil before making the roux.
Safety Gear
Hot oil requires heat-resistant gloves and a splatter screen to prevent burns. Keep a fire extinguisher rated for grease fires nearby—safety first. I also recommend long-handled tongs to maintain distance from hot oil.
Serving Essentials
A slotted spatula helps transfer chicken to serving plates without losing crust. Pre-warm your plates in a 200°F oven to keep everything hot. For gravy, a gravy boat with a spout makes pouring elegant and mess-free.
Budget Alternatives
No cast iron? A heavy stainless steel skillet works too. Skip the thermometer? Test oil with a wooden chopstick—bubbles around it mean it’s ready. For dredging, any wide, shallow dish will do in a pinch.
Nutrition Facts
Frequently Asked Questions
Can I substitute chicken thighs for breasts?
Use boneless, skinless thighs for juicier results. They stay tender even with longer cooking. Just extend frying time to 5-6 minutes per side to reach 165°F internally.
Why does my coating fall off during frying?
This usually happens if the chicken wasn’t patted dry before dredging or didn’t rest after coating. Ensure pieces are fully dry and let them sit for 10 minutes post-dredge to set the crust properly.
Can I make this air fryer-friendly?
Yes, but results differ. Spray coated chicken lightly with oil and air fry at 375°F for 12-15 minutes, flipping halfway. The texture won’t be as crispy as deep-frying, but it works in a pinch.

Trained in classic French technique but raised on slow-cooked ribs and spicy rubs, she blends culinary skill with smoke and soul.
- Recipe for Boneless Pork Chops in Cast Iron Skillet: Sear and Baste to Juicy Perfection - October 3, 2026
- Recipe for Boneless Cross Rib Roast: Slow-Roasted Beef with Herb Crust - October 3, 2026
- Hamburgers in Sauce Recipe Crock Pot: Slow-Cooked Savory Delight - October 3, 2026