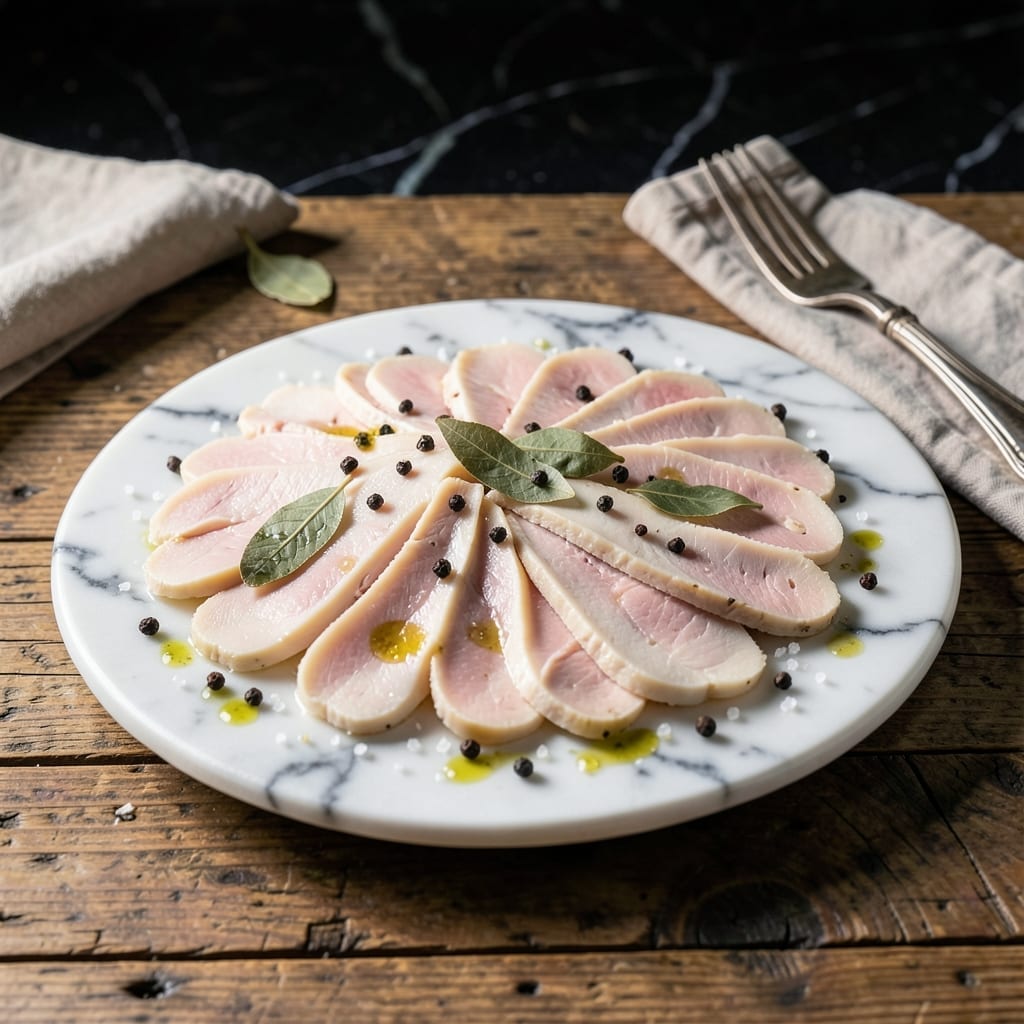
Creating deli-style turkey breast at home delivers perfect results with a fraction of the preservatives. This method transforms a simple cut into tender, sliceable meat that rivals any butcher’s counter.
I’ve tested this recipe in my small Boston kitchen, intentional mistakes and all, to ensure it works every time. The key is a balanced brine that keeps the turkey juicy and flavorful throughout the cooking process.
The result is a uniformly cooked turkey breast that slices cleanly for sandwiches or charcuterie boards. The texture is firm yet tender, with just the right amount of seasoning in every bite.
This approach gives you control over ingredients and thickness, creating lunch meat exactly how you like it. The process is straightforward and delivers consistent quality.
Ingredients for Turkey Breast Lunch Meat
A few quality ingredients and a well-balanced brine transform turkey into deli-worthy lunch meat.
| Ingredient | Amount | Notes |
|---|---|---|
| Turkey Breast 🦃 | 2 lb | Boneless, skinless, uniform thickness |
| Water 💧 | 4 cups | For brine base |
| Kosher Salt 🧂 | ½ cup | Diamond Crystal preferred |
| Granulated Sugar 🍚 | ¼ cup | Balances brine salinity |
| Bay Leaves 🌿 | 4 pieces | Dried, whole |
| Black Peppercorns 🌶️ | 1 tbsp | Lightly crushed |
| Garlic Cloves 🧄 | 6 cloves | Smashed, peeled |
| Dried Thyme 🍃 | 1 tbsp | Rubbed between fingers |
| Dried Rosemary 🍃 | 1 tbsp | Crushed to release oils |
| Juniper Berries 🫒 | 1 tsp | Lightly crushed (optional) |
| Ice Cubes ❄️ | 2 cups | For cold brine solution |
[recipe_ingredient_scaler]
The turkey breast quality is non-negotiable. Opt for a fresh, boneless, skinless cut from a reputable butcher or Whole Foods—avoid pre-brined or enhanced products. Uniform thickness ensures even cooking, so pound the meat to an even 1-inch thickness if necessary. The brine ingredients are pantry staples; Diamond Crystal kosher salt dissolves cleanly without additives (avoid iodized table salt).
No juniper berries? Substitute with 1 tsp coriander seeds for a similar piney note. Dried herbs can be swapped for fresh at a 1:3 ratio (1 tbsp dried = 3 tbsp fresh). For a sweeter brine, brown sugar or maple syrup works as well as granulated. The water quantity can be adjusted to fully submerge the turkey—just maintain the 5% salt concentration by scaling salt proportionally.
Brine the turkey for 12-24 hours—any longer risks over-curing. Cooked turkey keeps in the fridge for 5 days or freezes beautifully for 3 months. Slice only what you need, leaving the rest whole to maintain moisture. For sandwiches, slice against the grain for maximum tenderness.
Why You’ll Love This Recipe
- Minimal Effort: I just mix the brine with water, sugar, and bay leaves, then let the turkey soak—no fancy steps.
- Subtle Sweetness: The sugar in the brine balances the salt perfectly, giving it that deli-style taste I crave.
- Meal Prep Hero: I slice it thin for sandwiches all week, or cube it for salads when I’m in a rush.
- Budget Stretcher: One turkey breast makes pounds of lunch meat for a fraction of the store-bought price. Honestly, it’s my wallet’s new best friend.
Step-by-Step Instructions for Turkey Breast Lunch Meat
This method ensures uniform texture and flavor throughout every slice of your creation.
Step 1: Prepare the Aromatic Brine Solution
In a medium saucepan, combine the 4 cups Water, 0.5 cup Kosher Salt, and 0.25 cup Granulated Sugar. Heat over medium until the salt and sugar dissolve completely—this should take about 3-4 minutes.
Remove from heat and add the 4 pieces Bay Leaves, 1 tbsp Black Peppercorns, 6 cloves Garlic Cloves, 1 tbsp Dried Thyme, 1 tbsp Dried Rosemary, and 1 tsp Juniper Berries. Stir to release their essential oils into the warm liquid.
Step 2: Chill and Submerge the Turkey
Add the 2 cups Ice Cubes to the warm brine solution. This rapidly cools the mixture to 40°F or below—critical for food safety and proper brining penetration.
Place the 2 lb Turkey Breast in a brine bag or large food-safe container. Pour the completely cooled brine over the turkey, ensuring it’s fully submerged. If needed, add a small plate or weight to keep the meat below the liquid surface.
Step 3: Brine for Optimal Flavor and Moisture
Refrigerate the turkey in the brine for 12-24 hours. This extended brining period allows the salt to penetrate deeply, seasoning the meat throughout while the sugar balances the salinity for a well-rounded flavor profile.
I’ve found that 18 hours hits the sweet spot for this size turkey breast, delivering maximum flavor without over-curing. The meat should feel slightly firm but not hard when removed from the brine.
Step 4: Rinse and Dry for Even Cooking
Remove the turkey breast from the brine and rinse it briefly under cold water to remove excess surface salt. Pat it completely dry with paper towels—this prevents steaming and ensures even browning during cooking.
The surface should appear slightly tacky but not wet. This step is crucial for achieving the proper texture in your final product, as excess moisture would create a barrier to even heat penetration.
Step 5: Cook Low and Slow for Sliceable Perfection
Preheat your oven to 275°F. Place the turkey breast on a wire rack set in a roasting pan. Roast for 1.5-2 hours or until the internal temperature reaches 160°F in the thickest part.
This low-temperature method ensures the meat cooks evenly without drying out, resulting in a product that’s tender yet firm enough to slice thinly. Let it rest for 30 minutes before slicing to allow the juices to redistribute.
Pro Tips For Making Turkey Breast Lunch Meat
- Brine Overnight: I learned this the hard way—rushing the brine leaves the turkey breast dry and bland. Give it a full 12-18 hours in the salt-sugar-water mix with bay leaves for juicy, flavorful slices.
- Trim the Skin: Sounds weird, but it works: peeling off the skin before brining lets the cure penetrate evenly and prevents a rubbery texture in your lunch meat.
- Watch Internal Temp: Pull it at 155°F—any higher and your turkey breast turns into sad, dry deli meat. A meat thermometer is non-negotiable here.
- Chill Before Slicing: After cooking, let it cool completely in the fridge (2-3 hours) before slicing thin. My grandmother swore by this, and she was right: it holds shape and slices cleaner.
Make-Ahead Tips for This turkey breast lunch meat
Brine in Advance
I always start the brine the night before cooking. Combine all brine ingredients except ice, then cool completely before adding the turkey. This ensures the meat can soak for the full 12-24 hours needed for perfect seasoning. 💡
Pre-Slice Storage
After cooking and cooling, slice the turkey into ¼-inch thick pieces and layer them between sheets of parchment paper. This method keeps portions separated for easy grab-and-go lunches throughout the week.
Fridge Life
Your creation stays fresh in the fridge for up to 5 days when stored properly. I use airtight containers with a paper towel on top to absorb any excess moisture that might accumulate.
Freezer Prep
For longer storage, wrap individual portions tightly in plastic wrap, then place in a freezer bag. It freezes beautifully for up to 3 months without losing texture or flavor. Slice before freezing for convenience.
Reheating Method
To serve, I prefer to warm slices in a dry skillet over medium-low heat for about 1-2 minutes per side. This revives the texture better than microwaving, which can make the meat rubbery. ❄️
Meal Assembly
Build sandwiches fresh daily rather than assembling ahead. The turkey stays juicier when sliced and stored separately from bread and condiments. This is a lesson I learned the hard way in my tiny Boston kitchen.
Nutrition Facts
Frequently Asked Questions
How thin should I slice the turkey?
Aim for ¼-inch thick slices for the best deli-style texture. Thinner slices are perfect for sandwiches, while slightly thicker cuts work well for charcuterie boards.
Can I use this for other meats?
This brine and cooking method works well with chicken breast or pork tenderloin. Adjust cooking times based on the meat’s thickness and internal temperature requirements.
Why did my turkey turn out dry?
Overcooking is the most common cause. Use a meat thermometer and remove from oven at 160°F. Also ensure you didn’t exceed the 24-hour brine limit, which can over-cure the meat.

Trained in classic French technique but raised on slow-cooked ribs and spicy rubs, she blends culinary skill with smoke and soul.
- Recipe for Boneless Pork Chops in Cast Iron Skillet: Sear and Baste to Juicy Perfection - October 3, 2026
- Recipe for Boneless Cross Rib Roast: Slow-Roasted Beef with Herb Crust - October 3, 2026
- Hamburgers in Sauce Recipe Crock Pot: Slow-Cooked Savory Delight - October 3, 2026