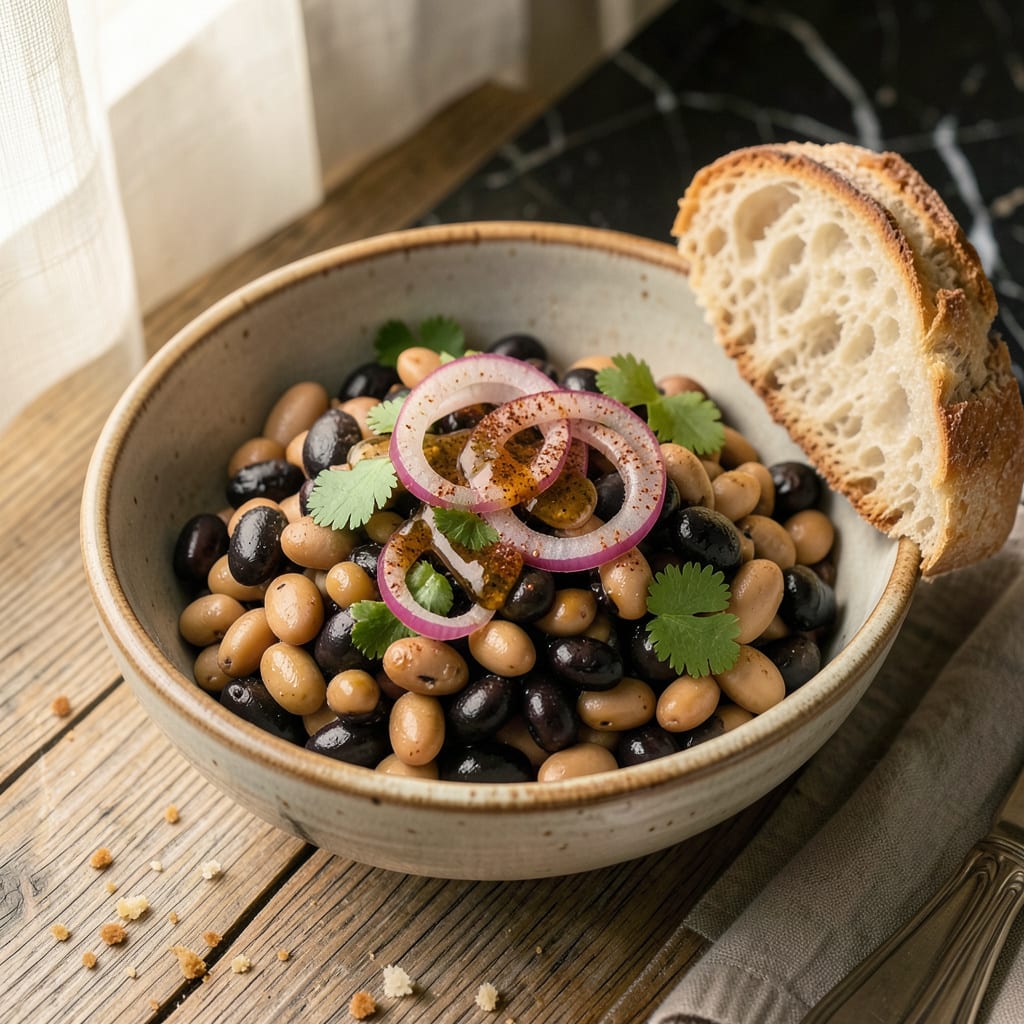
I’ll be real with you—vinegar in beans isn’t just some old wives’ tale. It’s the game-changer that transforms basic beans into something rich, creamy, and packed with depth. After years of experimenting with different vinegars and cooking methods, I’ve nailed down the perfect balance that makes every bite sing.
Here’s the thing—timing matters. Add vinegar too early and you’ll toughen the beans; too late and you’ll miss the flavor magic. My method uses just a splash at the right moment to tenderize while adding that bright, tangy kick. Whether you’re cooking pinto, black, or white beans, this technique works wonders.
What you’ll end up with is a pot of beans that’s anything but boring. The vinegar cuts through the richness, balancing the earthy flavors while making the beans creamy without any added fat. It’s the kind of dish that tastes like it simmered all day, even when it didn’t.
Perfect as a standalone side or paired with rice, cornbread, or your favorite protein. The best part? This method works whether you’re using a slow cooker, Instant Pot, or good old stovetop. Let’s get those beans cooking!
📚 In This Guide
- What You’ll Need
- Instructions
- Tips and Common Mistakes
What Youll Need
- ● Dried beans – 1 lb (16 oz) of your choice (pinto, black, navy, or kidney beans work great! 🌱)
- ● White vinegar or apple cider vinegar – 2–3 tbsp (5% acidity for best results)
- ● Water – 6–8 cups (for soaking and cooking, filtered preferred)
- ● Salt – 1 tsp (add after cooking for tender beans)
- ● Large pot or Dutch oven – 5–6 qt capacity (with lid for even cooking)
- ● Wooden spoon – for gentle stirring (no scratching!)
- ● Colander – for draining soaked beans
- ● Aromatics – 1 onion (halved), 2 garlic cloves, or 1 bay leaf (for extra flavor 🌿)
- ● Baking soda – ¼ tsp (if using hard water to soften beans faster)
- ● Instant-read thermometer – to check doneness (205°F for perfect tenderness)
- ● Lemon juice – 1 tbsp (for a brighter tang if desired)
Instructions for Adding Vinegar to Beans
This simple technique transforms ordinary beans into something extraordinary—let’s get started!
Choose Your Beans and Vinegar
Start with your favorite beans—whether they’re canned (drained and rinsed) or dried (cooked until tender). I love using pinto beans, black beans, or navy beans for this method, but any variety works beautifully. The key is to have your beans fully cooked before adding the vinegar.
For the vinegar, apple cider vinegar is my top choice for its mild sweetness, but red wine vinegar or white vinegar work too. You’ll want about 1 tablespoon of vinegar per cup of cooked beans—this ratio gives you that perfect tangy boost without overpowering the dish.
Add Vinegar at the Right Time
Here’s the secret: add the vinegar when your beans are nearly done cooking. For canned beans, this means after you’ve heated them through. For dried beans, add it during the last 15-20 minutes of simmering. This timing allows the vinegar to mellow and blend seamlessly with the beans.
Pour the vinegar evenly over the beans and stir gently to distribute. You’ll notice the liquid immediately becomes slightly cloudy—that’s the vinegar working its magic. Don’t worry if it seems strong at first; the flavor will balance beautifully as it cooks.
Simmer and Let Flavors Meld
After adding the vinegar, let the beans simmer for at least 10-15 minutes on low heat. This gentle cooking time is crucial—it allows the vinegar to penetrate the beans while softening its sharp edge. You’ll see the liquid reduce slightly and become more glossy.
Taste as you go! The vinegar should enhance the beans’ natural creaminess without making them sour. If needed, you can add a pinch of sugar or a splash of broth to balance the acidity. The beans are ready when the liquid has thickened just enough to cling lightly to each bean.
Rest Before Serving
Remove the beans from heat and let them rest for 5-10 minutes before serving. This short wait allows the flavors to fully marry together. You’ll notice the beans become even creamier as they sit, absorbing all that tangy goodness.
Give them one final stir before serving. The vinegar will have transformed the beans completely—they’ll be richer, more complex, and have that perfect velvety texture. Serve them warm as a side dish or as the star of your meal.
Adjust and Enjoy
Before serving, give the beans a taste and adjust the seasoning if needed. You might want to add a bit more salt to balance the acidity, or a sprinkle of fresh herbs like parsley or cilantro for brightness. The vinegar makes the beans more adaptable to different flavor profiles.
Watch how this simple addition elevates your beans! They’ll have a depth of flavor that makes them taste like they’ve been cooking all day. Store any leftovers in the fridge—they’ll keep for up to 5 days, and the flavors will continue to develop beautifully.
Tips and Common Mistakes for Perfectly Tangy Beans
This simple vinegar technique will transform your beans—here’s how to make them absolutely irresistible every time.
The Timing Secret: In Step 2, adding vinegar during those last 15-20 minutes of simmering is game-changing! This window allows the acidity to mellow perfectly while still infusing deep flavor. For canned beans, I’ve found heating them through first (about 5 minutes) before adding vinegar gives the best results. The beans absorb the tang beautifully without becoming sour.
Low Heat Magic: That 10-15 minute simmer on low heat in Step 3 is where the transformation happens. Keep the heat gentle—you should see tiny bubbles breaking the surface, not a rolling boil. This slow melding creates that velvety texture we’re after. I like to stir occasionally to help the vinegar distribute evenly through the beans.
Resting Revelation: Don’t skip the 5-10 minute rest in Step 4! I learned this the hard way after serving beans straight from the pot. That short rest lets the beans soak up all the tangy liquid, becoming impossibly creamy. You’ll actually see the liquid thicken slightly as it cools—this is the vinegar working its magic to create that perfect clingy consistency.
Flavor Balancing Act: When tasting in Step 5, remember the vinegar flavor will continue developing. If it seems too sharp initially, resist adding sugar right away. The acidity mellows beautifully during that final rest. I often find the flavor perfect after resting, but if needed, a tiny pinch of sugar (about 1/4 teaspoon) balances it perfectly without making the beans sweet.
Pro Tips for Vinegar In Beans
- This simple vinegar technique will transform your beans—here’s how to make them absolutely irresistible every time.
- The Timing Secret: In Step 2, adding vinegar during those last 15-20 minutes of simmering is game-changing! This wind…
- Low Heat Magic: That 10-15 minute simmer on low heat in Step 3 is where the transformation happens. Keep the heat gen…
Frequently Asked Questions
Got questions about using vinegar in beans? You’re not alone! Here are the most common queries—answered fast so you can get cooking.
How much vinegar should I add to beans?
Start with 1–2 tablespoons of vinegar (apple cider or white) per 1 pound of dried beans. For canned beans, use 1 teaspoon per can. Adjust to taste—too much can overpower, but a splash brightens flavor without dominating.
When’s the best time to add vinegar to beans?
Add vinegar at the end of cooking (last 10–15 minutes) for dried beans to avoid toughening them. For canned beans, stir it in after heating. Acid early on can slow softening, so patience pays off!
Can I use any type of vinegar, or are some better?
Apple cider vinegar (mild, fruity) and white vinegar (neutral) work best. Avoid balsamic (too sweet) or red wine vinegar (can darken beans). For smoky depth, try a dash of sherry vinegar in black beans.
Why did my beans stay hard after adding vinegar?
Vinegar’s acidity can prevent beans from softening if added too early. Fix it: Drain, rinse, and simmer in fresh water (no vinegar) until tender. Next time, wait until beans are almost done before adding it.
What’s a good vinegar substitute for beans?
No vinegar? Use lemon juice (1:1 ratio) or lime juice (½ the amount). For richness without tang, try a splash of dry white wine or pickle brine (¼ cup max). Each adds a unique twist!
Adding vinegar to your beans isn’t just a cooking hack—it’s a game-changer for flavor, texture, and digestion! 🌟 Whether you’re simmering a pot of pinto beans or whipping up a zesty three-bean salad, that splash of acidity brightens flavors, softens skins, and even cuts down on gas. The best part? It’s simple, affordable, and works with any vinegar you have on hand.
Ready to take your beans to the next level? Grab a bottle of vinegar and try it in your next batch—your taste buds (and dinner guests) will thank you! For extra inspiration, experiment with different types like apple cider, balsamic, or even rice vinegar. Happy cooking! 🍲

Trained in classic French technique but raised on slow-cooked ribs and spicy rubs, she blends culinary skill with smoke and soul.
- Recipe for Boneless Pork Chops in Cast Iron Skillet: Sear and Baste to Juicy Perfection - October 3, 2026
- Recipe for Boneless Cross Rib Roast: Slow-Roasted Beef with Herb Crust - October 3, 2026
- Hamburgers in Sauce Recipe Crock Pot: Slow-Cooked Savory Delight - October 3, 2026