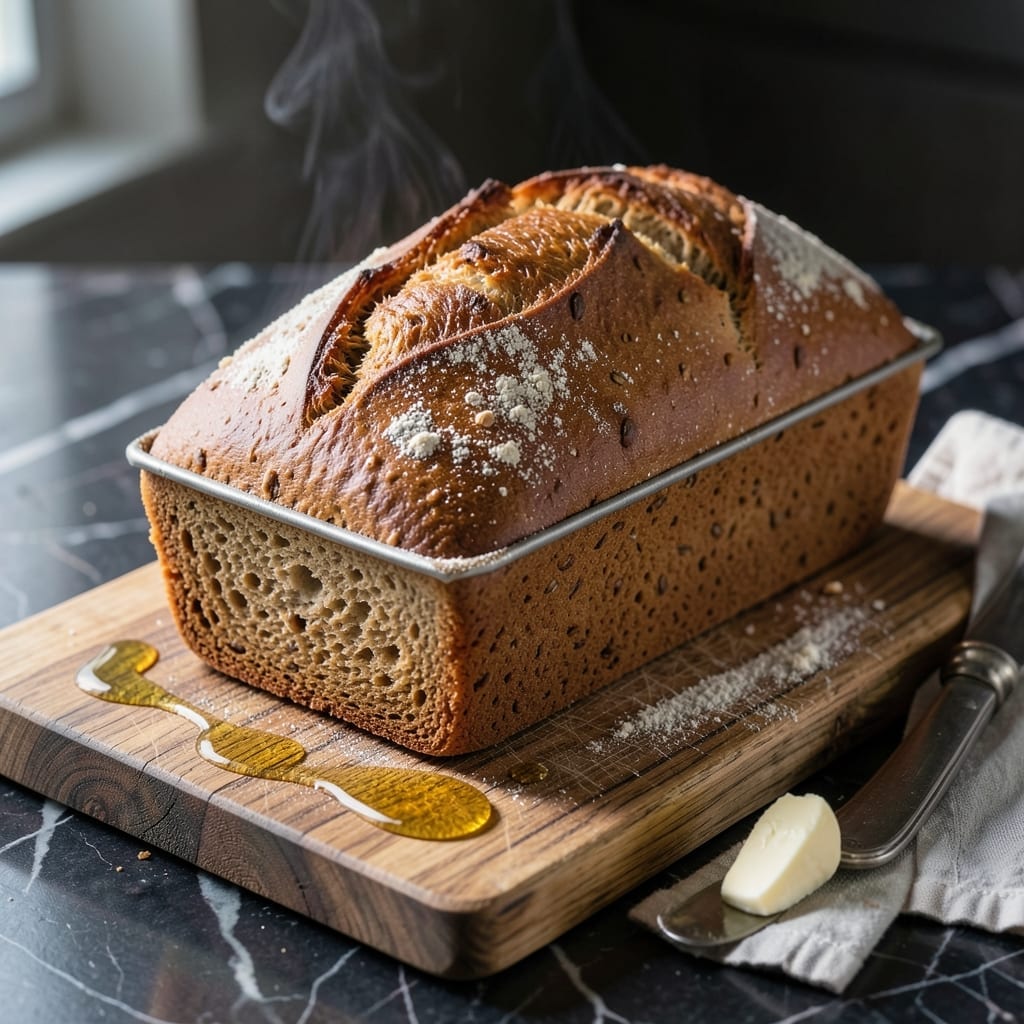
Making whole wheat bread at home has never been easier thanks to this foolproof bread maker method.
With just a few simple ingredients and the right settings, you’ll have a warm, homemade loaf ready in hours.
Ingredients for Whole Wheat Bread Recipe Bread Maker
Ten ingredients. One machine. Warm, homemade whole wheat bread in hours.
| Ingredient | Amount | Notes |
|---|---|---|
| Whole Wheat Flour 🌾 | 3 cups | Fine ground preferred |
| Bread Flour 🌾 | 1 cup | Adds lightness to texture |
| Water 💧 | 1 ¼ cups | Warm, about 110°F |
| Honey 🍯 | 2 tbsp | Or maple syrup for sweetness |
| Unsalted Butter 🧈 | 2 tbsp | Softened at room temperature |
| Active Dry Yeast 🍞 | 2 ¼ tsp | Single packet equivalent |
| Sea Salt 🧂 | 1 ½ tsp | Fine grain for even distribution |
| Non-Fat Dry Milk 🥛 | 3 tbsp | Enhances browning and texture |
| Vital Wheat Gluten 🌾 | 1 tbsp | Improves rise and structure |
| Vegetable Oil 🫒 | 1 tbsp | For greasing the pan |
[recipe_ingredient_scaler]
The flour ratio is critical here. King Arthur’s whole wheat flour gives consistent results, but Bob’s Red Mill works too. Bread flour adds necessary gluten for structure—don’t skip it. Vital wheat gluten is non-negotiable for whole wheat loaves; it prevents that dense, brick-like texture. Most supermarkets carry it near the baking aisle, or grab it from Whole Foods in bulk.
No honey? Maple syrup or agave swap in at equal amounts. Out of bread flour? All-purpose plus 1 extra tbsp vital wheat gluten mimics it. The dry milk can be omitted (slightly less tender crumb), but don’t replace it with liquid milk—it’ll throw off the hydration. Yeast must be fresh; test it in warm water with a pinch of sugar first if you’re unsure.
Store flour in airtight containers for up to 6 months. Yeast keeps in the fridge for 2 years unopened. Baked loaf stays fresh wrapped at room temperature for 3 days, or slice and freeze for 3 months.
Why You’ll Love This Recipe
- Set and Forget: I dump the ingredients in the bread maker before bed and wake up to fresh, warm loaf—no kneading, no fuss.
- Honey Butter Magic: The honey and butter combo gives it this subtle sweetness that makes every slice irresistible. Honestly, I catch myself sneaking extra pieces.
- Meal Prep Hero: One loaf fuels my week—sandwiches, toast, even bread pudding with the leftovers.
- Pantry Staples: Whole wheat flour, a little bread flour, and basics I already have. Between us, it’s cheaper than store-bought and twice as good.
Step-by-Step Instructions for Whole Wheat Bread
This method ensures a perfect loaf with ideal texture and rise every time.
Step 1: Activate the Yeast and Combine Wet Ingredients
Begin by warming the 1.25 cups Water to approximately 110°F. In the bread maker pan, add the warm water, then sprinkle the 2.25 tsp Active Dry Yeast on top. Allow it to sit for 5 minutes until the yeast becomes frothy and active—this confirms it’s alive and ready to leaven your bread.
Next, add the 2 tbsp Honey, 2 tbsp Unsalted Butter, and 3 tbsp Non-Fat Dry Milk to the pan. The honey provides natural sweetness and feeds the yeast, while the dry milk enhances browning and adds richness. Stir these wet ingredients gently to combine, ensuring the butter is fully softened and incorporated.
Step 2: Incorporate Dry Ingredients for Structure
Add the 3 cups Whole Wheat Flour, 1 cup Bread Flour, 1.5 tsp Sea Salt, and 1 tbsp Vital Wheat Gluten to the pan. The combination of whole wheat and bread flour creates a balanced texture—whole wheat for nuttiness and fiber, bread flour for lightness. The vital wheat gluten strengthens the dough, compensating for the lower gluten content in whole wheat flour.
Secure the pan in the bread maker and select the dough setting. The machine will knead the ingredients into a smooth, elastic dough. Watch for the dough to pull away from the sides of the pan during kneading—this indicates proper hydration. If it appears too sticky, add 1 tbsp of bread flour; if too dry, add 1 tbsp of water.
Step 3: Allow the Dough to Rise
Once kneading is complete, the bread maker will enter the rise cycle. Let the dough rise undisturbed until it has nearly doubled in size, which typically takes 1 to 1.5 hours depending on your machine and room temperature. The dough should look puffy and spring back slowly when gently pressed with a finger.
This rise time is critical for developing flavor and achieving a light, airy crumb. Avoid opening the bread maker lid during this stage, as fluctuations in temperature can disrupt the rising process. The sea salt regulates yeast activity, ensuring a steady, controlled rise without overproofing.
Step 4: Bake to Golden Perfection
After the rise cycle, select the bake setting on your bread maker. The machine will preheat and bake the loaf automatically. Bake for 45-55 minutes, or until the loaf is golden brown and sounds hollow when tapped on top. The non-fat dry milk and honey contribute to a beautifully browned crust.
Toward the end of baking, the aroma will fill your kitchen with a warm, nutty scent. If your bread maker has a window, check that the loaf is rising evenly and not collapsing in the center. The vital wheat gluten ensures the structure holds, even with the denser whole wheat flour.
Step 5: Cool and Slice for Optimal Texture
Once baking is complete, use oven mitts to carefully remove the pan from the bread maker. Gently shake the pan to release the loaf onto a wire rack. Brush the top with the 1 tbsp Vegetable Oil for a soft, glossy finish if desired. Let the bread cool for at least 20 minutes before slicing—this prevents a gummy texture by allowing the crumb to set.
Slice with a serrated knife for clean cuts. The interior should be tender yet sturdy, with a fine, even crumb. This loaf stays fresh for several days and makes excellent toast or sandwiches, delivering on the promise of effortless, homemade whole wheat bread.
Pro Tips For Making Whole Wheat Bread Recipe Bread Maker
- Warm Your Liquids: I learned this the hard way—using cold water or honey straight from the fridge can shock the yeast. Heat them to about 110°F (warm but not hot) to guarantee a proper rise.
- Mix Flours Right: Use a 50/50 split of whole wheat and bread flour for structure. Whole wheat alone makes dense loaves—I was skeptical until I tried it.
- Skip Overpacking: Resist the urge to cram too much flour into the bread maker pan. Whole wheat absorbs liquid differently, so stick to the recipe’s exact measurements.
- Butter Last: Add the unsalted butter after the first knead cycle. This prevents it from coating the flour too early, which actually changes the outcome for a lighter crumb.
Essential Equipment for This Recipe
Bread Maker Essentials
Invest in a reliable 2-pound capacity bread maker—I love the Zojirushi BB-PAC20 for its consistent results and dual kneading blades. This size handles most recipes perfectly, including this one. The non-stick pan makes cleanup a breeze. 💡
Measuring Tools
A good dry measuring cup set and liquid measuring cup are non-negotiable for accuracy. I use OXO Good Grips—their magnetic set stays organized. A kitchen scale (like Escali Primo) ensures precise flour measurements when needed.
Dough Check Tools
Keep a rubber spatula handy to check dough consistency during kneading. If it’s too sticky, add flour 1 tbsp at a time. Too dry? Add warm water 1 tsp at a time. This prevents dense or crumbly loaves.
Cooling Equipment
A wire cooling rack is essential—it allows air circulation to prevent soggy bottoms. I use a stainless steel rack from Wilton. Never cool bread in the pan; it continues cooking and can become dry.
Optional Upgrades
A dough scraper helps remove sticky residue from the pan. For perfect slices, a 10-inch serrated bread knife (like Mercer Culinary) glides through crusts without crushing. These small tools make a big difference.
Storage Solutions
Store your loaf in a bread box or wrapped in beeswax wrap to maintain freshness. For longer storage, slice and freeze in ziplock bags with parchment between slices. This keeps your bread fresh for up to 3 months. ❄️
Nutrition Facts
Frequently Asked Questions
Why add vital wheat gluten?
It compensates for whole wheat flour’s lower gluten content, ensuring a lighter texture. Without it, your loaf may turn out dense. 1 tbsp per recipe is ideal.
Can I skip the bread flour?
Not recommended. Bread flour adds structure for a better rise. Replace with all-purpose plus 1 extra tbsp vital wheat gluten if needed.
How do I fix a collapsed loaf?
Usually caused by too much liquid or not enough gluten. Check dough consistency during kneading—it should pull from pan sides. Add flour 1 tbsp at a time if too sticky.
What setting should I use?
Select the whole wheat or basic bread cycle. Most machines default to medium crust and 1.5-2 hour total time. Avoid rapid bake for best texture.

Trained in classic French technique but raised on slow-cooked ribs and spicy rubs, she blends culinary skill with smoke and soul.
- Recipe for Boneless Pork Chops in Cast Iron Skillet: Sear and Baste to Juicy Perfection - October 3, 2026
- Recipe for Boneless Cross Rib Roast: Slow-Roasted Beef with Herb Crust - October 3, 2026
- Hamburgers in Sauce Recipe Crock Pot: Slow-Cooked Savory Delight - October 3, 2026