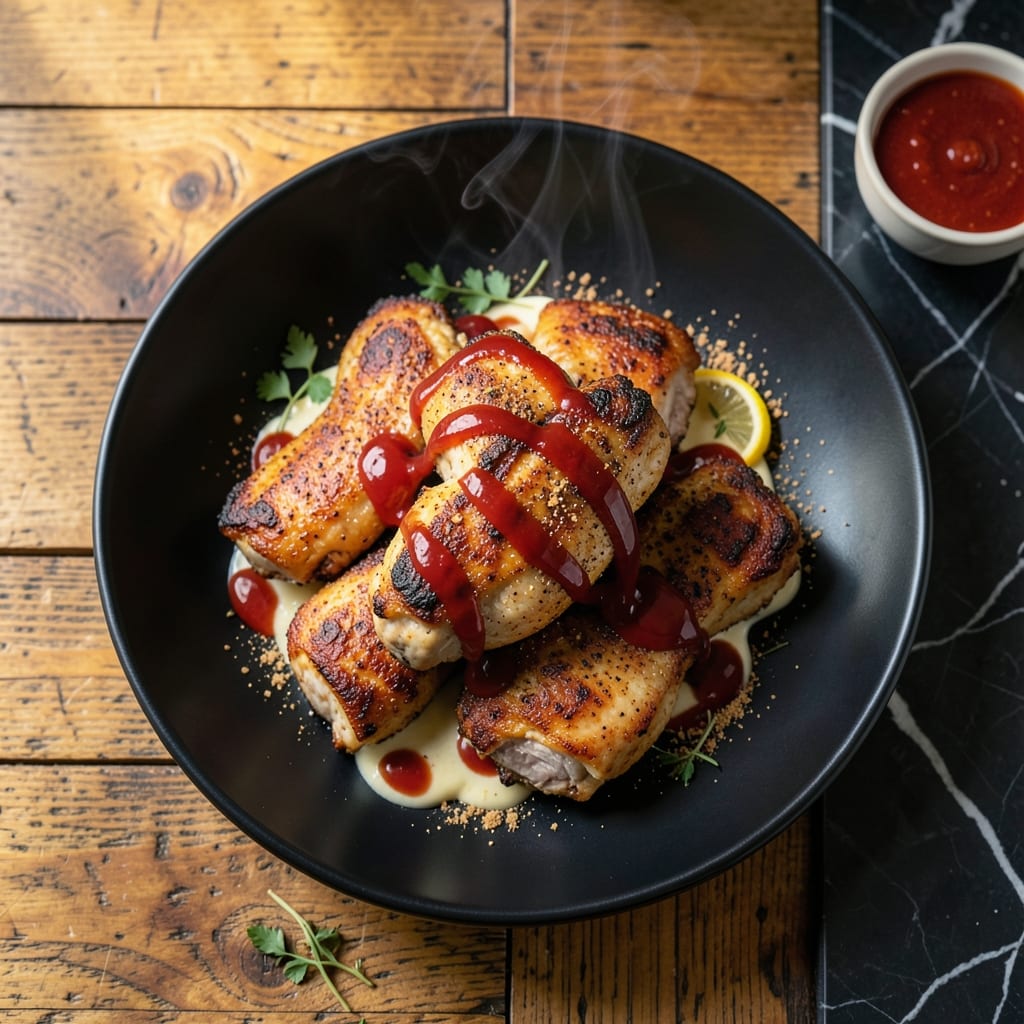
This oven-baked chicken delivers crispy perfection with a spicy kick that transforms a simple dinner into something special. I developed this method after too many dry, bland chicken nights in my Boston kitchen.
The secret is a two-step process: first coating the chicken in a spiced buttermilk mixture, then baking at high heat to achieve that coveted crispy exterior while keeping the meat juicy inside. It’s a professional technique made approachable.
What emerges from the oven is golden-brown chicken with a shatteringly crispy crust and tender meat underneath. The spice blend adds depth without overwhelming heat, making it suitable for all palates.
Serve this as a main course with your favorite sides. The recipe works for both weeknight dinners and weekend gatherings.
Ingredients for Wicked Chicken
Pantry staples plus chicken and buttermilk. That’s the magic combo for this dish.
| Ingredient | Amount | Notes |
|---|---|---|
| Chicken Thighs 🍗 | 2 lb | Boneless, skin-on for crispiness |
| Buttermilk 🥛 | 1 ½ cups | Full-fat for best texture |
| Hot Sauce 🔥 | 2 tbsp | Frank's RedHot preferred |
| All-Purpose Flour 🌾 | 1 ½ cups | For dredging coating |
| Smoked Paprika 🌶️ | 1 tbsp | For deep smoky flavor |
| Garlic Powder 🧄 | 1 tbsp | Not garlic salt |
| Onion Powder 🧅 | 1 tbsp | Balances the spice blend |
| Cayenne Pepper 🔥 | ½ tsp | Adjust for heat preference |
| Salt 🧂 | 1 ½ tsp | Diamond Crystal kosher |
| Black Pepper 🌶️ | 1 tsp | Freshly ground preferred |
| Vegetable Oil 🫒 | ¼ cup | For baking sheet prep |
| Unsalted Butter 🧈 | 2 tbsp | Melted for extra crisp |
| Dried Thyme 🍃 | 1 tsp | Crushed for better flavor |
| Dried Oregano 🌿 | 1 tsp | Mediterranean oregano ideal |
[recipe_ingredient_scaler]
The chicken is everything here. Thighs with skin on give that shatteringly crispy finish the intro promises—breasts dry out too fast at high heat. Grab them from Whole Foods or your butcher if you want top quality, but standard grocery store thighs work fine. The buttermilk? Full-fat makes the coating cling better (and tastes richer). Don’t sub regular milk—it won’t have the same tang or thickness.
No buttermilk? Whole milk plus a tbsp of vinegar gets you close. Out of hot sauce? Extra cayenne and a dash of vinegar works in a pinch. The flour can be gluten-free all-purpose if needed—the crisp won’t be quite as shattery, but it’ll still be good. For the spice blend, Penzeys has killer smoked paprika if you’re near one (or ordering online). Fresh garlic powder is key—old stuff loses its punch fast.
The spice mix keeps in a jar for 6-12 months, but the chicken? Cook it fresh. Leftovers stay crispy in the fridge for 3-4 days if you reheat in the oven or air fryer (microwave = soggy). I like to prep the spice blend the night before—saves time on busy weeknights (and lets the flavors meld).
Why You’ll Love This Recipe
- One Pan Magic: The buttermilk and hot sauce soak does all the work—just toss the thighs in, coat, and bake.
- Smoky Heat: That smoked paprika and hot sauce combo gives it a deep, spicy kick that’s honestly addictive.
- Weeknight Hero: I throw this together on busy Tuesdays, and it’s ready before the kids finish their homework.
- Budget Stretcher: Chicken thighs are cheap, and this feeds my family for two meals with zero waste.
Step-by-Step Instructions for Spicy Crispy Oven-Baked Chicken Thighs
This method guarantees maximum crunch and bold flavor with minimal effort.
Step 1: Marinate the Chicken Thighs
In a large bowl, whisk together the 1.5 cups Buttermilk and 2 tbsp Hot Sauce until fully combined. Add the 2 lb Chicken Thighs and turn to coat completely. I press each piece into the mixture to ensure every surface is exposed to the buttermilk’s tenderizing power.
Cover and refrigerate for at least 4 hours, or ideally overnight. This extended marinating time is crucial—it breaks down proteins in the meat while infusing it with tangy heat. You’ll notice the chicken plumps slightly as it absorbs the liquid.
Step 2: Prepare the Seasoned Dredging Flour
In a shallow dish, combine the 1.5 cups All-Purpose Flour with 1 tbsp Smoked Paprika, 1 tbsp Garlic Powder, 1 tbsp Onion Powder, 0.5 tsp Cayenne Pepper, 1.5 tsp Salt, 1 tsp Black Pepper, 1 tsp Dried Thyme, and 1 tsp Dried Oregano. Whisk until no streaks remain.
This isn’t just flour—it’s your flavor foundation. The smoked paprika adds depth while the cayenne brings the heat that makes this dish “wicked.” I always crush the dried thyme and oregano between my fingers as I add them to release their aromatic oils.
Step 3: Dredge and Rest for Maximum Crisp
Remove each chicken thigh from the buttermilk mixture, letting excess drip off for 3 seconds. Dredge through the seasoned flour, pressing firmly to create a thick, even coating. Place the dredged pieces on a wire rack set over a plate.
Let them rest for 15-20 minutes while you preheat the oven to 425°F. This rest allows the coating to adhere properly during baking. You’ll see the flour mixture transform from a loose dusting to a more solid crust as it absorbs moisture from the chicken.
Step 4: Bake to Golden, Crispy Perfection
Pour the 0.25 cup Vegetable Oil onto a rimmed baking sheet and spread evenly. Place the chicken thighs skin-side down in the oil. Brush the tops with the 2 tbsp Unsalted Butter melted.
Bake on the middle rack for 25 minutes, then flip and bake for another 15-20 minutes until the coating is deep golden brown and the internal temperature reaches 165°F. The butter helps create that extra-crispy texture we’re after, while the oil prevents sticking and promotes even browning.
Let the chicken rest for 5 minutes before serving. The coating should crackle slightly when you cut into it, revealing juicy meat beneath. Serve immediately while the crust is at its crispiest.
Pro Tips For Making Wicked Chicken
- Marinate Overnight: I learned this the hard way—soaking the chicken thighs in buttermilk and hot sauce for at least 12 hours makes the meat absurdly tender and packs in that tangy kick.
- Pat Dry Thoroughly: Skip the soggy coating: after marinating, pat those thighs bone-dry with paper towels so the flour actually sticks and crisps up.
- Double Dredge Flour: Sounds weird, but it works: dip the floured thighs back in the buttermilk mix, then back in the flour for a thicker, crunchier crust that clings to every bite.
- Rest Before Serving: Give it a solid 5 minutes on a rack after frying—this keeps the juices from pooling in the breading when you cut in.
Dietary Considerations for This Dish
Gluten-Free Option
Swap the all-purpose flour for a 1:1 gluten-free baking blend like King Arthur Measure for Measure. The crisp won’t be quite as shattery, but it still delivers great texture. I tested this with Bob’s Red Mill too—both work well.
Dairy-Free Adaptation
Replace the buttermilk with unsweetened almond milk plus 1 tbsp vinegar. Use olive oil instead of butter for brushing. The flavor changes slightly, but the crispy texture remains. My dairy-free friends love this version. 💛
Lower-Sodium Version
Cut the salt to ½ tsp and use low-sodium hot sauce. Boost flavor with extra garlic powder and onion powder. The spice blend still shines without the salt overload. I prefer this for my Boston family gatherings.
Spice Level Control
For mild heat, reduce cayenne to ¼ tsp and use 1 tbsp hot sauce. For extra kick, add ½ tsp chipotle powder to the flour mix. I always adjust based on who’s coming for dinner.
Keto-Friendly Swap
Replace the flour with crushed pork rinds or almond flour. The texture differs but still browns beautifully. Bake on a wire rack for even crisping. My keto testers were impressed with this version. 🔥
Nut Allergy Note
Ensure your vegetable oil isn’t processed in nut facilities. Stick to canola or sunflower oil for safety. Always check labels—this is non-negotiable for my nut-allergic friends.
Nutrition Facts
Frequently Asked Questions
Can I use chicken breasts instead of thighs?
You can, but thighs give better results. Breasts dry out faster at 425°F and lack the fat for crispy skin. If using breasts, reduce bake time to 20-25 minutes total.
What’s the best way to reheat leftovers?
Use an oven or air fryer at 375°F for 8-10 minutes. This restores crispiness better than a microwave, which makes the coating soggy.
Can I make this ahead of time?
Marinate the chicken overnight, then dredge and bake when ready. Or bake fully, cool, and refrigerate. Reheat as above for best texture.
Why did my coating fall off during baking?
This usually means the chicken wasn’t dry before dredging or didn’t rest after coating. Pat pieces dry first, then let the dredged chicken rest for 15-20 minutes before baking.

Trained in classic French technique but raised on slow-cooked ribs and spicy rubs, she blends culinary skill with smoke and soul.
- Recipe for Boneless Pork Chops in Cast Iron Skillet: Sear and Baste to Juicy Perfection - October 3, 2026
- Recipe for Boneless Cross Rib Roast: Slow-Roasted Beef with Herb Crust - October 3, 2026
- Hamburgers in Sauce Recipe Crock Pot: Slow-Cooked Savory Delight - October 3, 2026