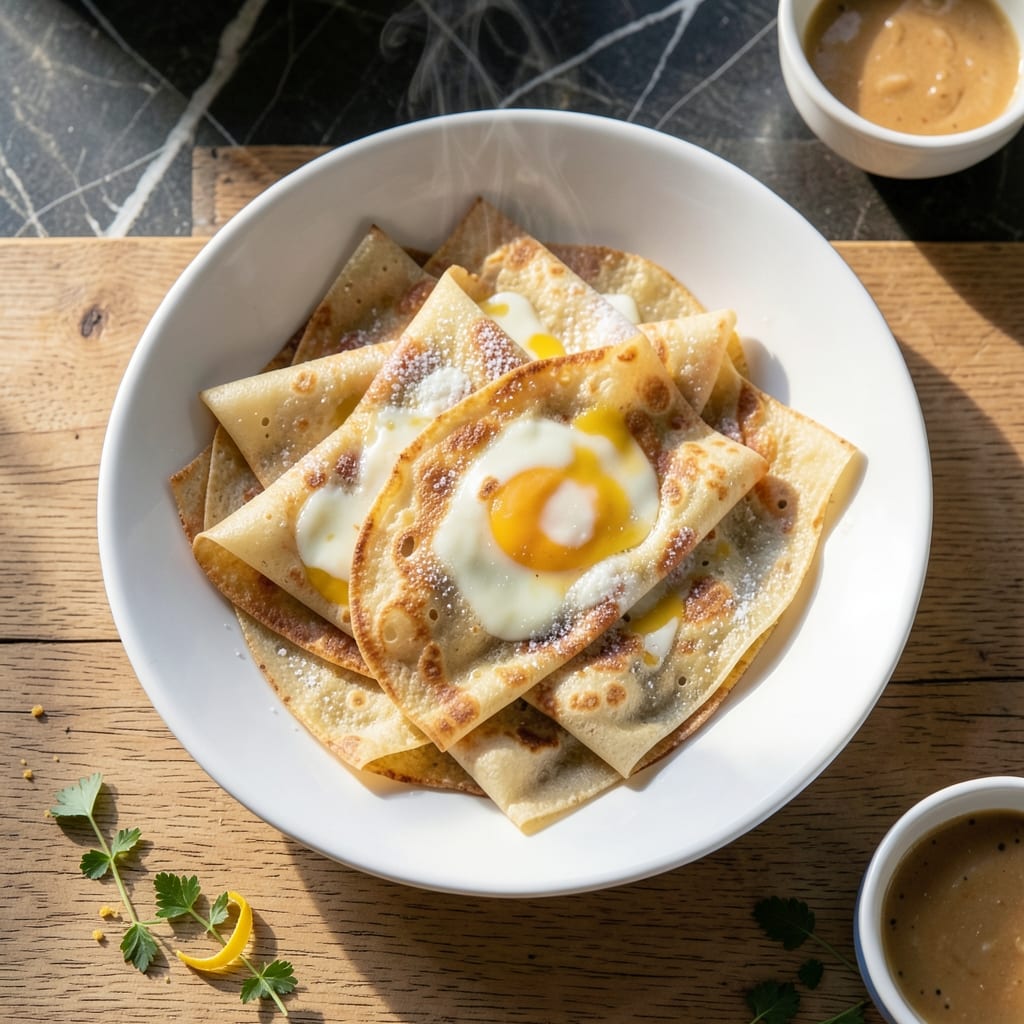
My first attempt at French-style crepes ended in a crumpled, rubbery disaster. Claudine’s simple advice—rest the batter, keep the pan hot—changed everything.
This recipe delivers light and lacy crepes with minimal effort. A short rest for the batter ensures tender results, while a properly heated pan creates that signature golden edge.
Each crepe emerges thin, delicate, and just slightly crisp at the edges. Fill with sweet jam, fresh fruit, or savory ham and cheese for a versatile breakfast.
The process moves fast once you start cooking, so have your toppings ready. Perfect for lazy weekends or impressive brunches.
Ingredients for Better Homes and Gardens Crepe
Pantry staples meet fridge basics for these delicate breakfast crepes.
| Ingredient | Amount | Notes |
|---|---|---|
| All-Purpose Flour 🌾 | 1 cup | Sifted for smooth batter |
| Large Eggs 🥚 | 2 whole | Room temperature preferred |
| Whole Milk 🥛 | 1 ½ cups | Full-fat for richness |
| Water 💧 | ¼ cup | Cold, for elasticity |
| Unsalted Butter 🧈 | 3 tbsp | Melted and cooled |
| Granulated Sugar 🍚 | 1 tbsp | Optional for sweet crepes |
| Vanilla Extract 🌿 | 1 tsp | Pure extract preferred |
| Salt 🧂 | ¼ tsp | Fine sea salt |
| Vegetable Oil 🫒 | 1 tsp | For greasing pan |
| Jam 🍇 | ½ cup | For filling, any flavor |
| Fresh Fruit 🍓 | 1 cup | Sliced, for filling |
| Ham 🍖 | ½ lb | Thinly sliced for savory |
| Shredded Cheese 🧀 | 1 cup | Gruyere or Swiss recommended |
[recipe_ingredient_scaler]
The flour is the backbone here—King Arthur all-purpose is my go-to, but any reliable brand works. I grab mine in bulk at Costco since I always seem to run out. Milk matters too: whole milk gives you that tender, rich texture. For the butter, European-style (like Plugrá) has a higher fat content that makes a difference, but regular grocery store butter is fine in a pinch.
Out of whole milk? Half-and-half plus a splash of water gets you close. No vanilla extract? Skip it—it’s optional anyway (and honestly, I often do for savory crepes). For the filling, any jam or fruit works—whatever’s in season or on sale. The ham can be swapped for turkey or prosciutto if you’re feeling fancy. Veggie option? Sautéed mushrooms and spinach are delicious.
Batter keeps in the fridge for 24 hours—actually improves with a rest. Cooked crepes can be stacked with parchment between layers and stored for 3 days. Freeze for 1 month, then reheat in a dry pan. Always have your toppings prepped before you start cooking (this moves fast!).
Why You’ll Love This Recipe
- Mix & Go: I love that I can blend the flour, eggs, milk, and water in one bowl—no fancy steps, just pour and cook.
- Buttery Delight: The unsalted butter gives them that golden, crisp edge with a melt-in-your-mouth center.
- Breakfast to Dessert: Sweet with fruit and powdered sugar or savory with ham and cheese—this batter does it all.
Step-by-Step Instructions for Light and Lacy French-Style Crepes
Here’s how I make foolproof crepes with restaurant-quality results at home.
Step 1: Whisk the Wet Ingredients Until Smooth
In a large mixing bowl, crack the 2 whole Large Eggs and add the 1.5 cups Whole Milk, 0.25 cup Water, 3 tbsp Unsalted Butter (melted and cooled), 1 tbsp Granulated Sugar, 1 tsp Vanilla Extract, and 0.25 tsp Salt.
Whisk vigorously for 2-3 minutes until the mixture is completely homogenous and slightly frothy. The eggs should be fully incorporated with no streaks remaining. This step ensures your batter has a consistent texture, which translates to even cooking and delicate, lacy crepes.
Step 2: Gradually Incorporate the Flour
With the same whisk, begin adding the 1 cup All-Purpose Flour a few tablespoons at a time. This gradual addition prevents lumps from forming and gives you better control over the batter’s consistency.
Continue whisking until the batter is smooth and the flour is fully hydrated. The final mixture should have the consistency of heavy cream—thin enough to pour easily but thick enough to coat the back of a spoon. If it’s too thick, whisk in a splash more Water.
Step 3: Rest the Batter for Optimal Texture
Cover the bowl with plastic wrap or a clean kitchen towel and let the batter rest at room temperature for 30 minutes. I know it seems like an unnecessary wait, but this resting period allows the gluten in the flour to relax, which makes the crepes more tender.
You’ll notice the batter thickens slightly during this time as the flour absorbs the liquid. Give it a quick whisk before using—it should pour like melted ice cream. This step also helps prevent tough crepes, which is crucial for that light, lacy texture.
Step 4: Cook the Crepes with Precision
Heat an 8-10 inch nonstick skillet over medium-high heat and brush lightly with Vegetable Oil. Pour ¼ cup of batter into the center of the pan, immediately tilting and swirling to coat the bottom evenly. The batter should spread thinly with minimal effort.
Cook for 30-45 seconds per side until the edges lift from the pan and the surface looks set with light golden spots. Flip using a thin spatula or your fingers (if you’re feeling brave) and cook the other side for 20-30 seconds. The first crepe is often a test—adjust heat if it browns too quickly or slowly.
Step 5: Fill and Serve Immediately
Transfer each cooked crepe to a plate and fill with your choice of 0.5 cup Jam and 1 cup Fresh Fruit for a sweet version, or 0.5 lb Ham and 1 cup Shredded Cheese for a savory option. Fold into quarters or roll tightly, depending on your preference.
Serve immediately while warm. The contrast between the tender crepes and the rich fillings is what makes this dish special. If making a batch, stack cooked crepes with parchment between each to prevent sticking, then reheat briefly in the pan before serving.
Pro Tips For Making Better Homes And Gardens Crepe
- Heat the Pan Right: Use medium-high heat and let the pan get fully hot before adding batter—I learned this the hard way after my first three crepes stuck like glue.
- Rest the Batter: Give the batter 30 minutes in the fridge after mixing; it relaxes the gluten and makes the crepes noticeably more tender.
- Skip Cold Ingredients: Take your eggs and milk out of the fridge 20 minutes early so everything blends smoothly without clumps.
- Butter Between Crepes: Wipe the pan with a tiny bit of butter between each crepe, even if it looks fine—this keeps them from tearing when you flip.
Essential Equipment for Perfect Results
The Right Crepe Pan
An 8-10 inch nonstick skillet is non-negotiable for perfect crepes. I swear by my Calphalon Contemporary—it heats evenly and releases crepes like a dream. Avoid cast iron; it’s too heavy for the quick flipping this dish requires. 💡
High-Quality Whisk
A balloon whisk with a comfortable handle makes mixing the batter effortless. I use an OXO Good Grips—it fits perfectly in my hand and reaches the bowl’s corners. The thin wires help break up any flour clumps quickly.
Thin Spatula
Flipping crepes demands a thin, flexible spatula. My Mercer Culinary fish spatula glides under delicate crepes without tearing. It’s also heat-resistant, so it won’t warp over time.
Batter Resting Setup
Use a large mixing bowl with a lid or plastic wrap for resting the batter. A 30-minute rest is key for tender crepes. I often set a timer on my phone to avoid forgetting this crucial step.
Measuring Tools
Precise measurements matter here. I keep a ¼ cup measure handy for pouring batter into the pan. Also, a liquid measuring cup helps ensure your milk and water ratios are spot-on.
Crepe Storage
For stacking cooked crepes, use parchment paper between layers. I buy pre-cut sheets from Reynolds Kitchen. This prevents sticking and makes reheating a breeze. ❄️
Nutrition Facts
Frequently Asked Questions
Why is resting the batter important?
Resting for 30 minutes relaxes gluten in the flour, ensuring tender, lacy crepes. It also allows the flour to fully absorb the liquid, creating a smoother consistency. Skipping this step may result in tough, rubbery textures.
Can I make the batter ahead of time?
Yes! The batter can rest in the fridge for up to 24 hours. In fact, an overnight rest improves the flavor and texture. Just whisk briefly before cooking.
How do I prevent my crepes from tearing when flipping?
Use a thin, flexible spatula and ensure the edges lift easily before flipping. Cook until the surface looks set with light golden spots before turning.
Can I use a different type of milk?
Whole milk yields the richest texture, but you can substitute half-and-half plus water or any milk you have. Avoid non-dairy milks unless they’re unsweetened.

Trained in classic French technique but raised on slow-cooked ribs and spicy rubs, she blends culinary skill with smoke and soul.
- Recipe for Boneless Pork Chops in Cast Iron Skillet: Sear and Baste to Juicy Perfection - October 3, 2026
- Recipe for Boneless Cross Rib Roast: Slow-Roasted Beef with Herb Crust - October 3, 2026
- Hamburgers in Sauce Recipe Crock Pot: Slow-Cooked Savory Delight - October 3, 2026