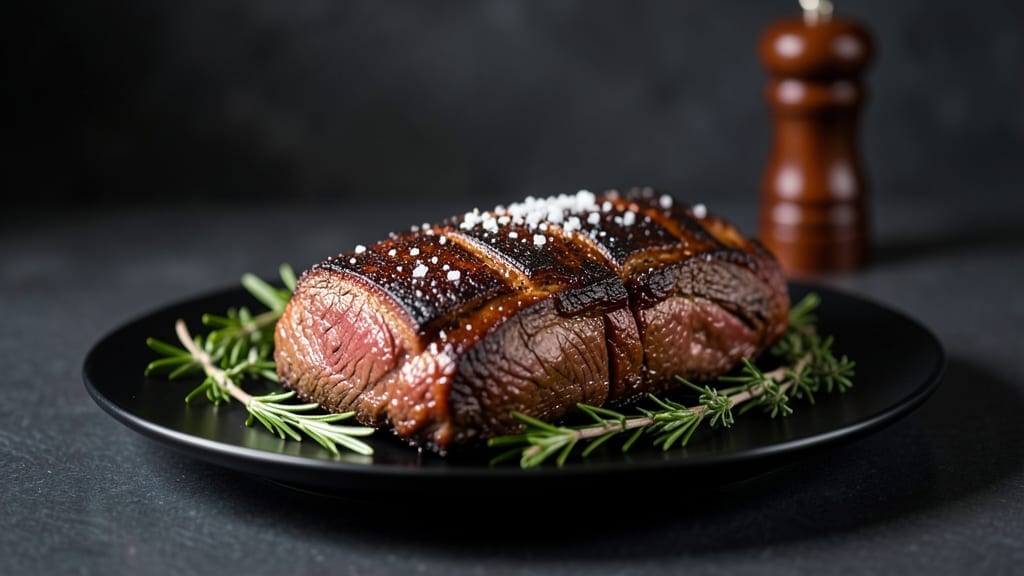
This Angus beef brisket recipe delivers the kind of deep, smoky flavor and melt-in-your-mouth tenderness that transforms a simple meal into an unforgettable centerpiece. After years of perfecting the technique, I’ve developed a method that ensures every bite is juicy, flavorful, and packed with that signature beefy richness.
The key lies in low-and-slow cooking, precise temperature control, and a seasoning blend that enhances—not overpowers—the natural richness of the meat.
The process begins with a careful trimming and seasoning of the brisket, followed by a cooking method that can be adapted to your equipment—whether you’re smoking it in a pit, slow-cooking in an oven, or using a combination of both.
This recipe is designed to be foolproof, with clear visual and temperature cues to help you determine when the brisket is ready. The result? A slab of beef that’s so tender it practically falls apart at the touch, with a crust that’s perfectly caramelized and smoky.
What sets this recipe apart is the balance of simplicity and precision. You don’t need a commercial smoker or years of experience to achieve restaurant-quality results—just patience, the right technique, and a few key tools.
The brisket rests for hours, allowing the juices to redistribute, ensuring every slice is as moist as the first. Serve it sliced thin against crusty bread, with classic sides like roasted potatoes or a fresh green salad, and you’ll have a meal that’s worth the time and effort.
The beauty of this recipe is its versatility. Whether you’re hosting a backyard barbecue, preparing for a holiday feast, or simply craving a hearty meal, this brisket delivers.
The method is adaptable to different cooking environments, and the flavor profile is rich enough to stand alone or complement a variety of sides. Once you master this technique, you’ll never settle for anything less than smoky, juicy perfection.
Ingredients for angus beef brisket
Six pounds of premium Angus brisket meets precision seasoning for restaurant-quality results.
| Ingredient | Amount | Notes |
|---|---|---|
| Premium Choice Angus Brisket 🥩 | 6 lb | Fat cap trimmed to ¼-inch, point and flat cut |
| Kosher Salt 🧂 | 3 tbsp | Diamond Crystal preferred for even distribution |
| Coarse Black Pepper 🌶️ | 2 tbsp | Freshly cracked for optimal flavor |
| Garlic Powder 🧄 | 2 tsp | Standardized for consistent seasoning |
| Onion Powder 🧅 | 2 tsp | Milled for immediate flavor release |
| Brown Sugar Packets 🍚 | 2 tbsp | Packaged for precise measurement |
| Smoked Paprika 🌶️ | 1 tbsp | Spanish variety for authentic smokiness |
| Chipotle Powder 🌶️ | 1 tsp | Smoked chipotle for depth |
| Dried Thyme 🌿 | 1 tsp | French thyme for aromatic complexity |
| Apple Cider Vinegar 🍎 | 2 tbsp | Pasteurized for shelf stability |
| Pecan Wood Chips 🪵 | 1 package | Soaked in apple cider vinegar |
| Pork Butcher Paper 📄 | 1 sheet | For wrapping during rest |
| Butcher Twine 🧵 | 1 piece | For securing foil/wrap |
[recipe_ingredient_scaler]
The brisket is the star, so source premium Choice-grade Angus from specialty butchers like Cattlemen’s Ranch or ButcherBox—look for marbling and fat content of at least 20%. Trim the fat cap to ¼-inch for even cooking, and separate the point and flat cuts if using a whole packer. The Diamond Crystal kosher salt distributes more evenly than table salt, ensuring crispy bark without saltiness. For the dry rub, Spanish smoked paprika from Penzeys adds authentic smokiness that commercial blends can’t match.
No chipotle powder? Substitute 1 tsp ground cayenne plus 1 tsp smoked paprika for heat and smoke. The apple cider vinegar in the soak isn’t just for flavor—it brightens the bark and helps with smoke adhesion. For pecan wood chips, Traeger or Weber brands are reliable, but any hardwood chips will work if soaked properly. If you’re short on time, pre-soak the chips for at least 30 minutes in the vinegar solution before adding to the smoker. The butcher paper is non-negotiable for the final wrap—aluminum foil can cause sogginess and ruin the bark texture.
The brisket should rest 1 hour per pound after cooking, wrapped in the butcher paper and secured with twine. This redistributes juices and maintains temperature. Store leftovers in airtight containers for up to 4 days in the refrigerator or freeze for 3 months for future meals. The best way to reheat is low and slow in the oven at 200°F until internal temperature reaches 160°F—this mimics the cooking process and prevents drying. For optimal presentation, slice against the grain using a sharp knife to maximize tenderness.
Why You’ll Love This Recipe
- No-Fuss Seasoning Magic: Honestly, this brisket’s secret weapon is that one bowl of seasoning—just mix the 3 tbsp kosher salt, 2 tbsp cracked pepper, and those aromatic powders (garlic, onion, thyme) together. Rub it on, let it sit overnight, and boom: zero last-minute stress. The salt and sugar (2 tbsp brown sugar packets) do all the heavy lifting while you sleep.
- Smoky, Spiced Perfection: That smoked paprika and chipotle powder? They’re the reason this isn’t just beef—it’s flavor bombs. The pecan wood chips, soaked in apple cider vinegar, give it that sweet, woodsy depth without being overpowering. Trust me, the first bite will have you licking your plate.
- Tender Without the Drama: Wrapping it in pork butcher paper at the stall? Game-changer. No foil needed, no soggy bark—just that perfect crispy edge with the creamy center. And since you’re cooking low-and-slow at 225°F, you’re not babysitting the smoker. Set it, forget it, and enjoy the process.
Step-by-step instructions for smoky, juicy Angus beef brisket
Mastering this brisket requires patience and precision—here’s how to achieve restaurant-quality results every time.
Prepare the Brisket and Seasoning Blend
Begin by trimming the fat cap of the 6 lb Premium Choice Angus Brisket to a uniform ¼-inch thickness using a sharp boning knife. This ensures even cooking while maintaining moisture. Place the brisket fat-side up on a wire rack set over a rimmed baking sheet to allow air circulation on all sides.
In a small bowl, combine the 3 tbsp Kosher Salt, 2 tbsp Coarse Black Pepper, 2 tsp Garlic Powder, 2 tsp Onion Powder, 2 tbsp Brown Sugar Packets, 1 tbsp Smoked Paprika, 1 tsp Chipotle Powder, and 1 tsp Dried Thyme. Mix thoroughly to create an even seasoning blend. Working quickly, rub this mixture generously over all surfaces of the brisket, pressing it into the meat to ensure maximum adhesion. The seasoning should coat the brisket completely, including the cavity if you choose to season it as well.
Here’s the thing—let the seasoned brisket rest uncovered in the refrigerator for at least 1 hour, or preferably overnight. This resting period allows the salt to penetrate deeply, enhancing flavor and improving moisture retention during the long cook. The longer it rests, the better the results.
Soak the Pecan Wood Chips and Set Up the Smoker
While the brisket seasons, prepare the 1 package Pecan Wood Chips by soaking them in 2 tbsp Apple Cider Vinegar for at least 30 minutes. This step prevents the wood from burning too quickly and adds subtle acidity to the smoke. Drain the wood chips before using, but don’t rinse them.
Set up your smoker for indirect heat, aiming for a consistent temperature of 225°F. Use the soaked pecan wood chips as your primary smoke source. The reason for this low-and-slow approach is to break down the tough connective tissue in the brisket gradually, transforming it into melt-in-your-mouth tenderness. Monitor the temperature closely—fluctuations of more than 10°F can affect cooking times and texture.
Once the smoker reaches the target temperature and you see steady, blue smoke (not white), place the brisket fat-side up on the smoker grate. Position it away from direct heat sources to promote even cooking. Close the lid and resist the urge to peek—each time you open it, you lose heat and potentially alter the cooking environment.
Smoke Until Probe-Tender and Handle the Stall
Smoke the brisket undisturbed for 6-8 hours, or until the internal temperature reaches 165-170°F. This is where you’ll encounter the “stall”—a period where the internal temperature plateaus as moisture evaporates. Don’t be alarmed; this is a natural part of the process and occurs around 150-160°F for brisket.
At this point, wrap the brisket tightly in the 1 sheet Pork Butcher Paper. This technique, known as the “Texas crutch,” helps push the brisket through the stall while preserving that coveted bark. Secure the wrap with the 1 Butcher Twine if needed to maintain a tight seal. Return the wrapped brisket to the smoker and continue cooking.
Continue smoking until the internal temperature reaches 200-205°F and a meat thermometer inserted into the thickest part of the brisket slides in like butter with no resistance. This typically takes an additional 4-6 hours, but trust the probe test over the thermometer reading. The brisket should be fork-tender at this stage, with a deep mahogany bark forming on the exterior.
Rest and Slice for Maximum Juiciness
Once the brisket reaches the target internal temperature, remove it from the smoker and transfer it to a cutting board. Tent loosely with aluminum foil and let it rest for at least 1 hour, or preferably 2 hours. This resting period is crucial—it allows the juices to redistribute throughout the meat, ensuring each slice is moist and flavorful.
During the rest, the internal temperature will continue to rise by about 5-10°F due to carryover cooking. Use this time to prepare your serving dishes and gather your guests. The longer you rest the brisket, the more tender and juicy each slice will be.
After resting, locate the grain direction by looking at the meat fibers. Using a sharp carving knife, slice the brisket against the grain into ¼-inch thick slices. The flat and point may have different grain directions, so adjust your angle accordingly. Serve immediately with your favorite sides, and you’ll achieve that perfect balance of smoky, juicy perfection promised in the title.
Pro Tips For Making Angus Beef Brisket
- Trim That Fat Cap: I learned this the hard way—leaving the fat cap too thick makes the edges cook unevenly and turns them tough. Stick to that ¼-inch trim with a sharp knife, or you’ll end up with dry spots no amount of smoking can fix.
- Crack the Pepper Fresh: Pre-ground black pepper loses its punch fast, but freshly cracked coarse pepper adds real bite. Use a pepper grinder right before mixing—your brisket’s bark and flavor will thank you.
- Don’t Rush the Stall Wrap: Wrapping too early (before hitting 165-170°F) traps steam and turns your bark into sad, soggy skin. Wait for that stall, then butcher paper + twine is your ticket to perfect texture—no exceptions.
- Vinegar-Soaked Wood Only: Skimping on the 2 tbsp apple cider vinegar soak for the pecan chips? You’ll get bitter smoke instead of that clean, sweet pecan aroma. Soak them for at least 30 minutes—no shortcuts here.
Make-ahead tips for leftovers
Prep-Ahead Seasoning
I always prepare the seasoning blend the night before to save time on cooking day. Mix the 3 tbsp kosher salt, 2 tbsp coarse black pepper, 2 tbsp brown sugar packets, 1 tbsp smoked paprika, and remaining spices in a bowl.
Store it in an airtight container—this keeps the flavors fresh and ready for application. When you’re ready to season the brisket, simply grab the bowl and apply it directly. This prep step ensures you’re not scrambling during the cooking process. 💡
Wood Chip Prep
Soaking the 1 package pecan wood chips in 2 tbsp apple cider vinegar is a game-changer. I do this the morning of cooking and let them soak for at least 30 minutes while I prep the brisket.
This prevents the chips from burning too quickly in the smoker and adds subtle acidity to the smoke. Drain them right before using—don’t rinse them. Store extra soaked chips in a sealed container in the fridge for up to 2 days if you plan to cook another batch. 🪵
Brisket Pre-Trim
If you’re short on time, trim the fat cap to ¼-inch the day before cooking and store the brisket in a ziplock bag with the seasoning blend. Place it on a wire rack in the fridge to maintain air circulation.
This method keeps the meat from sticking to the bag and allows the seasoning to adhere better. Just add the wrapped brisket to the smoker when you’re ready to cook. ⏰
Wrapping Materials
Wrap the 1 sheet pork butcher paper and 1 piece butcher twine in a separate bag to keep them clean and ready. I like to have everything laid out before I start cooking so I can focus on the brisket itself.
The butcher paper is crucial for the final wrap—it helps maintain the bark while pushing the brisket through the stall. Keep these materials within easy reach to avoid any last-minute stress. 📦
Side Dish Prep
Prep your favorite sides the day before to make serving easier. I like to make roasted potatoes or a cornbread casserole ahead of time and store them in the fridge. Reheat them gently in the oven while the brisket rests.
This way, you can focus on the brisket without worrying about last-minute cooking. The key is to have everything ready so you can enjoy the process without rushing. 🍽️
Temperature Setup
Set up your smoker the night before if possible. Charge it to 225°F and let it stabilize overnight. This ensures your cooking environment is ready to go when you are.
If you’re using an oven or slow cooker instead of a smoker, preheat it to the correct temperature and let it warm up. This proactive step saves time and ensures your brisket cooks evenly. 🌡️
Nutrition facts
Frequently asked questions
Why does my brisket need so much time to cook?
The low-and-slow method at 225°F breaks down tough collagen fibers in the meat, turning them into gelatin that keeps the brisket juicy. This process takes 12-16 hours total, including the stall phase where the temperature plateaus. Patience ensures melt-in-your-mouth tenderness that can’t be rushed!
Can I use aluminum foil instead of butcher paper for wrapping?
Aluminum foil can cause sogginess and ruin the bark texture, which is why pork butcher paper is recommended. The paper allows steam to escape while maintaining moisture, preserving that perfect crust. If you must use foil, wrap loosely and remove it during the final hour of cooking.
How do I know if my brisket is done without a meat thermometer?
Look for a deep mahogany bark and check for tenderness by inserting a sharp knife into the thickest part. If it slides in easily with minimal resistance, it’s done. Alternatively, probe the thickest section—if it feels like butter, it’s ready! The internal temp should reach 200-205°F when tested properly.
What’s the best way to reheat leftover brisket?
Reheat in a low oven at 200°F until it reaches 160°F internally. This mimics the slow cooking process and prevents drying. Avoid microwaving—it disrupts the texture and moisture distribution. Wrap tightly in foil to retain heat and flavor.

Trained in classic French technique but raised on slow-cooked ribs and spicy rubs, she blends culinary skill with smoke and soul.
- Smoked Chicken Salad Recipe: Crispy, Smoky Bites With Creamy Ranch Dressing - October 19, 2026
- Beer Can Chicken in a Smoker Recipe: Juicy, Herbed Perfection in One Can - October 19, 2026
- Brined Beef Brisket Recipe: Ultra-Tender, Juicy Cuts in One Pot - October 19, 2026