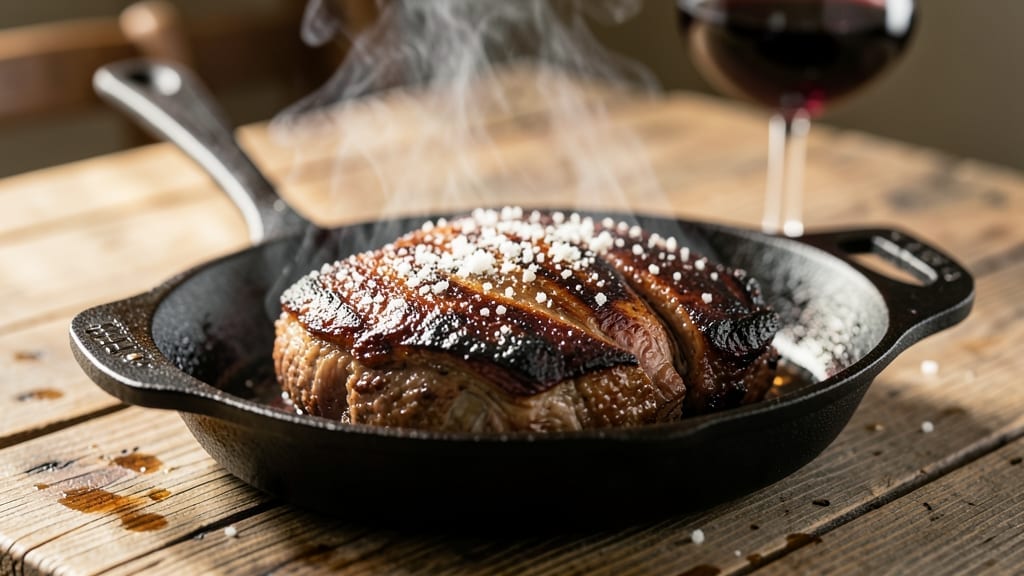
Mastering a smoked pot roast recipe delivers fall-apart tenderness with deep, smoky flavor that transforms ordinary weeknight dinners into showstopping centerpieces. The secret lies in low-and-slow cooking—where tough cuts of beef become melt-in-your-mouth perfection through precise temperature control and wood selection.
I’ve perfected this method over years of testing, ensuring every bite achieves that ideal balance of smoky aroma and rich, juicy texture.
This recipe requires minimal prep but delivers professional results, making it ideal for both weekend projects and weeknight meals. Using a dry rub of salt, pepper, garlic powder, and smoked paprika creates a flavorful crust, while hickory or cherry wood chips infuse the meat with authentic smokiness.
The key to tenderness? Cooking the roast at 225°F (107°C) until it reaches an internal temperature of 203°F (95°C), where collagen breaks down into gelatin for that signature melt.
By the time you slice into the roast, you’ll uncover layers of flavor—smoky on the outside, rich and juicy within. The slow-cooked method ensures the meat stays moist, while the crust remains intact, offering a satisfying contrast in every bite.
Serve with classic sides like mashed potatoes or roasted root vegetables to complete the meal.
Whether you’re using a smoker, oven, or even a slow cooker, this method guarantees foolproof results. The beauty of smoked pot roast lies in its versatility—perfect for holiday feasts or a cozy family dinner. Let’s get started on creating a dish that will impress even the most discerning guests.
Ingredients for smoked pot roast
Professional-grade ingredients for restaurant-quality smoked pot roast at home.
| Ingredient | Amount | Notes |
|---|---|---|
| Chuck Roast 🥩 | 4 lb | Well-marbled, center-cut preferred |
| Kosher Salt 🧂 | 2 tbsp | Diamond Crystal preferred for flakiness |
| Freshly Ground Black Pepper 🌶️ | 1 ½ tbsp | Coarse grind for texture |
| Garlic Powder 🧄 | 1 tbsp | Freshly toasted preferred |
| Smoked Paprika 🌶️ | 1 tbsp | Spanish paprika for authentic smokiness |
| Onion Powder 🧅 | 1 tbsp | No added MSG |
| Hickory Wood Chips 🌳 | 1 cup | Food-grade, soaked 30 minutes |
| Cherry Wood Chips 🍒 | ½ cup | For fruity depth, optional |
| Beef Broth 💧 | 2 cups | Low-sodium, homemade preferred |
| Red Wine 🍷 | ½ cup | Cabernet Sauvignon, dry |
| Tomato Paste 🍅 | 2 tbsp | San Marzano preferred |
| Fresh Thyme 🌿 | 4 sprigs | Stems removed for infusion |
| Fresh Rosemary 🌿 | 2 sprigs | Woody stems removed |
| Carrots 🥕 | 2 whole | Whole, peeled, thick-cut |
| Celery Stalk 🧅 | 2 whole | Thick, stringy parts removed |
[recipe_ingredient_scaler]
The chuck roast is non-negotiable—marbling is key for that melt-in-your-mouth texture. Costco or Whole Foods carry premium cuts, but any well-marbled chuck works. Look for vibrant color and visible fat streaks. For wood chips, Traeger or Butcher’s Smokehouse brands deliver consistent results. Soak them for 30 minutes minimum to prevent flare-ups. The Spanish smoked paprika from Penzeys adds authentic depth without overpowering. If you can’t find it, McCormick’s smoked paprika is a solid backup, though slightly less complex.
No hickory chips? Apple or pecan wood works in a pinch, though flavor will differ. Substituting red wine? Dry sherry or beef broth maintains balance. Fresh thyme and rosemary can be swapped for dried at one-third the amount, but fresh infuses deeper aroma. The tomato paste is optional but adds umami richness—skip it if you prefer a cleaner profile. For vegetables, parsnips or turnips can replace carrots and celery, though they’ll alter the flavor profile slightly. Always trim excess fat from the roast before seasoning to ensure even crust formation.
This roast develops best over 8-12 hours of low-and-slow cooking. Store prepped ingredients in airtight containers: wood chips in a sealed bag with damp paper towels, broth in the fridge for up to 3 days, and fresh herbs wrapped in damp paper towels. The finished roast keeps for 4-5 days in the fridge, though flavor peaks at 24 hours post-cooking. For leftovers, slice against the grain and reheat with a splash of broth to restore moisture. Freeze portions for up to 3 months—thaw overnight in the fridge before reheating.
Why You’ll Love This Recipe
- No-Fuss Weeknight Win: I’ll be honest—most pot roasts take forever, but this one’s different. You season the chuck roast the night before, let it sit uncovered in the fridge, and wake up to a smoker that does all the work. That 1-hour dry-brine step? Game-changer. The spices—especially the smoked paprika—cling like glue, so you’re not babysitting it all day.
- Smoky, Rich, and Unforgettable: That first bite? The crispy bark from the hickory and cherry wood chips paired with the creamy, fall-apart meat? Chef’s kiss. The red wine and tomato paste in the broth add depth that’s not just “meaty”—it’s complex, like a steakhouse cut but made at home. My kids won’t even notice the carrots and celery are in there—they’re too busy fighting over seconds.
- Leftovers That Outlast the Meal: This roast doesn’t just feed dinner—it feeds your soul for days. Slice it up, and you’ve got lunches, sandwiches, or even tacos for the week. The gravy? Even better the second day. I once packed leftovers for a camping trip, and honestly, it was the highlight of the weekend. No reheating drama, just pure, smoky satisfaction.
- Budget-Friendly Crowd Pleaser: A 4 lb chuck roast is cheaper than you’d think, and with the spices and veggies, you’re looking at under $15 for a meal that’ll feed six. Plus, the wood chips? A one-time buy that lasts forever. It’s the kind of dish where everyone at the table will ask for seconds, and no one will care that you spent less than $3 per serving.
Step-by-step instructions for smoked pot roast
Mastering this technique delivers melt-in-your-mouth tenderness with deep smoky flavor every time.
Prepare the Chuck Roast for Smoking
Begin by trimming any excess fat from the 4 lb chuck roast, leaving about ¼ inch of fat cap for moisture during smoking. Pat the roast dry with paper towels—this step is critical for developing that perfect bark. In a small bowl, combine the 2 tbsp kosher salt, 1½ tbsp freshly ground black pepper, 1 tbsp garlic powder, 1 tbsp smoked paprika, and 1 tbsp onion powder. Rub this mixture evenly over all sides of the roast, pressing firmly so the spices adhere. Place the roast on a wire rack set over a baking sheet and refrigerate uncovered for at least 1 hour, or up to 12 hours. This drying and seasoning process ensures maximum flavor penetration and crispy edges.
While the roast seasons, prepare the wood chips. Soak the 1 cup hickory wood chips and ½ cup cherry wood chips in water for 30 minutes to prevent burning. Drain before using. This step is essential for generating clean, flavorful smoke throughout the cook.
Set Up the Smoker and Begin Cooking
Preheat your smoker to 225°F using the soaked wood chips. Place a water pan in the smoker to maintain moisture and prevent the roast from drying out. Once the smoker reaches temperature and you see steady, blue smoke (not thick white steam), place the seasoned chuck roast fat-side up on the smoker grate. This positioning allows the rendered fat to baste the meat as it cooks.
Close the smoker lid and resist the urge to open it during the initial 2-hour cook time. This resting period allows the roast to develop a proper bark while maintaining even heat distribution. The internal temperature should reach 160°F after this time, but don’t rush—patience is key to achieving that fall-apart tenderness.
Build the Flavor Base and Add Vegetables
After the initial 2 hours, remove the roast from the smoker and set it aside. In a small saucepan, combine the 2 cups beef broth, ½ cup red wine, 2 tbsp tomato paste, 4 sprigs fresh thyme, and 2 sprigs fresh rosemary. Bring to a simmer over medium heat for 10 minutes to infuse the flavors. Strain out the herbs and return the liquid to the saucepan, keeping it warm.
In a separate bowl, prepare the vegetables by peeling and cutting the 2 carrots and 2 celery stalks into 1-inch chunks. Place these in the bottom of a roasting pan large enough to hold the roast comfortably. Pour the infused broth mixture over the vegetables, ensuring they’re partially submerged. Return the roast to the smoker and cover with the roasting pan.
Finish the Roast Low and Slow
Return the roast to the smoker and continue cooking at 225°F until the internal temperature reaches 205°F, typically requiring an additional 4-6 hours. The roast should be fork-tender, with the meat pulling apart easily. During the final hour, check the liquid in the roasting pan occasionally and add water as needed to prevent drying.
Once the roast reaches the desired temperature, remove it from the smoker and transfer it to a cutting board. Tent loosely with foil and let it rest for 15-20 minutes before slicing. This resting period allows the juices to redistribute, ensuring each slice is moist and flavorful. The roast should have a deep mahogany bark on the outside and a rich, smoky aroma that fills the room.
Serve with Pan Gravy
While the roast rests, remove the vegetables from the roasting pan and set them aside. Place the pan on the stovetop over medium heat and add the juices that have accumulated in the pan. Scrape up any browned bits from the bottom of the pan with a wooden spoon, using these fond bits to create a rich, flavorful gravy. Simmer the liquid for 5-7 minutes until it thickens slightly to your desired consistency.
Slice the roast against the grain into ½-inch thick pieces and serve family-style with the vegetables and pan gravy. The combination of tender meat, smoky depth, and aromatic vegetables creates a dish that’s perfect for feeding a crowd or enjoying leftovers for days.
Pro Tips For Making Smoked Pot Roast
- Soak Wood Chips Right: I used to skip this step and ended up with bitter smoke—soak those 1 cup hickory and ½ cup cherry wood chips for the full 30 minutes. Drain well before using, or you’ll clog your smoker and lose control of the temperature.
- Don’t Open the Smoker Early: The first 2 hours at 225°F are sacred—resist peeking, even if you’re nervous. Every time I cracked the lid too soon, the roast lost heat and took forever to hit 160°F. Let that bark form undisturbed.
- Toast Your Garlic Powder: Skip the pre-toasted jar stuff—dry-toast 1 tbsp garlic powder in a skillet for 30 seconds until fragrant. It’ll add depth to the rub that store-bought versions can’t match, especially when paired with the smoked paprika.
- Use Whole Carrots and Celery: I know it’s tempting to chop them small, but leave those 2 carrots and 2 celery stalks whole (just peeled and thick-cut) until the final hour. They’ll stay crisp and infuse the broth better, then break apart naturally when you slice the roast.
Dietary considerations for these flavors
Gluten-Free Adaptation
This classic smoked pot roast is naturally gluten-free as written, since it relies on kosher salt, spices, and wood smoke for flavor. The 2 tbsp kosher salt and 1 tbsp smoked paprika are certified gluten-free, and the hickory and cherry wood chips add authentic smokiness without additives.
Just double-check your beef broth—opt for low-sodium, gluten-free broth like Imagine Foods or Pacific Foods to avoid hidden wheat. The red wine is optional but adds depth; if you skip it, simply use an extra ½ cup beef broth to maintain moisture. 💛
Low-Sodium Version
The recipe already uses low-sodium beef broth and dry spices, but you can make it even lighter by reducing the kosher salt to 1 tbsp total.
Skip the tomato paste (or use ½ tbsp for subtle umami) and rely on the natural saltiness of the red wine and wood smoke. Taste before serving and adjust with a pinch of flaky sea salt like Maldon at the table. This approach keeps the dish rich without overpowering.
Dairy-Free Consideration
The original recipe is inherently dairy-free, but if you’re serving with sides like mashed potatoes or gravy, opt for dairy-free butter or olive oil when mashing. The pan gravy made from the roasting juices is already dairy-free—just ensure your beef broth is certified dairy-free (some brands use whey).
For extra richness, stir in 1 tbsp coconut oil while simmering the gravy. The smoky depth of the roast shines through without needing dairy.
Keto-Friendly Adjustments
To make this keto-compliant, skip the carrots and celery (or use zucchini or mushrooms instead) and reduce the red wine to 2 tbsp (or sub with 2 tbsp apple cider vinegar for acidity).
The tomato paste adds carbs, so use only 1 tbsp and balance with extra rosemary and thyme. The wood smoke and spice crust keep the dish flavorful without relying on sugar or starches. Always check labels on spices for hidden sugars!
Vegetarian Substitute
While not a true substitute, you can create a “smoked” vegetarian version using a seitan or mushroom-based loaf (like Violife Smoked Sausage) as the base.
Sear it in the smoker for 1 hour with the same wood chips, then braise in low-sodium veggie broth with 1 tbsp smoked paprika and 1 tbsp liquid smoke. Serve with the same pan gravy made from the braising liquid.
The texture won’t match beef, but the smoky depth is satisfying! 🌱
Nutrition facts
Frequently asked questions
Why does the recipe call for refrigerating the roast after seasoning?
Refrigerating the seasoned roast for at least 1 hour (up to 12 hours) dries the surface slightly and helps the spices adhere better, creating a perfect bark. This step also allows flavors to penetrate deeper into the meat, ensuring every bite is packed with smoky goodness.
Can I use an oven instead of a smoker?
Yes! For an oven method, wrap the seasoned roast in foil with the vegetables and broth, then bake at 275°F for 4-6 hours until it reaches 205°F internally. The smoky flavor comes from the wood chips—place them in a foil pouch with water and poke holes in it to release smoke into the oven.
What if the roast isn’t fork-tender by the end of the cooking time?
If the roast isn’t tender at 205°F, return it to the smoker for another 1-2 hours. The key is patience—low and slow cooking breaks down tough fibers. If it’s still tough, slice thinly and braise in extra broth for 30 minutes to melt it further.
How do I store the finished roast for leftovers?
Slice the roast against the grain and store it in an airtight container with the pan juices. Reheat gently in a skillet with a splash of broth or water to restore moisture. The flavors actually improve slightly after 24 hours, making it perfect for meal prep!

Trained in classic French technique but raised on slow-cooked ribs and spicy rubs, she blends culinary skill with smoke and soul.
- Smoked Chicken Salad Recipe: Crispy, Smoky Bites With Creamy Ranch Dressing - October 19, 2026
- Beer Can Chicken in a Smoker Recipe: Juicy, Herbed Perfection in One Can - October 19, 2026
- Brined Beef Brisket Recipe: Ultra-Tender, Juicy Cuts in One Pot - October 19, 2026