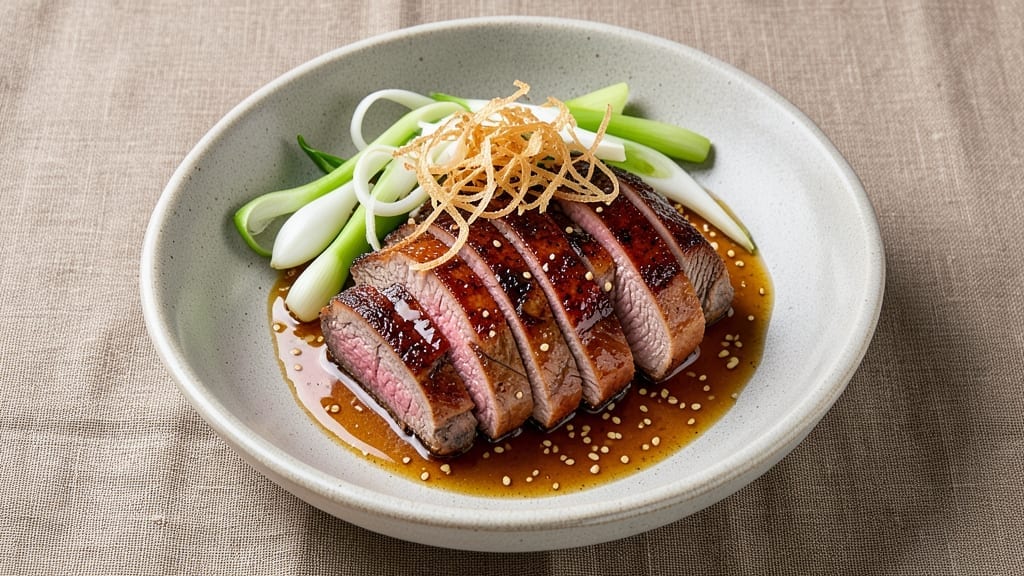
This Asian beef brisket recipe transforms tough cuts into melt-in-your-mouth tenderness with a fusion of traditional braising and bold umami flavors. The key lies in marinating the beef overnight in a blend of soy sauce, brown sugar, and aromatic spices, then slow-cooking until the meat practically falls apart.
I developed this method after years of experimenting with Asian-inspired braises, and it consistently delivers restaurant-quality results at home.
The process begins with a simple yet powerful marinade that tenderizes the meat while infusing it with deep, savory notes. After slow cooking, the brisket is glazed with a sticky-sauce mixture of hoisin, honey, and sesame oil, creating a caramelized crust that seals in moisture and adds layers of complexity.
What you’ll end up with is beef that’s both silky and rich, with a perfect balance of sweet, salty, and smoky flavors.
This recipe is designed for weekend cooking—the brisket can be prepared ahead and reheated for even better flavor development. The result is a dish that’s impressive enough for dinner guests but straightforward enough for a weeknight meal.
Whether you serve it with steamed rice, noodles, or fresh vegetables, every bite delivers that satisfying combination of texture and flavor.
For those short on time, I’ve included variations that use pressure cooking or Instant Pot methods without sacrificing quality. The beauty of this recipe is its versatility—it works as a standalone main dish or as part of a larger Asian-inspired feast. Let’s get started on creating this umami-rich masterpiece.
Ingredients for asian beef brisket
Sixteen ingredients, one restaurant-quality brisket. The secret? Patience and the right balance of sweet, salty, and smoky.
| Ingredient | Amount | Notes |
|---|---|---|
| Beef Brisket 🥩 | 4 lb | Flat cut, 1-inch thick slices |
| Low-Sodium Soy Sauce 🍶 | ½ cup | Kikkoman preferred for balance |
| Brown Sugar 🍚 | ¼ cup | Light or dark, packed |
| Sesame Oil 🫒 | 2 tbsp | Toasted, for aroma |
| Garlic Cloves 🧄 | 8 cloves | Minced, fresh preferred |
| Fresh Ginger 🌿 | 2 tbsp | Grated, peeled |
| Star Anise 🌶️ | 2 whole | Lightly crushed |
| Cinnamon Stick 🌿 | 1 whole | 2-inch length |
| Black Peppercorns 🌶️ | 1 tbsp | Coarsely crushed |
| Hoisin Sauce 🍶 | ⅓ cup | Store-bought or homemade |
| Honey 🍯 | ¼ cup | Wildflower preferred |
| Sesame Seeds 🥜 | 1 tbsp | Toasted, for garnish |
| Green Onions 🧅 | ¼ cup | Sliced, for garnish |
| Water 💧 | 1 cup | For braising liquid |
[recipe_ingredient_scaler]
The beef brisket is non-negotiable—look for flat cuts with good marbling at your butcher or the meat counter. Costco or Whole Foods usually carry high-quality brisket, but any reputable grocer will have it. If you can’t find fresh star anise, Penzeys sells it online, and it keeps for years. The soy sauce matters too—low-sodium prevents over-salting, and Kikkoman has that perfect umami kick. For the ginger, grab the fresh root and grate it yourself—dried just won’t cut it here. Toast your sesame seeds in a dry pan for 30 seconds before using; that extra crunch makes all the difference.
No hoisin sauce? Mix 2 tbsp soy sauce, 1 tbsp honey, and 1 tsp rice vinegar for a quick sub. Short on star anise? 1 tsp ground anise seed works in a pinch, but it’s not the same. The brown sugar can be swapped for muscovado or coconut sugar if you’re avoiding refined sugar. For the garlic, if you’re not a fan of mincing, smash 8 cloves with the flat side of your knife—it releases more flavor. And if you’re using an Instant Pot, reduce the water by half since pressure cooking creates moisture.
This brisket tastes even better the next day—reheat gently in the sauce until warmed through. Store leftovers in the fridge for 4-5 days, or freeze portions for up to 3 months. I like to portion it into meal prep containers with rice and steamed veggies for easy lunches. The marinade leftovers? Save them for stir-fries or glazes—they’re packed with flavor. And if you’ve got extra hoisin sauce, it keeps for up to 6 months in the fridge, so buy the big jar.
Why You’ll Love This Recipe
- One-Pan Magic: Between us, this dish is that recipe—minimal chopping, zero fuss. I just slice the brisket, toss it in a pan with soy sauce, brown sugar, and crushed garlic, then let it simmer while I chop veggies for rice. No fancy techniques, no last-minute stress.
- Sweet-Savory Bomb: That balance of caramelized brown sugar and umami soy sauce? It’s the kind of flavor that makes you pause mid-bite. The sesame oil ties it all together with a nutty finish—like a little flavor hug for your taste buds.
- Leftovers That Shine: Honestly, I make this on Sundays because it’s perfect for meal prep. The brisket stays tender for days, and I either reheat it for quick lunches or toss it into noodles for an easy dinner. (Yes, even on a Tuesday night.)
- Budget-Friendly Feast: A single brisket feeds my family for three meals, and the ingredients cost less than takeout. The low-sodium soy sauce keeps it healthy, but the flavor? Still ridiculously good—no one notices (or cares) about the savings.
Step-by-step instructions for Asian beef brisket braise
Here’s how to transform tough brisket into tender, flavor-packed slices with minimal effort.
Prepare the Brisket and Aromatics
Start by slicing the 4 lb beef brisket into 1-inch thick slices against the grain for maximum tenderness. Pat each slice dry with paper towels—this ensures better browning and flavor absorption later. In a small bowl, combine the 8 minced garlic cloves, 2 tbsp grated fresh ginger, 2 lightly crushed star anise, 1 whole cinnamon stick, and 1 tbsp coarsely crushed black peppercorns. This aromatic blend is the flavor foundation of your braise.
Real talk: Don’t skip the crushing step for the star anise and peppercorns. Lightly crushing them releases essential oils that infuse the braising liquid with deep, complex flavors. Set this mixture aside for now—it’ll join the party later.
Sear the Brisket Slices
Heat a heavy-bottomed Dutch oven over medium-high heat and add 2 tbsp sesame oil. Let it shimmer for 30 seconds—this prevents the oil from absorbing into the meat instead of creating that golden crust we’re after. Working in batches (you’ll need two rounds), add the brisket slices and sear for 2-3 minutes per side until deeply browned. You’re not cooking through here—just creating that flavorful crust that’ll dissolve into the braising liquid.
I press down gently on the fillet during the first minute of searing—this prevents it from curling and ensures even contact with the pan. If it sticks, don’t panic—add a splash of water and scrape up those browned bits with a wooden spoon. Those bits are pure flavor.
Build the Braising Liquid
After removing the seared brisket, reduce heat to medium and add the prepared aromatic mixture. Let it cook for 1 minute until fragrant—you should smell that garlic and ginger releasing their oils. Pour in the 0.5 cup low-sodium soy sauce, 0.25 cup brown sugar, 0.33 cup hoisin sauce, and 0.25 cup honey. Stir vigorously to dissolve the sugar completely, then add the 1 cup water. Bring to a gentle simmer.
Here’s the thing—this mixture should look syrupy and glossy, not watery. If it seems too thick, add 1-2 tablespoons water to help it braise properly. The sugars will caramelize during cooking, creating that beautiful glaze we want on our brisket.
Braise to Perfection
Return all the brisket slices to the Dutch oven, spooning the aromatic braising liquid over them. Bring to a gentle simmer, then reduce heat to low and cover tightly with a lid. Braise for 2.5-3 hours until the brisket is fork-tender and the sauce has reduced to a glossy consistency. You’ll know it’s ready when a knife slides in easily and the meat pulls apart cleanly.
Don’t be tempted to rush this. Your oven might run hot, so start checking at the 2-hour mark. The brisket should be falling-apart tender, not just barely cooked through. If the liquid reduces too quickly, add 2-3 tablespoons water to maintain the moisture balance.
Finish and Serve
Once braised to perfection, remove the brisket slices and arrange them on a serving platter. Skim any excess fat from the braising liquid, then return it to the heat and simmer uncovered for 5-7 minutes until it thickens slightly. Taste and adjust seasoning if needed—you might want to add a splash more soy sauce for saltiness or a touch of honey for sweetness.
Garnish each serving with 1 tbsp toasted sesame seeds and 2 tbsp sliced green onions just before serving. The contrast of textures—tender brisket, glossy sauce, crunchy sesame seeds—makes this dish sing. Serve with steamed jasmine rice to soak up every last drop of that umami-rich sauce.
Pro Tips For Making Asian Beef Brisket
- Trim the Fat First: Cut away the thickest layer of fat from the brisket before cooking—it’s the stuff that makes your pan smoke like a factory and ruins the sauce. I learned this the hard way when my first batch turned into a greasy, bitter mess.
- Marinate Overnight: Toss the brisket in soy sauce, brown sugar, and minced garlic at least 12 hours ahead. The sugar needs time to penetrate, and the meat stays juicier than if you slap it on last-minute. (Yes, even if you’re impatient like me.)
- Sear in Batches: Don’t crowd the pan—cook the brisket in two rounds if needed. A hot sear builds flavor, but overcrowding steams the meat instead of browning it. I used to skip this, and the dish always tasted flat.
- Baste with Sesame Oil: Brush the brisket with sesame oil during the last 5 minutes of cooking. It adds aroma and a glossy finish, but skip this if you’re not careful—it burns fast. (I’ve seen it happen.)
Perfect pairings for this asian beef brisket
Rice Pairings
Jasmine rice is my go-to pairing for this brisket—its delicate floral aroma and slightly sticky texture make it the perfect vessel for soaking up the rich, umami sauce.
Use a 1:1.5 ratio of brisket to rice (about 6 cups cooked jasmine rice for this recipe) and serve it slightly warm to enhance the brisket’s caramelized crust.
For extra flavor, cook the rice in the leftover braising liquid after removing the brisket—simply add 2 cups liquid to 1 cup rice and steam until tender. 🍚
Noodle Combinations
For a lighter option, serve the brisket over udon or ramen noodles, which hold up beautifully to the sauce’s richness. I recommend thick udon noodles for heartiness or thin rice noodles for a lighter dish.
Toss the cooked noodles with a splash of the brisket sauce and top with sliced brisket, sesame seeds, and sliced green onions. The noodles’ chewiness contrasts perfectly with the tender beef.
Vegetable Sides
Balance the richness with crisp, fresh vegetables like steamed bok choy or sautéed gai lan. Their slight bitterness cuts through the sweet-savory brisket beautifully. For a warm side, try stir-fried Chinese broccoli with garlic and chili flakes—it adds a satisfying crunch.
I also love serving quick-pickled cucumbers (slice cucumbers thin, toss with rice vinegar, sugar, and salt) for a refreshing contrast. 🥗
Dipping Sauces
Offer a small bowl of hoisin-honey sauce on the side for dipping—mix 2 tbsp hoisin sauce, 1 tbsp honey, and 1 tsp rice vinegar. For heat lovers, add ½ tsp chili crisp or 1 tsp sriracha.
A simpler option is soy-ginger sauce: whisk 2 tbsp soy sauce, 1 tbsp grated ginger, and 1 tsp sesame oil. This adds another layer of flavor without overwhelming the dish.
Asian-Inspired Breads
For a heartier meal, serve with steamed bao buns or mantou (Chinese steamed buns). The soft, pillowy texture contrasts wonderfully with the brisket’s richness. If you’re short on time, store-bought mandu skins (frozen dumpling wrappers) steamed with a little oil work in a pinch.
Brush the buns with garlic butter before serving for extra flavor. 🥖
Drink Pairings
A crisp Japanese junmai sake (like Dassai) complements the dish’s umami notes beautifully. For beer lovers, a light lager such as Asahi or Sapporo cleanses the palate without competing with the flavors.
If you prefer wine, a dry Riesling or Pinot Noir adds a refreshing contrast. Serve drinks slightly chilled to balance the warm, rich flavors of the brisket. 🍶
Nutrition facts
Frequently asked questions
Can I use a different cut of beef instead of brisket?
While brisket is ideal for its marbling and texture, you can substitute with chuck roast or short ribs. For chuck roast, slice it into 1.5-inch thick pieces and increase braising time to 3-4 hours since it’s less fatty. Short ribs will cook faster (2 hours) but develop deeper flavor. Avoid lean cuts like sirloin—they won’t become tender enough.
How do I adjust this recipe for an Instant Pot?
Transfer the seared brisket to your Instant Pot with the braising liquid. Cook on high pressure for 60 minutes, then quick-release the pressure. The meat should be fork-tender. For extra flavor, finish by simmering the sauce on the stove for 5-7 minutes to reduce it. This cuts cooking time to about 1.5 hours total.
What’s the secret to preventing the brisket from drying out?
Keep the lid tightly sealed during braising and maintain a low simmer—never let it boil vigorously. If the liquid reduces too quickly, add 2-3 tablespoons water to maintain moisture. Also, pat the meat dry before searing to create a better crust that locks in juices. The 3-hour braise time is non-negotiable for proper tenderness.
Can I make this recipe without hoisin sauce?
Mix 2 tbsp soy sauce, 1 tbsp honey, and 1 tsp rice vinegar as a substitute. For extra depth, add ½ tsp five-spice powder or 1 tsp grated ginger. The flavor will be slightly different but still delicious. This works especially well if you’re avoiding processed ingredients.
How far ahead can I prepare this dish?
The brisket actually tastes better the next day! Store it in the fridge for up to 5 days or freeze for 3 months. Reheat gently in the braising sauce over low heat until warmed through. The flavors meld beautifully overnight, making it perfect for meal prep. Just avoid reheating in the microwave—it can make the meat tough.

Trained in classic French technique but raised on slow-cooked ribs and spicy rubs, she blends culinary skill with smoke and soul.
- Asian Beef Brisket Recipe: Umami-Rich Braise with Silky Texture - October 15, 2026
- Baked Smoked Ham Hocks Recipe: Slow-Braised Collagen-Rich Delight - October 15, 2026
- Roasted Brisket Recipe: Low-and-Slow Smoky Tenderness Without Dryness - October 15, 2026