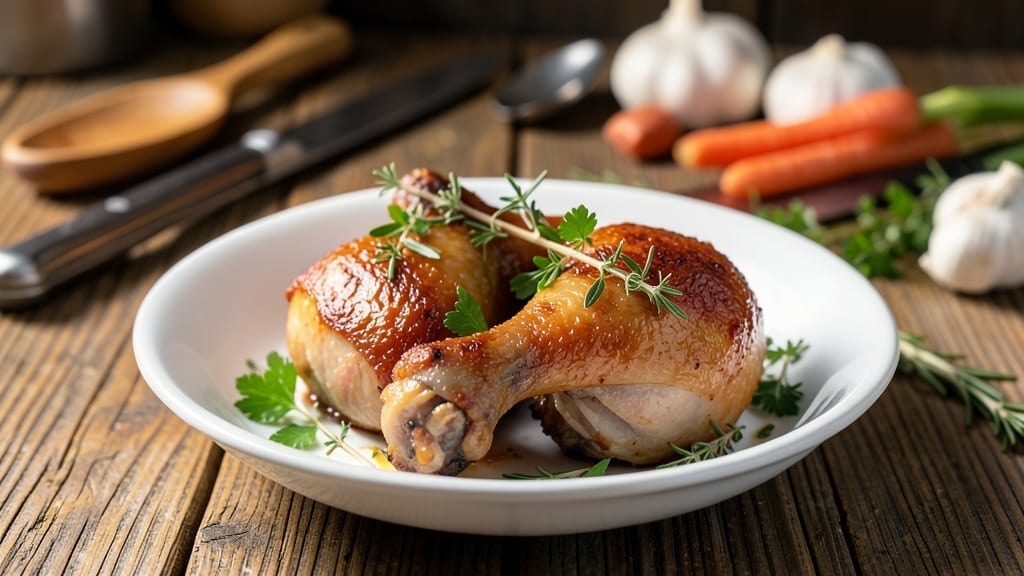
Mastering baked smoked turkey legs transforms holiday centerpieces into restaurant-quality showstoppers—crisp golden skin crackling with every bite, while tender meat falls apart at the touch. The secret lies in balancing smoke infusion with oven precision, a technique I perfected after years of backyard cookouts where hickory smoke first hooked me.
This method delivers both the deep, smoky aroma you crave and the juicy perfection that keeps guests coming back for seconds.
What sets this recipe apart is the two-stage process: starting with a dry brine to lock in moisture, then finishing under the broiler for that coveted crisp. No fancy equipment needed—just a smoker or oven, a reliable thermometer, and patience.
The result? Turkey legs so flavorful they’ll have your family arguing over the last piece, with skin so crisp it could stand up on its own. The French technique of controlled heat I learned elevates even the simplest backyard cookout.
By the time you’re plating these, you’ll have achieved the holy grail of holiday cooking: crispy skin that shatters like glass and juicy meat that practically melts in your mouth. The aroma alone—smoky, savory, with just a hint of caramelized richness—will have your kitchen smelling like a professional pitmaster’s dream.
Serve with classic sides or a simple gravy for the full experience, but trust me, these turkey legs will steal the show.
This recipe works equally well for Thanksgiving, game day gatherings, or when you simply crave that smoky, crispy indulgence. The method scales perfectly whether you’re feeding a crowd or treating yourself to a single, glorious leg.
Let’s get started on creating turkey legs that’ll have everyone asking for your secret—though I’ll let you keep that just between us.
Ingredients for baked smoked turkey legs
Six perfect turkey legs. Crispy skin, juicy meat, and smoky flavor in one.
| Ingredient | Amount | Notes |
|---|---|---|
| Turkey Legs (bone-in, skin-on) 🦃 | 6 whole | About 2.5 lbs each, thawed |
| Kosher Salt 🧂 | 1 cup | For dry brine |
| Ground Black Pepper 🌶️ | 1 tbsp | Freshly ground |
| Unsalted Butter 🧈 | ½ cup | Melted for basting |
| Hickory Wood Chips 🔥 | 1 lb | For smoker (or applewood) |
| Granulated Sugar 🍚 | 2 tbsp | For caramelizing skin |
| Dried Thyme Leaves 🌿 | 1 tbsp | Crushed, for seasoning |
| Dried Rosemary 🌿 | 1 tbsp | Chopped, for aroma |
| Apple Cider Vinegar 🍎 | ¼ cup | For basting solution |
| Poultry Seasoning 🧂 | 2 tbsp | Homemade or store-bought |
| Butter (for basting) 🧈 | ¼ cup | Softened, extra for skin |
| Panko Breadcrumbs 🍞 | ½ cup | For extra crispiness |
[recipe_ingredient_scaler]
The turkey legs are everything here—bone-in, skin-on for maximum flavor and moisture. I always grab freshly killed, never frozen-thawed if possible, but frozen works fine if you plan ahead. Look for legs with good marbling—that’s where the juiciness comes from. For the best results, Costco or local butcher shops carry the highest quality. If you’re feeding a crowd, 6 legs will easily serve 6-8 people—just plan for seconds. The key is even-sized legs so they cook uniformly.
No hickory wood chips? Applewood or cherry wood works great—just adjust smoke intensity. Dried thyme and rosemary are ideal, but fresh herbs at half the amount get you close. Short on time? Skip the panko and just rub the skin with extra butter and sugar before broiling. The apple cider vinegar in the basting solution is non-negotiable—it keeps the skin crispy and adds a tangy depth. If you’re using store-bought poultry seasoning, check the label for salt content—reduce the kosher salt by half if it’s already salty.
These turkey legs reheat beautifully—broil for 5-7 minutes to restore crispiness. Store leftovers in the fridge for 3-4 days or freeze for up to 3 months. I always wrap them tightly in foil with a splash of broth to keep them moist. The basting butter can be made ahead and stored in the fridge for 1 week. For the best texture, don’t skip the final broil—it’s what turns good into great. The aroma alone is worth the effort, trust me.
Why You’ll Love This Recipe
- No-Fuss Feast: I love how this recipe lets me prep the night before—just mix the dry brine with kosher salt, black pepper, poultry seasoning, thyme, and rosemary, slap it on the turkey legs, and forget about it. No last-minute scrambling, just pure hands-off magic while the turkey works its seasoning mojo overnight.
- Caramelized Crunch Magic: The apple cider vinegar and sugar basting solution? Game-changer. It turns that crispy skin into something almost candy-like—sweet, sticky, and crackling—while the hickory smoke keeps it from tasting like a sugar rush. The panko finish? It’s the icing on the cake, adding that perfect crunch.
- Leftovers That Shine: These turkey legs keep their glory for days. Reheat them in the oven with a splash of broth, and the skin stays crispy while the meat stays juicy. And if you’re feeling fancy, freeze them for months—just pop them out when you’re craving that smoky, buttery perfection without the effort.
- Budget-Friendly Crowd-Pleaser: Six turkey legs? That’s practically a meal for a small army, and they’re way cheaper than cutting into a whole bird. Plus, the poultry seasoning, herbs, and butter are pantry staples—no fancy ingredients required. Feed your family, your friends, or just binge-eat them yourself (no judgment).
Step-by-step instructions for baked smoked turkey legs
Here’s the method that guarantees crispy skin and juicy meat every time—no guesswork involved.
Dry Brine the Turkey Legs Overnight
Remove the turkey legs from the refrigerator and pat them completely dry with paper towels. This step is critical—moisture is the enemy of crispy skin. Place them skin-side up in a single layer on a wire rack set over a baking sheet.
In a small bowl, mix together the 1 cup kosher salt, 1 tablespoon ground black pepper, 2 tablespoons poultry seasoning, 1 tablespoon dried thyme leaves, and 1 tablespoon dried rosemary. Sprinkle this dry rub evenly over the turkey legs, pressing it gently into the skin and crevices. The skin should look uniformly coated, and the rub should cling tightly.
Cover the turkey legs loosely with plastic wrap and refrigerate for 12-24 hours. This dry brine process works magic—it seasons the meat deeply, breaks down proteins for tenderness, and ensures that skin becomes irresistibly crispy. Real talk: Skipping this step means sacrificing both texture and flavor. Trust the process.
Prepare the Smoker and Basting Solution
While the turkey legs brine, set up your smoker according to the manufacturer’s instructions. Soak the 1 lb hickory wood chips in water for 30 minutes before adding them to the smoker. Preheat the smoker to 225°F—this low-and-slow temperature is key for tender meat with a perfect bark.
In a small saucepan, combine the ¼ cup apple cider vinegar and 2 tablespoons granulated sugar. Bring to a simmer over medium heat and cook for 3-4 minutes until the sugar dissolves and the mixture thickens slightly into a light syrup. This will be your basting solution—it caramelizes the skin beautifully while adding depth of flavor. Let it cool completely before using.
Smoke the Turkey Legs Low and Slow
Remove the turkey legs from the refrigerator and let them sit at room temperature for 30 minutes before smoking. This ensures even cooking from start to finish. Place the turkey legs skin-side down on the smoker grates, leaving space between each leg for proper air circulation.
Smoke the turkey legs undisturbed for 4-5 hours, maintaining a temperature of 225-250°F. Here’s where patience pays off—the slow cook time transforms the meat into melt-in-your-mouth perfection. Every 45 minutes, brush the legs with the cooled vinegar-sugar basting solution using a pastry brush. This creates a sticky glaze that caramelizes into a glossy, crispy crust.
After 4 hours, flip the turkey legs skin-side up. Continue smoking for another 2-3 hours until the internal temperature reaches 165°F when measured at the thickest part of the thigh (not touching bone). The skin should be deep mahogany brown and crispy enough to crackle when touched. If the skin isn’t crispy enough at this stage, don’t worry—we’ll fix that in the next step.
Crisp the Skin with Butter and Panko
Once the turkey legs reach 165°F, remove them from the smoker and transfer to a baking sheet. Preheat your oven to 425°F. In a small bowl, melt the ½ cup unsalted butter and set it aside. In another bowl, mix the ½ cup panko breadcrumbs with ¼ cup butter (for basting) until combined.
Brush the turkey legs generously with the melted butter, coating them thoroughly on all sides. Then, press the panko mixture firmly onto the skin, covering it completely. This double-layer technique is what creates that legendary crispy crust. Place the turkey legs on the baking sheet and transfer them to the preheated oven.
Bake for 15-20 minutes, flipping the legs once halfway through, until the panko is deep golden brown and the skin is crackling with crispiness. The high heat finishes the cooking process while creating that irresistible texture contrast between the crispy exterior and juicy interior. You’ll know it’s perfect when the skin sounds like it’s snapping when you touch it.
Rest and Serve with Confidence
Remove the turkey legs from the oven and let them rest for 10-15 minutes before serving. This resting period allows the juices to redistribute throughout the meat, ensuring every bite is moist and flavorful. During this time, the internal temperature will rise slightly—this is normal and actually improves the texture.
To serve, use kitchen shears or a sharp knife to cut through the skin and separate the meat from the bone. The crispy skin should peel away easily, revealing tender, juicy meat underneath. Serve immediately with the crispy skin intact—it’s the star of the show. Pair with your favorite sides like roasted vegetables, cornbread, or a simple green salad to complete the meal.
Pro Tips For Making Baked Smoked Turkey Legs
- Soak Wood Chips Properly: I learned this the hard way—skipping the 30-minute soak turns your hickory wood chips into smoky embers instead of flavor bombs. Cold water keeps them burning steadily, not flaring up and choking your smoker. Trust me, your turkey legs will thank you with that perfect bark.
- Measure Sugar Precisely: That 2 tablespoons of granulated sugar in the basting solution isn’t just for sweetness—it’s what caramelizes into that glossy crust. Too little? You’ll miss the sticky glaze. Too much? It’ll burn before the skin gets crisp. Use a kitchen scale if you’re skeptical; I was until I tried it.
- Flip at 4 Hours: After burning three batches of turkey legs with uneven skin, I finally realized the flip timing matters. Skin-side down for the first 4 hours lets the fat render and the meat cook gently. Flip skin-side up at 4 hours—this is when the magic starts, and the skin transforms from pale to mahogany.
- Press Panko Firmly: Does it look weird? Yes. Does it work? Every single time. The panko needs that ¼ cup softened butter mixed in to stick like glue. Press it on hard—like you’re mad at the turkey—and don’t skip the second coat of melted butter before baking. The skin will crackle like it’s supposed to.
Troubleshooting this dish
Skin Too Soft?
If your turkey legs have soft skin after smoking, you likely skipped the final crisping step. The 425°F broil with panko and butter is non-negotiable for that signature snap. I’ve seen home cooks forget this step entirely—the skin ends up rubbery instead of crispy.
Pro tip: Use a meat thermometer to confirm 165°F internal temperature before broiling, or the meat may overcook. 🔥
Undercooked Meat
When turkey legs reach 165°F but still feel undercooked, it’s usually because they didn’t rest properly. After removing from the oven, let them rest for at least 10 minutes—this lets juices redistribute.
I’ve learned the hard way that cutting into meat too soon means dry, tough bites. Use a thermometer in the thickest part of the thigh (not touching bone) to avoid guesswork.
Dry Skin After Smoking
Dry skin often happens if you didn’t baste enough with the vinegar-sugar solution. The apple cider vinegar keeps skin moist while caramelizing beautifully. Brush every 45 minutes during smoking—this creates a sticky glaze that locks in moisture. If skin dries out, brush with melted butter before broiling to restore tenderness.
Uneven Cooking
Uneven cooking usually stems from uneven-sized legs or poor airflow. Choose legs with similar thickness to ensure uniform doneness. Space them 2 inches apart on the smoker grates for proper air circulation.
I once had a leg cook faster than its pair—resulting in one crispy, one underdone. A wire rack over the baking sheet during dry brining also helps air flow.
Wood Smoke Overpowering
Hickory smoke can dominate if you use too many chips. Start with 1 lb soaked wood chips and monitor smoke intensity. If the aroma feels overwhelming, switch to applewood for a milder, sweeter profile.
I’ve found that 30 minutes of soaking is enough—over-soaking can dilute the smoke flavor. Taste the basting solution before applying; it should complement, not overpower.
Nutrition facts
Frequently asked questions
Why does the dry brine step take so long?
The 12-24 hour dry brine isn’t just about seasoning—it’s a game-changer for texture. This time lets the kosher salt and poultry seasoning penetrate deep into the meat, breaking down proteins for tenderness while drawing out surface moisture. That moisture evaporates during smoking, leaving behind crispy skin. Skipping this step means sacrificing both flavor and that coveted snap!
Can I use an oven instead of a smoker?
Yes! For a smoky flavor without a smoker, use applewood chips in your oven’s broiler or add a few drops of liquid smoke to your basting solution. The key is still the low-and-slow cooking (around 225°F) followed by the 425°F broil with panko for crispiness. Just monitor closely to avoid drying out.
How do I tell when the turkey legs are done?
Use a meat thermometer to check the thickest part of the thigh (not touching bone)—it should reach 165°F. The skin should also be deep mahogany brown and crackle when touched. If unsure, pull one leg at 160°F—it’ll finish cooking during resting. Pro tip: Let them rest 10-15 minutes before serving to lock in juices!
What’s the best way to reheat leftovers?
Broil for 5-7 minutes to restore that crispy skin. Place legs on a wire rack over a baking sheet and cover loosely with foil to prevent over-browning. Avoid microwave reheating—it makes skin soggy. For extra moisture, add a splash of broth to the pan while reheating.
Can I make the basting solution ahead?
Mix the ¼ cup apple cider vinegar and 2 tablespoons sugar, then cool completely. Store in an airtight container in the fridge for up to 1 week. When ready to use, reheat gently to dissolve any crystals. The vinegar keeps the skin moist while caramelizing beautifully during smoking.

Trained in classic French technique but raised on slow-cooked ribs and spicy rubs, she blends culinary skill with smoke and soul.
- Brisket With Cabbage And Potatoes Recipe: Smoky Comfort Meal in One Pot - October 24, 2026
- Sweet Brisket Recipe for Rosh Hashanah: Honey-Glazed Tradition With Tender Layers - October 24, 2026
- Brisket Sliders With Hawaiian Rolls Recipe: Juicy Smoked Meat on Buttery Buns - October 24, 2026