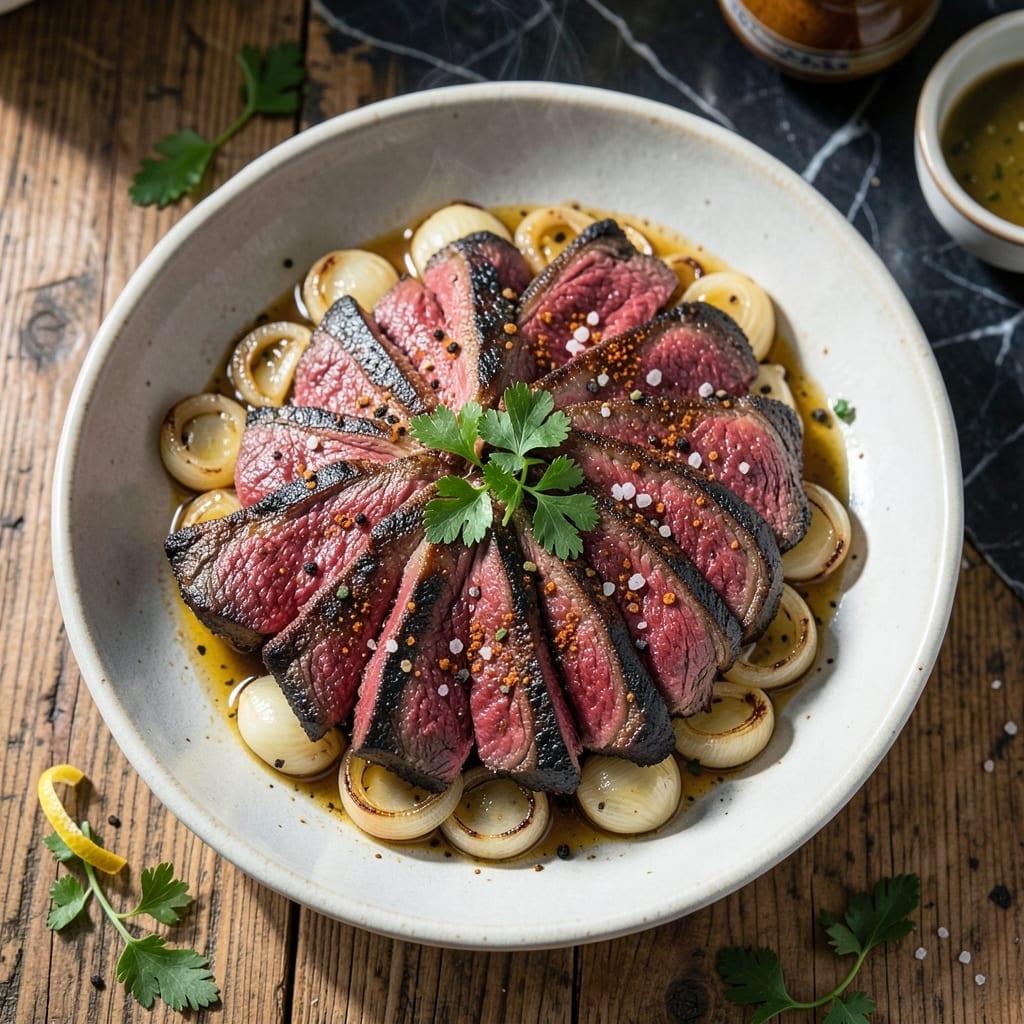
There’s a reason backstrap remains my favorite cut for grilling—it delivers tender results with minimal effort. This lean, flavorful muscle responds beautifully to high heat and simple seasoning.
I learned early that the secret lies in not overcomplicating things. A good sear, proper resting time, and quality beef are all you need. The natural marbling does most of the work.
What emerges from the grill is meat so tender it nearly cuts itself, with a robust beefy flavor that shines through any rub or marinade. The crust forms a perfect contrast to the juicy interior.
Serve it sliced against the grain for maximum tenderness. This cut deserves center stage on your plate.
Ingredients for Beef Backstrap
Lean, flavorful beef plus a few pantry staples for that perfect sear.
| Ingredient | Amount | Notes |
|---|---|---|
| Beef Backstrap 🥩 | 2 lb | Trimmed of excess fat |
| Kosher Salt 🧂 | 1 ½ tsp | Diamond Crystal preferred |
| Black Pepper 🌶️ | 1 tsp | Freshly ground |
| Garlic Powder 🧄 | 1 tsp | Not garlic salt |
| Onion Powder 🧅 | 1 tsp | Fresh ground preferred |
| Smoked Paprika 🌶️ | ½ tsp | Adds depth to crust |
| Olive Oil 🫒 | 2 tbsp | High smoke point for searing |
| Unsalted Butter 🧈 | 2 tbsp | For basting while grilling |
| Fresh Rosemary 🌿 | 2 sprigs | Optional for aroma |
| Fresh Thyme 🍃 | 2 sprigs | Optional for aroma |
| Red Wine Vinegar 💧 | 1 tbsp | For finishing touch |
| Flaky Sea Salt 🧂 | ½ tsp | For finishing |
[recipe_ingredient_scaler]
The beef is everything here. Backstrap (also called strip loin) should be bright red with visible marbling—ask your butcher for a center-cut piece. Costco and Whole Foods usually have great quality, but a local butcher will give you the best cut. Look for pieces about 1.5 inches thick for even cooking. Don’t trim all the fat—it adds flavor during grilling.
No backstrap? Ribeye or New York strip are solid substitutes with similar tenderness. Fresh out of rosemary or thyme? Dried herbs at half the amount work, but fresh brings brighter flavor. The smoked paprika can be regular if that’s what you’ve got. For the vinegar, apple cider vinegar gives a similar brightness if you’re out of red wine.
Let the meat rest at room temp 30 minutes before grilling. Leftover sliced beef keeps 3-4 days in the fridge, or freeze for 3 months. Perfect for sandwiches or salads later.
Why You’ll Love This Recipe
- Five-Minute Prep: I just rub the backstrap with salt, pepper, and those powders—no marinating, no fuss.
- Deep, Savory Crust: The garlic and onion powders form this insane crust that’s salty, peppery, and just a little sweet from the beef itself.
- Weeknight to Weekend: I’ve served it with mashed potatoes for company and sliced it thin for next-day sandwiches—both times it disappeared fast.
- Stretches the Budget: One backstrap feeds four, and the leftovers (if any) taste even better sliced into stir-fries or salads.
Step-by-Step Instructions for Beef Backstrap
Here’s the method I use for perfect tenderness and a bold crust every time.
Step 1: Season the Beef Backstrap Generously
Pat the 2 lb beef backstrap dry with paper towels to ensure a good sear. In a small bowl, combine the 1.5 tsp kosher salt, 1 tsp black pepper, 1 tsp garlic powder, 1 tsp onion powder, and 0.5 tsp smoked paprika.
Rub this spice blend all over the beef, pressing it in firmly so it adheres. I like to let it sit at room temperature for 30 minutes before cooking—this allows the seasoning to penetrate and the meat to cook more evenly.
Step 2: Sear Over High Heat
Heat a grill or heavy skillet over high heat until very hot. Drizzle the 2 tbsp olive oil over the beef and place it on the grill. Sear for 4-5 minutes per side until a deep, dark brown crust forms.
Don’t move the meat around too much—let it develop that beautiful crust. The high heat ensures a perfect sear while keeping the inside juicy. If using a skillet, make sure it’s large enough so the beef isn’t crowded.
Step 3: Baste with Herb Butter
Reduce the heat to medium and add the 2 tbsp unsalted butter, 2 sprigs fresh rosemary, and 2 sprigs fresh thyme to the grill or skillet. Tilt the beef slightly and baste it with the melted butter using a spoon.
Continue basting for 2-3 minutes until the beef reaches your desired doneness. For medium-rare, aim for an internal temperature of 130-135°F. The butter and herbs add incredible aroma and richness to the crust.
Step 4: Rest and Finish
Transfer the beef to a cutting board and let it rest for 10-15 minutes. This resting period allows the juices to redistribute, ensuring every bite is moist and tender.
Before slicing, drizzle with the 1 tbsp red wine vinegar and sprinkle with the 0.5 tsp flaky sea salt. The vinegar adds a bright contrast to the rich beef, while the flaky salt provides a final textural and flavor boost. Slice against the grain and serve immediately.
Pro Tips For Making Beef Backstrap
- Rest Before Slicing: Let the cooked backstrap rest under foil for 8-10 minutes before slicing—I learned this the hard way after serving dry, juiceless meat to dinner guests.
- Dry the Surface: Pat the backstrap completely dry with paper towels before seasoning; moisture is the enemy of a good sear, and you’ll get a better crust with a dry surface.
- Don’t Overcrowd the Pan: Resist the urge to cook all pieces at once; give each piece space in the pan or you’ll end up steaming instead of searing.
- Season Generously: Use more kosher salt and black pepper than you think—backstrap can handle bold seasoning, and the flavor really shines through with a heavy hand.
Flavor Customization for These Flavors
Herb Crust Variation
Swap the smoked paprika for 1 tbsp dried Italian seasoning and add 1 tsp dried oregano. I love this bright, aromatic twist that reminds me of my French training days. The herbs form a beautiful crust when seared. 🌿
Coffee-Chili Rub
Add 1 tbsp finely ground coffee and ½ tsp cayenne pepper to your dry rub. This deep, earthy combination adds complexity that pairs beautifully with grilled flavors. It’s my go-to for local BBQ competitions.
Citrus Zest Boost
Mix 1 tsp lemon zest and 1 tsp orange zest into your seasoning blend. The citrus oils brighten the beef’s richness without overpowering. I discovered this trick while foraging wild herbs along the coast.
Spicy Korean Gochujang
Replace the olive oil with 1 tbsp gochujang paste mixed into 1 tbsp sesame oil. Brush this onto the beef before grilling for a sweet-spicy Korean-inspired crust. Finish with 1 tsp toasted sesame seeds after resting. 🔥
Smoked Salt Finish
Instead of flaky sea salt, use ½ tsp smoked sea salt for the final sprinkle. This intensifies the grilled flavor and adds a subtle smokiness. I always keep some from my coastal rides in my spice collection.
Garlic-Forward Rub
Double the garlic powder to 2 tsp and add 1 tsp onion salt. This creates a bold, savory crust that garlic lovers will adore. Just reduce the kosher salt to 1 tsp to balance the flavors.
Nutrition Facts
Frequently Asked Questions
What’s the best way to slice backstrap?
Always slice against the grain into ½-inch thick pieces. This shortens the muscle fibers for maximum tenderness. Look for the natural grain lines running through the meat.
Can I cook this in the oven instead of grilling?
Yes! Use a cast iron skillet on the stovetop for the sear, then transfer to a 400°F oven for 8-10 minutes to finish. The results will be just as juicy.
How do I know when it’s done?
Use a meat thermometer for accuracy. For medium-rare, pull it at 130-135°F—it will rise to 140°F while resting. The meat should feel slightly firm but springy.
Why does my backstrap turn out tough?
Overcooking is the main culprit. This lean cut cooks fast—don’t exceed medium doneness. Also, be sure to let it rest for the full 10-15 minutes before slicing.

Trained in classic French technique but raised on slow-cooked ribs and spicy rubs, she blends culinary skill with smoke and soul.
- Recipe for Boneless Pork Chops in Cast Iron Skillet: Sear and Baste to Juicy Perfection - October 3, 2026
- Recipe for Boneless Cross Rib Roast: Slow-Roasted Beef with Herb Crust - October 3, 2026
- Hamburgers in Sauce Recipe Crock Pot: Slow-Cooked Savory Delight - October 3, 2026