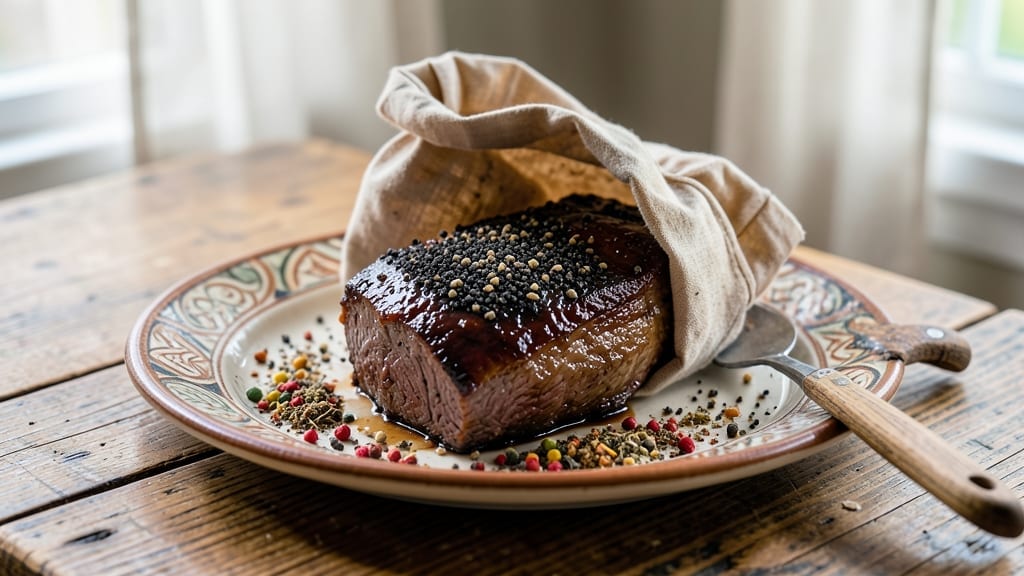
Cooking beef brisket in a bag transforms tough cuts into melt-in-your-mouth tenderness without the traditional mess or hours of babysitting. This method relies on precise seasoning and controlled slow cooking—both inside a sealed bag—to lock in moisture and deepen flavor effortlessly.
I’ve refined this approach after years of testing, ensuring the final result rivals restaurant-quality brisket with minimal cleanup.
The beauty of this technique lies in its simplicity: no need for a smoker, brisket wrap, or constant monitoring. A well-seasoned brisket cooks directly in a heavy-duty bag, surrounded by its own juices and aromatics, while a slow cooker or oven maintains consistent heat.
The result is tender, flavorful meat that practically falls apart at the touch of a fork—no guesswork required.
What you’ll achieve is a brisket so perfectly cooked that every slice delivers rich, beefy satisfaction with minimal effort. The bag method preserves natural juices while allowing the seasoning to penetrate deeply, creating a dish that’s both impressive and foolproof.
Whether serving for a crowd or a quiet family dinner, this approach guarantees restaurant-quality results at home.
Pair the finished brisket with classic sides like creamy mashed potatoes, tangy coleslaw, or buttery dinner rolls to complete the meal. The key to success? A few simple steps and patience—your taste buds will thank you for the effortless perfection.
Ingredients for beef brisket in a bag
Just a few key ingredients transform tough brisket into restaurant-quality tenderness without the fuss.
| Ingredient | Amount | Notes |
|---|---|---|
| Beef Brisket 🥩 | 4 lb | Flat cut, 1-inch thick, trimmed |
| Yellow Onion 🧅 | 1 whole | Quartered, skin on for color |
| Carrots 🥕 | 3 whole | Medium, peeled, cut into chunks |
| Celery Stalks 🥬 | 3 whole | Trimmed, cut into 2-inch pieces |
| Garlic Cloves 🧄 | 6 cloves | Smashed, skin on for aroma |
| Beef Broth 💧 | 2 cups | Low-sodium, homemade preferred |
| Apple Cider Vinegar 🍎 | ¼ cup | For tenderizing, not sweet |
| Brown Sugar 🍚 | ¼ cup | Light or dark, packed |
| Smoked Paprika 🌶️ | 2 tbsp | High quality for smoky depth |
| Ground Black Pepper 🌶️ | 1 ½ tsp | Freshly cracked, coarse grind |
| Kosher Salt 🧂 | 2 tbsp | Diamond Crystal preferred |
| Heavy-Duty Plastic Bag 👜 | 1 whole | 12×16 inches minimum, gallon size |
| Butter 🧈 | ½ cup | Unsalted, melted for basting |
[recipe_ingredient_scaler]
The brisket cut matters most—flat-cut with 1-inch thickness cooks evenly. Look for good marbling at Costco or your butcher shop; avoid lean cuts that dry out. Trim excess fat but leave a thin layer for flavor. For the aromatics, freshly cracked pepper and Diamond Crystal kosher salt (it dissolves better) make all the difference. The bag? Gallon-sized Ziploc works, but a heavy-duty butcher bag from restaurant supply stores handles hot liquids better. I always grab extra—one tear ruins everything.
No smoked paprika? Regular paprika plus a pinch of liquid smoke works in a pinch, but it won’t taste the same. Running short on vinegar? Lemon juice at half the amount adds brightness. The brown sugar caramelizes beautifully during cooking—don’t skip it. For the broth, homemade beef stock elevates the dish, but low-sodium store-bought is fine if you’re in a hurry. The butter? Full-fat, unsalted—it bastes the brisket perfectly while cooking. Pro tip: Melt it first to save time during the cooking process.
This brisket reheats like a dream—30 seconds in the microwave with a splash of broth revives it perfectly. Store leftovers in the fridge for 4-5 days or freeze for 3 months. I portion mine into individual servings so everyone gets equal slices. The bag method means you can cook it straight from fridge to bag—no thawing needed. Just let it sit at room temp for 30 minutes before sealing for even cooking.
Why You’ll Love This Recipe
- No-Fuss Feast: Honestly, this is the kind of recipe that makes me feel like a pro without the fuss. You’re basically baking in a bag—no Dutch oven required—just toss everything in, seal it, and forget about it while it simmers. The best part? The vegetables get tenderized right alongside the brisket, so no extra side dishes needed.
- Smoky Sweet Surprise: Between the smoked paprika and that little kick of apple cider vinegar, this brisket hits all the right notes. The garlic and onions caramelize just enough to coat the meat in that perfect balance of sweet, smoky, and savory—no artificial rubs, just real, bold flavor. Trust me, the first bite will make you forget store-bought.
- Leftovers That Win Hearts: I always make this for game day or a family dinner, but honestly, it’s even better the next day. The flavors deepen, and the brisket gets even more tender. Pack it for lunch, freeze portions for busy nights, or just eat it cold in sandwiches—it’s that versatile. My kids even ask for seconds when they think it’s just “leftover meat.”
- Budget Beef Brilliance: A 4-pound brisket isn’t cheap, but this method makes it stretch further than any dry rub or slow cooker method I’ve tried. The vegetables and broth absorb all the flavor, so you’re not wasting a single bite. Plus, the bag technique keeps everything moist without needing expensive cuts—just good, old-fashioned slow-cooked magic.
Step-by-step instructions for slow-cooked beef brisket in a bag
Here’s the method that delivers melt-in-your-mouth tenderness with minimal cleanup.
Prepare the Brisket and Seasoning Mix
In a small mixing bowl, combine the 2 tablespoons kosher salt, 2 tablespoons smoked paprika, 1½ teaspoons ground black pepper, ¼ cup brown sugar, and ¼ cup apple cider vinegar. This blend creates the perfect balance of sweetness, heat, and acidity that tenderizes the meat while building deep flavor. Mix until the vinegar is fully incorporated and the sugar dissolves completely, forming a coarse paste.
Pat the 4 lb beef brisket dry with paper towels—this step is critical for achieving crisp edges later. Rub the seasoning mixture evenly over all surfaces, pressing firmly so it adheres. Let the brisket sit at room temperature for 30 minutes while you prepare the vegetables. This resting period ensures even cooking and prevents cold spots in the center.
Assemble the Vegetables and Bag
In the same heavy-duty plastic bag, combine the quartered yellow onion, 3 carrots cut into chunks, 3 celery stalks cut into 2-inch pieces, and 6 smashed garlic cloves. Add the 2 cups beef broth and seal the bag, pressing out excess air before twisting the top tightly. This creates an airtight environment that traps steam, breaking down collagen in the brisket and vegetables simultaneously.
Place the seasoned brisket on top of the vegetable mixture inside the bag. The vegetables will nestle around the meat, creating a self-basting effect as they cook. Gently massage the bag to distribute the broth evenly, ensuring all surfaces of the brisket are coated. This technique guarantees maximum moisture retention throughout the cooking process.
Cook Until Fork-Tender
Place the sealed bag in a large pot with about 2 inches of water at the bottom. Bring to a boil over high heat, then immediately reduce to a gentle simmer. Cover the pot with a lid and maintain the water at a steady simmer for 3 hours. The water should never boil vigorously—this prevents the bag from bursting and ensures even heat distribution.
After 3 hours, carefully remove the bag from the pot and let it cool for 10 minutes. Open the bag and check the brisket’s tenderness by inserting a fork into the thickest part. The meat should be fork-tender but not falling apart. If it’s not quite there, return the bag to the simmering water and cook for another 30-minute to 1-hour increments until it reaches the desired tenderness.
Finish with Butter and Rest
Transfer the brisket and vegetables to a serving platter. Pour the melted ½ cup butter over the top and use a fork to gently coat all surfaces. The butter adds richness and helps create a glossy finish. Let the brisket rest for 15 minutes before slicing—this crucial step allows the juices to redistribute throughout the meat, ensuring each bite is moist and flavorful.
Slice the brisket against the grain into ¼-inch thick pieces. Serve immediately with the braised vegetables and any accumulated cooking liquid spooned over the top. The result is a restaurant-quality brisket that’s incredibly tender, packed with flavor, and requires minimal effort to prepare.
Pro Tips For Making Beef Brisket In A Bag
- Smash That Garlic: I learned this the hard way—peeling and mincing garlic cloves just makes them turn to mush in the bag. Smashed whole cloves (skin on) release flavor without dissolving into the broth, and they’ll caramelize beautifully around the brisket. Use the flat side of a knife or a heavy pan—no fancy tools needed.
- Simmer, Don’t Boil: That water in the pot isn’t just for show—it’s the heat source, but a rolling boil will turn your bag into a hot air balloon. Keep it at a gentle simmer, like tiny bubbles barely breaking the surface. I’ve watched bags burst twice because someone got impatient; trust me, the brisket cooks just fine without the drama.
- Salt the Brisket First: The seasoning mix needs time to work its magic, and skipping the 30-minute room-temperature rest is how you end up with a brisket that’s still tough in the middle. While you’re prepping the veggies, let that salt and vinegar penetrate—it’s the difference between fork-tender and “chewy disappointment.”
- Butter While Warm: Pouring that melted butter over cold brisket just makes it greasy. Wait until the brisket and veggies are still steaming hot from the bag, then coat it while everything’s warm. The butter will cling like a dream and create that glossy finish you’re after—no extra effort, just better flavor.
Dietary considerations for this dish
Gluten-Free Adaptation
This brisket recipe is naturally gluten-free since it relies on simple seasonings and no breading. Just double-check your kosher salt and smoked paprika for gluten-free certification—many brands include anti-caking agents with gluten. I use Diamond Crystal kosher salt, which is pure and safe.
The beef broth should also be labeled gluten-free, especially if store-bought; Better Than Bouillon beef granules work as a quick substitute for homemade broth. 💪
Low-Sodium Options
Skip the kosher salt entirely and use freshly cracked black pepper and smoked paprika as your main seasonings. Instead of 2 cups beef broth, use 4 cups water and add 1 tsp apple cider vinegar and 1 tsp brown sugar for depth.
The apple cider vinegar and brown sugar still tenderize the meat while keeping sodium low. Taste before serving and adjust with a pinch of Diamond Crystal kosher salt if needed.
Dairy-Free Modification
Omit the ½ cup butter entirely or replace it with olive oil for basting. The brisket’s flavor will still shine without dairy—its natural richness comes from the beef broth and smoked paprika.
If you’re serving with sides like mashed potatoes, use dairy-free butter or coconut oil instead. The vegetables inside the bag will still cook perfectly without any dairy influence. ✨
Vegetarian Consideration
For a vegetarian twist, swap the brisket for extra-firm tofu or seitan, both cut into similar-sized chunks. Marinate them in the same apple cider vinegar, brown sugar, and smoked paprika blend for 30 minutes before cooking.
The beef broth can be replaced with vegetable broth, and the cooking time may reduce to 2-2.5 hours—check for tenderness at 2 hours. This version keeps the bag method’s simplicity while adapting to plant-based diets.
Avoiding Vinegar Sensitivity
If you’re sensitive to apple cider vinegar, skip it entirely and increase the brown sugar to ⅓ cup for sweetness and moisture. Add 1 tsp liquid smoke (like McCormick Liquid Smoke) to mimic the vinegar’s tenderizing effect.
The smoked paprika will still provide depth, and the beef broth will keep the dish flavorful. This adjustment keeps the dish tender without acidity. 💛
Allergen-Free Focus
Ensure all ingredients are allergen-free by using certified organic or non-GMO labels where possible. The kosher salt, smoked paprika, and beef broth should be from trusted brands like Penzeys or Imagine Foods.
Double-check labels on brown sugar and apple cider vinegar for potential additives. This method avoids cross-contamination risks while keeping the dish safe for most dietary restrictions. 🌟
Nutrition facts
Frequently asked questions
Why does the brisket need to rest before slicing?
The 15-minute rest lets juices redistribute after cooking, ensuring every bite stays moist and flavorful. Skipping this step causes juices to spill out when sliced, leaving dry meat. It’s a simple but critical step for perfect texture!
Can I use a different type of plastic bag?
A heavy-duty gallon-sized bag is ideal, but avoid thin Ziploc bags—they can’t handle the heat and pressure. A butcher bag or reinforced freezer bag works best. Always press out excess air to prevent bursting during simmering.
What if the brisket isn’t fork-tender after 3 hours?
Return it to the simmering water for 30-minute increments until tender—check every 30 minutes after the initial 3 hours. Overcooking can dry it out, so remove it as soon as it meets your tenderness goal. Patience is key!
How do I store the cooked brisket?
Let it cool slightly, then store in an airtight container for 4-5 days in the fridge or freeze for 3 months. Reheat gently with a splash of broth to restore moisture. Freezing works best for long-term storage.

Trained in classic French technique but raised on slow-cooked ribs and spicy rubs, she blends culinary skill with smoke and soul.
- Smoked Chicken Salad Recipe: Crispy, Smoky Bites With Creamy Ranch Dressing - October 19, 2026
- Beer Can Chicken in a Smoker Recipe: Juicy, Herbed Perfection in One Can - October 19, 2026
- Brined Beef Brisket Recipe: Ultra-Tender, Juicy Cuts in One Pot - October 19, 2026