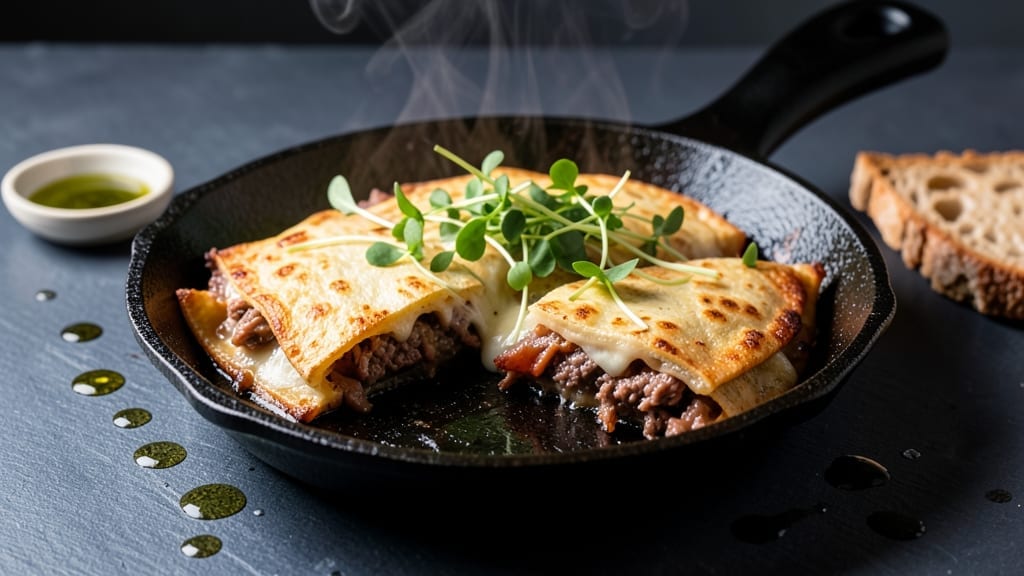
This beef brisket quesadilla recipe transforms tough, slow-cooked brisket into melt-in-your-mouth bites that belong between crispy tortillas and gooey cheese. The key? A perfect balance of smoky, tender meat and sharp cheddar that melts into rich, stretchy perfection.
I learned this technique during a Texas road trip when my brisket leftovers needed a second life—and now it’s my go-to for game day or weeknight dinners.
The process starts with brisket that’s either slow-smoked to fork-tender perfection or braised until it falls apart at the touch. Then, it’s layered with sharp cheddar, a touch of pepper jack for heat, and a drizzle of chipotle aioli for that smoky kick.
The tortillas get crisped just enough to hold everything together without breaking. This isn’t your average quesadilla—it’s a restaurant-quality handheld meal that feels indulgent yet simple to make.
By the time you take that first bite, you’ll taste layers of flavor: the deep, caramelized notes of the brisket, the sharp tang of the cheese, and the subtle heat from the aioli.
It’s the kind of dish that turns leftovers into something special and makes every meal feel like a celebration. Serve with cooling salsa, pickled jalapeños, or a side of roasted corn for the full experience.
What makes this recipe foolproof is the flexibility—use store-bought brisket if you’re short on time, or make a big batch of brisket ahead for meal prep. The quesadillas reheat beautifully, so you can assemble them fresh when hunger strikes. Let’s get cooking!
Ingredients for beef brisket quesadilla
Smoky brisket, melty cheddar, and crispy tortillas—this is your new game-day shortcut.
| Ingredient | Amount | Notes |
|---|---|---|
| Beef Brisket 🥩 | 3 lb | Slow-cooked or pre-shredded |
| Sharp Cheddar Cheese 🧀 | 2 cups | Shredded, mild to medium |
| Pepper Jack Cheese 🌶️ | 1 cup | For heat and tang |
| Flour Tortillas 🌯 | 12 whole | 8-inch size preferred |
| Chipotle Aioli 🥒 | ½ cup | Store-bought or homemade |
| Butter 🧈 | ½ cup | Melted for crisping |
| Salt 🧂 | 1 tsp | Kosher or sea salt |
| Black Pepper 🌶️ | ½ tsp | Freshly ground preferred |
| Olive Oil 🫒 | 1 tbsp | For pan searing |
| Salsa 🍅 | 1 cup | For serving, optional |
| Pickled Jalapeños 🌶️ | ½ cup | For serving, optional |
| Roasted Corn 🌽 | 2 cups | For serving, optional |
[recipe_ingredient_scaler]
The brisket is everything here. Costco’s pre-smoked brisket is my go-to for big batches, but even store-bought slow-cooked brisket works. Look for good marbling—that’s where the flavor lives. If you’re making it from scratch, low and slow is non-negotiable. I always grab extra cheese—sharp cheddar from the deli counter melts better than bagged shreds. Pepper jack adds that little kick, but monterey jack works in a pinch if you’re short on time.
No chipotle aioli? Mix mayo with 1 tsp smoked paprika and 1 tsp chipotle powder for a quick swap. Tortillas getting soggy? Wrap them in foil with a paper towel while you cook. Want extra crunch? Toast them in the pan first before adding the filling. The salsa and jalapeños are optional but Trader Joe’s roasted red salsa is my favorite for serving—bright and tangy.
Assemble quesadillas just before cooking to keep them crisp. Reheat in a dry skillet for 2-3 minutes per side if you’ve made them ahead. Store leftovers in the fridge for 4-5 days—they freeze beautifully for up to 3 months. I portion mine into containers so I can grab one for lunch. The aioli? Keep it separate until serving—it’ll get soggy if mixed in too soon.
Why You’ll Love This Recipe
- Slow-Cooker Shortcut: I’ll be honest—slow cooking the brisket takes time, but it’s the secret to that melt-in-your-mouth texture. And if you’re in a rush? Pre-shredded brisket from the deli still works, just without that extra depth. Either way, you’re saving hours of chopping or marinating.
- Cheesy, Smoky Perfection: The sharp cheddar and pepper jack combo is chef’s kiss—creamy, tangy, and just a little kick from that chipotle aioli. Trust me, the first bite with that crispy tortilla edge? You’ll forget you were stressed about dinner.
- Game-Day Hero: These quesadillas are my secret weapon for game nights or impromptu gatherings. Serve them with salsa and pickled jalapeños, and suddenly, you’ve got a meal that’s both fancy and foolproof. Plus, they reheat like a dream—perfect for leftovers.
- Budget Meets Bold: Three pounds of brisket might sound pricey, but when you stretch it into 12 quesadillas with cheese and toppings, it’s a steal. And if you’re feeling extra, freeze half the batch—ready to pull out for a lazy weeknight when you’re too tired to cook.
Step-by-step instructions for beef brisket quesadillas
Here’s how to turn smoky brisket into crispy, cheesy quesadillas that bring the party.
Slow-Cook the Brisket Until Fork-Tender
Place the 3 lb beef brisket in a slow cooker with 1 tablespoon olive oil. Sprinkle with 1 teaspoon salt and ½ teaspoon black pepper, then add ½ cup water to keep it moist. Cook on low for 8-10 hours until the meat shreds easily with two forks.
Here’s the thing—don’t rush this step. The slow cook transforms tough brisket into tender, flavorful shreds perfect for quesadillas. If you’re short on time, use pre-shredded brisket from the deli section, but it won’t have the same depth of flavor.
Once tender, remove the brisket and shred it using two forks. Discard any large fat pieces, but save the cooking juices. You’ll have about 2½ cups of shredded meat—enough for all 12 tortillas with plenty of filling.
Assemble the Cheese and Filling Mixture
In a large bowl, combine the shredded brisket with 2 cups sharp cheddar cheese and 1 cup pepper jack cheese. This combination gives you that perfect balance of sharp cheddar and spicy, tangy pepper jack. Add the 2 cups roasted corn for extra texture and sweetness that cuts through the richness.
Mix everything together with your hands until the cheeses start to melt slightly from your body heat. This helps create a cohesive filling that won’t fall apart when you press the tortillas. If the mixture feels too dry, add 1 tablespoon of the reserved brisket juices to help bind it.
Now’s the time to warm up the ½ cup chipotle aioli. Microwave it for 20-30 seconds until it’s spreadable. You’ll use this later to add that smoky, spicy kick to each quesadilla.
Make Perfectly Crispy Quesadillas
Melt ½ cup butter in a large skillet over medium heat. You want the butter to be hot but not smoking—this ensures your tortillas get that golden-brown crust we’re after. Working with 2 tortillas at a time, place them in the skillet and let them cook for 1-2 minutes until lightly browned on one side.
Here’s where it gets fun—spread about 1 tablespoon of the chipotle aioli on each tortilla half. Then, divide the cheese mixture evenly between the tortillas, spreading it toward the edges but leaving about ½ inch border. This prevents the filling from oozing out when you flip.
Carefully flip the quesadillas and cook for another 1-2 minutes until the second side is golden brown and crispy. You’ll know they’re ready when you can see the cheese starting to melt through the tortilla. Transfer to a plate and keep warm while you make the rest.
Serve with All the Fixings
Keep the completed quesadillas warm in a 200°F oven while you finish the batch. This maintains their crispiness while you assemble everything. Cut each quesadilla into 4 wedges and serve immediately with 1 cup salsa and ½ cup pickled jalapeños on the side.
Here’s the moment that matters: the presentation. Arrange the quesadilla wedges on a platter with the salsa and pickled jalapeños in small bowls. The contrast of cool pickled jalapeños and warm, melty cheese creates the perfect bite every time. Serve with extra chipotle aioli for dipping if you’re feeling extra indulgent.
Each serving will give you 2 quesadilla wedges, a generous helping of salsa, and a few pickled jalapeños—perfect for sharing or enjoying as a hearty meal. The combination of smoky brisket, spicy cheese, and tangy toppings makes this a crowd-pleaser that’s easier than it looks.
Pro Tips For Making Beef Brisket Quesadilla
- Preheat Butter Properly: The butter should be hot enough to sizzle but not smoke—if it’s just melted and sitting there, your tortillas will steam instead of crisp. I learned this the hard way after making soggy quesadillas that tasted more like a sad burrito than a crispy masterpiece.
- Mix Cheese by Hand: Skipping the hand-mix step means your filling will clump and ooze out when you flip. The warmth of your hands melts the cheddar and pepper jack just enough to bind everything together—like a cheesy glue. Yes, it’s messy, but it works.
- Leave the Border Empty: That half-inch edge of bare tortilla isn’t just decoration—it’s what keeps your quesadilla from falling apart when you flip. Fill too close, and you’ll end up with a greasy, cheese-slathered mess instead of clean, crispy wedges.
- Use Pre-Shredded Brisket Carefully: If you’re using pre-shredded brisket, don’t skip the reserved juices—it’s the difference between dry, crumbly filling and something that actually sticks together. Add 1-2 tablespoons of the cooking liquid (or water in a pinch) to moisten it up.
Serving suggestions for beef brisket quesadilla
Plating Like a Pro
I love how a simple platter transforms these quesadillas into a showstopper. Arrange the wedges on a wooden board or slate platter—something with texture contrasts beautifully with the golden tortillas. Scatter roasted corn kernels around the edges for a pop of color and sweetness that balances the smoky brisket.
The contrast of warm, melty cheese against the crispy tortillas is what makes this dish feel so indulgent.
Dipping Stations
Set out small bowls of chipotle aioli, salsa, and pickled jalapeños in separate dishes so everyone can customize their bite. I like to include a drizzle of hot honey too—it adds a touch of sweetness that cuts through the richness.
For a cooler contrast, serve with a side of avocado crema (mix ½ cup sour cream with ½ cup diced avocado and 1 tbsp lime juice).
Garnish with Freshness
Top each quesadilla wedge with a sprinkle of fresh cilantro or chopped scallions right before serving. The bright green adds visual appeal and a fresh contrast to the smoky flavors.
A few drops of flaky sea salt like Maldon on top elevates the dish instantly—it’s like a little salted caramel finish. This garnish makes it feel restaurant-worthy without extra work.
Family-Style Serving
For gatherings, I serve these family-style with a big bowl of salsa and pickled jalapeños in the center. Pass around a platter of quesadillas so everyone can grab their share. Add a side of black beans or charro beans for extra protein and texture.
The combination of textures—crispy tortillas, creamy cheese, and fresh toppings—makes this dish feel like a full meal.
Make-Ahead Magic
Assemble the quesadillas ahead of time and keep them warm in a 200°F oven while you finish cooking. Reheat them in a dry skillet for 2-3 minutes per side to restore crispiness.
Store leftovers in an airtight container for up to 5 days—they freeze beautifully for up to 3 months. I freeze them whole, then reheat and cut into wedges when ready to serve. This way, you always have a crowd-pleasing meal on hand. 🔥
Nutrition facts
Frequently asked questions
Can I use pre-cooked brisket instead of slow-cooking?
If you’re short on time, store-bought slow-cooked or pre-shredded brisket works perfectly. Just skip the cooking step and proceed with shredding the meat. However, homemade brisket will have deeper, more complex flavors that elevate your quesadillas.
Why is my quesadilla filling falling apart when I cook it?
This usually happens when the filling isn’t properly bound. Mix your hands into the cheese and meat mixture until the cheeses start melting slightly from your body heat. If it’s still dry, add 1-2 tablespoons of the reserved brisket juices to help bind everything together. Also, leave a ½ inch border of tortilla around the filling to prevent oozing.
How do I keep quesadillas crispy while cooking multiple batches?
Keep cooked quesadillas warm in a 200°F oven while you finish the rest. This prevents them from getting soggy. For extra crispiness, toast the tortillas in the pan for 30 seconds before adding the filling. You can also wrap them in foil with a paper towel to absorb any excess moisture.
Can I make these quesadillas ahead of time?
Yes! Assemble them ahead and keep them warm in a 200°F oven until ready to serve. For reheating, place them in a dry skillet for 2-3 minutes per side. They also freeze beautifully—store in an airtight container for up to 3 months. Just reheat and cut into wedges when ready.

Trained in classic French technique but raised on slow-cooked ribs and spicy rubs, she blends culinary skill with smoke and soul.
- Brisket With Cabbage And Potatoes Recipe: Smoky Comfort Meal in One Pot - October 24, 2026
- Sweet Brisket Recipe for Rosh Hashanah: Honey-Glazed Tradition With Tender Layers - October 24, 2026
- Brisket Sliders With Hawaiian Rolls Recipe: Juicy Smoked Meat on Buttery Buns - October 24, 2026