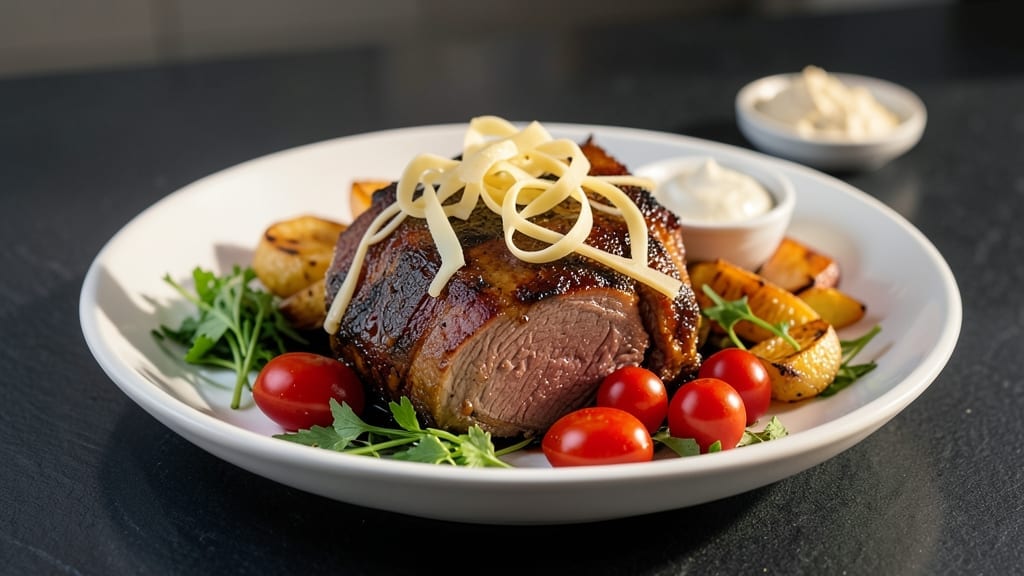
This Hanukkah brisket recipe delivers restaurant-quality tenderness with a slow-cooked spice rub that transforms tough cuts into melt-in-your-mouth perfection. The secret lies in a precise balance of warming spices—cinnamon, cloves, and black pepper—that infuse the meat while keeping it moist over hours of gentle cooking.
I’ve perfected this method to honor tradition while making it approachable for home cooks, ensuring your table feels like a festive gathering every time.
The process begins with a dry rub applied generously to the brisket, allowing the spices to adhere and develop a flavorful crust during the initial searing. After browning, the meat slow-cooks in its own juices, breaking down collagen for that signature tender texture.
This method preserves natural flavors without overwhelming them, and the foil-wrapped finish ensures no moisture escapes—critical for a brisket that stays succulent from edge to edge.
By the time you carve into this brisket, you’ll uncover layers of savory depth and velvety tenderness that pair beautifully with classic Hanukkah sides like latkes, roasted potatoes, or a tangy applesauce. The aroma alone will fill your kitchen with warmth, making it the centerpiece of your holiday meal.
Whether you’re serving a crowd or a quiet family dinner, this brisket delivers on both tradition and comfort.
For best results, let the brisket rest before slicing—this ensures clean cuts and maximum juiciness. Serve with traditional accompaniments like matzo ball soup or a crisp green salad to balance the richness.
The key to success? Patience and precision in the cooking process, which pays off in every tender bite. Here’s how to make it happen.
Ingredients for best hanukkah brisket
Warm spices, slow cooking, and a brisket that melts in your mouth—this is the Hanukkah centerpiece you’ve been waiting for.
| Ingredient | Amount | Notes |
|---|---|---|
| Beef Brisket 🥩 | 4 lb | Flat cut, trimmed of fat |
| Ground Cinnamon 🌿 | 1 tbsp | Freshly ground preferred |
| Ground Cloves 🌶️ | 1 tsp | Whole cloves work too |
| Black Pepper 🌶️ | 1 tbsp | Freshly ground, coarse |
| Garlic Powder 🧄 | 1 tbsp | Not garlic salt |
| Onion Powder 🧅 | 1 tbsp | Fresh ground preferred |
| Brown Sugar 🍚 | 2 tbsp | Packed, dark preferred |
| Kosher Salt 🧂 | 1 tbsp | Diamond Crystal preferred |
| Olive Oil 🫒 | ½ cup | Extra-virgin for richness |
| Dry Red Wine 🍷 | ½ cup | Cabernet or Merlot |
| Beef Broth 💧 | 2 cups | Low-sodium preferred |
| Foil 🔥 | 1 sheet | Heavy-duty preferred |
[recipe_ingredient_scaler]
The brisket is everything here. Flat cut, trimmed of excess fat—this is the secret to even cooking and maximum tenderness. Costco often has pre-trimmed briskets, or ask your butcher to handle it. Look for a vibrant red color and good marbling; dark spots mean it’s been sitting too long. The spices? Whole cloves and cinnamon sticks toasted in a dry pan give more depth than pre-ground—just pulse them in a spice grinder if needed. Penzeys has great bulk spices if you want to invest in quality.
No red wine? Beef broth with a splash of balsamic vinegar mimics the depth, though it won’t be as rich. Want to skip the wine entirely? Double the broth and add a pinch of espresso powder—trust me, it works. Freshly ground spices are ideal, but dried oregano at half the amount can stand in for the garlic and onion powders if you’re in a pinch. The brown sugar? Packed, dark brown caramelizes better than light—it’s worth the extra step to scoop it tightly. And if you’re worried about the brisket drying out, poke holes in the foil before sealing to let some steam escape.
This brisket shines after resting—45 minutes minimum before slicing lets the juices redistribute beautifully. Store leftovers in the fridge for 4-5 days or freeze for 3 months. I always portion mine into containers so lunches are sorted for the week. The foil-wrapped cooking method keeps it moist, but if you’re short on time, undercook by 30 minutes and finish in the oven at 275°F for the last hour. The spices? Taste before serving—adjust with more salt or pepper if needed, but don’t overdo it; the meat’s natural saltiness will balance things out.
Why You’ll Love This Recipe
- Here’s what sold me: that perfect blend of cinnamon and cloves—it’s like a hug in every bite. The brown sugar caramelizes just enough to balance the boldness of the garlic and onion powders, while the coarse black pepper adds a little bite. It’s not your typical brisket; it’s got that festive warmth that makes you think of Hanukkah mornings with latkes and hot cocoa, even if you’re eating it on a Tuesday night.
- Let’s be real: brisket isn’t cheap, but this recipe stretches it into something special without breaking the bank. The spices are a fraction of the cost, and using red wine and beef broth instead of expensive sauces keeps it affordable. Plus, with leftovers lasting up to 4-5 days in the fridge or freezing for three months, you’re not throwing money away. It’s the kind of dish that makes you feel like you’re treating yourself to a restaurant meal, but for less than takeout.
Step-by-step instructions for slow-cooked spice-rubbed brisket
Here’s the proven method for achieving melt-in-your-mouth tenderness with deep, aromatic flavors.
Prepare the Brisket and Create the Spice Rub
Begin by trimming the 4 lb beef brisket (flat cut) of any excess fat, leaving about ¼-inch layer to protect the meat during cooking. Pat the surface completely dry with paper towels—this ensures the rub adheres properly and creates a better crust later.
In a small bowl, combine the 1 tbsp ground cinnamon, 1 tsp ground cloves, 1 tbsp black pepper, 1 tbsp garlic powder, 1 tbsp onion powder, 2 tbsp brown sugar, and 1 tbsp kosher salt. Mix thoroughly until the spices are evenly distributed and the sugar is broken up. The brown sugar adds subtle sweetness that balances the warmth of the spices.
Generously coat the brisket with the spice mixture, pressing it firmly into the meat so it adheres well. Place the seasoned brisket on a plate and let it sit at room temperature for 1 hour before cooking. This resting period allows the rub to penetrate the meat and ensures even cooking throughout.
Sear the Brisket and Deglaze the Pan
Heat ½ cup olive oil in a large Dutch oven over medium-high heat until it shimmers but doesn’t smoke. Place the brisket fat-side down in the pan and sear for 8-10 minutes, pressing down gently with a spatula to ensure even contact. You’ll know it’s ready to flip when the surface is deeply browned and the edges begin to crisp.
Flip the brisket and sear the other side for another 6-8 minutes. Remove the brisket from the pan and set it aside on a cutting board. The goal here is to create a flavorful crust while building layers of depth in the pan.
Carefully pour in the ½ cup dry red wine, scraping up any browned bits from the bottom of the pan with a wooden spoon. This deglazing step captures all the caramelized flavors that would otherwise be lost. Let the wine simmer for 3-4 minutes until it reduces by half and the alcohol burns off, leaving behind a rich, concentrated base.
Slow-Cook Until Fork-Tender
Return the brisket to the Dutch oven, fat-side up. Pour in the 2 cups beef broth, ensuring the liquid comes at least halfway up the sides of the brisket. Cover the pot tightly with the 1 sheet foil, crimping the edges to create a seal. This traps steam and helps tenderize the meat.
Transfer the pot to a preheated 300°F oven and cook for 3 hours. Here’s the thing—patience is key. The low temperature ensures the meat breaks down slowly, resulting in that signature fork-tender texture. After 3 hours, check the internal temperature using a meat thermometer. It should read 195-200°F—this is when the collagen fully converts to gelatin, creating that irresistible pull-apart tenderness.
If the brisket isn’t yet tender, continue cooking for another 30-60 minutes, adding a splash of water or broth if the liquid evaporates completely. The goal is to keep the meat moist and flavorful throughout the cooking process.
Rest and Serve with Confidence
Once the brisket reaches the perfect internal temperature, remove it from the oven and transfer it to a cutting board. Tent loosely with foil and let it rest for 30 minutes. This resting period allows the juices to redistribute throughout the meat, ensuring every slice is moist and flavorful.
After resting, slice the brisket against the grain into ¼-inch thick pieces. The grain runs horizontally across the flat cut, so cutting perpendicular to these lines creates the most tender texture. Serve immediately with your favorite Hanukkah sides—mashed potatoes, roasted vegetables, or crusty bread to soak up the delicious juices.
Each bite should deliver rich, spice-infused meat that falls apart with just a gentle tug. The combination of slow cooking and the aromatic rub creates a brisket that’s truly special—perfect for celebrating with family and friends.
Pro Tips For Making Best Hanukkah Brisket
- Press the Rub Hard: Don’t just sprinkle the cinnamon, cloves, and black pepper—dig your fingers in and work it into every crevice. I used to skip this, and half the flavor would just wash off during the sear. The brown sugar sticks best when you press, too, so the sweetness caramelizes into the crust.
- Check the Wine’s Edge: When deglazing with the red wine, let it bubble until it’s reduced by half—about 3-4 minutes. Stop just before it turns syrupy-thick; if you push it too far, the cloves and cinnamon can turn bitter. Taste it—it should still have wine’s bright acidity, not just a dark, flat residue.
- Don’t Skip the Foil Crimp: Seal that foil tight around the Dutch oven’s edges—no gaps. I learned this after a batch where steam escaped, leaving the brisket dry and the broth reduced to a glaze. A few extra seconds with your fingers now saves you from a sad, tough brisket later.
- Slice While Warm, Not Cold: Cut the brisket right after the 30-minute rest, while it’s still warm. Cold meat fights the knife, and you’ll end up with uneven slices that tear instead of clean cuts. The juices stay where they belong—on the meat, not pooling in the pan.
Dietary considerations for this recipe
Gluten-Free Adaptation
The original recipe already works beautifully for gluten-free diets since it relies on spices, broth, and natural beef flavors—no gluten-containing ingredients are used. The spices like cinnamon and cloves are naturally gluten-free, and the low-sodium beef broth ensures no hidden gluten sources.
Just double-check the Dry Red Wine label—opt for certified gluten-free varieties like Apothic Red or Ravenswood if needed. The olive oil and kosher salt are also gluten-free, so this dish is safe for those avoiding gluten. 🍷
Kosher & Passover-Friendly
For a kosher version, simply swap the dry red wine for kosher-certified beef broth (like Knorr or Swiss Miss kosher line) and ensure all spices are kosher-certified. For Passover, omit the brown sugar and use Passover-certified honey instead—it adds sweetness without chametz.
The spices and meat remain kosher-friendly as long as they’re certified. This makes it perfect for your Hanukkah celebration! ✨
Lower-Sodium Options
If you prefer lower sodium, reduce the kosher salt in the spice rub to ½ tbsp and use extra-low sodium beef broth (like Better Than Bouillon beef flavor).
Skip adding extra salt during cooking, and taste before serving—adjust with salt-free seasoning blends if needed. The spices will still deliver bold flavor without excess sodium. 💡
Vegetarian Substitutions
This recipe isn’t vegetarian, but you can adapt it for a vegetarian-friendly side dish by swapping the brisket for a spiced mushroom and lentil loaf. Combine 1 lb mushrooms (sliced), 1 cup cooked lentils, 1 tbsp each of the same spices, and 1 tbsp olive oil.
Bake at 375°F for 30 minutes until firm. Serve alongside the same broth and sides—it’s a hearty alternative! 🌱
Dairy-Free Considerations
The recipe is naturally dairy-free, but if you’re serving it with traditional Hanukkah sides like latkes (potato pancakes), ensure they’re made without butter—use olive oil instead. The brisket’s spice rub and broth keep it dairy-free, so no adjustments are needed for the main dish itself.
Pair with dairy-free applesauce for a fully plant-based spread. 🥒
Nutrition facts
Frequently asked questions
Why does this brisket need to rest before slicing?
Resting the brisket for 30 minutes after cooking lets the juices redistribute evenly throughout the meat. This ensures every slice is moist and flavorful—skipping this step can lead to dry, uneven bites. The 195-200°F internal temperature is perfect for tenderness, but resting seals the deal for juiciness.
Can I use a different cut of brisket?
The flat cut is ideal because it cooks evenly and stays tender, but a point cut (thicker end) works too—just trim excess fat and adjust cooking time by 30-60 minutes longer. The spice rub works on both cuts, but the flat cut delivers the most consistent results.
What if the brisket isn’t fork-tender after 3 hours?
If it’s not yet tender, cook it another 30-60 minutes at 300°F, adding a splash of water or broth if the liquid evaporates. The key is patience—collagen needs time to break down into gelatin for that melt-in-your-mouth texture. Check the internal temp again at 195-200°F.
How do I slice the brisket for the best texture?
Slice ¼-inch thick against the grain—this shortens the muscle fibers for maximum tenderness. The grain runs horizontally across the flat cut, so cut perpendicular to those lines. Use a sharp knife for clean slices and avoid tearing the meat.
Can I make this brisket ahead of time?
Yes! Cook it 1-2 days ahead, let it cool, then refrigerate or freeze. Reheat in the oven at 275°F for 1-2 hours until warmed through. The foil-wrapped method keeps it moist, so reheating works perfectly for holiday gatherings.

Trained in classic French technique but raised on slow-cooked ribs and spicy rubs, she blends culinary skill with smoke and soul.
- Award-Winning Brisket Chili Recipe: Deep-Smoked Flavor That Wins Every Time - October 16, 2026
- Smoked Standing Rib Roast Recipe: Low-and-Slow Perfection for Crowds - October 16, 2026
- Slow Roast Brisket Recipe: Fall-Apart Tenderness with Maillard Crust Magic - October 16, 2026