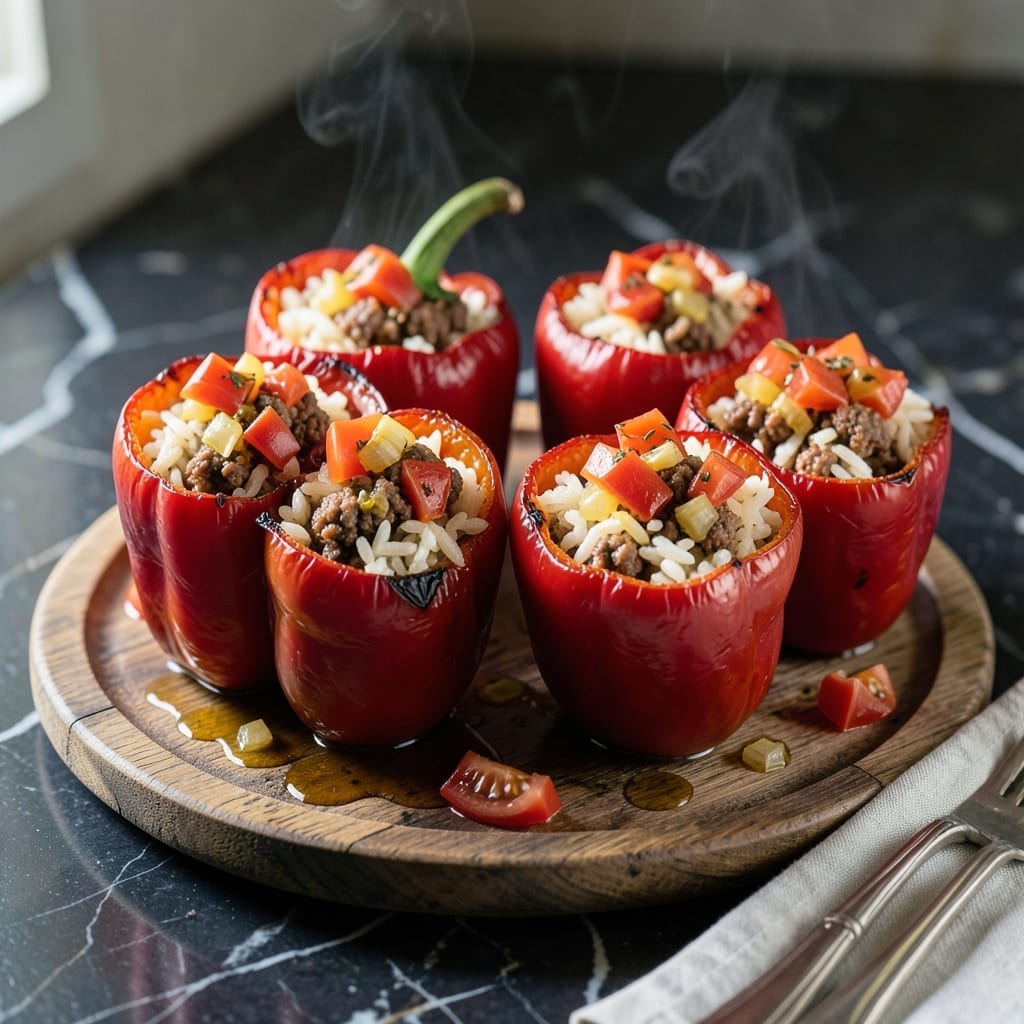
This stuffed bell pepper recipe delivers a restaurant-quality meal with every bite. The combination of seasoned beef, fluffy rice, and melted cheese creates a filling that’s hearty and satisfying.
What makes this version the best is the balance of textures and flavors. The peppers soften perfectly in the oven while the filling stays moist and flavorful. It’s comfort food at its finest.
Ingredients for Best Stuffed Bell Pepper Recipe Ever
Simple ingredients deliver that restaurant-quality magic in every stuffed pepper.
| Ingredient | Amount | Notes |
|---|---|---|
| Bell Peppers 🌶️ | 4 whole | Large, any color, tops cut off |
| Long-Grain White Rice 🍚 | 1 cup | Uncooked, or substitute quinoa |
| Vegetarian Ground Beef 🌱 | 1 lb | Beyond Meat or similar brand |
| Yellow Onion 🧅 | 1 whole | Medium-sized, finely diced |
| Garlic Cloves 🧄 | 3 cloves | Minced for filling |
| Canned Diced Tomatoes 🍅 | 1 can | 14.5 oz, with juices |
| Tomato Sauce 🍅 | ½ cup | Plain, no added herbs |
| Shredded Cheddar Cheese 🧀 | 1 ½ cups | Sharp cheddar recommended |
| Shredded Monterey Jack Cheese 🧀 | 1 cup | For extra meltiness |
| Olive Oil 🫒 | 2 tbsp | Extra-virgin for sautéing |
| Dried Oregano 🌿 | 1 tsp | Mediterranean variety preferred |
| Dried Basil 🍃 | 1 tsp | Crushed between fingers |
| Salt 🧂 | 1 tsp | Kosher or sea salt |
| Black Pepper 🌶️ | ½ tsp | Freshly ground preferred |
| Vegetable Broth 💧 | ½ cup | Low-sodium for control |
[recipe_ingredient_scaler]
The vegetarian ground beef is key here. Beyond Meat or Impossible brands mimic the texture of real beef best. Look for them in the frozen section of most Whole Foods or Target stores. The peppers should be firm with smooth skin—avoid any with soft spots. For the rice, any long-grain variety works, but basmati adds a nice floral note (worth the extra minute).
No vegetarian ground beef? Crumbled firm tofu or lentils work as great protein swaps. Short on Monterey Jack? Pepper Jack adds a nice kick. The canned tomatoes can be fresh if you’re feeling fancy—just blanch and dice them yourself. Skip the pre-shredded cheese (it doesn’t melt as well), and always grate your own from a block.
Assemble the peppers just before baking—if they sit too long, the filling absorbs too much moisture. Leftovers keep 4-5 days in the fridge and reheat beautifully. They freeze well too, up to 3 months, though the peppers may soften a bit more.
Why You’ll Love This Recipe
- One Pan Wonder: I toss everything into the peppers and bake—no extra bowls, no mess, just a sheet pan and dinner.
- Garlic-Packed Punch: The garlic cloves and onion caramelize inside the peppers, making every bite ridiculously good.
- Meal Prep Hero: Honestly, these reheat like a dream for lunches all week—just as tasty on day three.
- Budget Stretcher: Vegetarian ground beef and rice fill up a crowd without breaking the bank.
Step-by-Step Instructions for Cheesy Beef and Rice Stuffed Peppers
This method ensures perfectly tender peppers with a rich, flavorful filling every time.
Step 1: Prepare the Peppers and Cook the Rice
Preheat your oven to 375°F. Cut the tops off the 4 whole Bell Peppers and remove the seeds and membranes. I trim the tops just enough to create a stable base while allowing easy access to hollow out the insides.
Rinse the 1 cup Long-Grain White Rice under cold water until the water runs clear. This removes excess starch and prevents the rice from becoming gummy. Cook the rice in 0.5 cup Vegetable Broth and 0.5 cup water according to package directions until tender.
Step 2: Sauté the Vegetables and Vegetarian Beef
Heat 2 tbsp Olive Oil in a large skillet over medium heat. Add the finely diced 1 whole Yellow Onion and cook for 5-6 minutes until soft and translucent. Stir in the minced 3 cloves Garlic Cloves and cook for 30 seconds until fragrant.
Add the 1 lb Vegetarian Ground Beef, breaking it up with a wooden spoon. Cook for 6-8 minutes until browned and crumbly. Season with 1 tsp Salt, 0.5 tsp Black Pepper, 1 tsp Dried Oregano, and 1 tsp Dried Basil.
Step 3: Combine All Filling Ingredients
In a large bowl, combine the cooked rice, beef mixture, 1 can Canned Diced Tomatoes (with juices), and 0.5 cup Tomato Sauce. Mix well to distribute all the flavors evenly. This is where the magic happens—the tomatoes and sauce create a rich, savory base.
Fold in 1 cup Shredded Monterey Jack Cheese and 1 cup of the 1.5 cups Shredded Cheddar Cheese. Reserve the remaining 0.5 cup Shredded Cheddar Cheese for topping. The cheeses melt beautifully, binding everything together with a creamy texture.
Step 4: Stuff the Peppers and Bake
Fill each hollowed-out Bell Pepper with the rice and beef mixture, pressing down gently to pack it in. Place the stuffed peppers in a baking dish and top each with the reserved 0.5 cup Shredded Cheddar Cheese.
Bake at 375°F for 25-30 minutes until the peppers are tender and the filling is heated through. The peppers should hold their shape but yield slightly when pierced with a knife. For extra browning, broil for 1-2 minutes at the end, watching closely to avoid burning.
Step 5: Rest and Serve
Remove the peppers from the oven and let them rest for 5 minutes. This allows the filling to set and makes them easier to handle. The cheese should be fully melted and bubbly, with the edges of the peppers slightly caramelized.
Serve warm, garnished with fresh herbs if desired. The peppers should be tender but not mushy, with a filling that’s rich, cheesy, and packed with flavor in every bite.
Pro Tips For Making Best Stuffed Bell Pepper Recipe Ever
- Parboil the Peppers: I learned this the hard way—raw peppers stay crunchy and undercooked. Drop them in boiling water for 3-4 minutes before stuffing to guarantee they soften perfectly in the oven.
- Precook the Rice: Sounds obvious, but undercooked rice ruins the texture. Cook your long-grain white rice until it’s 90% done (about 10 minutes), then finish it in the oven with the peppers.
- Drain the Beef: Vegetarian ground beef can be oily. After browning it with the onion and garlic, drain off the excess liquid—your filling will hold together better and avoid a soggy mess.
- Cover While Baking: My first few batches dried out until I started tenting the dish with foil for the first 20 minutes. It locks in moisture so the peppers steam just enough before finishing uncovered.
Creative Variations of This Recipe
🔥 Spicy Texas Style
Kick up the heat with a Texas-inspired twist! Swap the classic beef for 1 lb ground chorizo and add 1 diced jalapeño (seeds in for extra spice) to the filling. Mix in 1 tsp smoked paprika and 1/2 tsp cayenne pepper for a bold, smoky flavor. Top with 1 cup shredded pepper jack cheese and a drizzle of chipotle crema before baking. This version pairs perfectly with a side of cool sour cream to balance the heat! 🌶️
🍯 Sweet and Savory Fusion
For a unique flavor combo, try adding 1/2 cup diced apples and 1/3 cup crumbled feta cheese to the beef and rice mixture. Stir in 1 tbsp honey and 1 tsp cinnamon for a subtle sweetness that complements the savory filling. Bake as usual, then garnish with chopped fresh mint for a refreshing finish. This fusion is a crowd-pleaser! 🍏
🥗 Healthy Lighter Version
Cut calories without sacrificing flavor by using 1 lb lean ground turkey instead of beef and substituting cauliflower rice for regular rice (use 2 cups). Add 1 cup diced zucchini and 1/2 cup black beans for extra fiber. Season with 1 tsp cumin and 1/2 tsp garlic powder, then top with 1/2 cup reduced-fat shredded cheese. Bake until tender for a nutritious, guilt-free meal! 💪
🍂 Seasonal Twist
Embrace fall flavors by incorporating 1 cup cooked quinoa (instead of rice) and 1/2 cup diced butternut squash into the filling. Add 1 tsp sage and 1/2 tsp nutmeg for a cozy, aromatic touch. Top with 1/2 cup crumbled goat cheese and a sprinkle of toasted pecans before baking. This autumnal variation is hearty and full of seasonal charm! 🍁
Nutrition Facts

Trained in classic French technique but raised on slow-cooked ribs and spicy rubs, she blends culinary skill with smoke and soul.
- Recipe for Boneless Pork Chops in Cast Iron Skillet: Sear and Baste to Juicy Perfection - October 3, 2026
- Recipe for Boneless Cross Rib Roast: Slow-Roasted Beef with Herb Crust - October 3, 2026
- Hamburgers in Sauce Recipe Crock Pot: Slow-Cooked Savory Delight - October 3, 2026