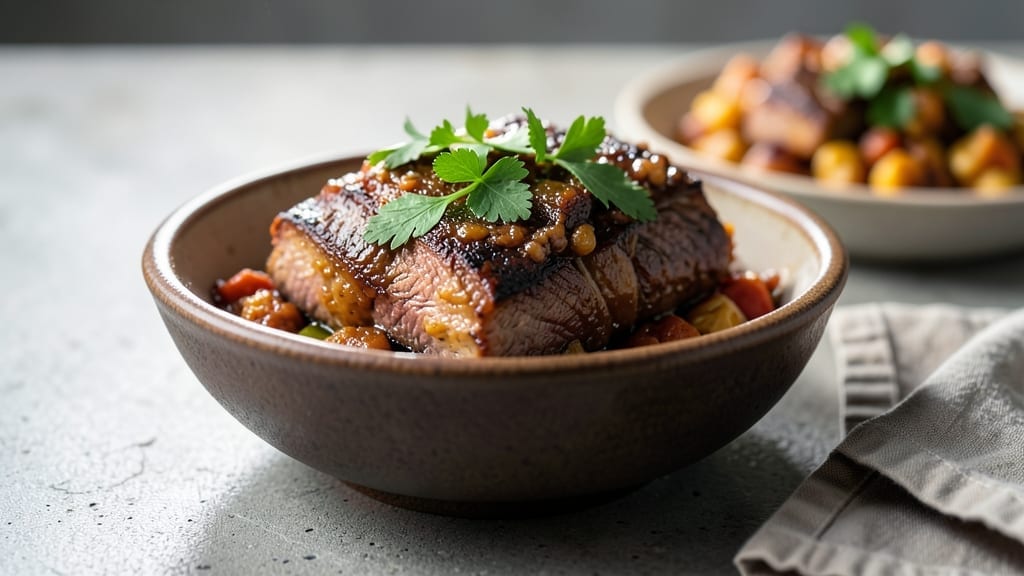
The best way to cook corned beef brisket transforms a tough cut into melt-in-your-mouth perfection with just one pot and a few hours of patience. I first mastered this technique during St. Patrick’s Day when my husband’s Irish grandmother insisted “real corned beef” couldn’t come from a can. The secret lies in slow braising—where collagen dissolves into rich, velvety gravy while the meat becomes so tender it practically falls apart.
This method works whether you’re using a stovetop Dutch oven, a pressure cooker for speed, or a traditional oven approach. The key steps—soaking the brisket (if needed), layering aromatics, and maintaining steady heat—ensure every bite delivers that signature Irish pub tenderness.
No need for fancy equipment; even my cast-iron skillet from college can handle it. The result? A brisket that’s juicy, flavorful, and worthy of any holiday table.
What makes this recipe foolproof is the one-pot approach: the same liquid that braises the meat becomes your gravy, and the vegetables you add (cabbage, carrots, or potatoes) absorb those deep, savory flavors. The aroma alone will have your whole house smelling like a cozy Irish pub by dinnertime.
Serve with mustard, pickles, and crusty bread for the full experience—or let the brisket shine as the star of a simple, satisfying meal.
Perfect for St. Patrick’s Day, Sunday suppers, or when you crave comfort food that feels special. The beauty of this method is its flexibility: make it ahead, freeze leftovers, or adjust the sides to suit your family’s tastes. Here’s how to achieve restaurant-quality corned beef brisket in your own kitchen.
Ingredients for best way to cook corned beef brisket
Pantry staples meet Irish tradition—just a few ingredients transform tough brisket into melt-in-your-mouth perfection.
| Ingredient | Amount | Notes |
|---|---|---|
| Corned Beef Brisket 🥩 | 3 lb | Raw, uncooked, preferably with spices |
| Yellow Onions 🧅 | 2 whole | Medium size, sliced into half-moons |
| Carrots 🥕 | 4 whole | Medium size, peeled and halved lengthwise |
| Garlic Cloves 🧄 | 6 cloves | Fresh, peeled and lightly crushed |
| Green Cabbage 🥬 | 1 lb | Fresh head, cut into wedges |
| Beef Broth 💧 | 2 cups | Low-sodium preferred, homemade or high-quality |
| Bay Leaves 🌿 | 2 whole | Dried, for deep flavor infusion |
| Black Peppercorns 🌶️ | 1 tbsp | Whole, lightly crushed for aroma |
| Salt 🧂 | 2 tsp | Diamond Crystal kosher preferred |
| Fresh Thyme 🌿 | ½ oz | Or 1 tbsp dried thyme |
| Potatoes 🥔 | 2 lb | Russet or Yukon gold, halved |
| Apple Cider Vinegar 🍎 | ¼ cup | For tenderizing if needed |
| Dijon Mustard 🍯 | 1 tbsp | For depth of flavor |
[recipe_ingredient_scaler]
The brisket is the star, so look for well-marbled cuts from the meat department—Kroger or Whole Foods usually carry great options. If your brisket has spices pre-applied, skip the extra salt; otherwise, season generously with kosher salt before braising. The cabbage should be crisp and vibrant green—avoid any with yellowed leaves. For the broth, homemade is ideal, but Annie’s or Pacific Foods low-sodium options work beautifully. Fresh thyme steals the show here—if you can’t find it, dried works at one-third the amount, but trust me, fresh is worth the hunt at Trader Joe’s or your local farmers market.
No beef broth? Substitute with water plus 1 tbsp soy sauce for umami depth. Running short on potatoes? Sweet potatoes or parsnips add a lovely twist. The apple cider vinegar is non-negotiable for tenderizing—it’s what makes this brisket restaurant-quality. No Dijon mustard? Yellow mustard in a pinch, though it won’t have the same complexity. For the carrots, baby carrots work perfectly if that’s what you have on hand. And if you’re feeling adventurous, swap half the cabbage for red cabbage—the color contrast is stunning when served.
This brisket tastes even better the next day, so plan ahead. Store leftovers in the fridge for 4-5 days or freeze for up to 3 months—the flavors only deepen over time. I like to portion the gravy separately so I can reheat it quickly for crispy potatoes. The vegetables keep their texture beautifully, so you can reheat everything together. For serving, keep the mustard and pickles on the side—trust me on this—they let the brisket shine without overpowering it.
Why You’ll Love This Recipe
- No-Fuss Feast Maker: This is the kind of dish where I can throw everything in the pot while the kids are doing homework—literally. The prep is straightforward: just slice the onions, halve the carrots, and crush the garlic. The Dutch oven does all the heavy lifting while I focus on other things.
- Crispy Outside, Creamy Inside: That first sear on the brisket? Chef’s kiss. You get this perfect crust on the outside while the inside turns so tender it practically falls apart. The apple cider vinegar and Dijon mustard keep it from being too heavy, balancing that richness with something bright and tangy.
- Dinner for Days: I make this once and it feeds my family for days. The brisket gets even better the next day, and the leftovers are perfect for sandwiches, wraps, or just reheating with extra veggies. Plus, the potatoes and cabbage get just as flavorful as the meat—no sad sides here.
- Budget-Friendly Powerhouse: Corned beef brisket isn’t cheap, but this recipe stretches it into a full meal with potatoes, cabbage, and onions. And if you’ve got a freezer, you can make it once and have dinner covered for weeks. The spices and broth keep costs down while making it taste like a restaurant.
Step-by-step instructions for slow-braised corned beef brisket
Here’s the method that transforms tough brisket into melt-in-your-mouth perfection every time.
Prep the Brisket and Vegetables for Maximum Flavor
Rinse the 3 lb corned beef brisket thoroughly under cold water to remove any surface brine, then pat it completely dry with paper towels. This step is crucial—wet skin prevents proper browning and crisping. Place the brisket in a large Dutch oven or heavy pot that can handle low heat for hours without burning.
Peel and halve the 4 carrots lengthwise, then slice the 2 yellow onions into even half-moons. Cut the 1 lb green cabbage into 6 wedges, leaving the core intact to hold the leaves together. Peel and lightly crush the 6 garlic cloves—just enough to bruise them, not mince. Toss all vegetables together in a bowl and set aside.
Sear the Brisket for Deep Flavor Foundation
Place the Dutch oven over medium-high heat and add just enough oil to coat the bottom lightly—about 1 tablespoon. Once shimmering hot, add the brisket fat-side down and sear for 8-10 minutes until deeply golden brown. You’ll see those beautiful crusty spots form—that’s where all the flavor develops.
Flip the brisket and sear the other side for another 6-8 minutes. Remove it from the pot and set aside. Here’s the thing—don’t skip this step. The Maillard reaction happening now creates complex flavors that slow cooking alone can’t replicate. The brisket will be tender, but that crispy crust makes it extraordinary.
Build the Braising Liquid with Aromatics
In the same pot, add the 2 bay leaves, 1 tbsp black peppercorns (lightly crushed between your palms), ½ oz fresh thyme (strip leaves from stems), and 2 tsp salt. Let them sizzle for 30 seconds until fragrant. This creates the aromatic base that infuses the entire dish.
Pour in the 2 cups beef broth and scrape up all those delicious browned bits from the bottom—this is called deglazing, and it captures all the flavor you just created. Add the ¼ cup apple cider vinegar and 1 tbsp Dijon mustard, then stir to combine. The acidity from the vinegar helps tenderize the meat while cooking, and the mustard adds depth that cuts through the richness.
Slow-Braise Until Fork-Tender
Return the brisket to the pot, fat-side up, then add the prepared vegetables around it. The cabbage wedges should sit upright, carrots and onions nestled around the sides. Pour in enough beef broth to come about halfway up the brisket—this ensures everything steams gently.
Bring to a gentle simmer, then reduce heat to low (about 300°F). Here’s where patience pays off: cover the pot and braise for 3-3½ hours until the brisket is fork-tender. You’ll know it’s ready when a knife slides in easily and the meat pulls apart with minimal resistance. The potatoes should be tender when pierced with a fork, and the carrots should be soft enough to collapse under gentle pressure.
Rest and Serve with Perfectly Infused Vegetables
Remove the brisket from the pot and transfer it to a cutting board. Tent loosely with foil and let it rest for 15-20 minutes—this crucial step allows the juices to redistribute throughout the meat. While it rests, skim any excess fat from the braising liquid if desired, then adjust seasoning with additional salt if needed.
Slice the brisket against the grain into ¼-inch thick pieces. The meat should be incredibly tender, falling apart with just a gentle pull. Serve the brisket with the braised vegetables—those potatoes will be creamy from absorbing all the flavorful juices, and the cabbage will be perfectly tender with just a hint of bite. The entire dish should sing with complex, savory notes that balance richness with bright acidity from the vinegar.
Pro Tips For Making Best Way To Cook Corned Beef Brisket
- Sear Until Golden: That first sear isn’t just for looks—push the heat until the brisket develops deep brown patches with crispy edges. I used to rush this, and the meat always tasted flat. Take the extra 2 minutes per side, and you’ll get that restaurant-quality crust that holds up even after hours of braising.
- Crush, Don’t Mince Garlic: Lightly crushing the 6 garlic cloves with the flat of your knife releases flavor without turning to mush. I learned this the hard way after mincing mine into oblivion—it just dissolves into the broth instead of adding that punchy aroma. A few firm presses is all it takes.
- Water Level Matters: Pour water only halfway up the brisket—any more and you’re steaming, not braising. Too little? The veggies burn. I once nearly ruined a batch by adding too much, and the potatoes turned to mush while the brisket stayed tough. Aim for that middle ground where everything cooks evenly.
- Rest the Meat Properly: Skimping on the 15-20 minute rest under foil means juices pool on your cutting board instead of soaking back into the meat. I know, waiting feels like torture, but slice into it early, and you’ll get a dry, sad pile of brisket. Trust the process—your future sandwich will thank you.
Regional styles of best way to cook corned beef brisket
Irish Pub Tradition
My first taste of authentic Irish corned beef came during a trip to Dublin when I visited the famous Bewley’s Café. Their version uses a soak-and-simmer method where the brisket is pre-soaked in water for 12-24 hours to remove excess salt and tenderize.
After soaking, they sear the brisket in beef tallow (or butter if unavailable) until deeply browned, then braise with whole spices like cloves and allspice. The result? A brisket with layers of depth that’s perfect for St. Patrick’s Day feasts.
I always bring a small bag of Irish mustard from the market for serving—it’s a must!
Jewish Delicatessen Style
The deli-style approach from New York’s Katz’s Deli focuses on smoked brisket with a sweet-savory glaze. They start with a 3-hour smoke at 225°F using hickory wood, then finish with a glaze of honey, brown sugar, and Worcestershire sauce.
The key difference? No vinegar—just sweetness and smokiness that pairs beautifully with rye bread and pickles. I’ve adapted this by adding 1 tbsp honey to my braising liquid for a similar touch.
Southern BBQ Twist
In the South, corned beef often gets a BBQ makeover—especially in places like Asheville, North Carolina. I’ve seen versions where the brisket is slow-cooked with apple cider and bourbon (about ½ cup each) for a tangy, boozy depth.
The vegetables get a spice rub with smoked paprika and cayenne, giving everything a subtle kick. For a quick Southern touch, add 1 tsp smoked paprika to your braising liquid or sprinkle it on the cabbage wedges before cooking.
German Bratenhouse Style
German immigrants in the Midwest often prepare corned beef as part of a Sunday roast, similar to their famous Rindfleischbraten. They use white wine (about ½ cup) instead of vinegar in the braising liquid, which gives the dish a lighter, more elegant flavor.
The brisket is often served with red cabbage (instead of green) and potato dumplings—a fantastic way to elevate the meal. I’ve experimented with this by replacing the apple cider vinegar with ½ cup dry white wine in the recipe.
Pacific Northwest Adaptation
Here in Portland, we love to localize everything—and corned beef is no exception! I’ve adapted the recipe by swapping the beef broth for mushroom broth (about 1 cup mixed with 1 cup water) and adding fresh rosemary to the vegetables.
The result is earthier and more aromatic, perfect for our rainy winters. I also like to serve it with roasted sweet potatoes and a maple-glazed cabbage slaw—trust me, the flavors are a match made in heaven. 🌿
Nutrition facts
Frequently asked questions
Why does the recipe call for searing the brisket before braising?
The searing step is essential for creating that crispy crust through the Maillard reaction, which adds layers of deep, caramelized flavor. This process also helps seal in juices, preventing the meat from drying out during the long braise. Skipping this step means missing out on the dish’s signature richness and texture—trust me, it makes all the difference!
Can I use a pressure cooker to cook the corned beef brisket?
While this recipe is designed for stovetop braising, you can adapt it for a pressure cooker by reducing the cooking time to 1.5-2 hours on high pressure after searing. Just ensure you use the natural release method for 30 minutes before quick-releasing to avoid toughness. The texture will be slightly different but still incredibly tender!
What if my brisket isn’t fork-tender after 3 hours?
Check the internal temperature—it should reach 195-203°F for perfect tenderness. If not, return it to the pot with a little extra beef broth and cook another 30-60 minutes on low heat. Overcooking can dry it out, so always use a meat thermometer to avoid this mistake. Patience here pays off!
How do I make the gravy thicker without adding flour?
Simply simmer the braising liquid uncovered for 10-15 minutes to reduce it by half. This concentrates the flavors naturally while thickening the gravy. If needed, whisk in a 1 tbsp cornstarch mixed with cold water for an instant boost—just stir constantly to avoid lumps!

Trained in classic French technique but raised on slow-cooked ribs and spicy rubs, she blends culinary skill with smoke and soul.
- Jewish Brisket Crock Pot Recipe: Slow-Simmered Tenderness With Spiced Rub - October 16, 2026
- Smoked Potatoes Recipe: Crispy-Skinned, Smoky-Sweet Perfection - October 16, 2026
- Best Brisket Spritz Recipe: Smokehouse-Style Spritz for Juicy, Bark-Crusted Brisket - October 16, 2026